Ahh, you would be the definite guy to know! Thanks! Was think'n of pm'ing you bout it. All I know is two BLFers that said an AR lens reduces CRI. I think the AR lens requirement was dropped from the BLF Q8 for that reason alone. Maybe it's bad AR treatments, as we see in some low cost AR lens?
I think the tint can be affected with some reflector lens combinations, which would make the beam purplish on the edges of the spill, but from my testing with the same light with and without AR lens, it has no ill effect on the CRI.
Have to agree with this. I’ve had a hard time putting mine down since it arrived. It just feels good in the hand, a really nice size/shape to hold and use. Maybe I just got lucky, but I’ve got no issues with mine. I’m sure the PWM is there but I can’t see it or hear it. And my tailswitch is as good as most other metal switches I’ve used, better than some really. Its just a solid light that I’m not at all worried about harming, cause its very solid. I’m normally a copper sort of guy, but this brass has really grown on me.
The Pineapple does appear to have some sort of hue splitting, in the same manner I normally see on AR-coated lights. Here’s a beam slice which shows the typical blue ring around the outside of its beam:

As for the beam itself, mine seems to be about the same color temperature as my ZL H52Fw (4400K) or L3 L10-219A (4500K), except it’s a little bit green instead of a little bit pink. There is also a ring in the middle of the spill area:

It appears warmer than my Nichia 219B lights at 4750K-5000K, and warmer than my Cree 3D (~4900K) lights, but colder than my BLF A01 at 4000K, and colder than my ZL H51w at 4200K. I haven’t tried removing the lens yet, to see if the beam gets colder with the blue ring mixed back in.
The Rey Pineapple is looking nicer after a bit of wear though. The head is now the same color as the body, and the recessed areas now have a bit more depth. However, the logo is nearly invisible; it could perhaps have been engraved a little deeper. Here are some pictures of it after some attempts to weather and polish it:

![]()

Looks awesome TK! I added an ice blue trit in the switch, and changed the tail assembly so the rubber boot is under the sleeve instead of over (switch felt better), otherwise left it stock for now.
Polished mine and I like it much better; orange trit looks good too. Regarding the switch button wobbliness - all credit to gunga for this idea:
just stack approx. 2 layers of thicker self-adhesive material - he suggested glow sticker material which I used -- right on top of the smallest part of the black switch inside the tailswitch. It not only has much less play/wobbliness, but it does actually tailstand a little bit better.
Also wanted to add how much I like this light.
So many positive review for this pineapple, can’t wait to see mine arrived.
The new batch will have 9K Hz.
Fabulous Rey! Is this in reference to the Ti version with the slightly different body style, or the current brass body style version?
Will the driver maybe be available too?
It will be used in both brass and ti.
Got mine today. Awesome light, well centred LED and general level of craftsmanship high. Very happy.
Now looking forward to a Ti version with the Damascus design.
As to the discussion about comparing this with the Astrolux 4xLED: I own both but for different reasons. Astrolux is a nice show-off light with a very useful low-mode in a SHTF situations. I bring it with me when I want to impress friends and lure them into this not-so-budget LED light craze ![]()
The pineapple is a nice EDC light I can leave on the night-stand and pick up when not wanting to thread on one of the cats while stumbling to the loo. But it’s a joy to have due to the thinking that went into the design of this thing, the nice execution and the high CRI LED used.
Thanks Rey, looking forward to your next projects!
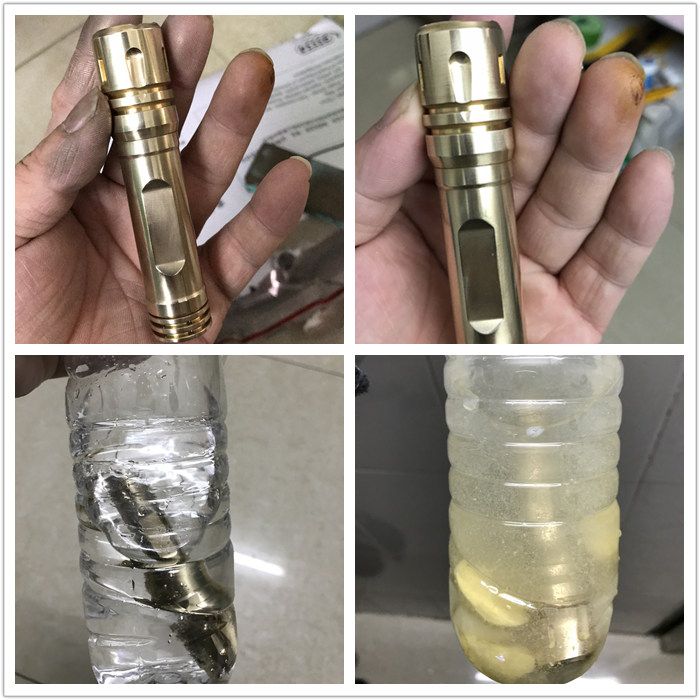
Tried to patina, failed.
Borrowed from another member.


I have polished the light and put it in the vinegar with boiled egg last Sunday, after 4 days, nearly nothing happened, expect the SS button turned black.
FWIW, original-recipe Palmolive soap is a relatively quick and safe way to add patina. Basically, rub the dish soap onto the light for a couple hours, adding more soap when it dries. Then rinse it off and it should look older.
However, brass is much harder to treat than copper. It doesn’t react as quickly and doesn’t become as colorful.
I darkened my brass Pineapple using ammonia gas. I got a large empty jar (quart size, iirc) and poured about a cm or 2 of regular household ammonia in the bottom. Then I got a piece of string and ran it through the pocket clip of my light. I held the string taunt across the mouth of the jar, suspending the light into the jar but without touching the ammonia in the bottom, then I screwed on the lid to hold it in place.
I only left mine in there a few hours, but it was long enough for it to start to darken down in the “cracks” and low places, which is all I wanted it to do anyway. Developing a very dark or deep patina like this would probably take a long time since there’s no direct contact, but if all you want is a touch of “age” it seems to work pretty well.
emarkd thanks for the explanation on the reflector, I was wondering, is the driver epoxied?
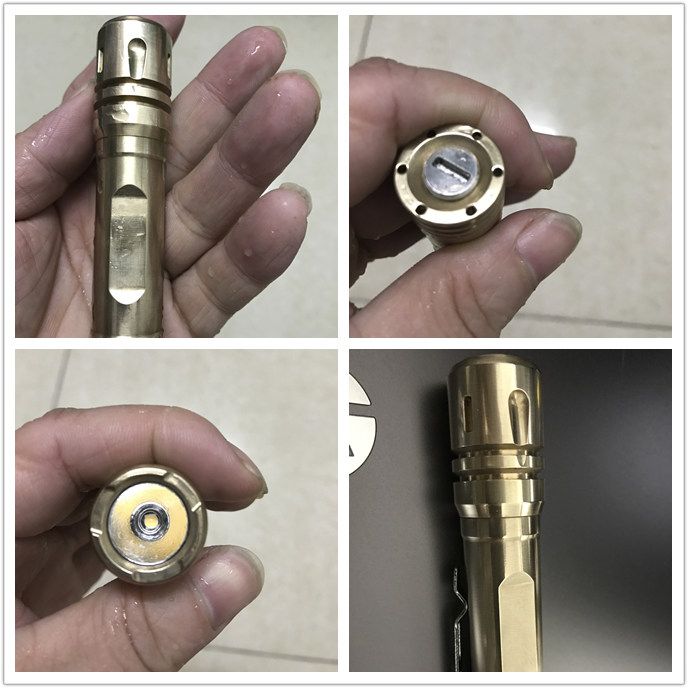
I tried the Palmolive trick and it took off fast, so got my camera ask quick as I could and caught some pictures, I’d suggest thinking it out prior to application though, I just dabbed some on my finger and swirl rubbed it on the head and it was almost instant and worrisome, so the last two pictures in this set was after washing and drying the head, top left was within 2 minutes, enough time to go get my camera and back to the kitchen and it was changing, so now maybe a light double or triple O steel wool lightly and a more even application of the soap.

Post missing? 2 hours ago, I was about to have lunch and saw a post about the beam.
I think reason is the brass bezel reflects the light.
Yes Rey, I did post a double comparison beam shot then pulled it after reading a remark about what the cause may be but re-posted here for you to see, the circle just outside the hot spot shown with near identical LEDs put different reflectors of course, and could you please tell me is the driver epoxied in?
I don’t want to attempt to remove it and accidentally scrap across one of those traces, I’ve done that before and it is awful tight and it looks like epoxy just about the driver at thread level, so wanted to ask before really twisting on it.

Thanks Rey, Yes glue, I appreciate your reply and just wanted to check as it is in tight, so now that I know I can put some torque into it and not worry thanks for link also.
Looking at the light the next morning now after using Palmolive it looks dark for sure, very nice start really.