Almost finished with this one.  It has a 219C triple regulated at 1.14A with guppy drive firmware. The brass pill was shortened and copper added back to give minimum driver depth. Short springs on both ends allow for more wood in the middle using a 16650 cell. The brass liner sleeve extends ~10mm past the head threads and seats onto the pill. Here it is between an 18650 A6 and an 18350 S2+.
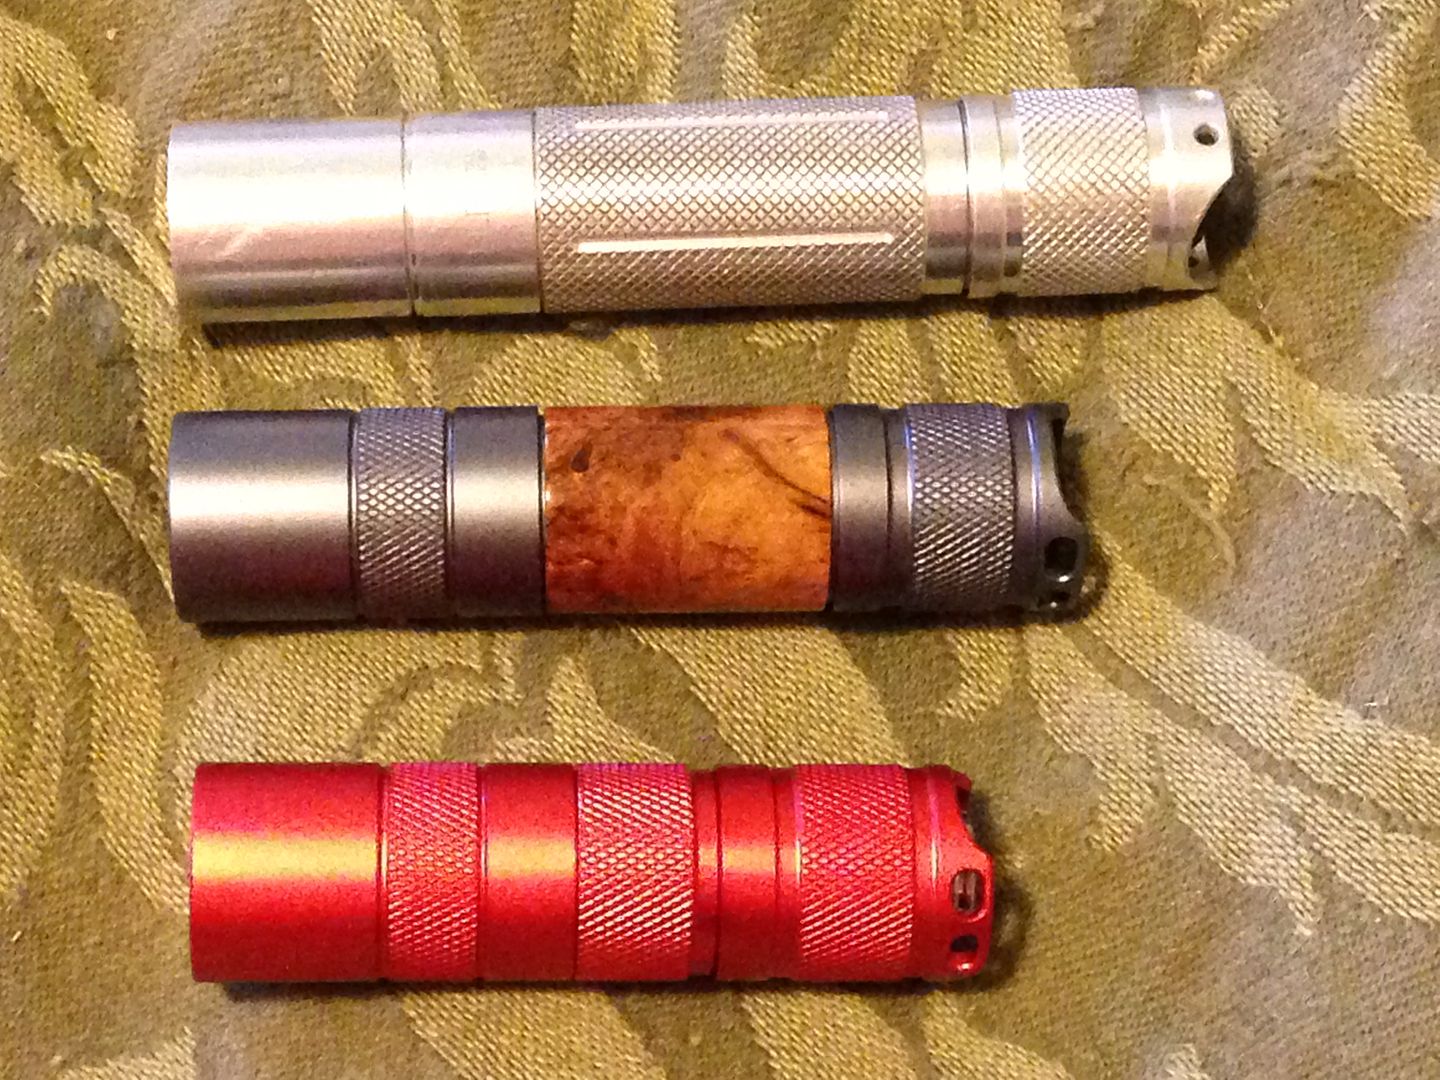
Nice :+1:
Thats pretty sweet RBD. Lucky you limited it to 1.14A. It may have ended up along the lines of a movie made along time ago by Cheech and Chong. ![]()
Cigar goes up in smoke?
My memory of that is a bit Foggy but I am pretty sure it wasn’t a Cigar.
vwpieces sorry for a stupid question but how did you do the finish on your S2?
It is really nice, is this maybe what they call a bead blast finish? Or maybe there’s just a S2+ in this finish and I’ve never noticed?
Thank you, looks really great to me…!
Thanks!
Some discussion was in this thread about the stripping and polishing. If you are reading through the thread you should come across the info in a page or 2.
I will check… but if you search the thread for
Stripping
polishing
Lye
or even 2000 grit
you will find it. That S2+ was originally Blue. Stripped with Lye and wet sanded up to 2000 grit and polished with Mothers aluminum polish.
OH, I got ya, I did pick up some what was it called Simply Purple or something down that line and have read of countless other options including what you’ve mentioned here, I’ve read through all the stripping processes I could find but I jump around a lot and hadn’t really seen such a fine example of the end product so this strikes me as a premium example for sure, you did a great job, so now I have to go get whatever it was that I bought out of my trunk and get to work, oh wow that is so clean, just a beautiful example of what I imagined and hoped for when I do mine. Really does put the spurs to me, well sort of… ha ha
Thank you for the reply VW and by the way while I have you here, I am still sitting on that Ti X6 we talked about months ago on another thread and did follow your suggestion and went and looked through the pills/spacers made by Kirbu…?? The Russian fella?
I think I know what to put together when ordering these parts, but do you mind if when I get my thoughts in order here and a list if I PM it to you for review prior to making a colossal mistake?
I know you know what your doing and I can’t really say that about myself with confidence so would really appreciate someone to just double check before I jump?? Thanks VW
I’ve been thinking about stripping & polishing one, but something I don’t remember hearing a verdict on… after stripping, will the aluminum oxidize? If so, do you just re-polish it? Clear coat it?
I had read that one person claimed that Museum wax worked well, I can’t confirm that of course.
Edit: By the way I have a lot of Mothers aluminum polish and I am reasonably certain that not only does it polish it also puts a protective coating down as well, how durable I don’t know but I do know that once I’d go through a spend a lot of time polishing the rims on my collectable it would hold up real well and for quit awhile in this rainy muddy state of WA. I could just hose spray the mud off and dry and it would still be shiny like when I polished.
Raw Aluminum Oxidizes instantly. It takes special primers to get paint to adhere so Clear Coat isn’t a great idea. After sanding and polishing it it does take some time for ti to generate actual cristals of oxidization, like years, if it’s not exposed to salts or other harsh environments. Oh, your skin oils may cause faster corrosion if your PH is acidic.
Once it is polished it will last for a long time. And already being polished makes it easy as cleaning it to get it back up to shiny with another quick polish. Car Wax will help on long term storage.
@ T18
I use Sodium Hydroxide crystals (Lye) dissolved in water and warmed in the microwave for a minute after dilution to help a weaker solution work better. Please read up on it as there are potential dangers involved. Wet sanding starts with 400 on a sanding block moving the block around the circumference. 800, 1200, 1500 and working up to 2000 Grit. Polishing with a Bounty paper towel with Mothers polish worked into the towel before using. Once the desired finish is achieved I use Dish detergent to wash off the Black polish from light and my hands. You will want to grease the threads after stripping anno off. Raw threads can be coarse and gall if tightened dry.
ALL sanding and polishing is by hand. Machines, buffers, dremels can not achieve a smooth mirror finish.
Have heard the Museum wax but never tried it. I like to wash anything I polish after. It changes the color to more silver, brighter IMO. Any wax willad the protection after washing. No joke some car enthusiasts use Pledge furniture polish as a quick shine. I am partial to Mothers Carnauba Gold. Easy to apply and get off the residue.
Thanks for the Info VW, cut and pasted to book of important stuff, to do someday very soon… ![]()
I did a driver mod.
FET+1 modded to 19+1, totalling 20x 7135.
Here’s the pics:

I’m just not a fan of direct drive, so the FET had to go.

Original plan was 12x or 14x 7135 for an Astrolux S3, but:

Inside a copper sheet 16mm circle 19 of them will fit. ![]()
This will fit snugly in most pills for decent cooling (with some thermal goo).

Positioned them with grey epoxy before soldering them to the copper enclosure.

Added solder paste for thermal and electrical path to the copper ‘wall’.

Heating it up inside a pill to keep the wall in shape.
Had to do it twice because the paste loses about 50% volume when soldered.

Thin ring for the + and a fatter one for the - output. Both have lips for soldering leads.
Behold a 6.65 Ampere Constant Current donut.

Leads on driver PCB for + to the 19x 7135 and - from the on board 7135 to the - output of the donut.
Made some room with a rotary tool so the copper wall can be soldered to the outer ring trace of the PCB.
Hole in PCB for + wire spring bypass.

More epoxy as solder mask and to keep the parts in place and to join PCB and donut.

Donut and PCB soldered together, bypassed spring added.

Output side. Black wire soldered to output lip of the donut.

Epoxy added to secure the lot a little extra.
NOT TESTED YET ! ![]() Praying it will work… :person_facepalming:
Praying it will work… :person_facepalming:
I’ll be using it (if it works) in a S2+ triple with either XP-G3 or 219C.
Waiting on blue S2+ host and XP-G3 S4 3A from Fasttech.
Planning on de-anodizing and polishing the S2+, especially after seeing that beauty vwpieces produced.
I don’t like coloured lights too much, but i wanted that switch boot. ![]()
:+1: :+1: Jerommel!
Someone said it can’t be done.
Nice job, great way of packing all those chips in a small space ![]()
I personally would have tested before filling it with epoxy, but watevs ![]()
You’re right of course…
I ‘beeped’ with DMM for short circuits and conduction and all was well.
The driver was working before i removed the FET.
The risky bit was soldering the donut to the PCB, so i can only hope it went well… :person_facepalming: :partying_face:
We’ll see…
this a USA penny, thats the year on it… i made my own USB soldering microscope. based on pictures from a sub-100 dollar commercial unit? i have more magnification and 10x the working height…

the tech is done, just nuts and bolts to go from mock up to prototype… i think i might be able to blow the commercial units out of the water, maybe… i’m thinking of a moveable table under it maybe… heh heh…
Manker E14 18500 battery tube

Went through one of these cheapie unbranded 18650 lights. Has a charge port but it is dependent on the charger or wall wart for the charging capabilities. 3.5mm power port.
Modes are H, L, Strobe on a softer remote SW feel. I do like these lights and have a few around the house. Snagged off ebay auctions for $1 or $2. They have plastic reflectors but offer a nice spot and no artifacts.
I swapped the 20mm MCPCB with an aluminum DTP Nichia 219B 4000K high CRI. It has a pressed in emitter shelf and that was removed, sanded flat and good thermal paste. Driver output was about 900mA on High and I stacked another 1R0 resistor to the existing 2 already there. I used the same value as the existing resistors 3X 1R0 is now 0.333 ohm from previous 0.5 ohm. Jumped the output to 1.3A and is a nice increase but well within reason for this light. Also replaced the wires and added some lead to the solder.
Others have emitter swaps but the results of this one turned out good. May go through the others to put the resistor into those too.

spacer looks like its not seated flat but it is, just shadow from the light I used for the pic. Reflector is actually shiny too and that looks dull, but its not.
little better in some ways…
