Do you mean 18650 ?
I would really like to see some pics of yours too !
BTW, nice work OP ! THAT is modding ![]()
Nope, I mean 16650. It’s a 4.35V Sanyo cell purchased from RMM. Now that it’s done I should really update that thread. The 16650 is used since a brass sleeve is needed both to carry current through an otherwise wood tube and for strength. Since the brass fits inside the threaded tube ends it reduces available ID in some cases requiring the use of a narrower cell. K&S Precision metals makes some great thin wall brass tubing but only thicker walled stock in this diameter. I can now make my own thin wall tubing but it’s not so precise. I’ve also reamed this same tubing enough for an 18650 but it still requires the narrowest of cells. I really enjoy seeing how others do mods like the one in this thread and what different approaches to shared obstacles are used. The length of threading in the heads of S2’s is what makes the mod here possible and fuels the imagination for other mods as well.
The new short head also works with the 18350 tube with an 18350 cell inside.
However, note the gap between the head and the tube. This is because I didn’t file off the threads on the 18350 tube as much as I did on the threads on the 18650 tube. This gap wouldn’t have been there if I hadn’t accidentally slipped with the grinding bit and ended up having to shorten the head a little more than I first intended. Also, in retrospect I don’t think I should have tried to shorten the tailcap at all. If I were doing this mod again I’d fix those problems so there were no visible gaps.
As-is, I might be able to fix the gaps on the current sample, but to do so I’d need to open up a little more room inside the battery tube. I should be able to get 2mm from filing down the top of the switch retaining ring and contact post on the bottom of the driver. But to get more than that I’d have to grind the pill flatter.
Here are some pics of the light with 18350 tube (it is fully functional with either length tube):


That’s awesome. With the new pics you can really appreciate how short you made it.
Very cool mod. Thanks for sharing.
Bob
Here’s a picture of the Shortened S2+ next to an unmodified S2+


Alternate shortened Convoy S2+ host in polished bare aluminum.
I soaked the light in Greased Lightning to remove the anodizing. Then to remove the final bit of green anodizing I soaked it in Clorox bleach for 6 hours. The bleach also turned the aluminum a dull dark grey. I sanded and polished off the grey from the raised portions of the light, but left it in the cracks as much as possible as it provides a nice contrast.
Great mod, better for EDC, buy what about heat dissipation?
By removing alle that material it will heat up even faster
Yup heats up very fast… which is why I have it set to 3 amp max output and have the driver’s temperature sensor set to its most sensitive setting. With such a small head and no heatsinking, it does heat up very fast.
That said, the light you have on you is always more useful than the light you left at home because it was too big. There’s certainly something to be said for a small and compact light. And these are capable of very high outputs, even though due to heat they can only sustain it for a very brief time.
So little is removed and most heat transfer is to the hand anyway that it shouldn’t be very different.
I actually found I could run the shortened S2+ on the second highest FET setting for extra output. The head gets too hot to comfortably touch after awhile. The body tube especially near the head gets hot, but not too hot for the hand and the battery is fine. The temperature sensor kicks in to keep the light from getting too hot.
It’s perfectly usable like that even when left tailstanding. However, I’d probably want to wait 30 seconds for it to cool before putting it back in my pocket.
Does it work with a lit tailcap?
Btw. I like your strip and polish. I stripped mine and did minor cleanup. I think I’ll polish because I like how tired looks.
Unfortunately no.
If I hold the illuminated switch to the end of the battery tube without the tailcap I can see the 2 blue LEDs on the tailcap dimly lighting. But when I assemble the tailcap their output is far too dim to actually make it out of the cap. And this after I replaced the metal washer above the switch with a transparent one and verified that the rubber gasket around the metal plunger is full transparent.
I need an illuminated tailcap switch mechanism with a brighter LED in it.
Does it work with that driver? No bleeder resistor needed?
Works as is without a bleeder resistor. Just not very bright.
What’s the bleeder resistor do? If I add one will it be brighter?
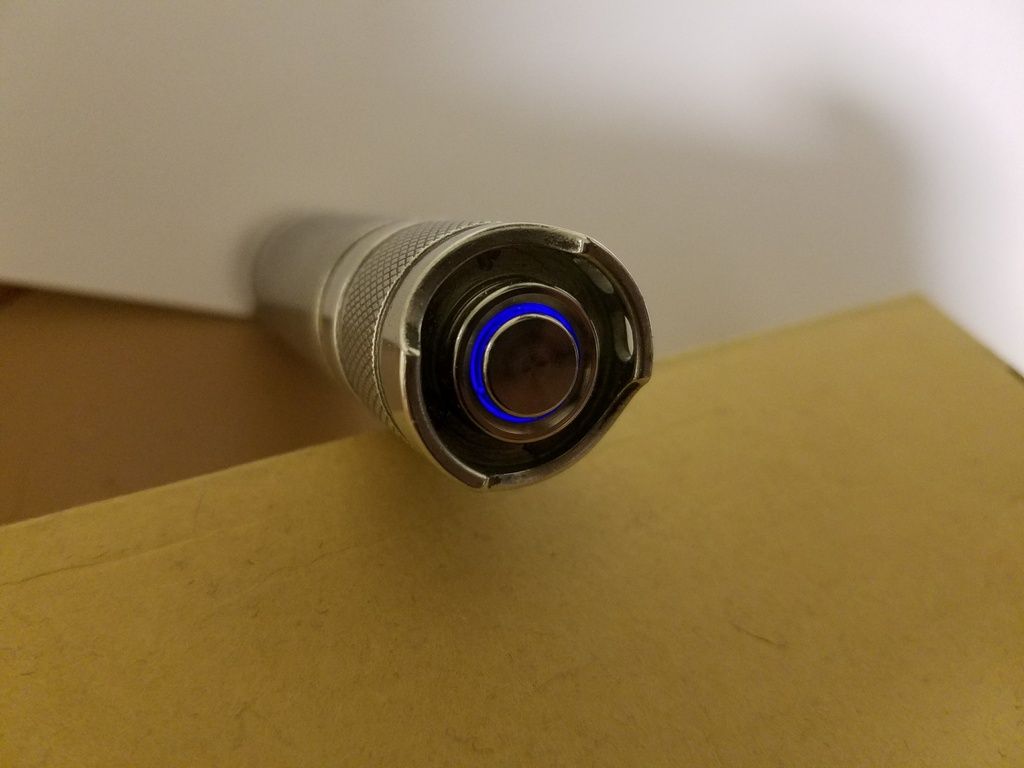
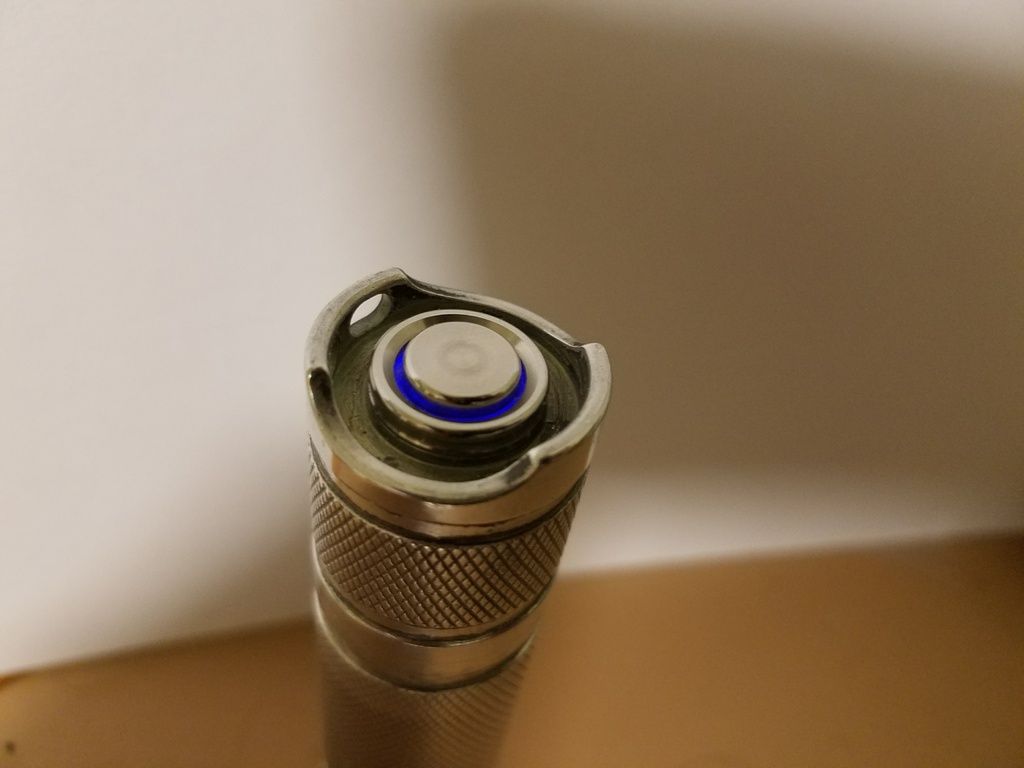
Got the lighted tailcap working in my shortened polished S2+. It’s not blazingly bright, but is quite visible in the dark.


Since I had 8 of the lighted tailcap switches from Banggood, I decided to try resistor modding one by stripping the resistors from one module and stacking them on the other. This resulted in slightly brighter LED output.
- I then took the stripped module and jumpered over where the resistors used to be. This resulted in even brighter output. Since the light still seems to still work even with no resistors on the switch I used the jumpered module as it had the most output.
- I did not install a bleeder resistor on the driver. The driver still seems to be fully functional so perhaps this one doesn’t need it.
- To get the light from the tiny LEDs on the switch module around the edges of the button, I needed to do two things:
- The module rests on an opaque metal washer with just the switch protruding through. I needed to replace this washer with a transparent one. I didn’t have a transparent washer on hand of similar size and thickness, so I cut up a 2x18650 storage box from Mountain Electronics and made that into a washer. It’s mostly transparent and worked well, though I could probably get slightly greater output making a washer from a plastic lens from Flashlightlens.com.
- Surrounding the top of the button, between the button and the housing is a thin ring of hard white plastic. It was opaque enough that the light wasn’t getting through. At first I removed this ring completely. That let the light through, but it was mostly only visible if you looked straight down the top of the plunger. The ring also served a second purpose of keeping the plunger from falling out of the light (unlikely since it actually locks into its rubber gasket) and helps stabilize it from wobbling side-to-side.
- I replaced this plastic ring with a transparent one. I noticed that the bottom of my transparent plastic x-acto knife cover was almost the same size diameter as the white ring. I sawed off the end of the cover then filed it till it was the right size. In installing it, it did split into a c-ring, but that was ok as the break aided in fitting. It’s not needed for waterproofing as the gasket takes care of that. There are grooves at the top of the housing that lock the ring into place.
Nice mod! I find flashlights more EDC-able if they are short.
Also nice to know that the DrJones driver works well with no bleeder and no resistors for the tail leds.
I do not really understand what happened in thse post above though.
Are you btw aware that there are led-rings allowing 6 leds in a circle available at Oshpark, that can replace the washer in the tail assembly, so that the leds shine more efficient through the gap?
I have an H17F+ that is the same as the H17F but made for multiemitter higher output lights. It should be the same outherwise and it works with the lighted tailcap and no bleed resistor. Actually, the driver starts freeking out if a bleed resistor is added.
I am now! I should get one of those. Should be much better than what I am using now.
I really like this mod. The shortened s2 with the 18350 tube is so small! ![]() Nice job! I’m looking forward to seeing what it’s like when you replace that washer with the PCB LED ring!
Nice job! I’m looking forward to seeing what it’s like when you replace that washer with the PCB LED ring!