I had a full weekend off and I think it was a perfect time to start begin my scooter headlight project development. The guinea pig is my faithful Honda scooter. It's a very common Honda scooter in Indonesia, myriads of them actually. Honda sold more than 1.300.000 unit in 2016 alone for this particular type. Urban Indonesian rarely walks, they scoots.
And the good thing is, Honda has completely switched to LED headlights for all it's product lineup in Indonesia since 2015. I used to mod the whole headlight assembly to get one. I forgot to take before pics, I already stripped the whole headlight, doh... I'll borrow my neighbour's scooter later tonight for a before-after beamshots.
Summary of modification objectives:
- wider and more evenly distributed beam. The OEM HL was too narrow and gave me limited close and medium sight, while the hotspot was too bright and liney (how do you call a thin vertical beam in english?).
- brighter or equal to OEM HL brightest hotspot with the same good cutoff to prevent glaring others
- more neutral CCT, to get better view in smoky or foggy nights.
- much higher and wider high beam. The OEM high beam was nothing but adds more intensity in the center
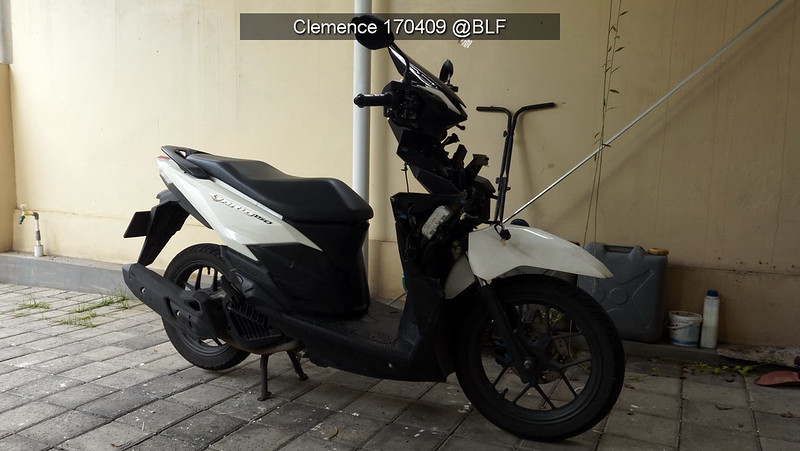
It's small, lightweight, and fast @110km/h stock. I modded mine and got a 124km/h top speed. You can carry your monthly grocery with this one. The underseat box is big enough for a full face helmet. The best thing about this 150cc scooter is the fuel consumption, 45km/liter is easy. With patience you can get almost 50km/liter. It's fuel injected with a single alternator/charger which also the electric starter. I rode on this dude from Bali to Jakarta last year (1400 km /trip).
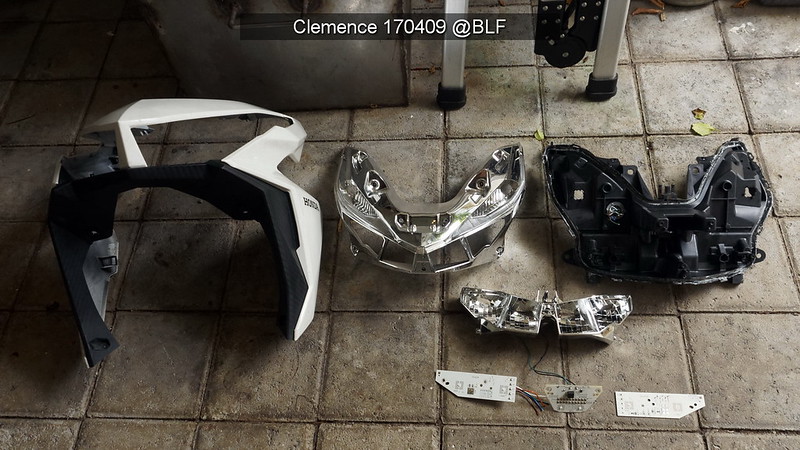
Finally, dissasembled. Designed in Japan by Stanley exclusively for Honda.
Looks easy for many of you while it was a real PITA. The reflector holder (middle) was severely glued to the recessed groove in the headlight body (right).
Most modder here advised me to use heat gun and a small spoon to pry open slowly. I didn't have the time for a time consuming-nerve-testing,process. So I put the whole headlight assembly in a big metal bucket and boiled them in a boiling water (yes boiling water). With heatgun method I opened the joint at about 15cm/hour, and I had to keep it separated, otherwise the joint will closed back. With boiling method I snapped open the whole thing in 2 hours.
I really hate the glue, why don't they just use rubber seals and screws instead??
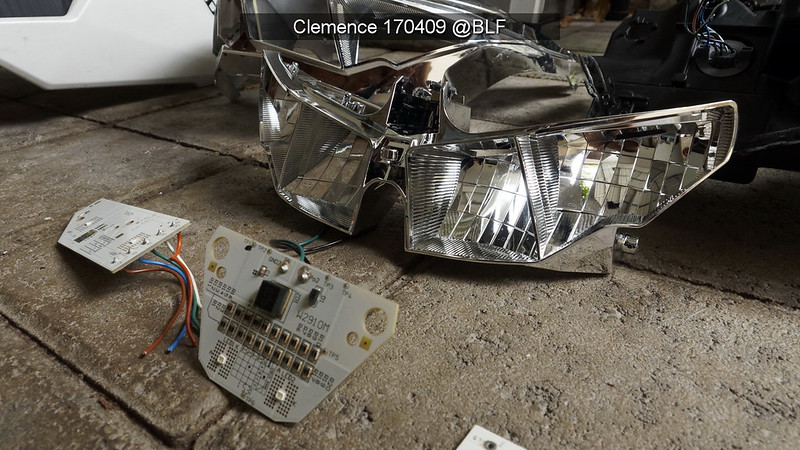
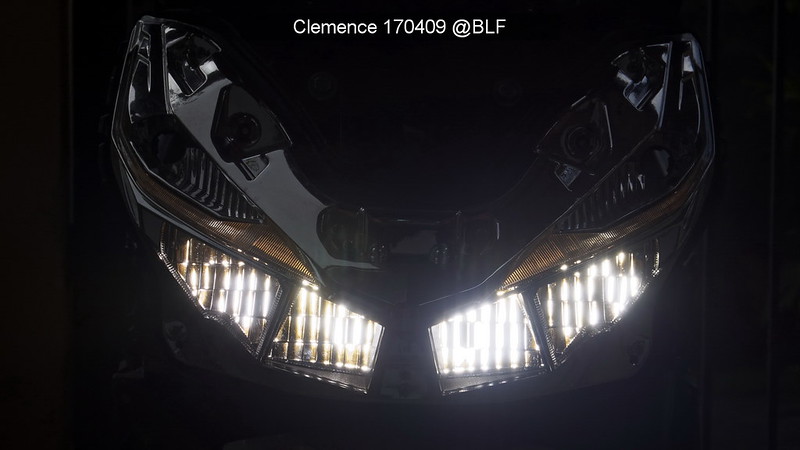
One of the best/clever design to get the most from the LED with minimal glare. A sharp cutoff is a must for headlights, according to many Japanese automotive regulations. The bare LED positioned just a bit above the reflector so the strongest emission hit the reflector and the high angle emission exit the headlight at horizontal angle at worst. Some beam directed upwards to aid shining traffic signs, but in this HL, it's too dim, only useful in a complete darkness. The driver isn't sophisticated at all. The driver positioned in the center right above the accent lights.
FR4 boards with double copper sides. I don't know what are the flat domeless LEDs used here. The die measured ~ 1mm x 1mm. Any larger die LED should give me floodier beam, right? EDIT: they're Stanley LED
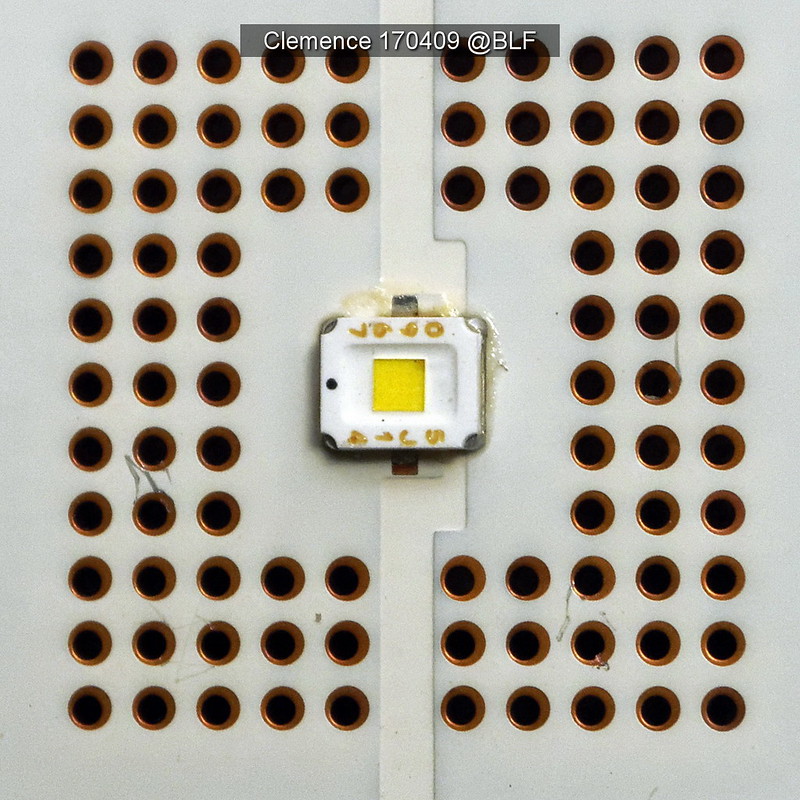
6000+K with magenta-ish tint and of course very low CRI (not measured, just saw it)
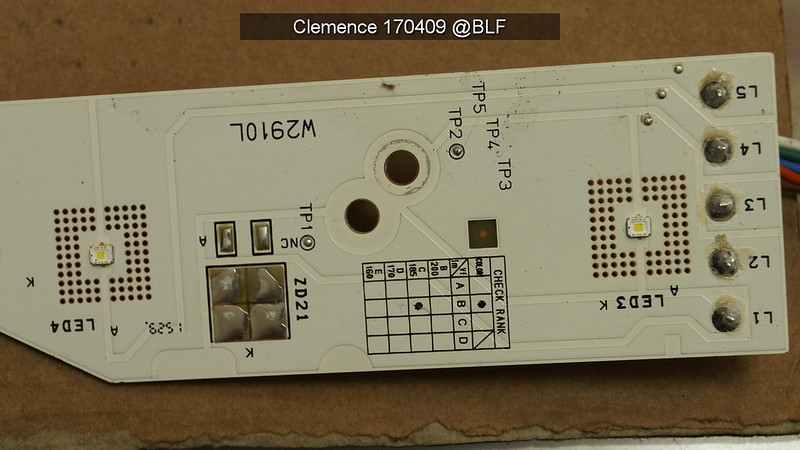
3535 soldering foot print. It's a NON DTP PCB used with DTP-able LED. Common in streetlights to save cost. Note the generous through hole vias connecting to the backside of the PCB to get the largest cooling area.
Left is the cathode side. At ~ 350mA/LED, this design is more than capable even in a sealed HL chamber unit like this one. And this scooter designed with the low beam turned on all the time.

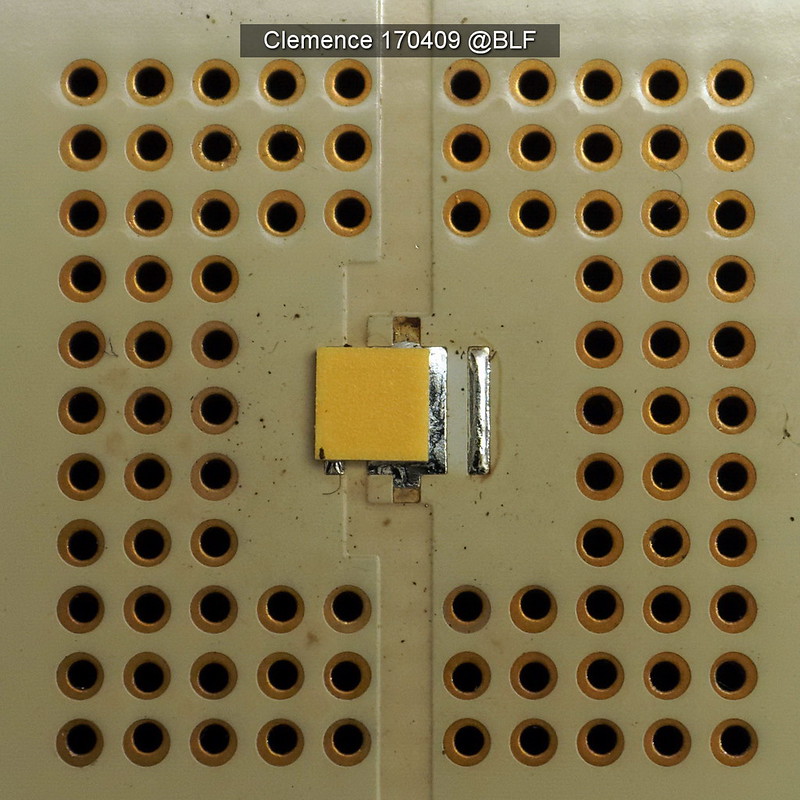
Got me wondering if the E21A could be used....checking....hmmmmm, interesting. Symmetry isn't needed with a scooter HL. Almost all car's headlight also assymetric. 1mm off center should be OK
Just to give the idea how it would soldered. Man...this E21A is so tiny and THIN, even flipping it was a challenge (for my sore trembling thumbs from glue prying session earlier)
COMMERCIAL BREAK: DELUXE REFLOW ADJUSTABLE STATION + PANCAKE BATTER (OPTIONAL)

OEM LEDs removed. The new sm503 9080 E21A stuck in place using sticky flux. No additional solder needed at this point. At 240C the masking paint started to yellow, lower than 240C the solder didn't melt too well. I remember JIS requires automotive solder to melt at around 227C minimum. I think Stanley/Honda uses IR rather than hot plate to reflow this one.
Looks good except for the burnt flux on the LED. Cleaned it with IPA later. Centering was a bit off in X axis, I don't care, I left it at the best position I could do with my shaky trembling thumbs.
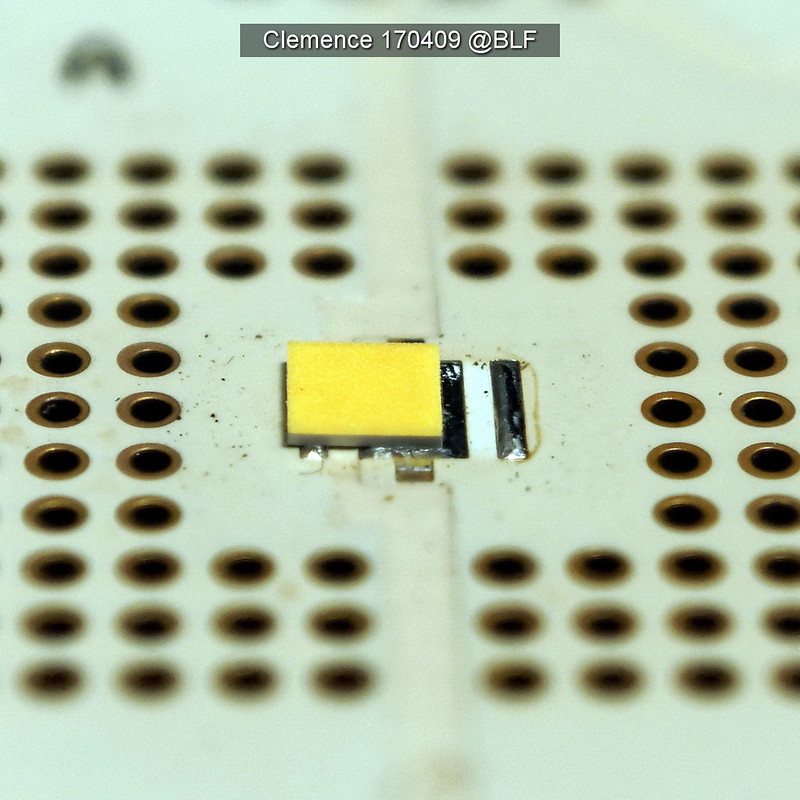
Looks like the silicone protective layer is mixed with the phosphor, isn't it?
PRETTY!
I used 2 3500K 319A for the accent lights. Blueish LED was once looks cool on the streets, not anymore. Now they're too mainstream.

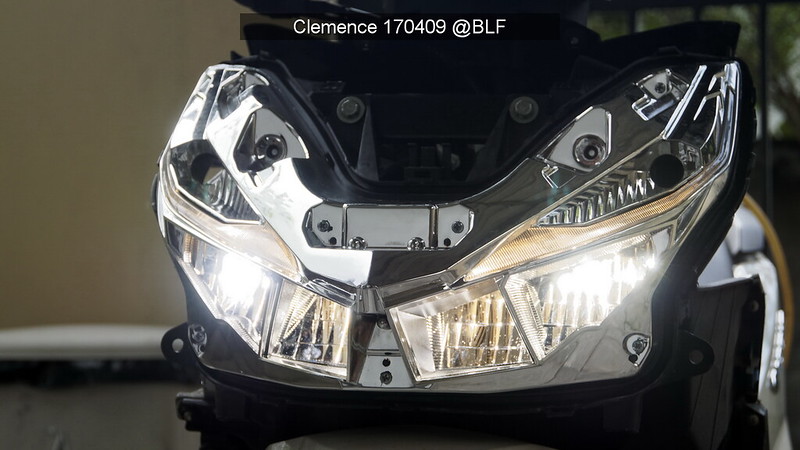
High beam on. Cool, is it a 600CC super bike one might asks?
Under exposed
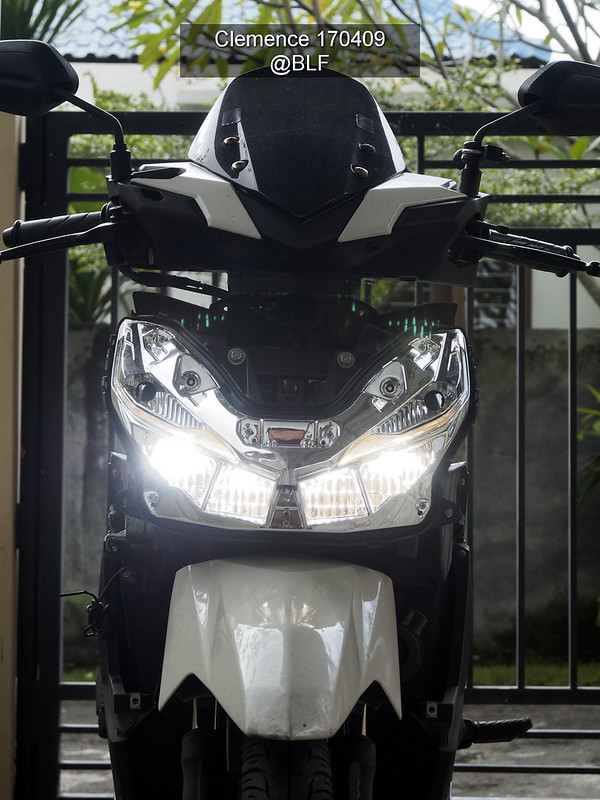
Too bad, it's still the same work scooter.....
Will update soon with more beamshots and comparison pics...

Meet Duddo, my loyal crazy naughty chewy dude
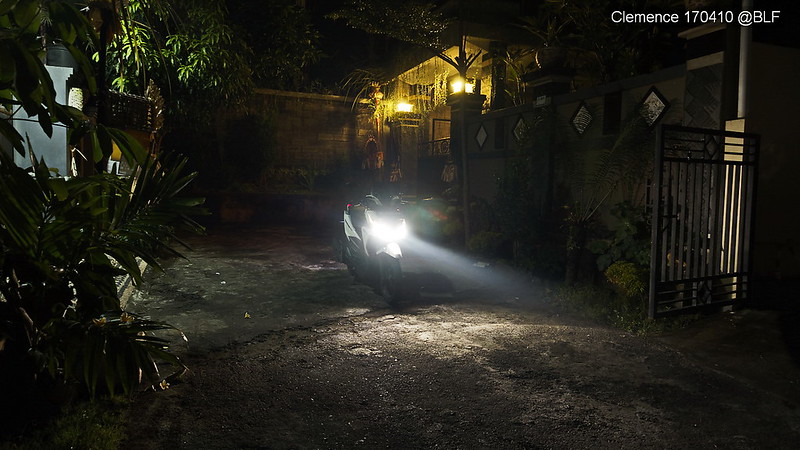
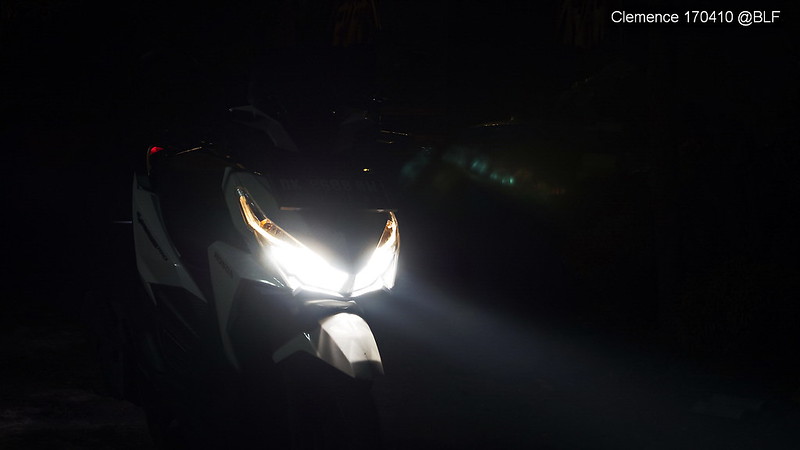
BEAMSHOTS:

CONTROL
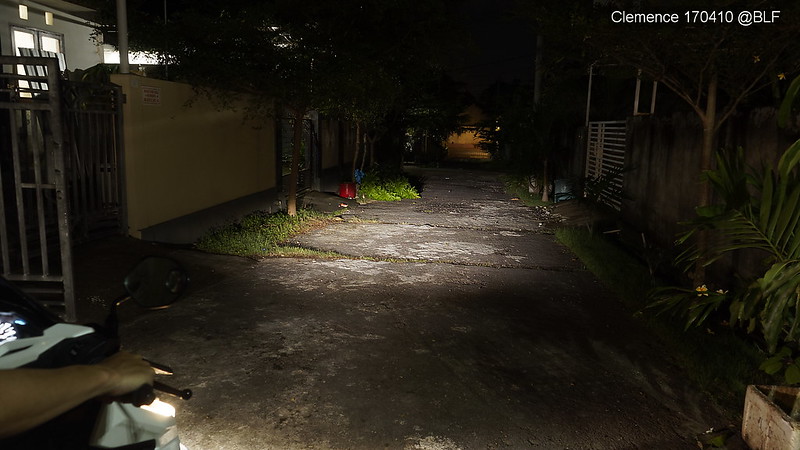
LOW BEAM: Still far from perfect. Too high contrast between close and medium range, making slow careful riding in rough terrain difficult. The eyes have to adjust from bright to dim, strained. But this is way better than the OEM (approx. double the OEM width), the hotspot was thin horizontal line. And adjusting the beam closer just makes it even thinner.
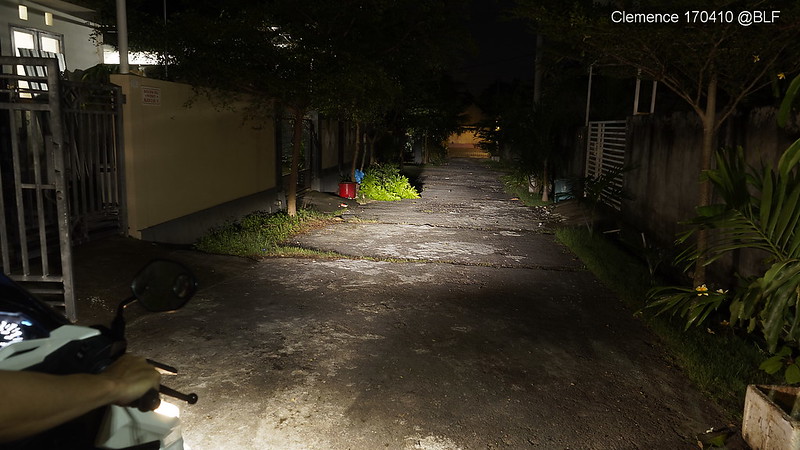
HIGH BEAM: Only makes a difference at very long range, definitely brighter than OEM. If you think this is bad then imagine the OEM which only added ~5 meters more range with the same setup.

CONTROL: Didn't dare to ask the neighbors to turn their lights off.

LOW BEAM: Minimal glare same as OEM but minus the blinding blues
HIGH BEAM: Minimal glare same as OEM but minus the blinding blues
THE BEAM
- Clemence