Nobody is interested in a 46mm version?
Then I will take 2 17mm Narsil no spring.
OP updated with last orders
Caleb has not responsed yet to PMs
42 drivers payed
4 drivers not payed
1 driver for repair a light
So 43 already taked, 4 no response yet, 3 drivers free
I hope to get a response from Caleb or those drivers get availiable again
Leaves only 3 drivers availiabe right now
What size are the 3 drivers not spoken for?
50 drivers is just a rough target
I ordered more parts and also some sizes of boards are not taken yet
47 is the number that are definately taken by now
as of today 47 drivers in list parts are limited this way
2 more 15mm boards LFPAK33 FET
3 more Boards with LDO
2 Attiny 85 for Narsil
7 Attiny 25 for Bistro
8 more boards with SIR800 FET
ideally it is possible to make at most 9 more boards (56 total) if at least one 15mm is taken with the smaller FET
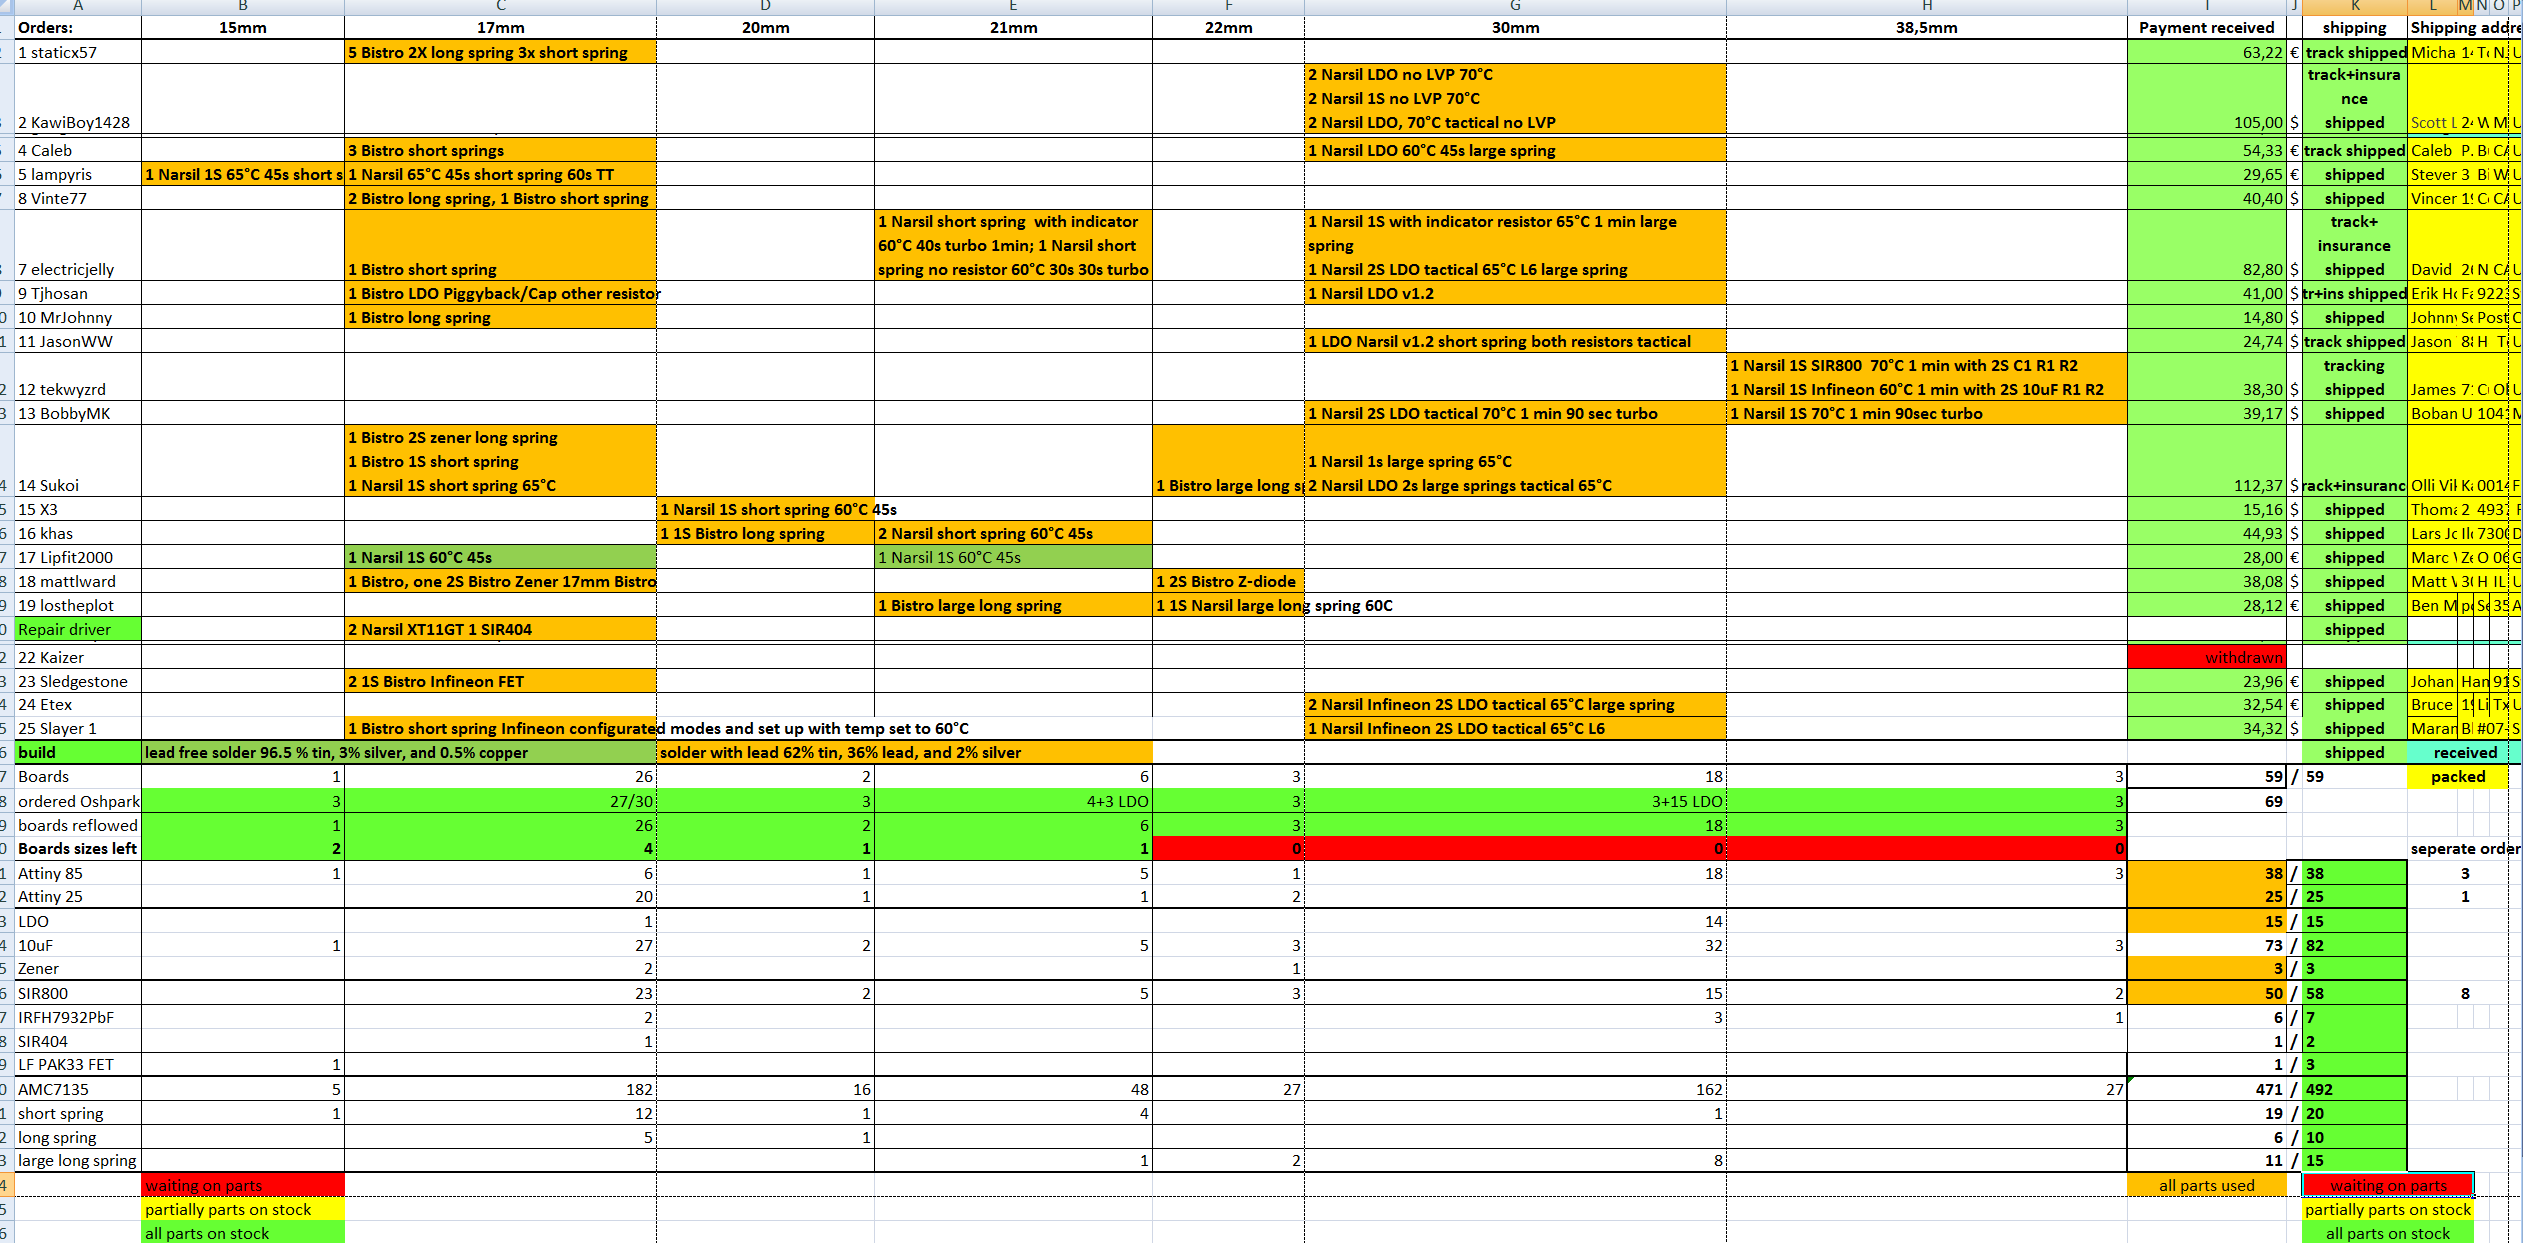
to see which parts are availiable I made this Excel sheet
Thank you again for offering this service to BLF members! I’m still not able to partake of this offer yet, but hopefully some day will get a few of these. Meanwhile, I had a thought. I would like to see one day somebody offering just the MCU’s pre-flashed with some of the latest firmware choices. Richard at Mountain sells pre-flashed chips, but his firmware options don’t include the newest BLF creations, like Bistro and Narsil.
2x 22mm if not to late,can use other diameter if no 22.
pm sent
I got spammed today from oshpark
Most of the drivers are shipped now
the ones ordered later will follow next days.

It would also be cool if somebody offered a top of the line complete kit, with everything needed to flash our own chips, maybe a written step by step instruction sheet too??? ![]() Nudge nudge!! :+1:
Nudge nudge!! :+1:
NovicesFirmwareGuide: learn to use existing code for your custom builds (WIP) <!--break--> - #2 by Lexel OP how to maker own hex files.
To compile a hex file in Amtel Studio 7 is the same as in 5
The how to do in Amtsl Studio 5 can lead to errors if the file also needs to load information from the config files, you see more files in the Bistro HD folder
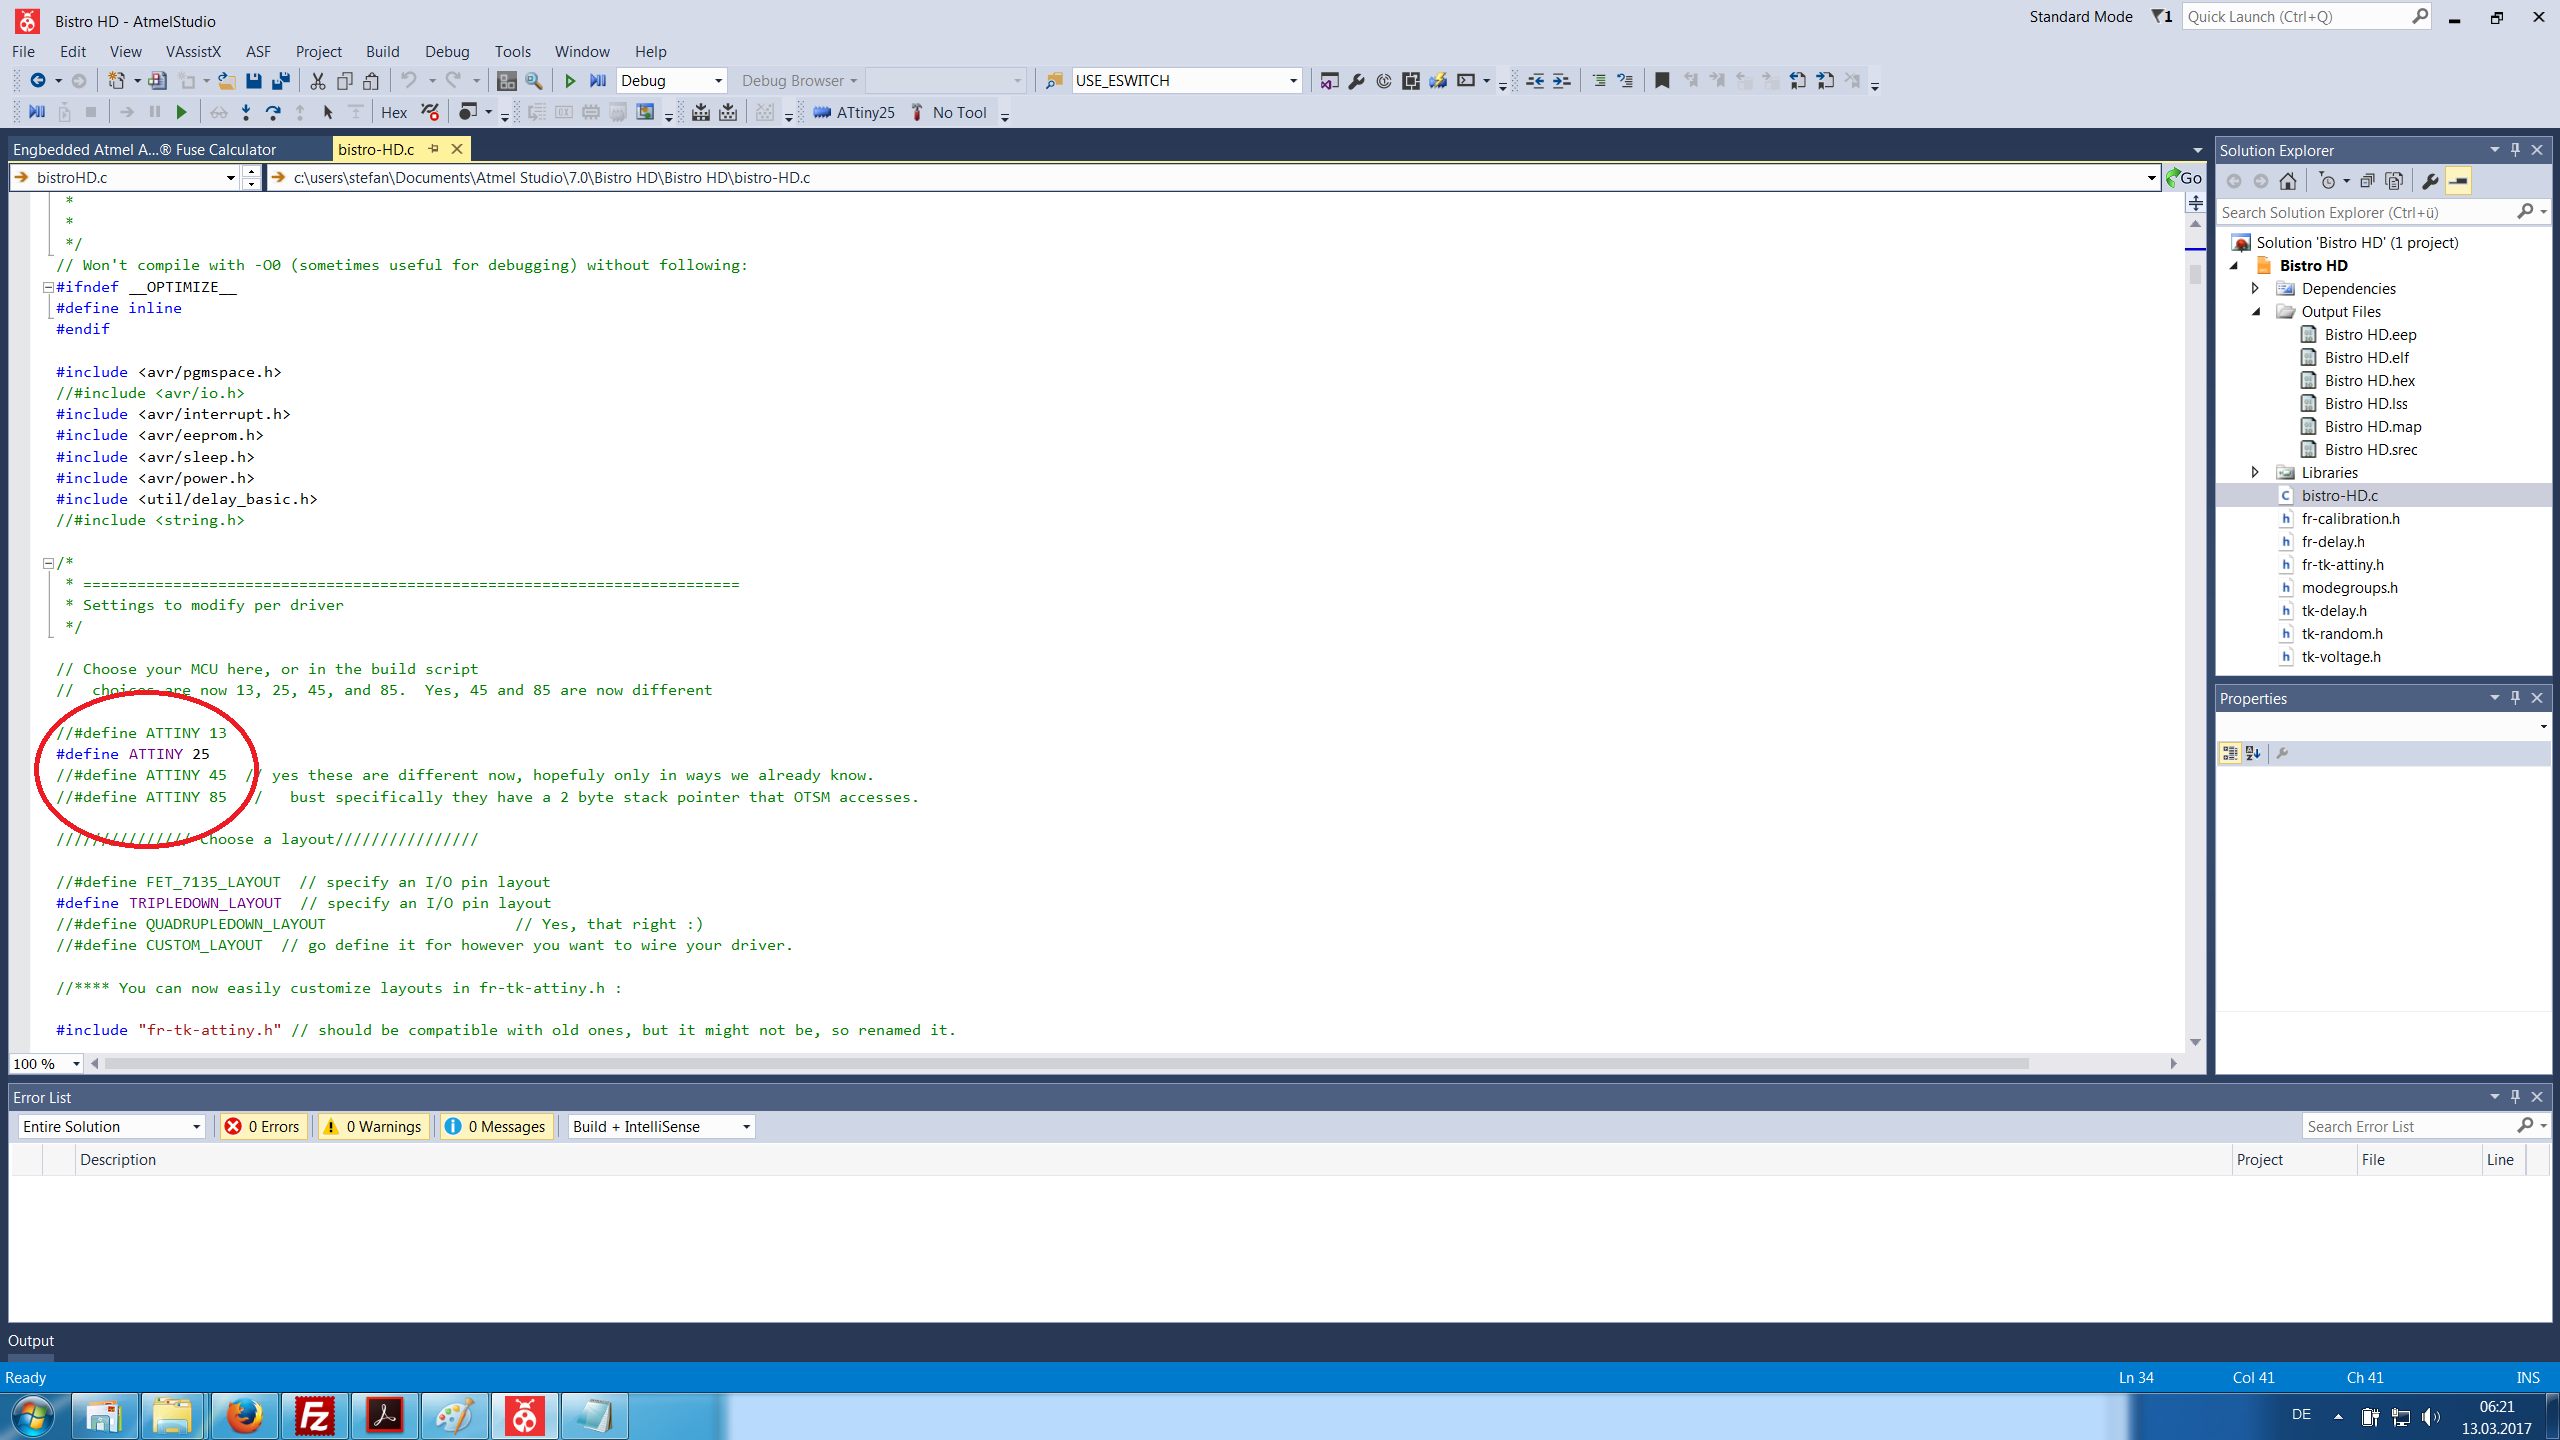
You can simply load the bistroHD.c file
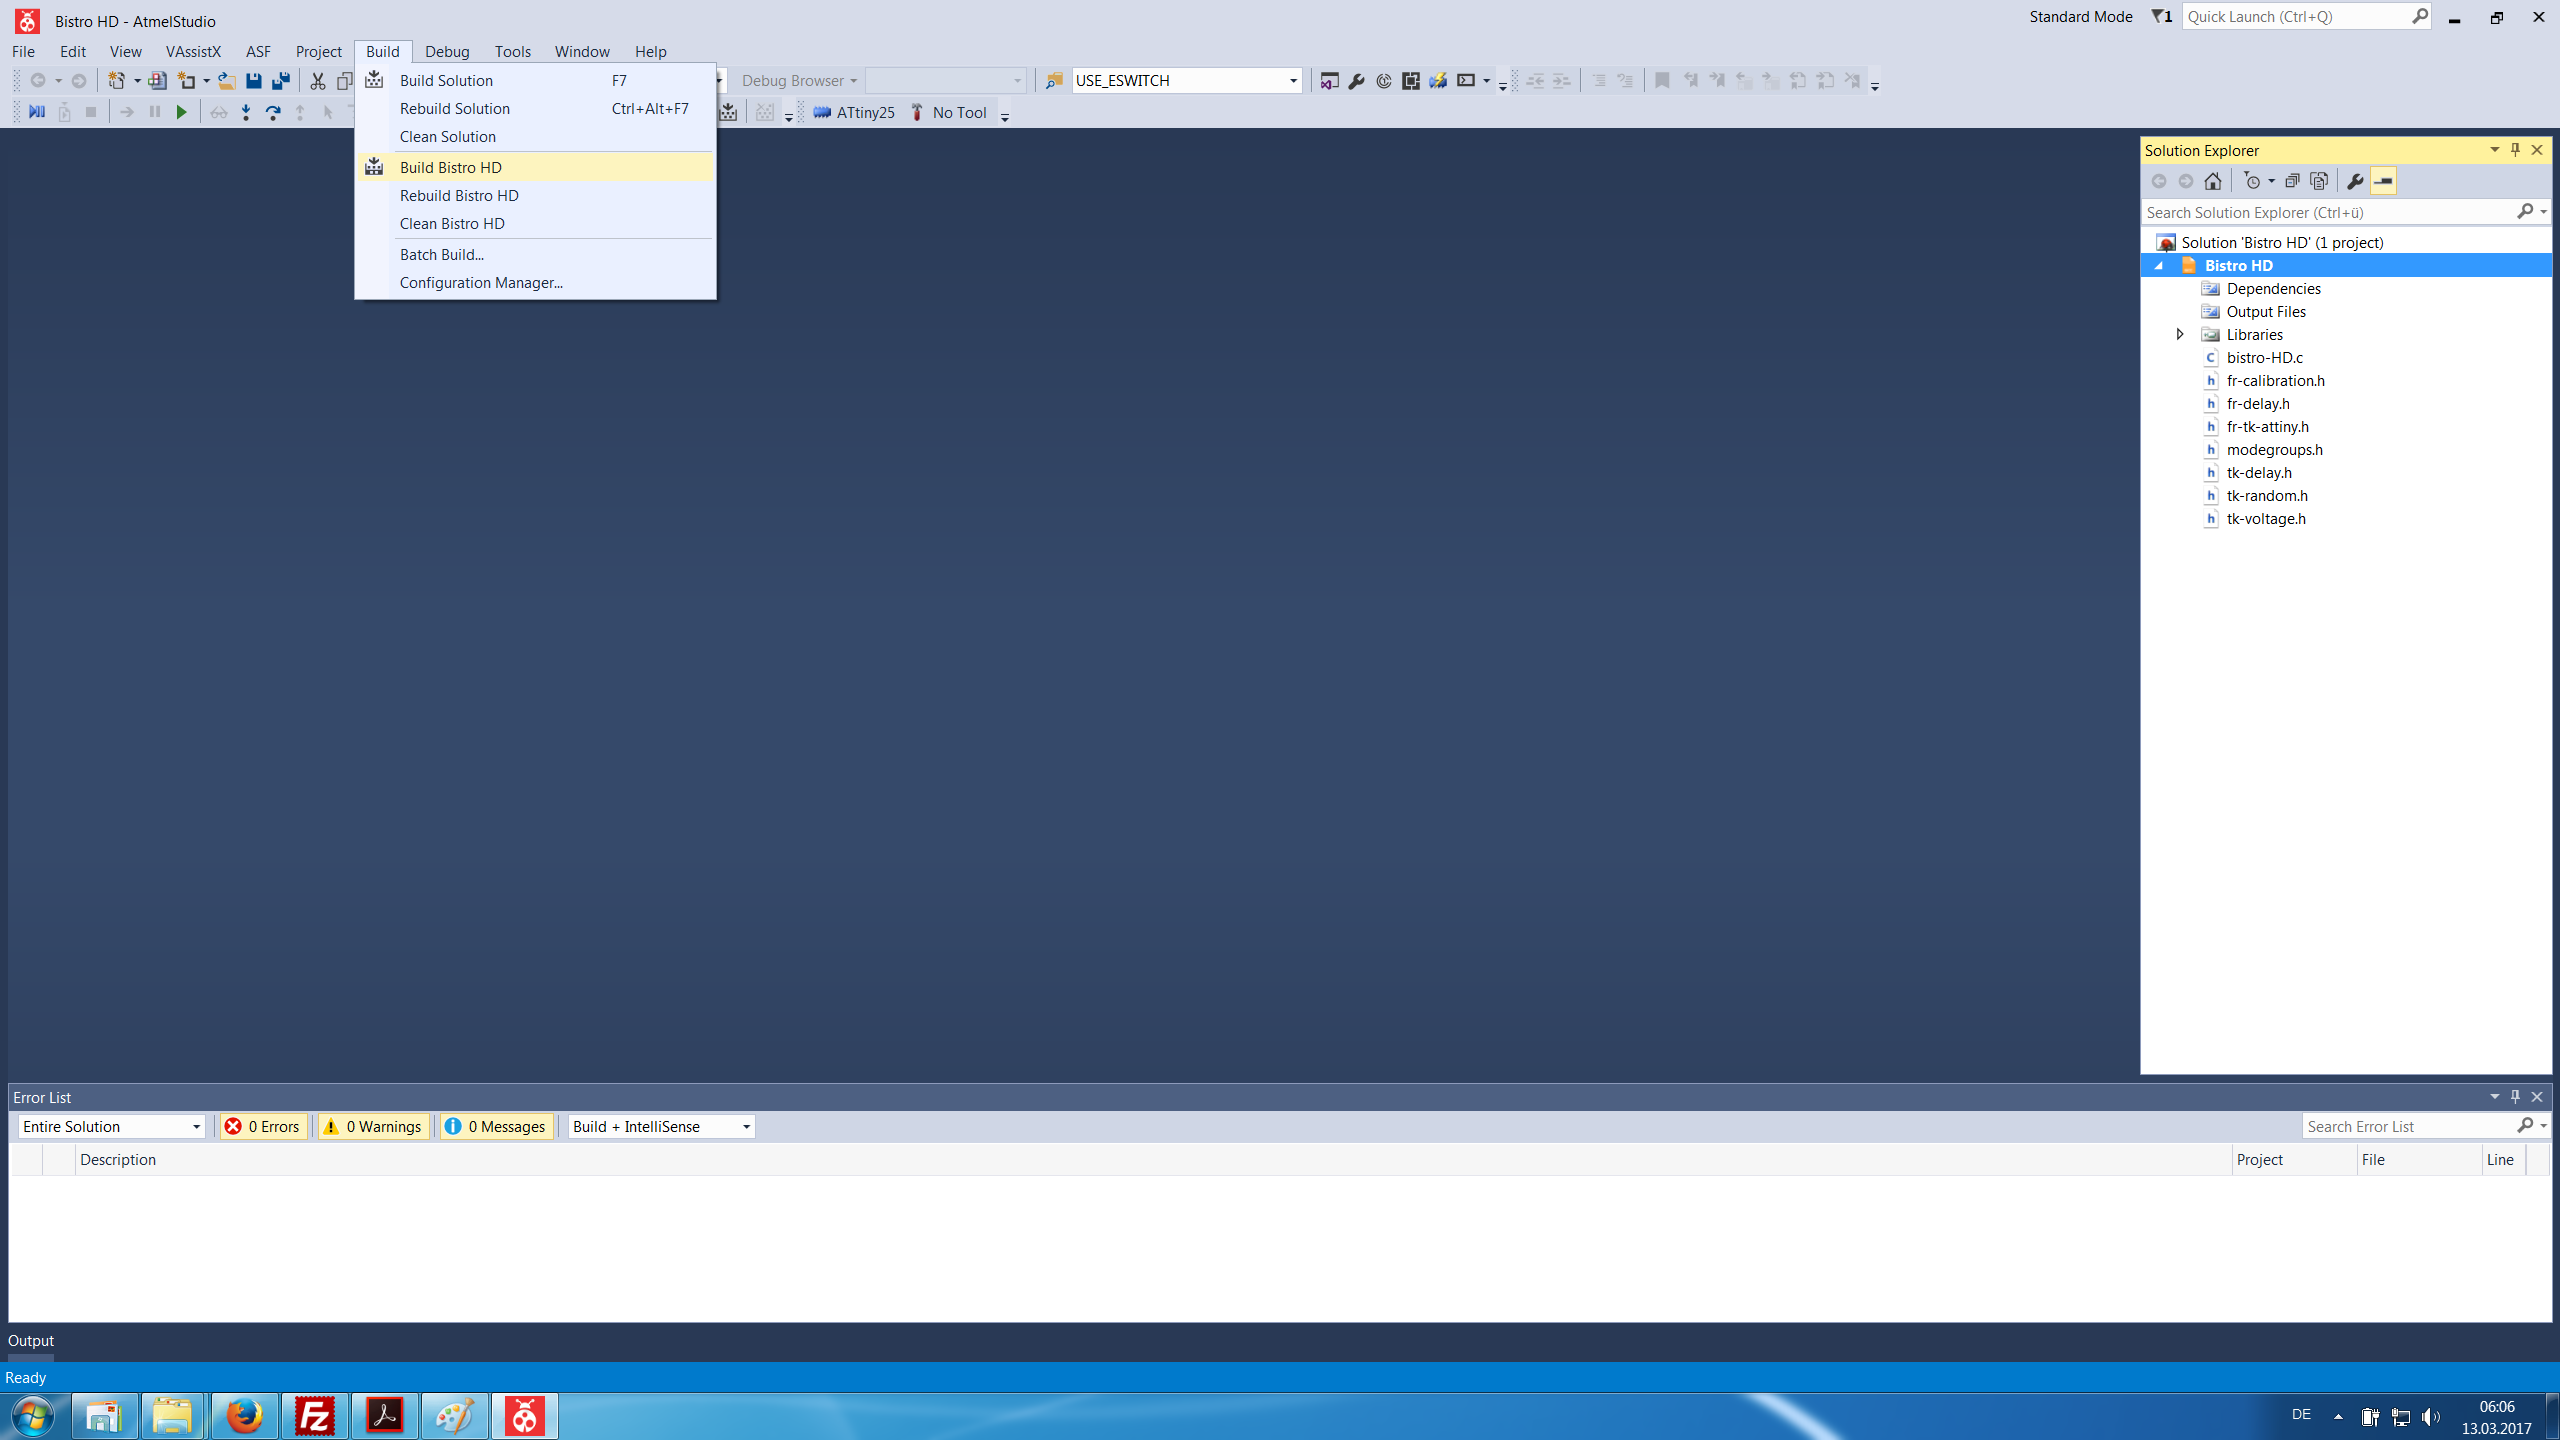
And then start from build in the how to create hex in studio 5
The studio will have also the other files
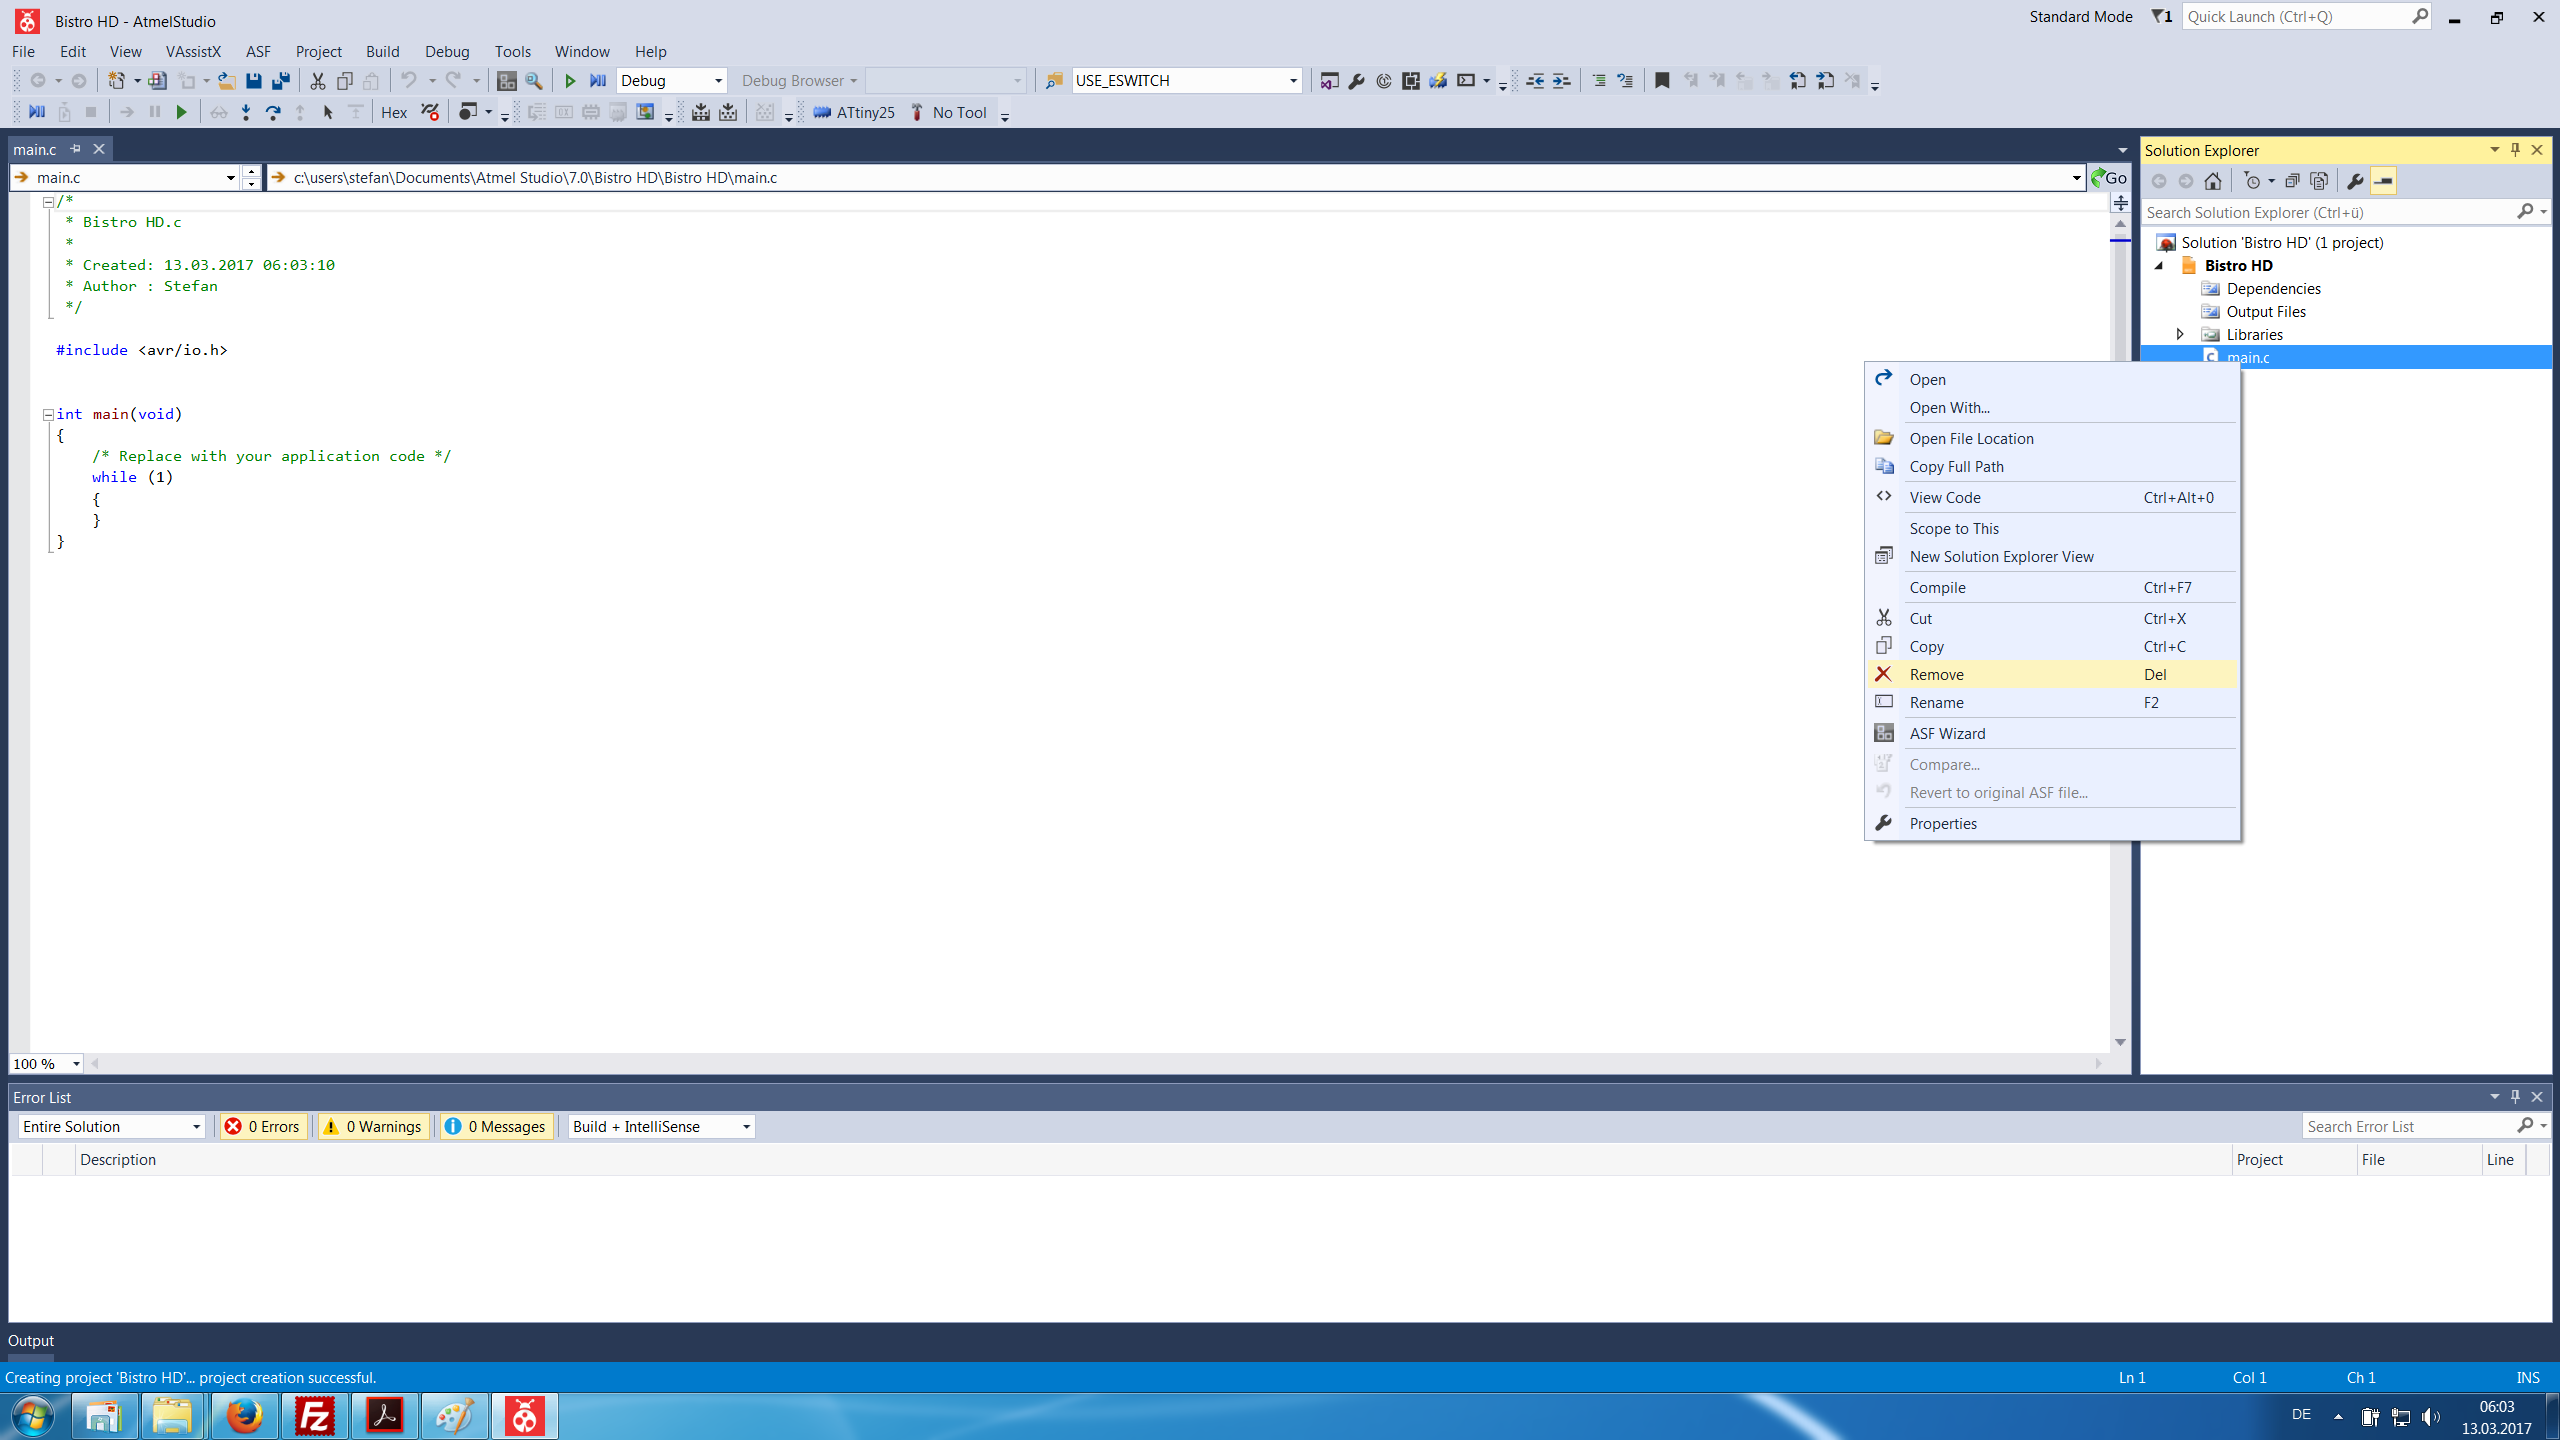
Rightclick on solution explorer on the right side
Click on add new project,
Remove the main.c
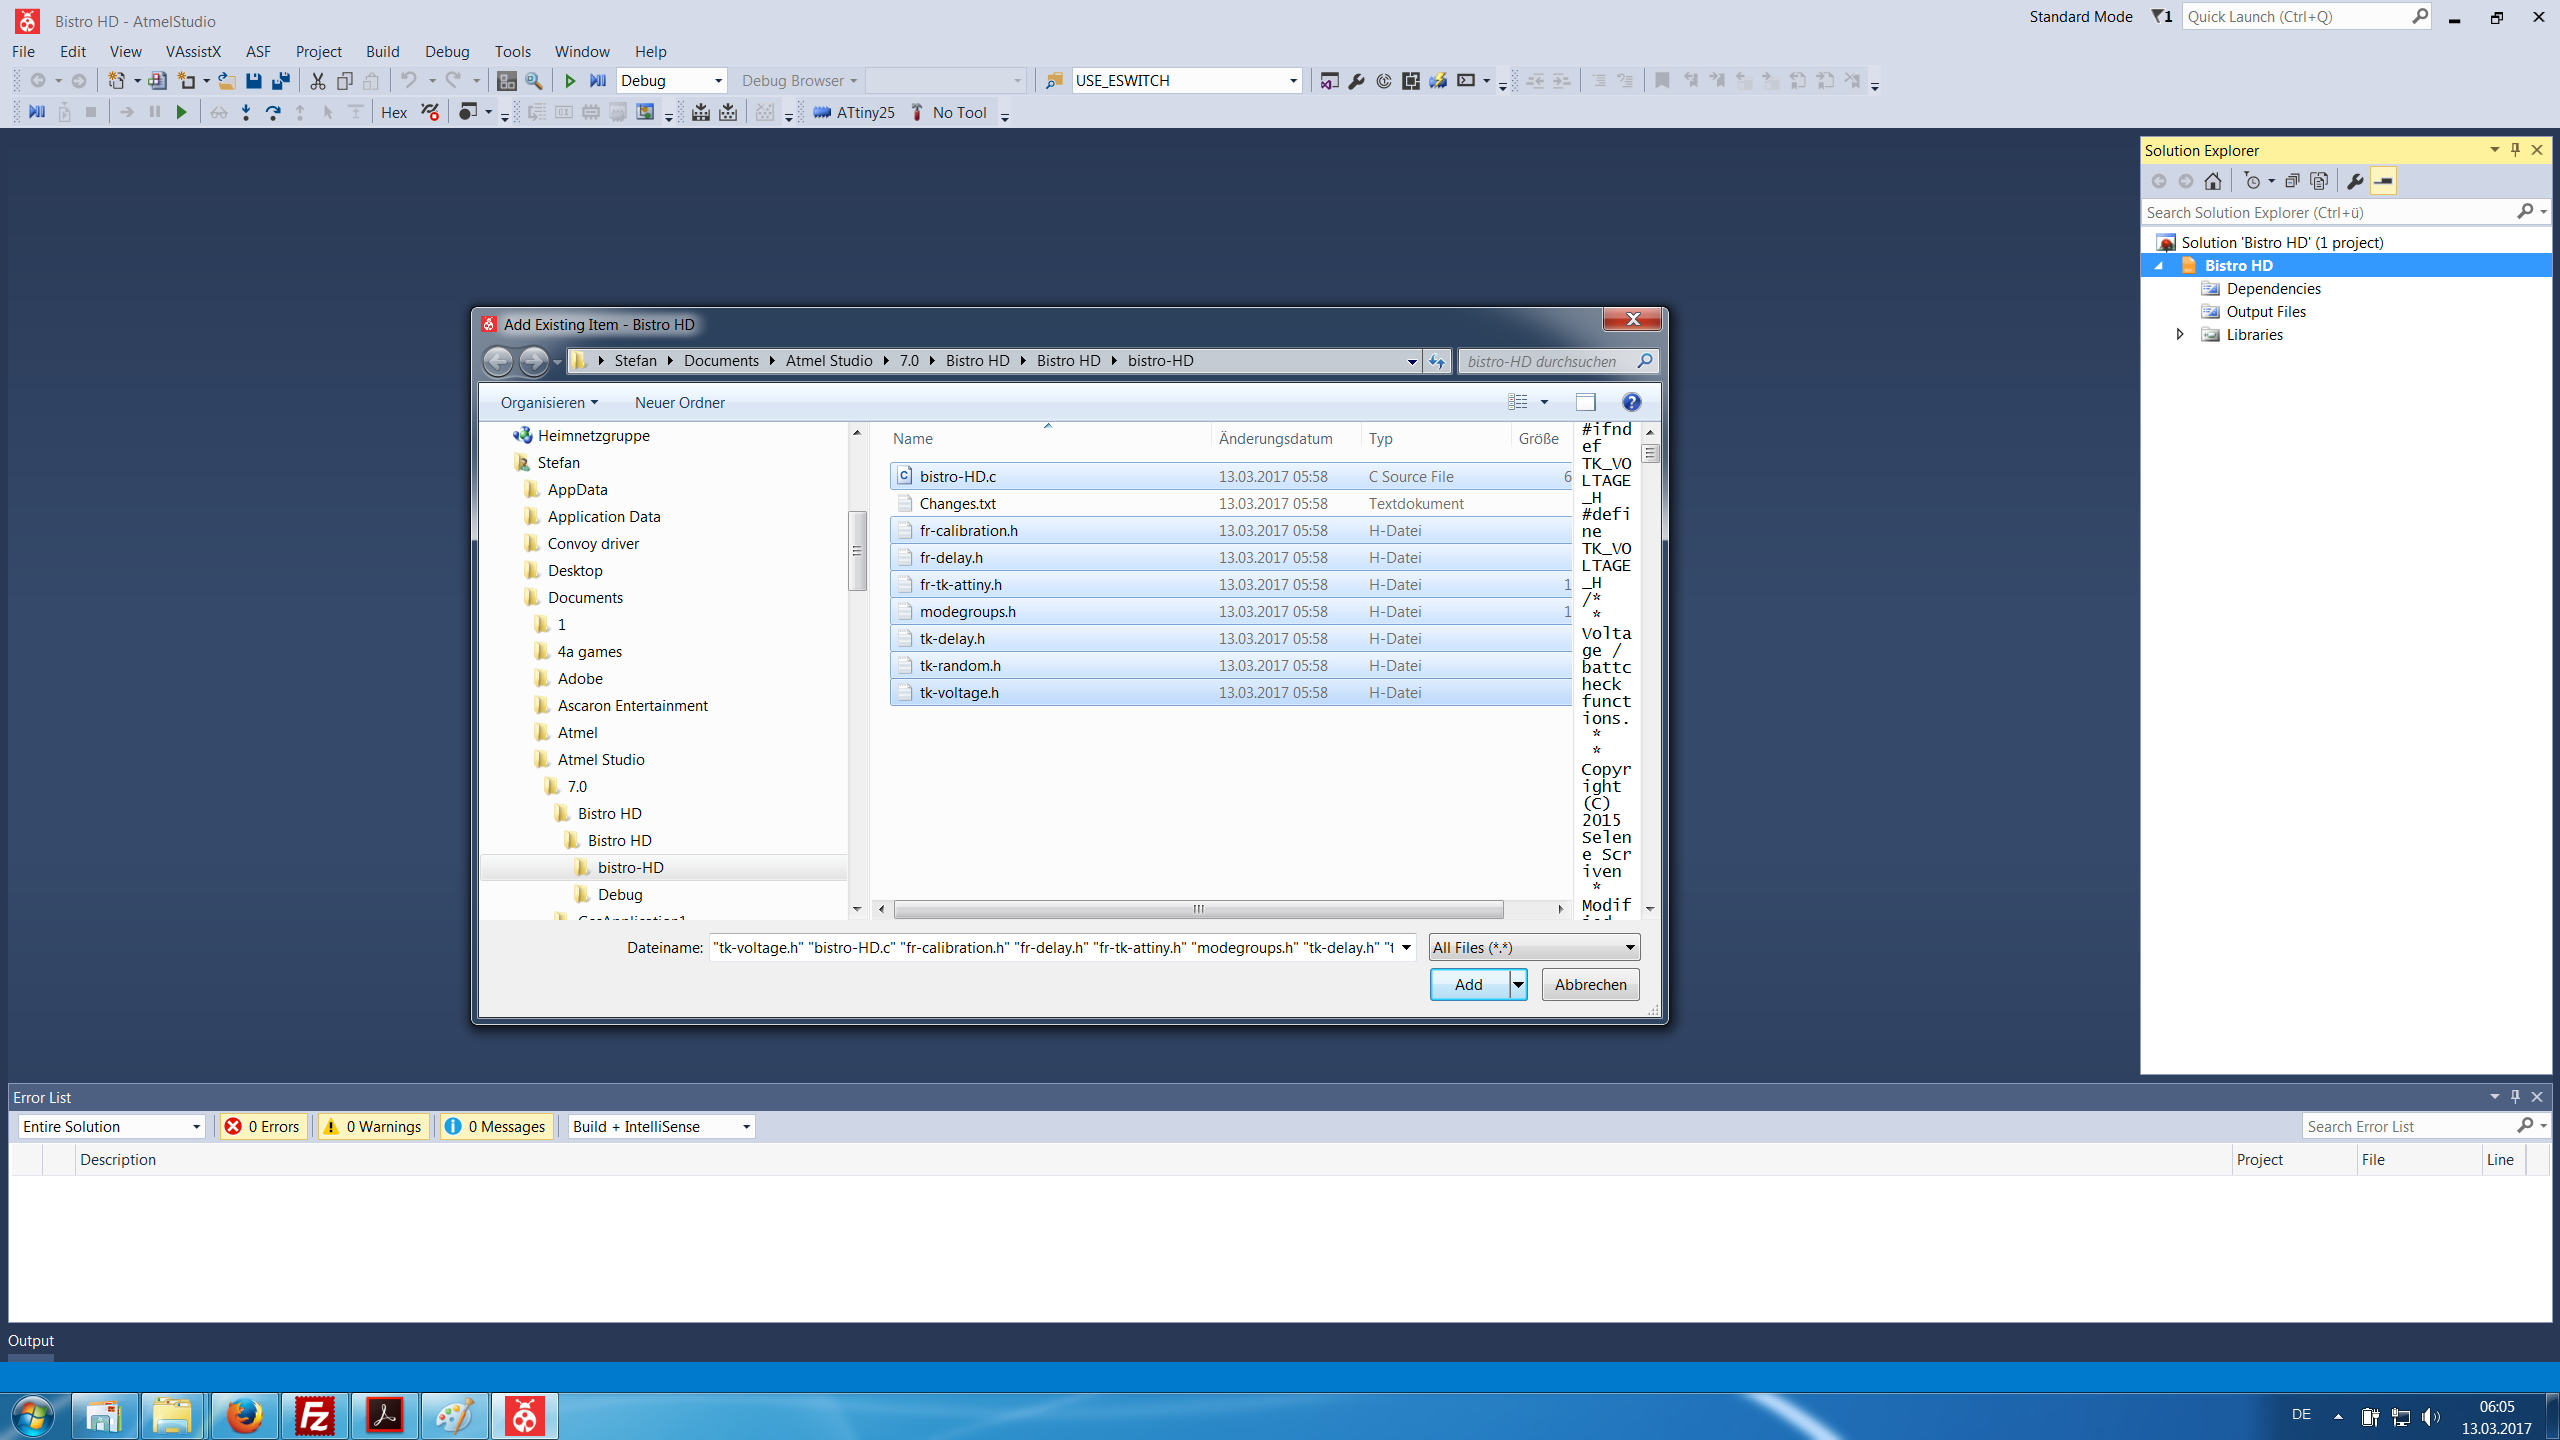
Add existing Item BistroHD.c and the other files
from there you can use the how to in the blf topic from comfychair
Comment out or disable just add // in front
Enable remove //
For different pwm channels you need to enable or disable the channels in top section of the file, read the comments on the code lines they tell you what to do
There is only one hex file!
The Amtel studio loads from all those config files what it needs and build a flash code in the hex file
If you got the hex file you need also use the right fuses to flash the driver, most will have add a .bat file to do so
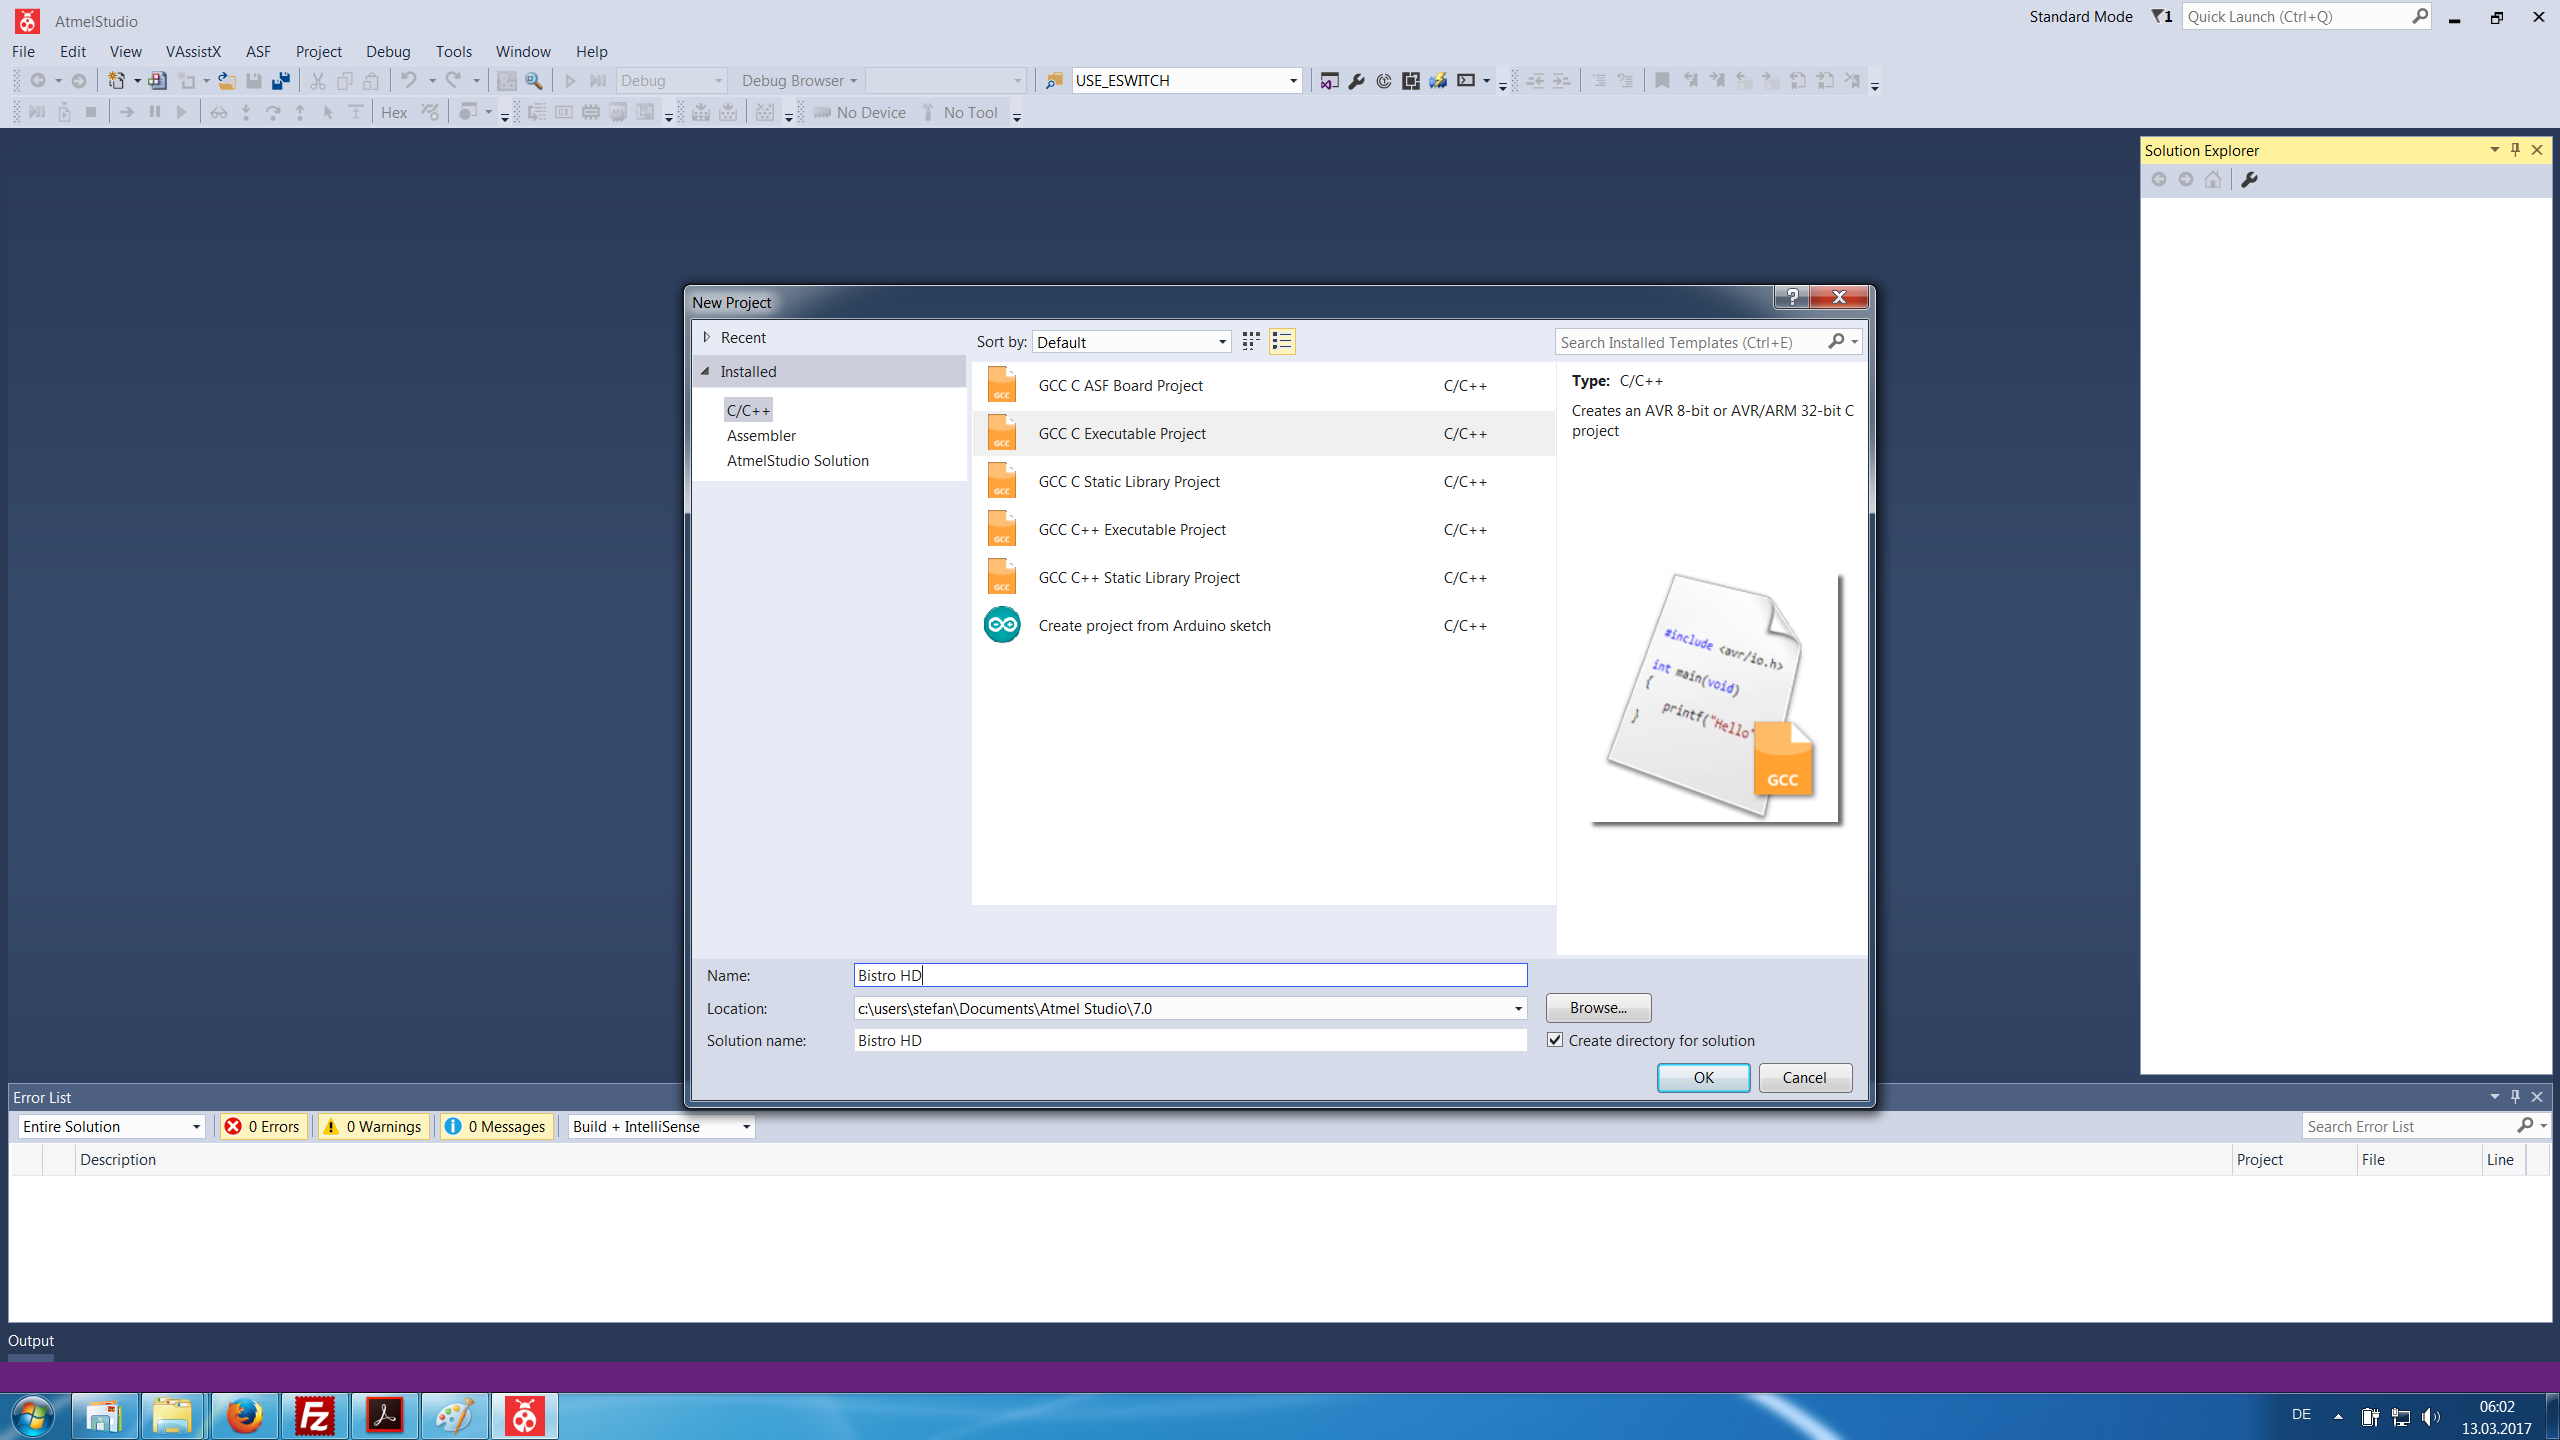
new project
select your Chip
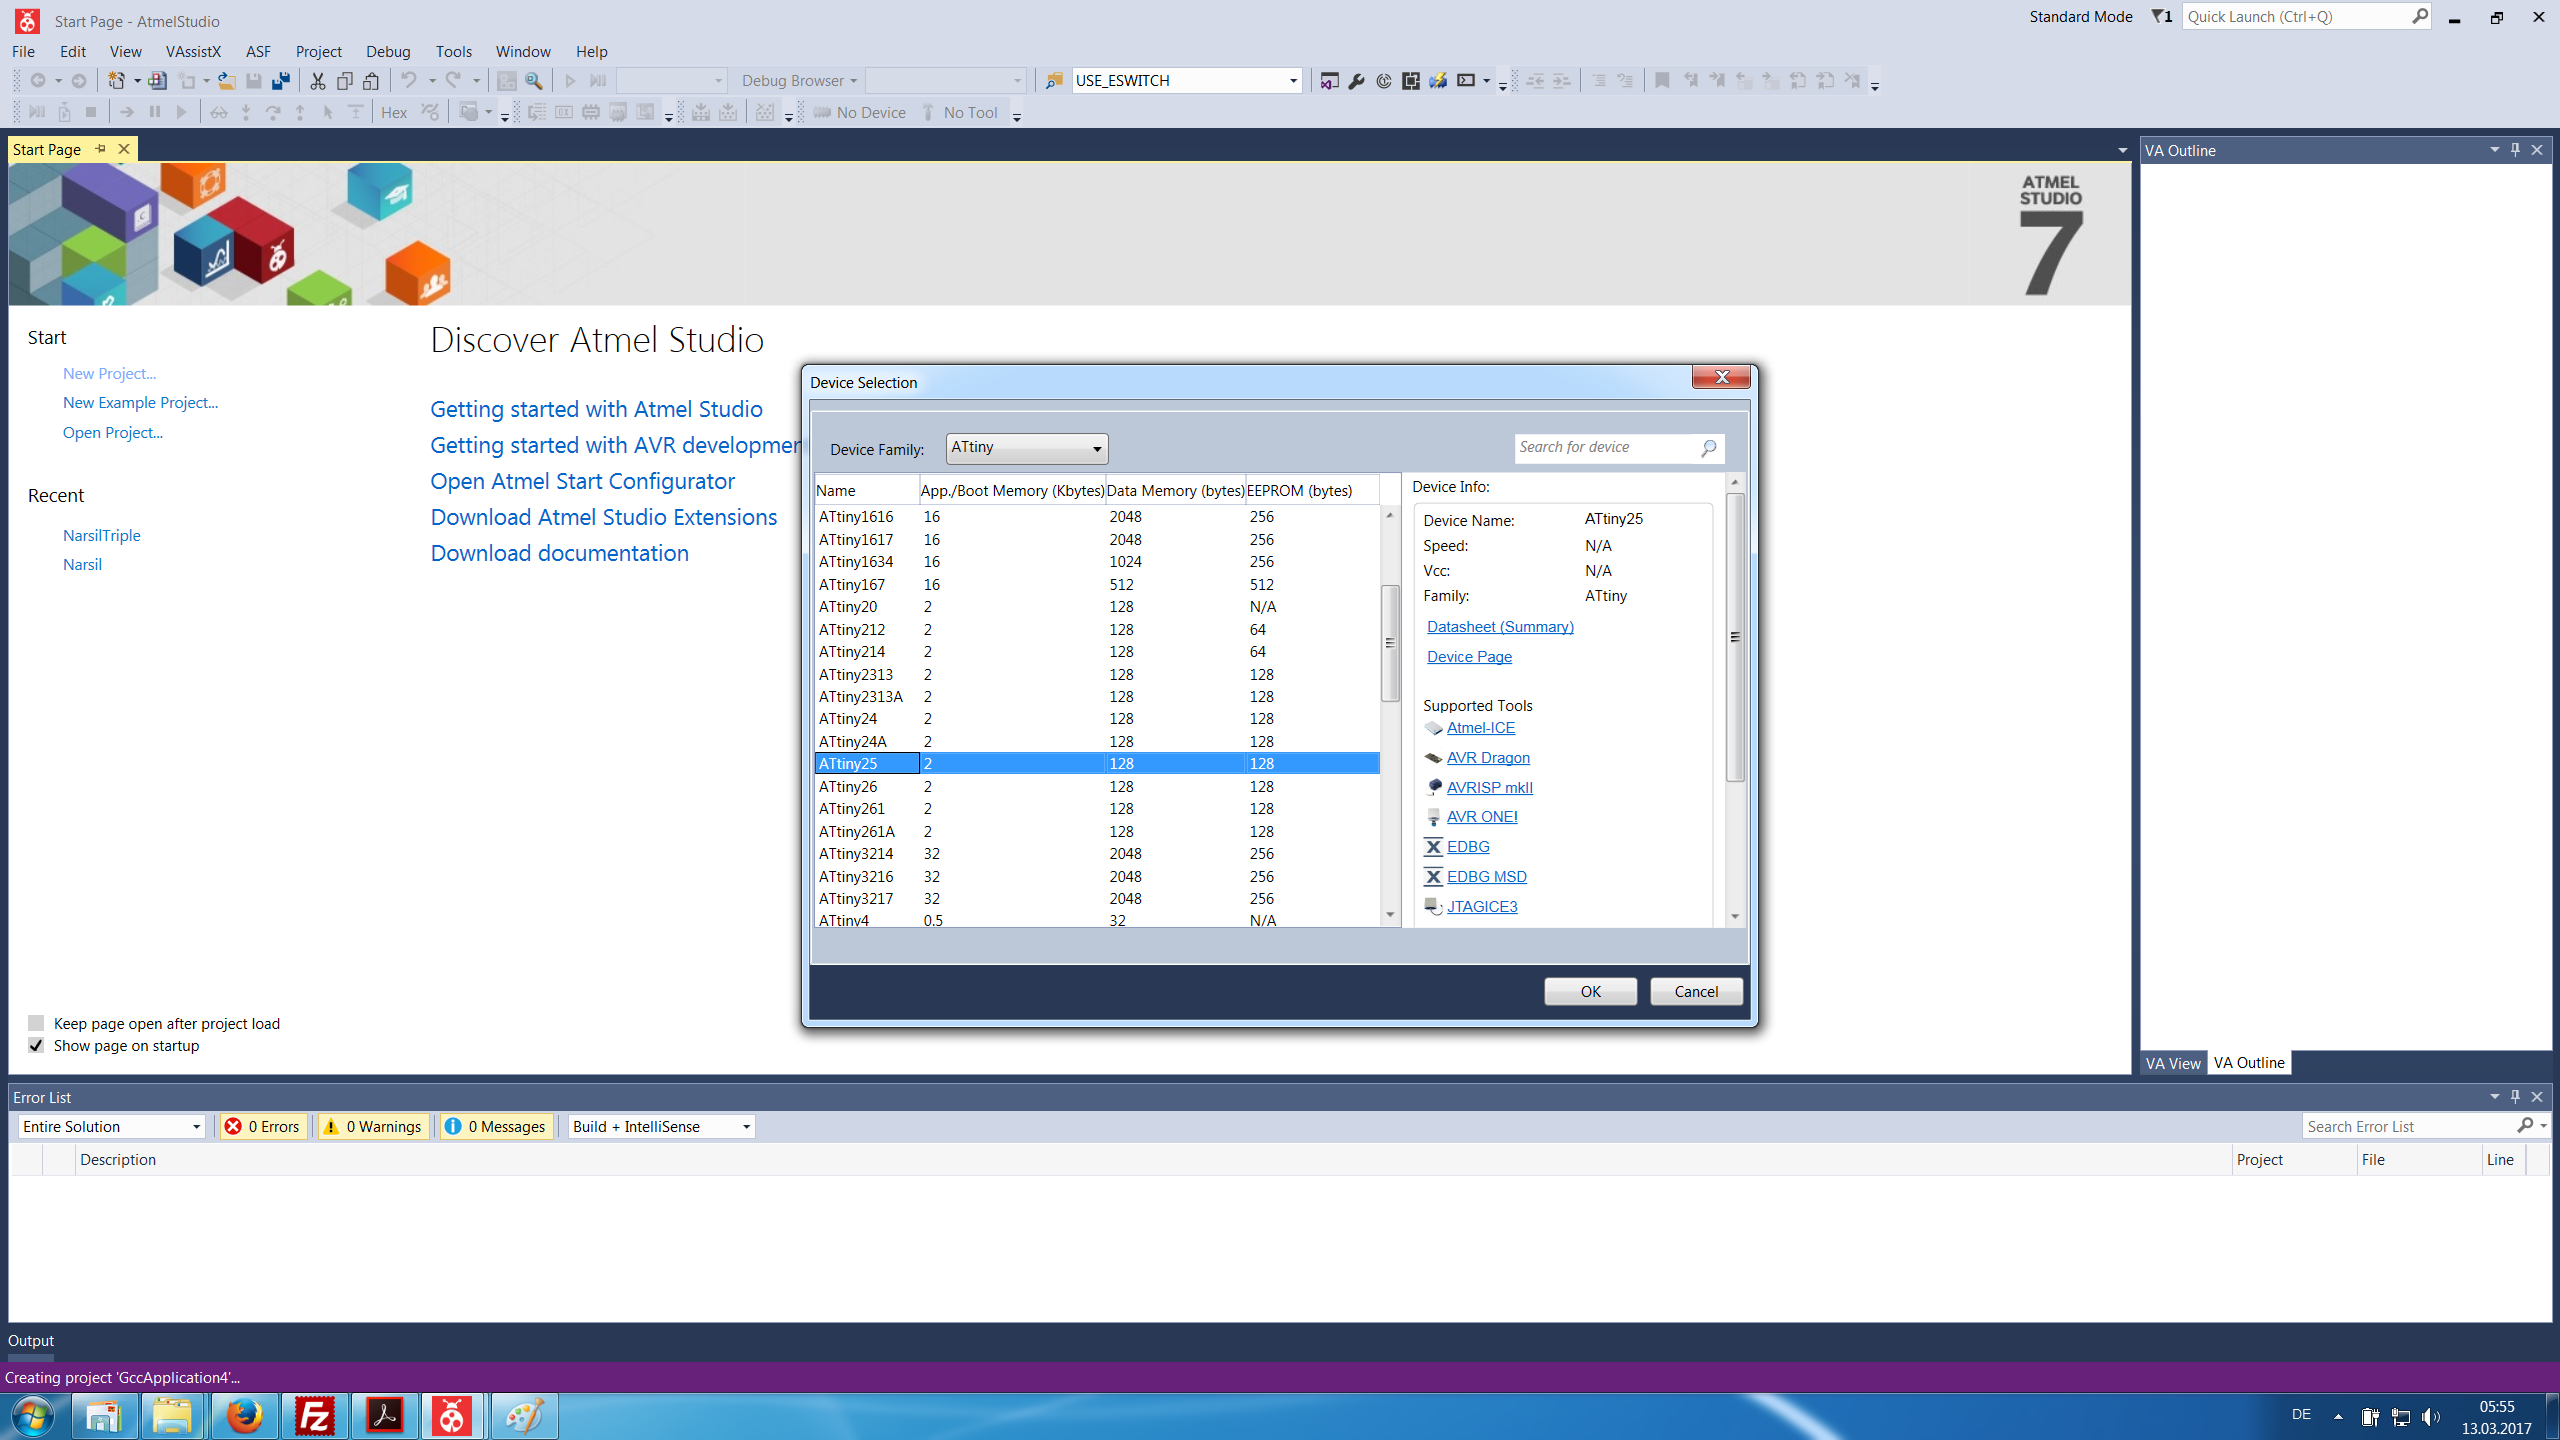
if you use a different than the 25 you need to change that in the BistroHD.c file as well
delete the main.c
getting the files loaded
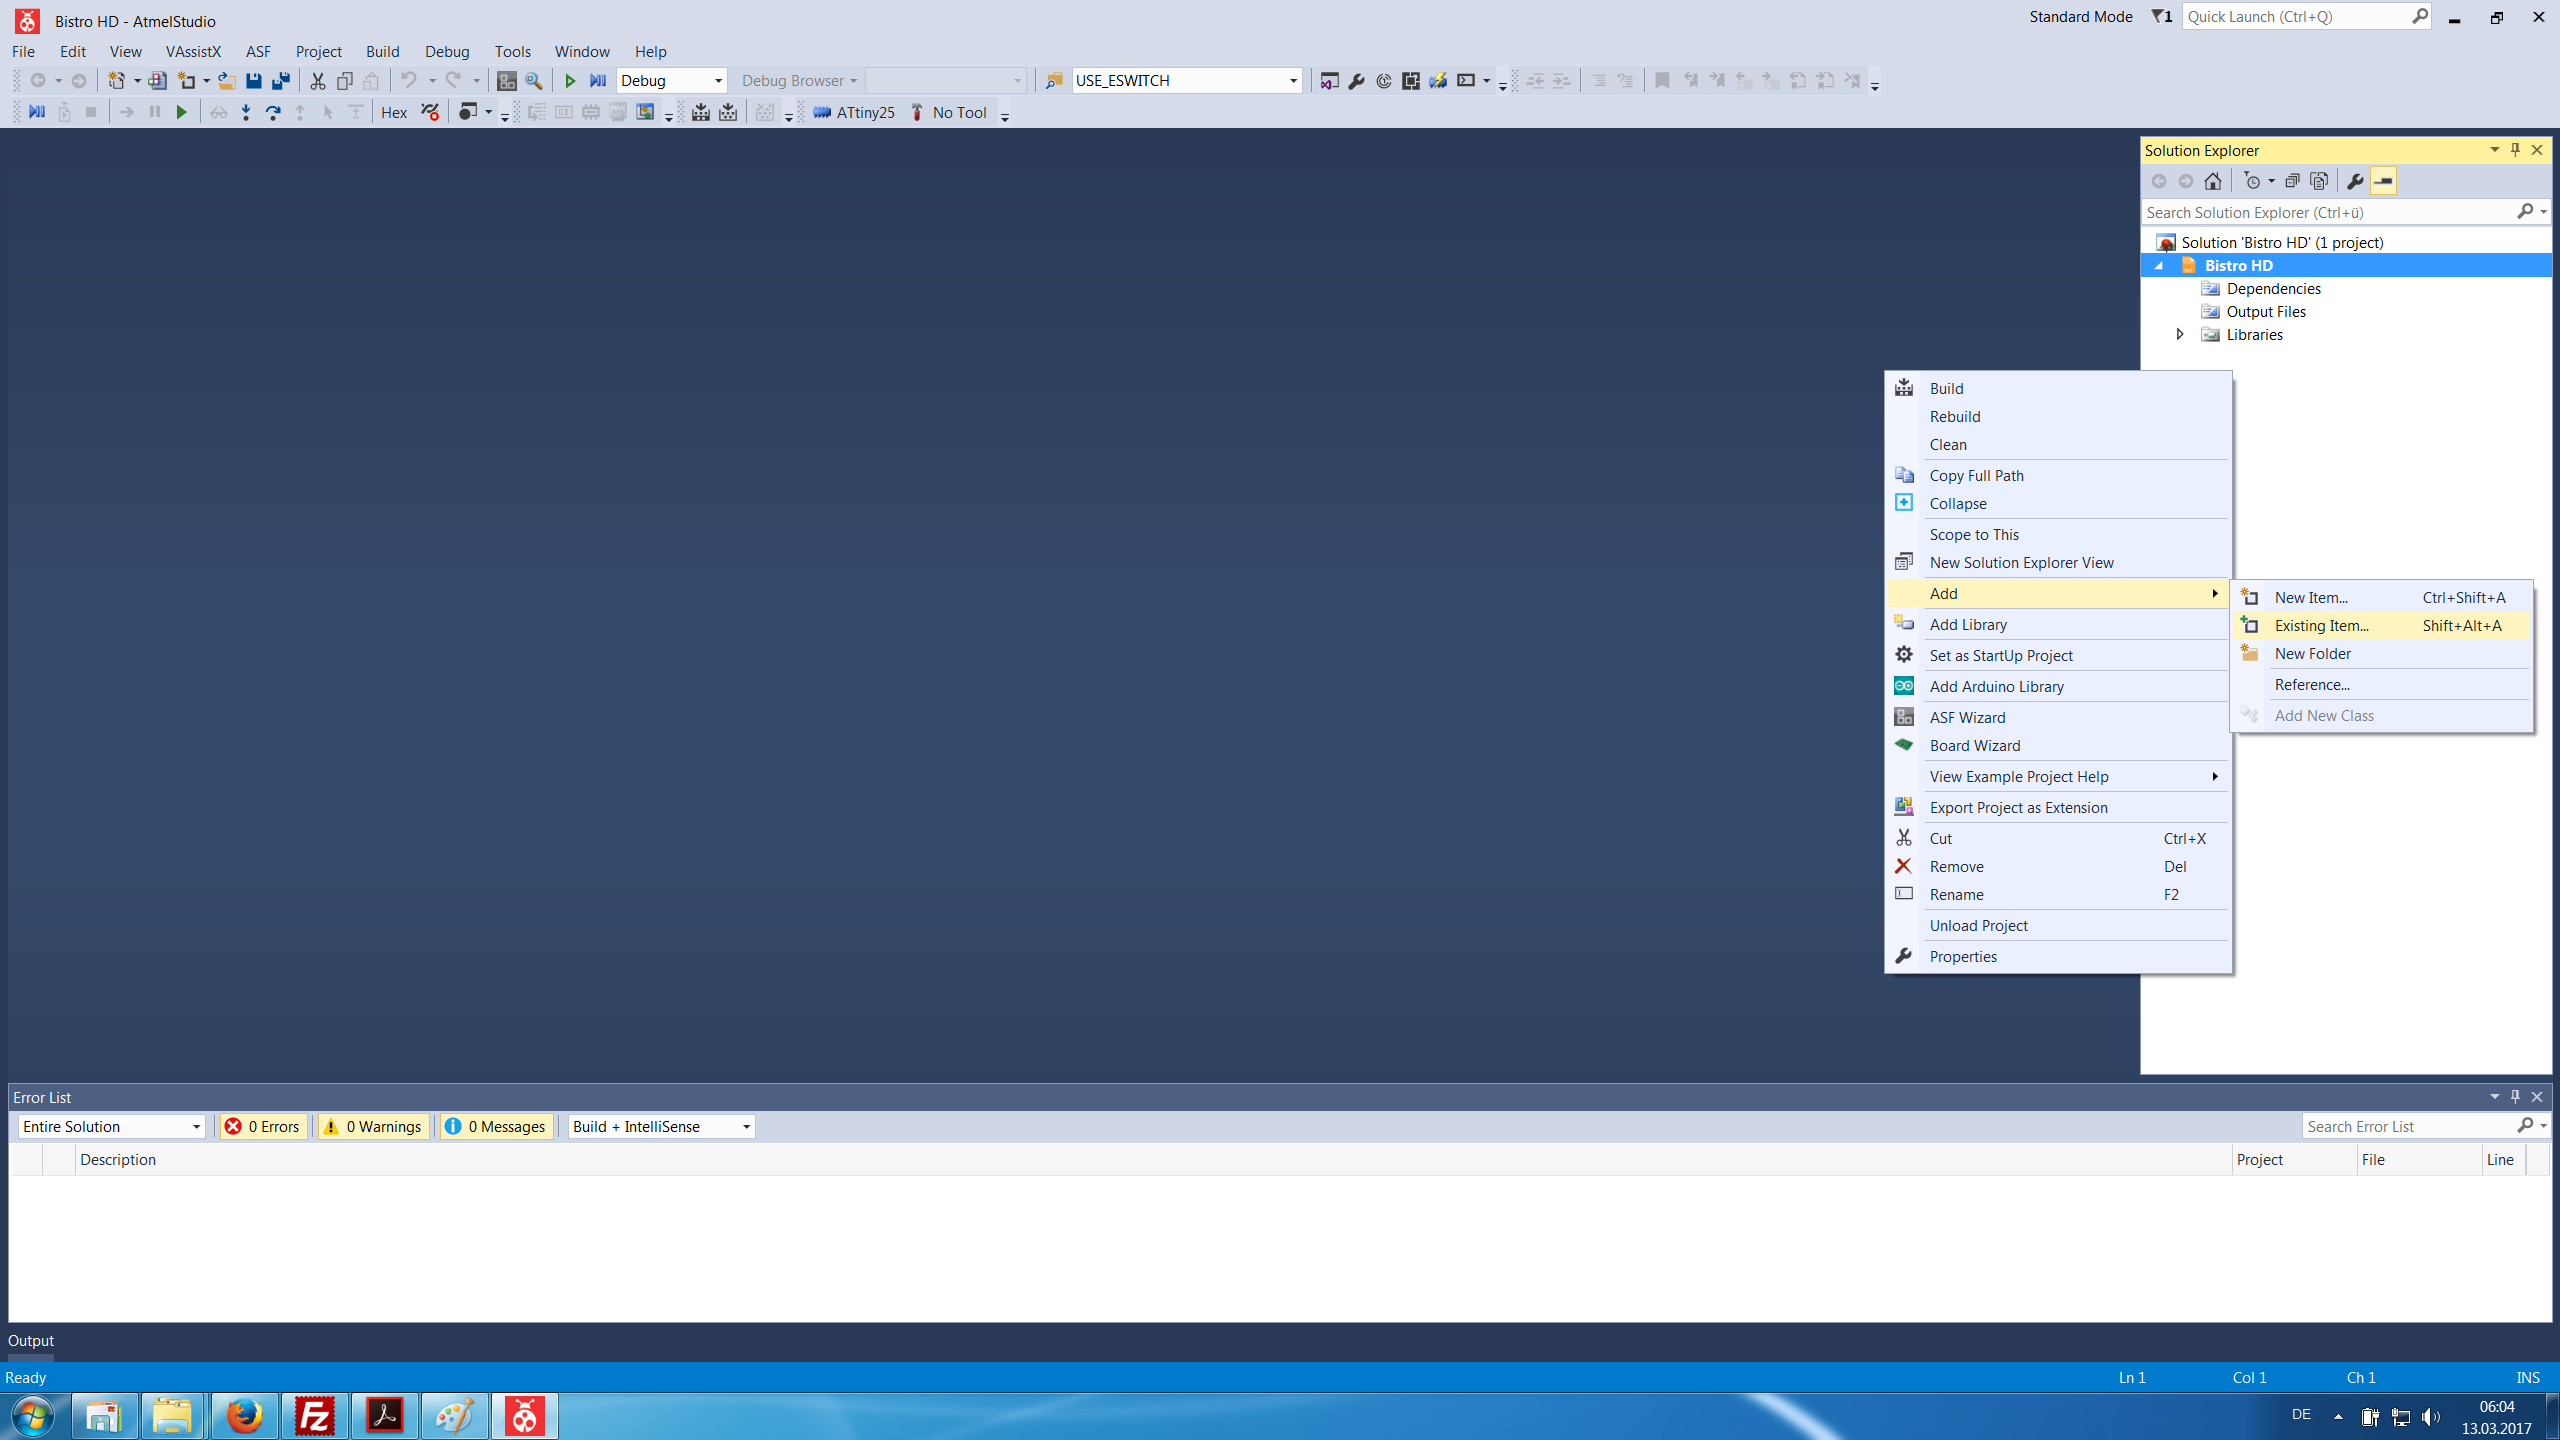
load all the files for the solution
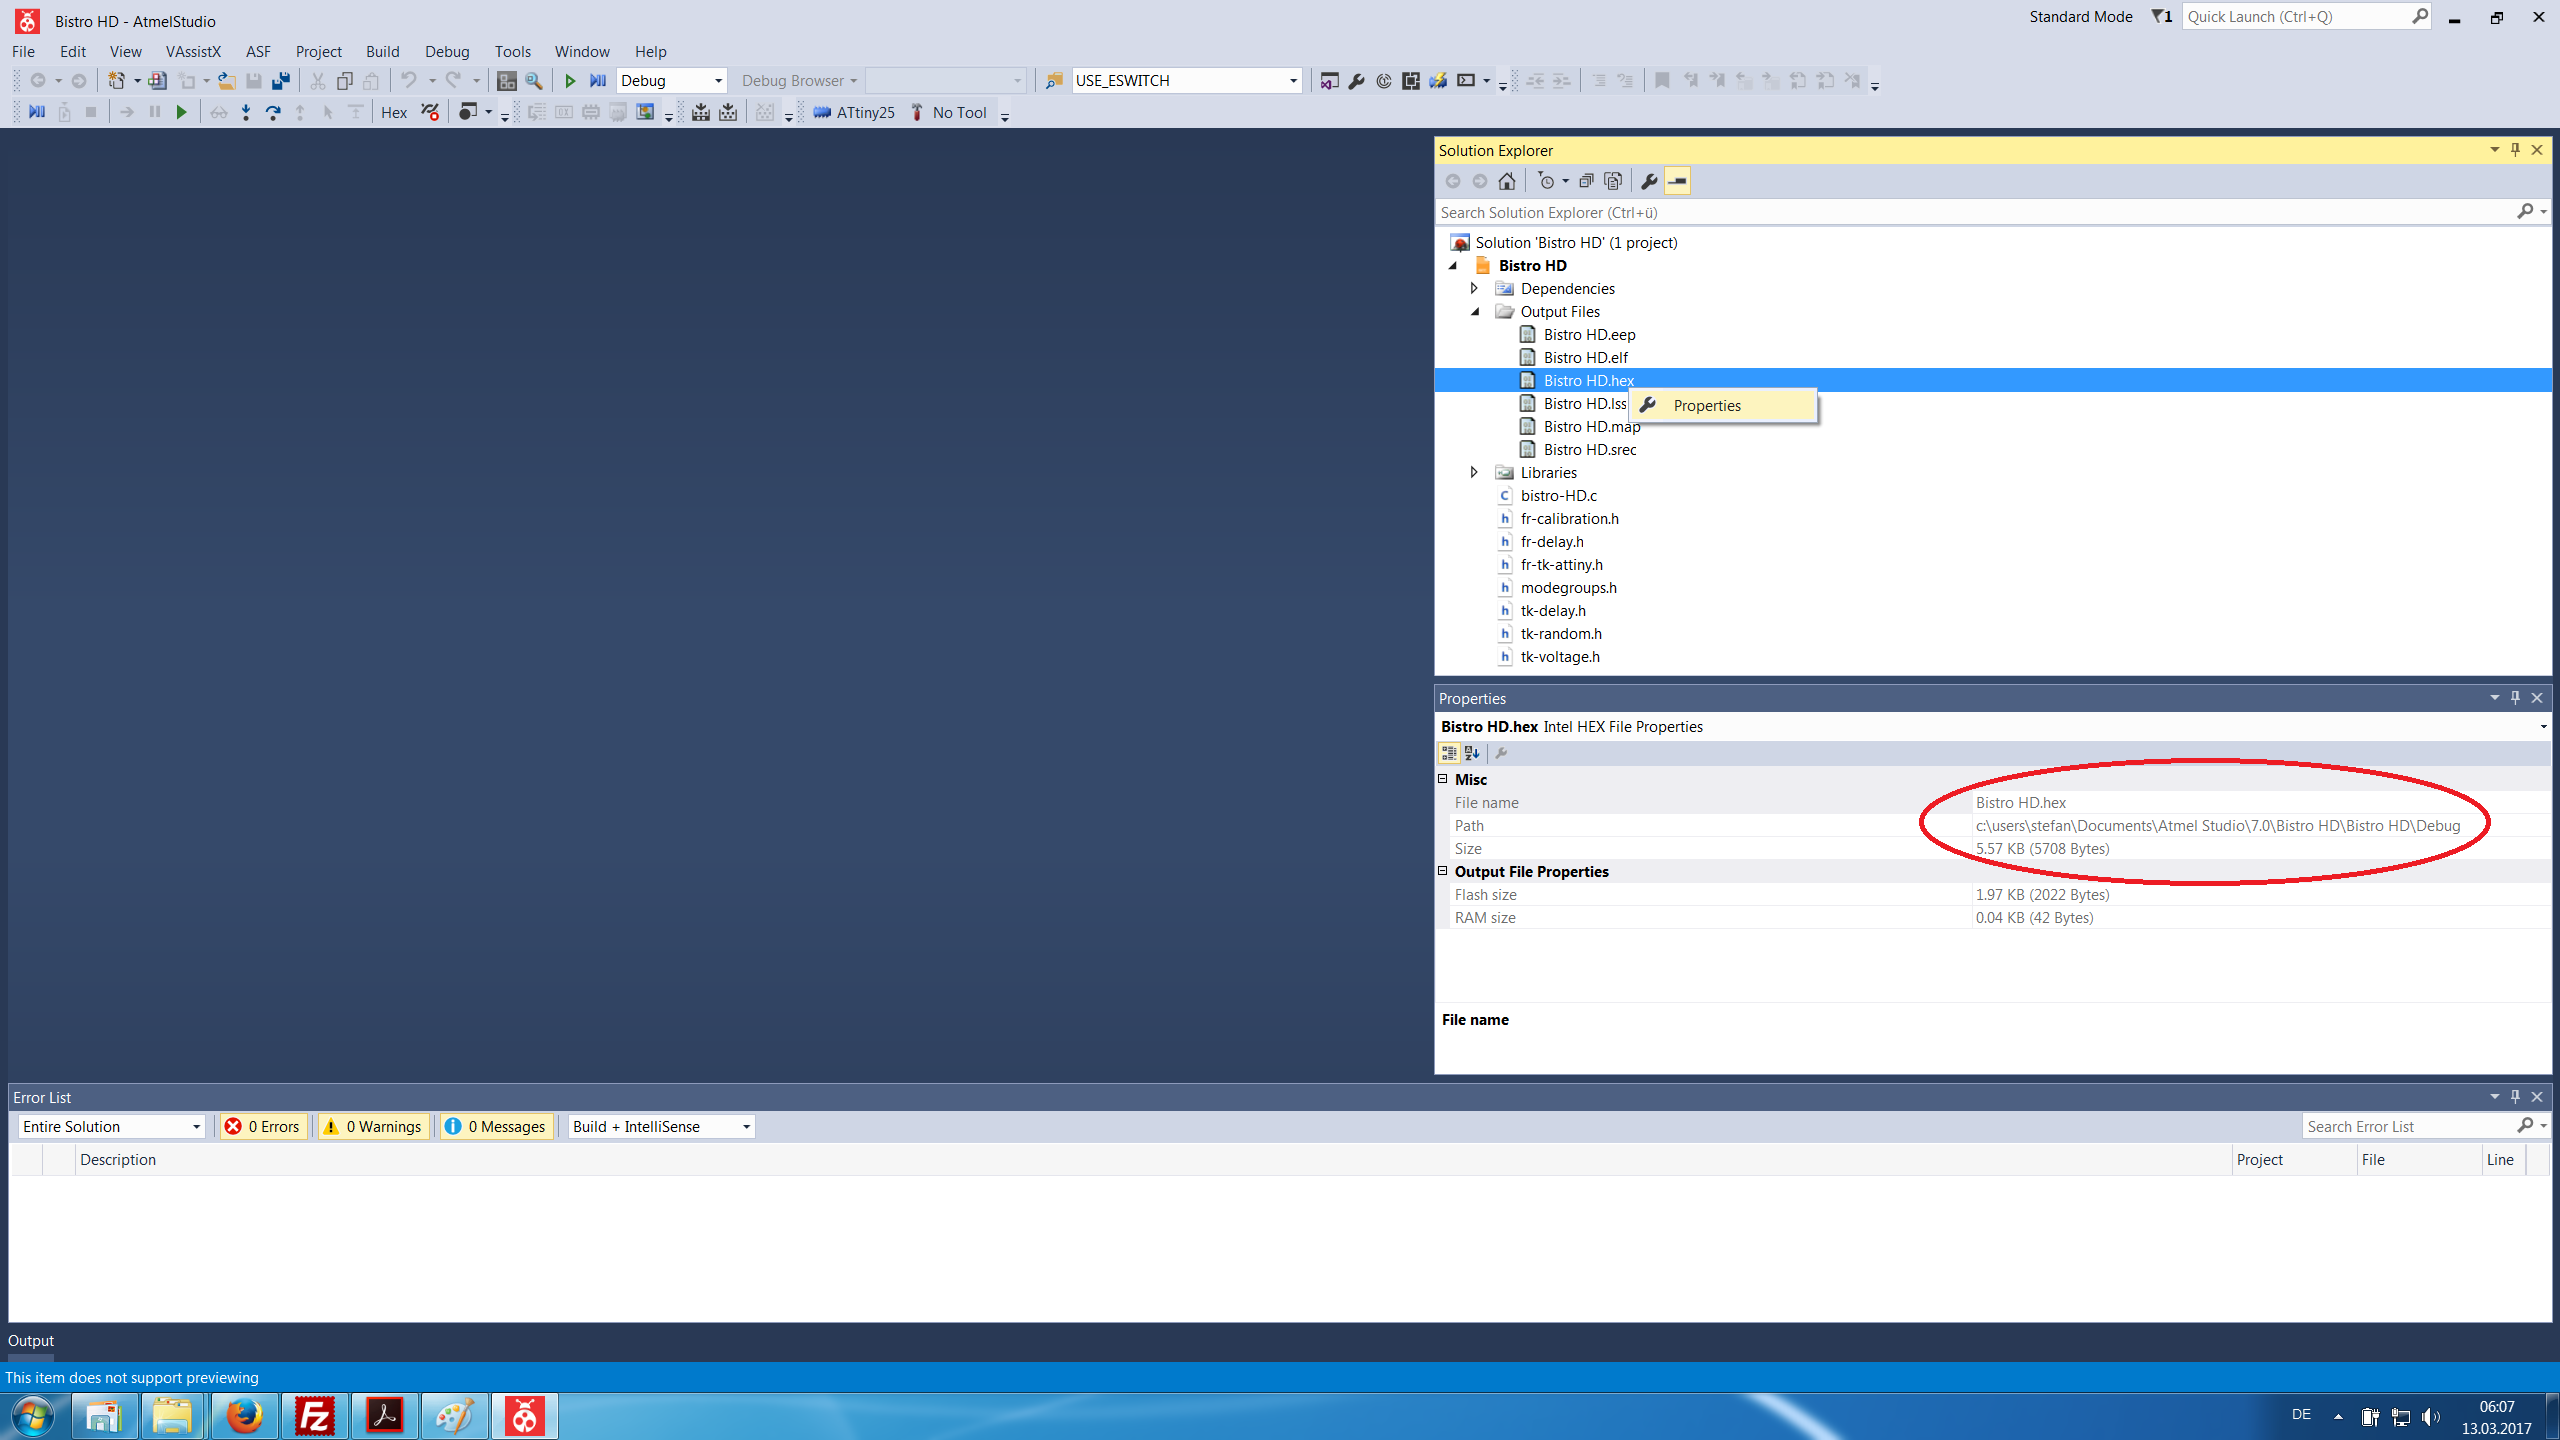
building the hex file
here you find the hex files
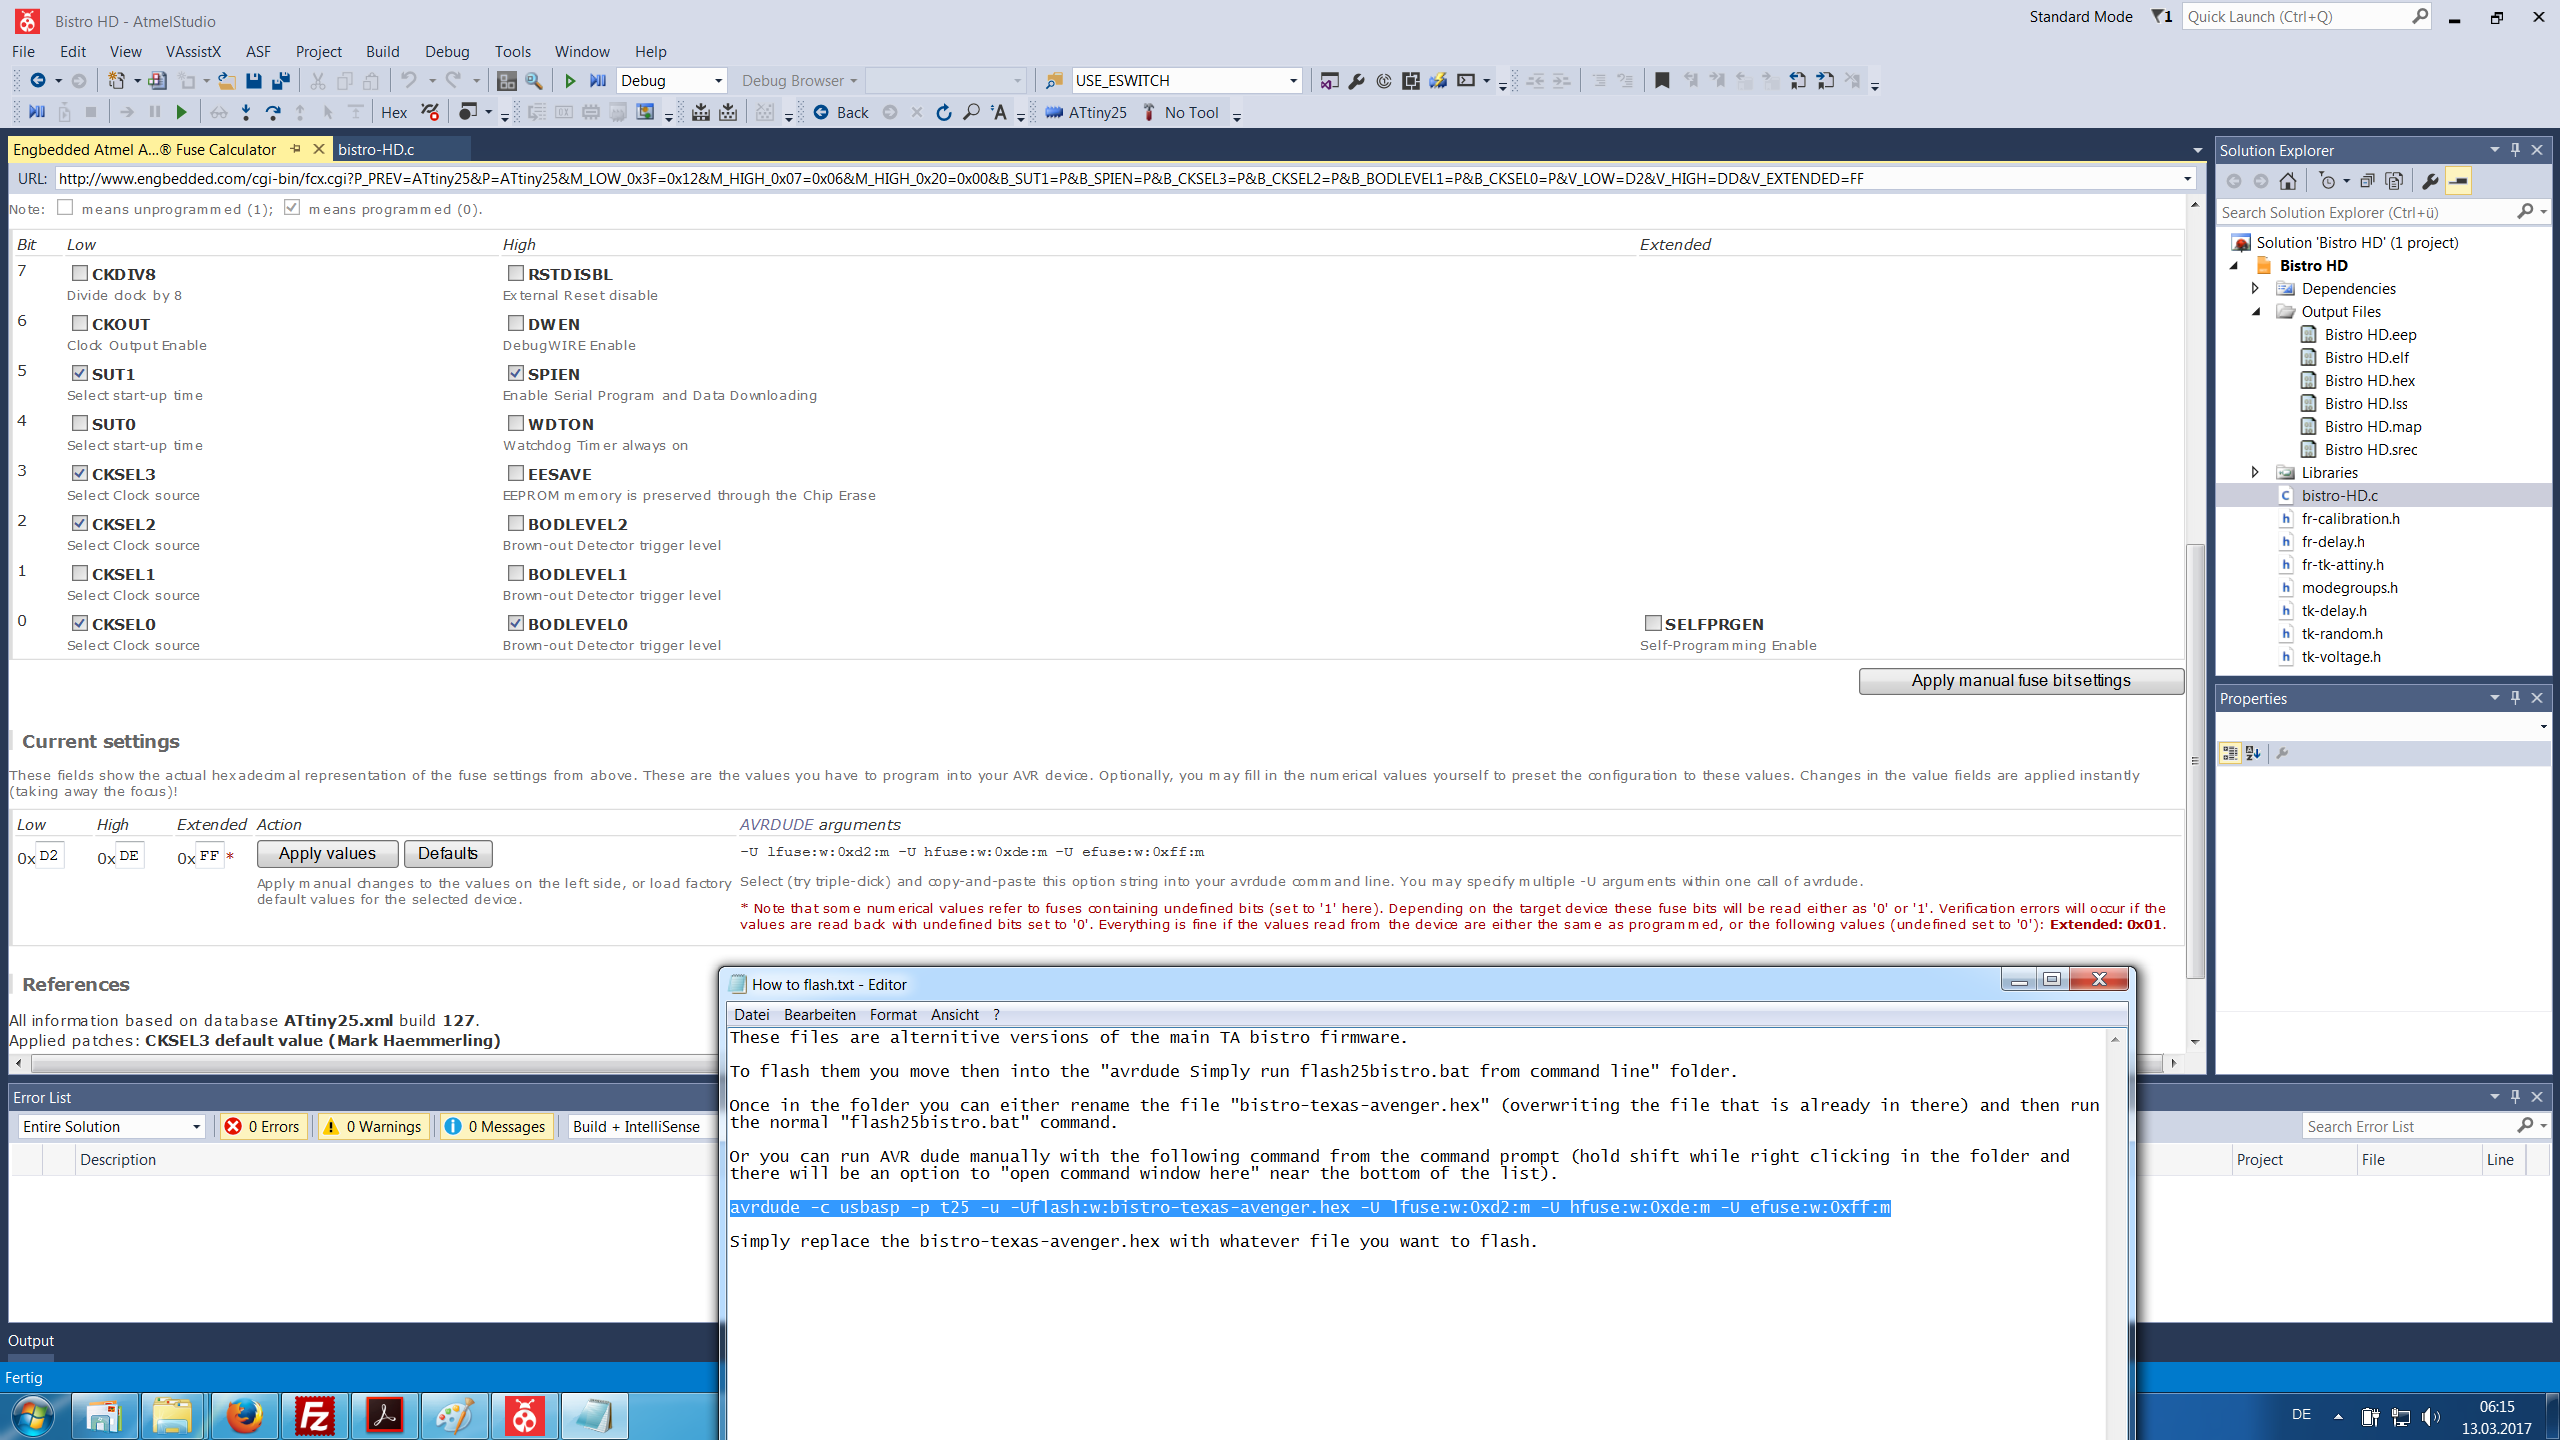
fuses
the text file is from texas Bistro including the whole command prompt to flash
here is the whole project for Amtel Studio 7
including the Attiny25 hex file
http://www.metronixlaser.de/bilder/flashlight/Bistro%20HD.zip
Now all is needed is the hardware kit made up to be sold!
Ordered 5 more Attiny 85 from German Ebay shop
The clip for chips 3$
http://www.ebay.de/itm/SOIC8-SOP8-Flash-Chip-IC-Test-Clips-Socket-Adpter-BIOS-24-25-93-Programmer-MF-/182230151497?hash=item2a6dc37149:g:~BIAAOSwnQhXojmf
Thank you Lexel! :+1: Ordered 2 of each!!
Anything else I might need? Besides Patience!
You mentioned bistro in this thread, didn't realize you were using HD, or maybe you're just showing how?
I'm sure bistro-HD can be flashed as Lexel shows, but without hardware support for OTSM included in the build, or some other specific feature you're trying to get out of it, there may not be much point. It might work well on the eswitch lights, but I haven't even actually tested that yet off a bench, or gotten any feedback. OTSM is the biggest reason to use it, but I don't think these builds are setup for it, which is kind of reasonable, because although I've tested that well, there's not really any early adopter feedback at the moment that I know of, other than my own (no problems here).
Also Lexel, your version and instructions are very outdated. Lot's of bug fixes and changes since those initial releases. If you've got a particular configuration running fine from that version, then no problem, but if people want to experiment they absolutely should use the latest one. The configs were re-organized a few versions back and are separated into different files, with only the attiny version and config file itself being selected at the top of the code. Anyway, the basic idea presented in your pics should get people going if they also read the included compiling instructions and generally just look around at where things are. Still to get the main benefit from HD you need the caps and resistors setup for OTSM.
The latest version of HD is here,:
Looks like you link to something based on 0.2. Presently latest is 1.3. I don't think OTSM even worked right in 0.2. Instructions for OTSM hardware requirements are included in the latest Manual.txt, copied in that post.
Today 200 AMC7135 arrived and from last drivers I had 2 boards over
so i could fit the rest of parts to them, 21mm fully reflow soldered, 17mm resistors and Attiny25 hand soldered
while reflow one 7135 (left side of 21mm) on the back shift position, got that fixed, even if it was electrically OK
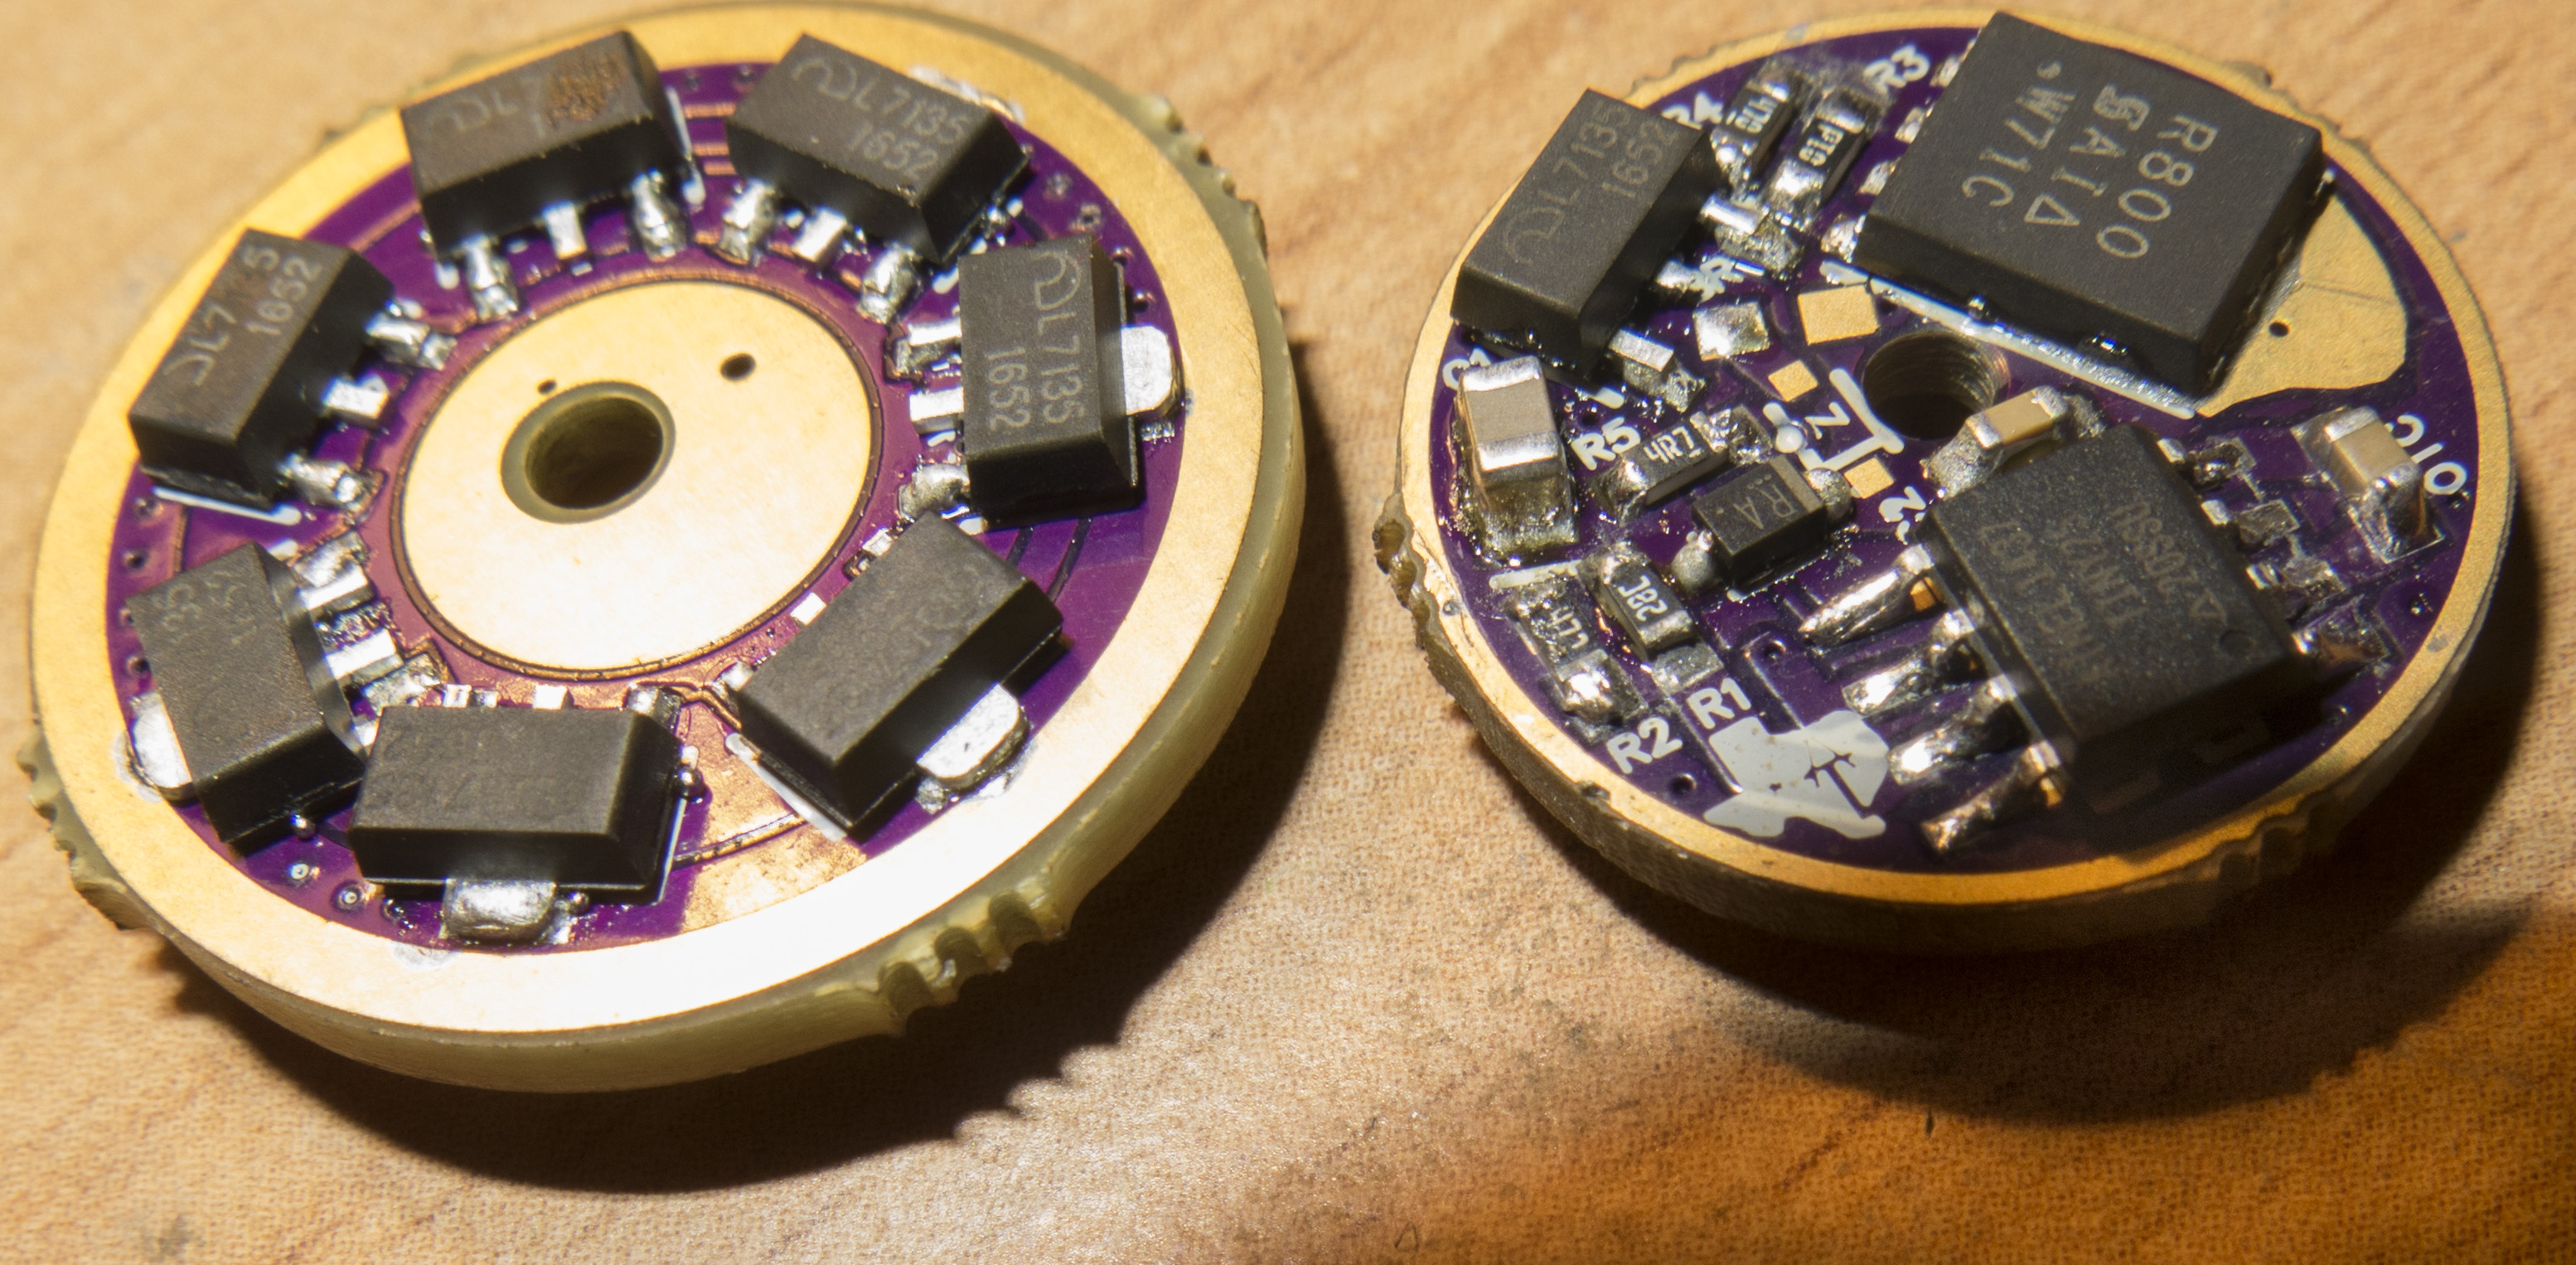
need to use less paste especially on the FET, like i did on the 2. 17mm driver I did
and add solder with iron to fets pad, as its not easy to push it down and hold still till the solder gets solid with more than one driver under the heat gun later
it is no clean flux but it looks ugly if there is too much of it squeezed out under the FET
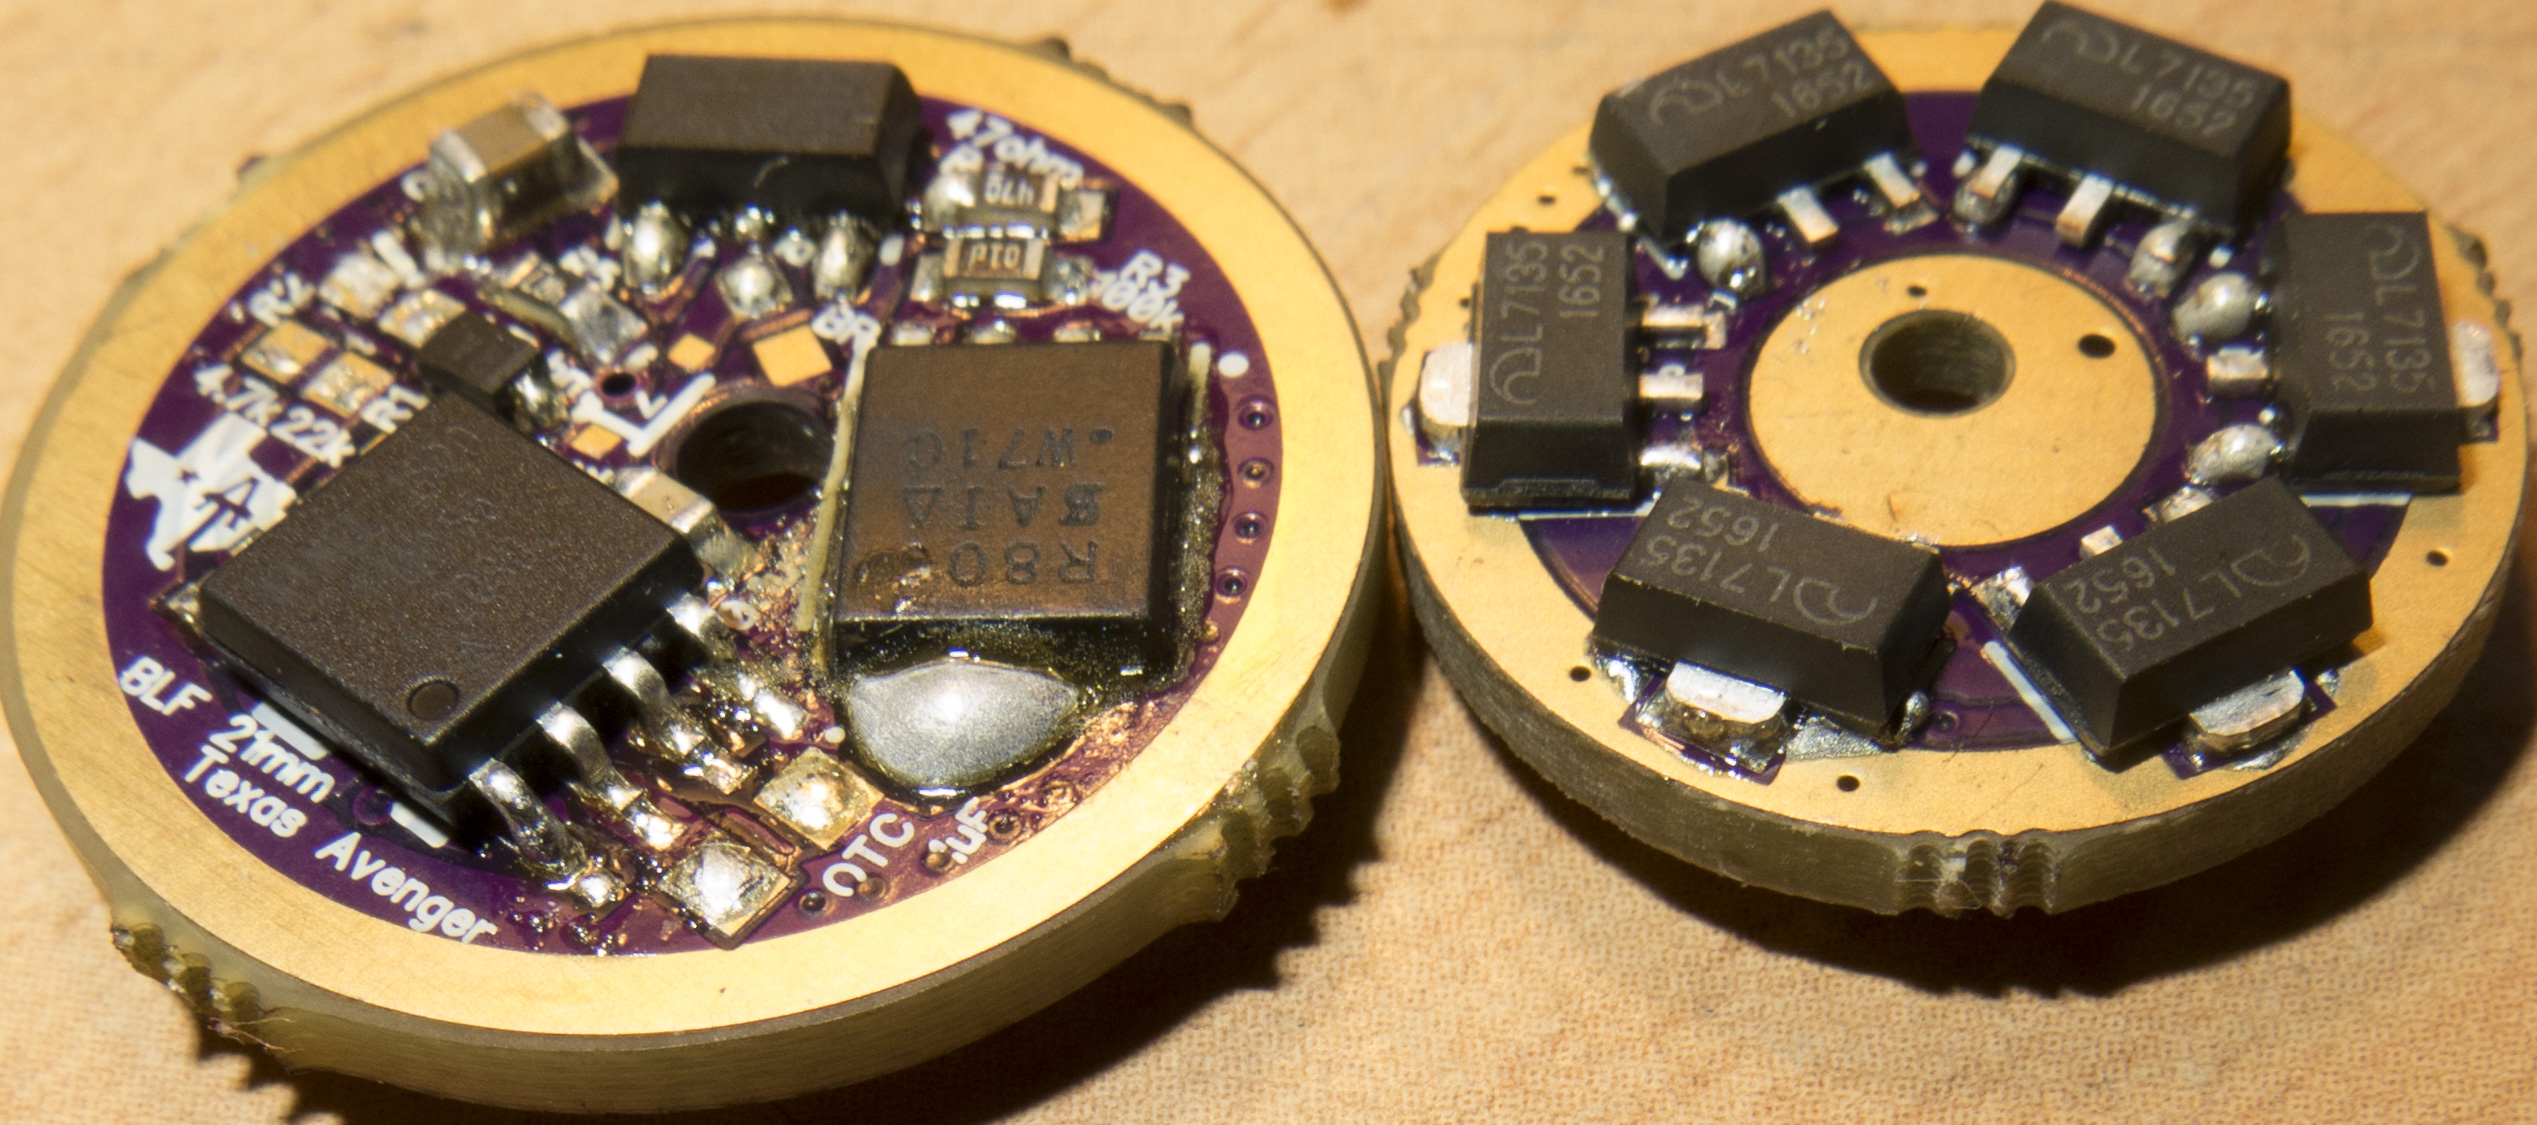
final reflow wil be cleaner as I make progress with it
I am using TA v1.3 Triple Bistro
http://pballandmore.com/Download/2016/Bistro-Texas-Avenger-V1.zip
based on Toykeepers tripledown
http://bazaar.launchpad.net/~toykeeper/flashlight-firmware/tiny25/files/head%3A/ToyKeeper/bistro/tripledown/
Ok, your posted instructions and the link you provided a few posts up though are for Bistro-HD not TA 1.3, but a very old version of bistro HD. So I think you were just showing that in response to questions about getting recent stuff.
FWIW I just updated HD with a one click build script so that importing into Atmel Studio is no longer needed. You need Atmel Studio installed (or WinAVR), just to have the compiler tools available, but compiling just requires double-clicking the included buildal-AS.bat file. You can edit configuration files in any editor you like, including Atmel Studio (or even Notepad or maybe Notepad++ which seems very recommended), but again, without the need to import the project or configure options in AS. This has the added benefit that you are guaranteed to get the same compiler options I used.
Also FWIW, the OTSM build in HD use the TA 1.3 modegroups. The only noticable differences for the basic OTSM build is just that click timing is far more stable (but only with OTSM components). The thermal control is also changed a bit in the latest version, and there are three extra modes included. Otherwise it works like trippledown with TA modes.
Yeah Bistro with OTSM is no option as it requires a quite expensive capacitor and this batch progress is too far advanced to change to OTSM
you can choose soldering paste
lead free 96.5 % tin, 3% silver, and 0.5% copper
or
with lead 62% tin, 36% lead, and 2% silver
Oshpark has all boards from first order shipped, so it wont be long till first drivers go into production
Check the Excel screenshot if the information to your order is right, I keep it up to date dayly
Yeah, it's a little expensive, maybe adds about $1.70 to compared to OTC build if you're buying small batches.
I'm actually thinking folks may try it with cheaper hardware and see how it goes. I bought that cap to make sure it would work well, but with like 3 or 4 seconds of sleep time even at low voltage, it works more than well enough. I like this cap: CL21A476MQMNRNG Actually my original ceramic build wasn't too terrible, but that was 3 by 16V 10uF caps stacked, not one 6.3V 47uF cap. Still even a good ceramic cap of that size is somewhere around $0.60 to $1.00 so maybe $1 saved.
I am though thinking of increasing the timing resolution. Unless I do it pretty cleverly that will eat some capacitor time. Using a 500 ohm bleeder can get a little energy back too as possibly. I have wondered if just using a Ta cap for OTC would stabilize things quite a bit. It's still just annoying form a modding and design perspective, because you have to get the calibration right on every new build, but it may actually work fairly well.
Just fyi... Hoping to get to updating NarsilTriple this week to support the new UI configuration I have in Narsil 2-channel, where the thermal regulation trigger point can be configured.
Not sure yet in the "how to", but would like to combine both Narsil versions into one code base - will be easier maintaining going forward.
If I can get this working, this would also bring 2S battery support into Narsil 3-channel support.
Tom, that’s a great announcement! Thanks for all the coding work you do for us here at BLF! Narsil is amazing!
Thanks! As many as you know, Narsil is built on top of, and using tools by other major contributors.
Roughly, and probably leaving a lot out - Dr Jones, JohnnyC, ToyKeeper, Werner
Also a hugh contribution from BLFers for input on adding features, and others involved in testing and providing feedback.
I should have kept better track of it all... 