Yes! Only design spec changes we asked for from round #2 was width and diameter:
- Old width was 1.2 mm, new is 2.07 mm (yes was a typo - "King Typo" stuff
 )
) - old diameter was 36 mm, new diameter is 38 mm
Yes! Only design spec changes we asked for from round #2 was width and diameter:
)OOPS indeed 2.07mm
More info on stock Q8
ledboard
2.07mm thick
38.05mm OD
right amount of thermal paste, evenly, not too little and not too much
integrated shelf stripped of ano where the ledboard sits, nice
Thickness integrated shelf 5.85mm
Thanks! The end is looking closer with every passing day.
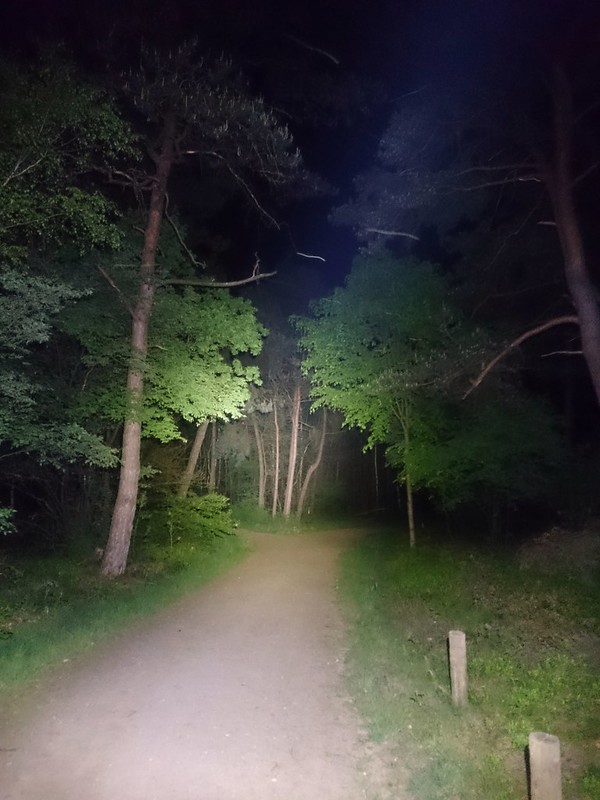
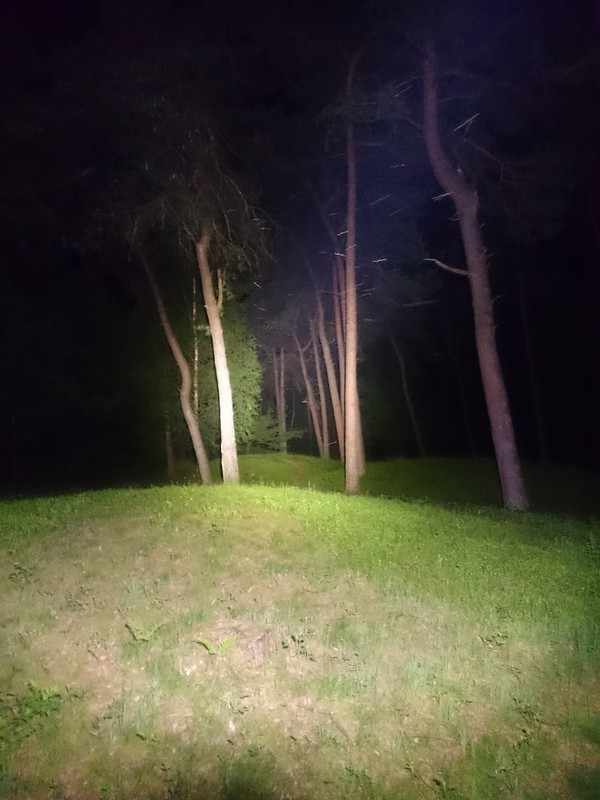
Some Q8 proto3 experiences:
I had proto3 with me on a school trip to Amerongen and took it on a night walk to some prehistorical grave hills. An I must say that apart from it being quite a chunk of a light, it is an enormous pleasure to use: tons of light with quite some throw, despite the 5000+ lumen it does not get hot anytime fast, in the open air (21 degC, it was a warm night) after 5 minutes it still is not too hot to hold, the operation is logical and smooth. Here's two beam shots in the woods (one of these i already posted abovem thanks to khas):
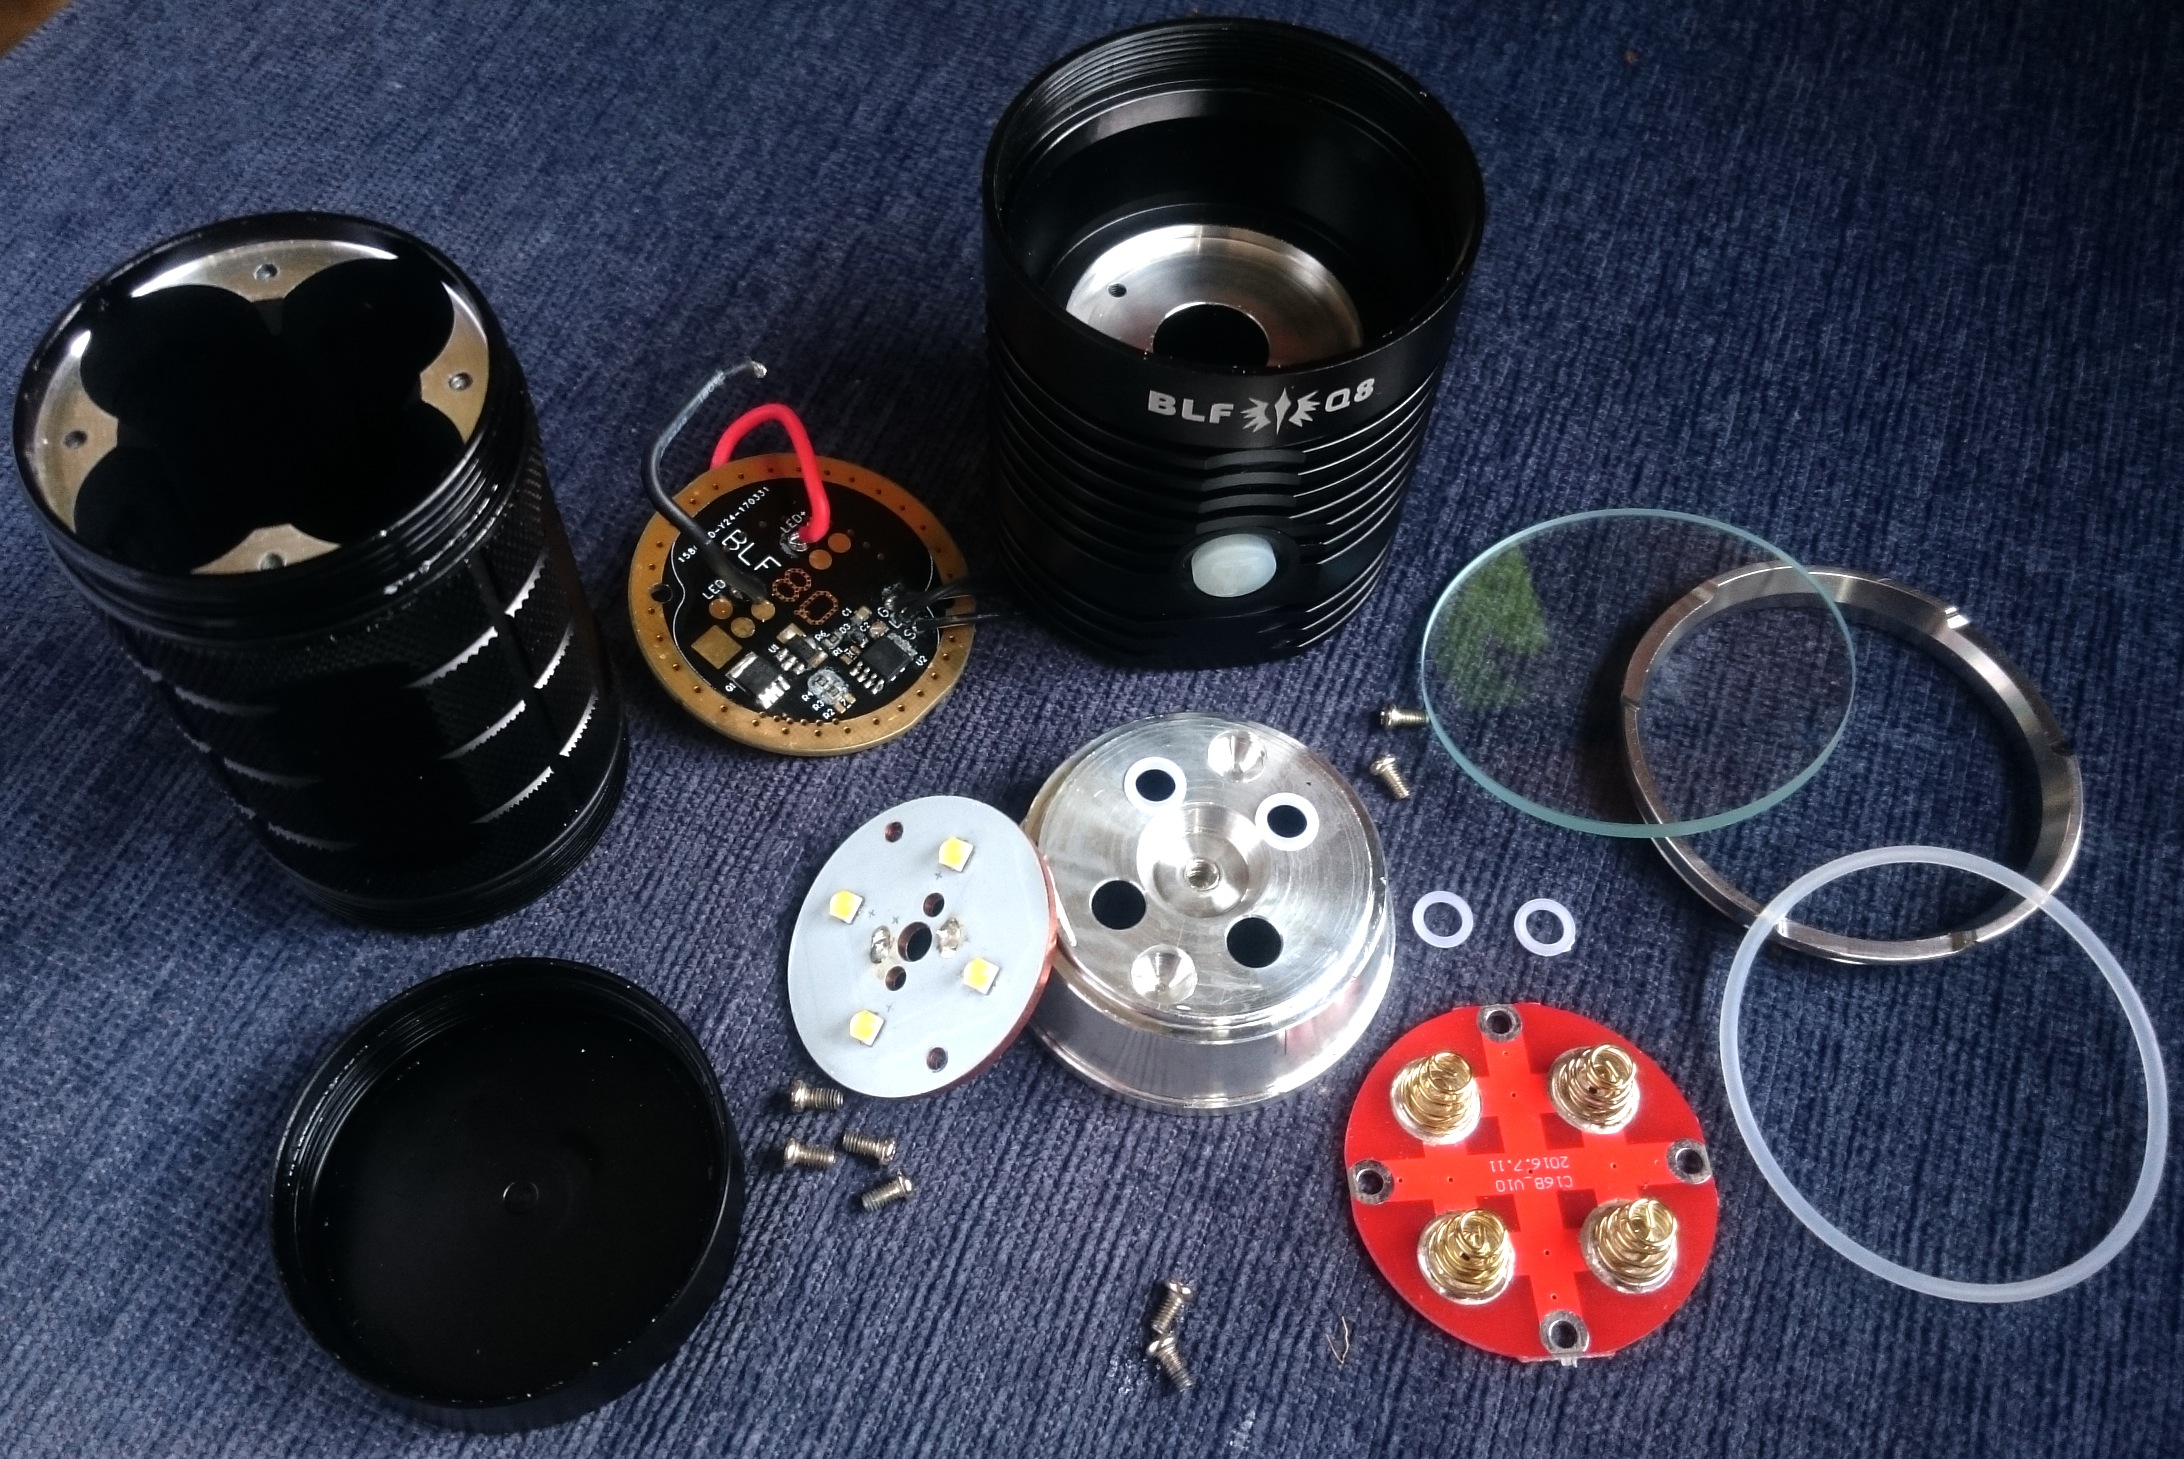
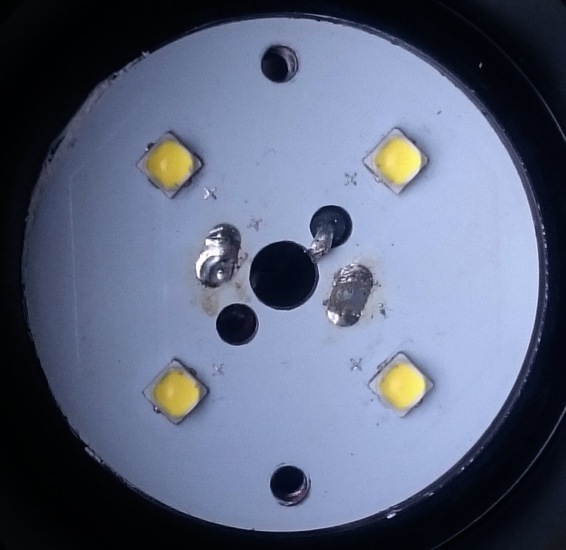
This morning I took the light apart:
I did not disassemble the switch.
Some things I found:
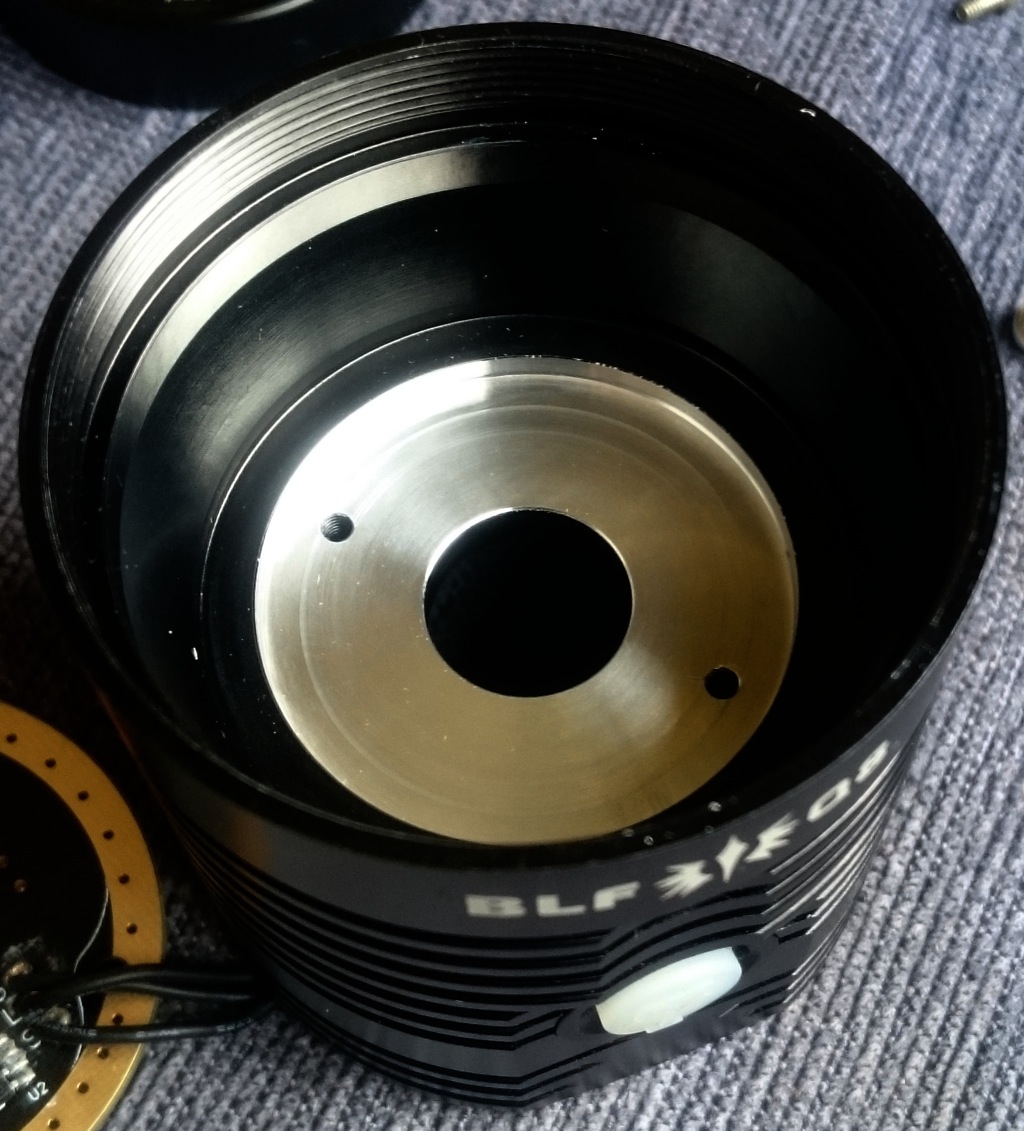
*the ledboard shelf is not extremely flat, but considering the enormous contact area and the board being screwed down it works more than fine:
*the holes in the ledboard and in the shelf do not line up completely, but the screws are a bit narrower than the ledboard holes so they screw down smoothly anyway. You can see that the leds are reflowed in the middle of their solder pads (more about that later):
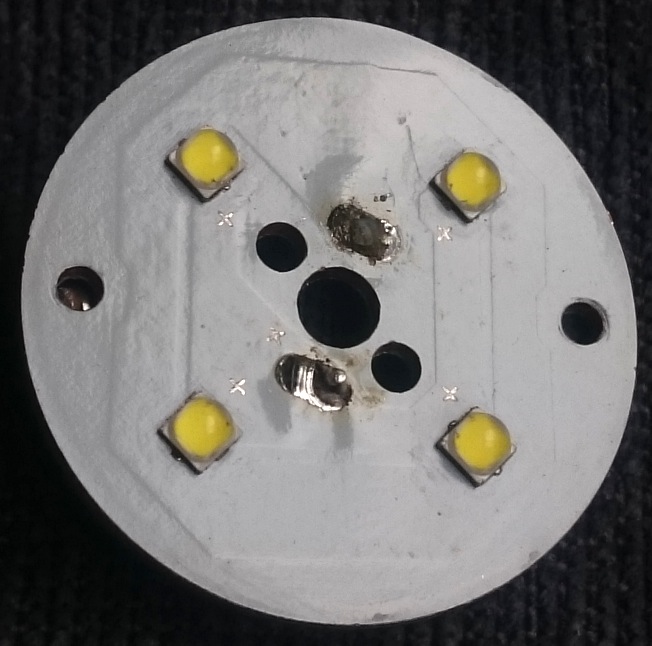
*where the ledboard got hot from soldering (or from my rather hot de-soldering  ), the traces delaminate from the ledboard base (they bubble up near the solder blobs), I expect this not to be a functional issue, but it is not great of course. Also at one of the sides of the board the solder mask curls up a bit. In this picture you can also see the nice fat traces on the board:
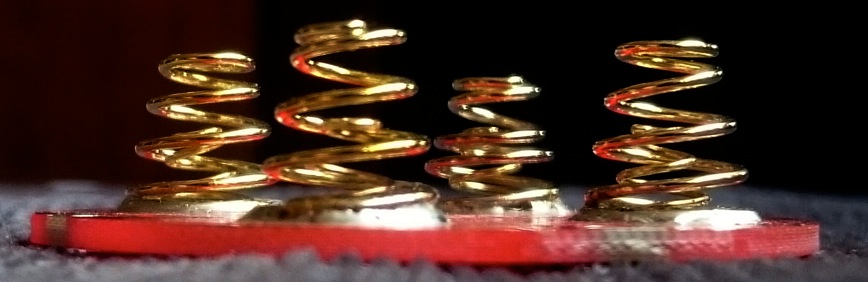
For fun a picture of the double springs:
 After this, I re-assembled the light and I found that when I press the reflector down with the glass lens while screwing tight the screw on the underside, I actually centered the leds a bit better than how I got the light. Centering is still not perfect because the solder pads on the ledboard do not align fully with the holes in the reflector (this is a bad thing and we noticed this before but we are not going to make a deal of it because the beam is fine like this):
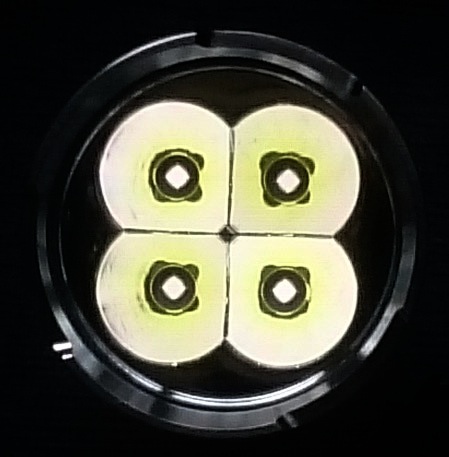
Finally I did an output measurement with the partly depleted 30Q cells. They were 3.9V which is close to halfway full and the voltage is quite steady at that point. The output of the Q8 I expect to be as steady as it gets now:
After switch on:
3 seconds: 5300 lumen
30 seconds: 5085 lumen
120 seconds: 4958 lumen.
So after 2 minutes we are still at over 90% of the initial output, sounds good to me!
I am interested in one as well
Thanks for the Pics. excited to have one of these.
Thanks for all the pics, this is great :+1: :heart_eyes:
Don’t know if this has been discussed before but are there any tir optics that would fit the Q8 without to much modding?
Hello Jos,
What size have the screws of the tailcap board? Is this M3 or smaller?
I think they should be M3 at least.
Delaminating traces are not verry nice. I hope thats why you used too much heat.
Thanks for the pictures. I want to have this flashlight as soon as possible. ![]()
I’m away for the weekend now, the screws are M2 I’m guessing, but perhaps one of the other prototype people can confirm.
I’m not sure how much harm the loose traces can do, Tom mentioned (and I have experienced that too) that the KD DTP-boards do that too. It is certainly a concern that we will communicate to Thorfire. Is there anyone who has experienced functionality loss or danger from the delaminating of KD boards yet?
The biggest issue with the traces de-laminating are first that without the heat sinking they could overheat, although they are pretty beefy so this should not be a big issue.
The second possible issue is they could possibly short out against the mcpcb base since the substrate is obviously not that great.
Although this could just be due to a bad manual reflow where they overheated the mcpcb, I have done this before. In which case with a proper production run where a reflow oven is used, this should not be an issue, hopefully.
That would mean that only half the threads are actually engaging with the holes, leaving it very easy to strip by overtightening.
Just thinking about eventually modding when better LEDs are available, it’d be better if the parts lined up correctly.
They need to align them using a jig, not hand-drilling.
I have reflowed some kd-board and did not had any issue.
But with very high overheating I had this on a sinkpad. Or I had Problems with a Nitecore EC4S.
If you dont want to overheat the MCPCB by soldering, use a good soldering iron with external soldering top. I have good experiences with the following: https://www.amazon.de/Ersa-0920BD-Lötkolben-Multitip-230V/dp/B0009QX1S8/ref=sr_1_1
It is classes better than my former soldering irons.
There are no threads in the LED board, so no problem there. I don’t recall anyone mentioning the threads in the shelf being loose at all. As long as the screw has a snug fit in the threads of the shelf, and the head of the screw holds down on the LED board, all is well. ![]()
Correct David, the board is clamped in well and tight. Actually, I tightened all screws more than Thorfire did. I even think (imagine) that the better clamped tailboard boosted output a bit. 20A is a b*tch for any connection!
So far the best coating/paint i tested for lantern diffusers (to reflect & disperse a flashlights focused beam) is flat/satin white on the opposite end of the diffuser. it reflects the most of the output compared to silver, chrome, or even shiny white paints.
One trick to make the flood of the diffuser warmer tint is to use an “off-white” or cream flat/satin/matte color paint if diffusing a cool white flashlight.
Talk about preoccupied.
I was baking the Q8 this afternoon when a storm broke
Hail and thunder
So I get outside to protect a very small olive tree and when I came back in it was raining inside.
A tile or probably even a few must have been broken by the hail.
And a beam guided water Creating a nice waterfall
And below that beam, my notebook, soldering iron, box with Q8 parts.
Dang dang dang.
Quickly to the shop to get rice and roof tiles
Notebook in a bag with a kilo of rice.
And a sloppy fast assembly … Oh will it work, yes light!
So rest asure the Q8 lives!
(Not able to upload pics or edit OPs till my notebook is dry ![]() )
)
Ah and M4DM4X has started an action for cells
Here: DEAL IS LIVE: 30Q button top (set of 4) for your BLF Q8
NKON has a guy in Helmond add the buttons, and Dutch labor is expensive so I bet Martin has a better price.
Thanks Martin!
That is awesome I have several white toned spray paint cans, so will add a layer or two tobtge now translucent grey, thanks!
Sorry to hear about your indoor waterfall. Hope the rain stops soon so you can fix it.
TLC told you not to go chasing waterfalls. (Ugh, sorry. I had to.)
|
|
Somebody call a digital doctor!
Anyone know how to do CPR on a computer?
Or, anyone know who to call for a little techno-necromancy?
I hope the ghost will stay in the machine.
