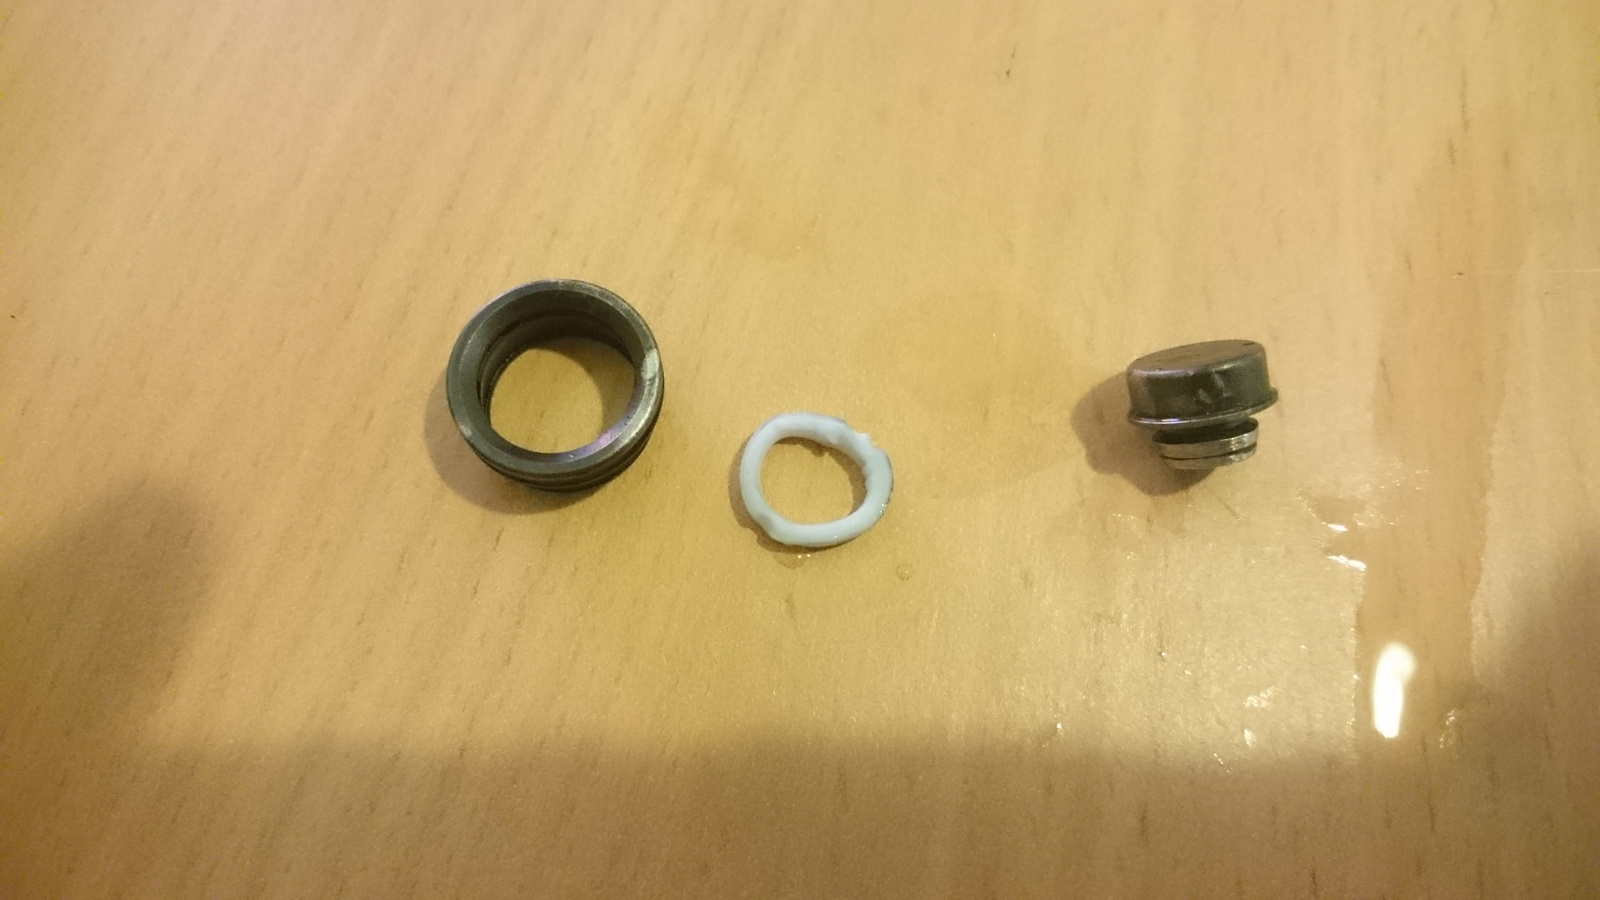
Aaaand it’s ruined :person_facepalming:
I managed to take out the black switch but I can’t take out the little plastic ring where the light came out. I putted it in some solvent and it melted the plastic ring but the black paint almost intact. :cry:
So now the button felling out and that means I can not use the whole flashlight.
I really need now a stainless button to replace the mess what I just made. I don’t know now I contact with banggood because of fast erasing black paint or Simon at aliexpress to please send me a replacement part for some money.
![]()
I would try Simon.
No need for tears… Simon is having some extra switches made. Just send him a message through the Convoy Aliexpress store here. . He’ll take care of you. Tell him I sent you. ![]()
I messaged him about my problem and yesterday I got the reply from him that he has a few and will send me. But I forgot to mention about it here. Simon is the best manufacturer!
Will the clear hosts be offered with the bare stainless switches or only black?
That’s what I like to hear. ![]()
It wasn’t just the value of Convoy lights that led me to where I am. It was the very personal customer service from the owner of the company, taken to a level unmatched in my experience that impressed me so much.
Glad it worked out. :+1:
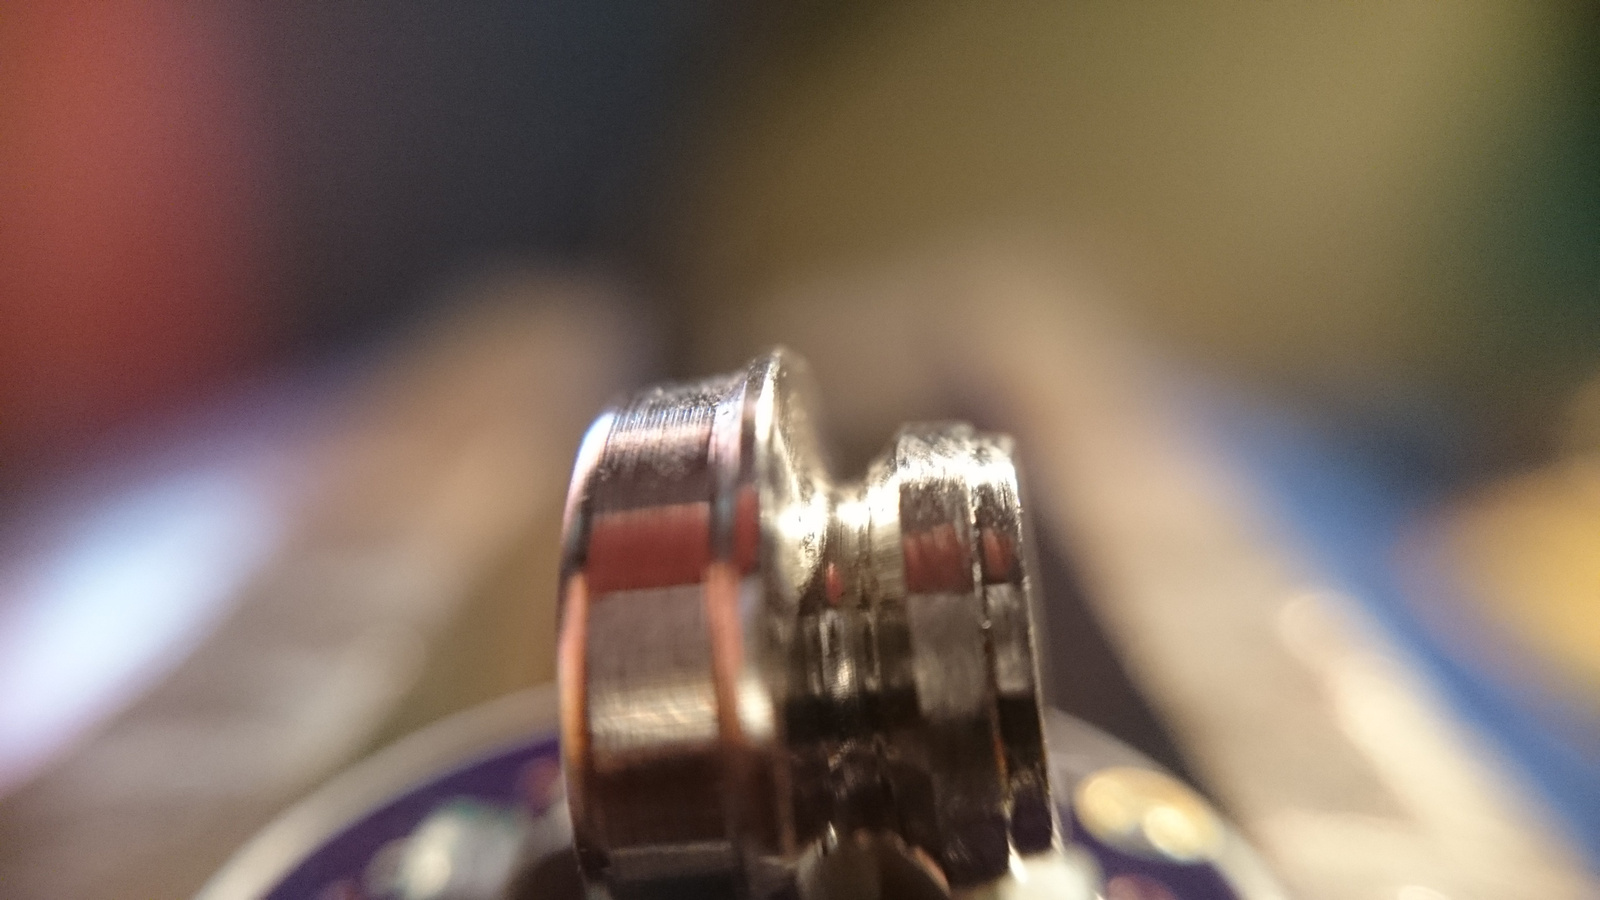
What gap?
Can you be more precise or mark it on picture?
The next round of the clear S2+ is supposed to have the stainless switches. Also, Simon just got a batch of the stainless switches so if anyone wants to try swapping one out they should be listed in the store soon.
He’s referring to a small gap where the tail threads into the tube. Jarder28 contacted me about it.
Look here:

It’s not a big gap but it’s there. I actually checked mine and it too has that tiny gap. I’ve gone months of using without ever noticing that so it’s not heartbreaking IMHO but I will bring it up to Simon so that he can address it in the next run.
I see it now.
I don’t have that on mine.
Did you try to screw switch retaining ring further? It may solve the problem.
I had one grey with gap but switch board was not right in place and retaining ring wasn’t tight and after fixing no more gap.
I tried swapping in from gray s2+ with normal or no gap and still the clear one has that gap. I also tried tightening the retaining ring still didn’t work. It’s not a big issue but its a factor for quality but I think It’s fix-able.
For units with a gap, it could probably be fixed at home by sanding down the body tube a little.
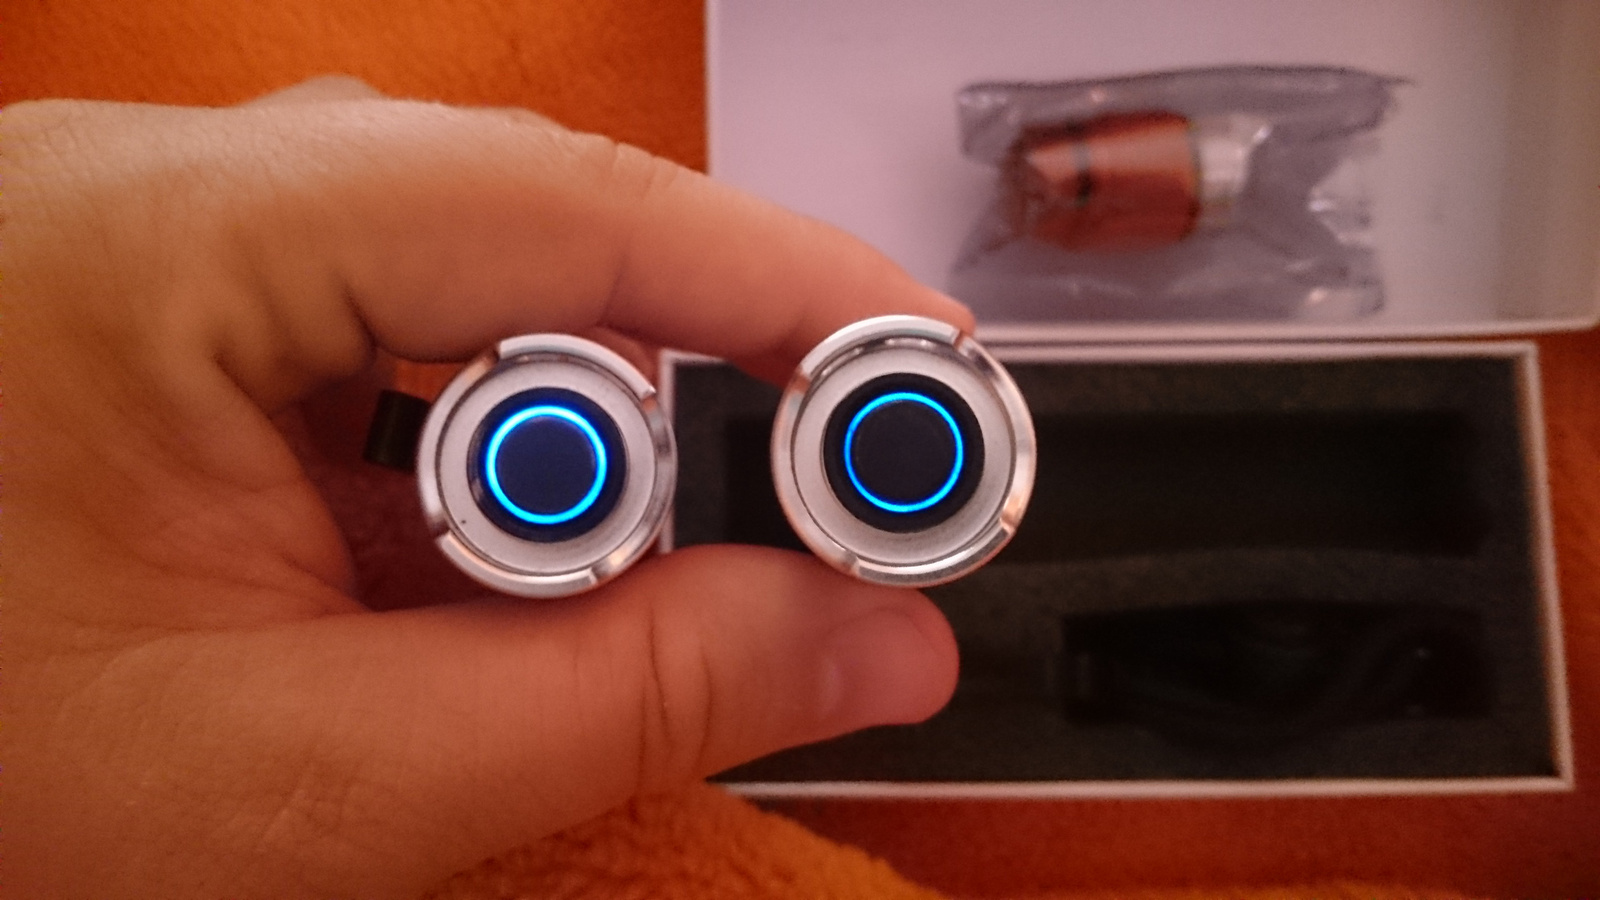
I received my clear S2+ from Shenzhen Convoy. Suprised it came with a blue lit tailcap. I also ordered the new firmware but unfortunately it doesn’t work properly because of the lit tailcap.
When I put a tailcap from my old S2+ on the clear the new firmware has no problem. I contacted Simon to let him know but it is not really a big problem for me.
I prefer just to remove the tailcap light. Do I just unscrew the ring inside the tailcap and then unsolder the LED from the PCB in the tailcap?
Dug in the spare parts bag and found a normal pcb with switch and spring that i ordered from Simon long ago.
Fitted this and it’s all good :+1:
Wow, I didn’t know they were gonna come with a lighted tail cap. That’s a nice idea, but it has to match the driver. A lot of times they are not compatible with each other.
I’ve already sent information to Simon about the lighted tailcap causing issues depending on the firmware, and information about how to fix it with a bleeder resistor. But for a metal switch, it’s generally best to not even attempt a lighted tailcap. Not much light can get through, so it’s kind of a waste.
Oh, is it only on the black metal switch models?
I thought it was the rubber switch models.
I have nice results with grinding down the bottom edge of metal button and using PD68 six LED lighted tailcap board.
Stock on right and 6 leds with grinded button on the left. I used 22K resistor to each LED pair IIRC and 1K bleeder on driver and biscotti working correct that way.
And I have some other color with 6 LEDs and grinded button:

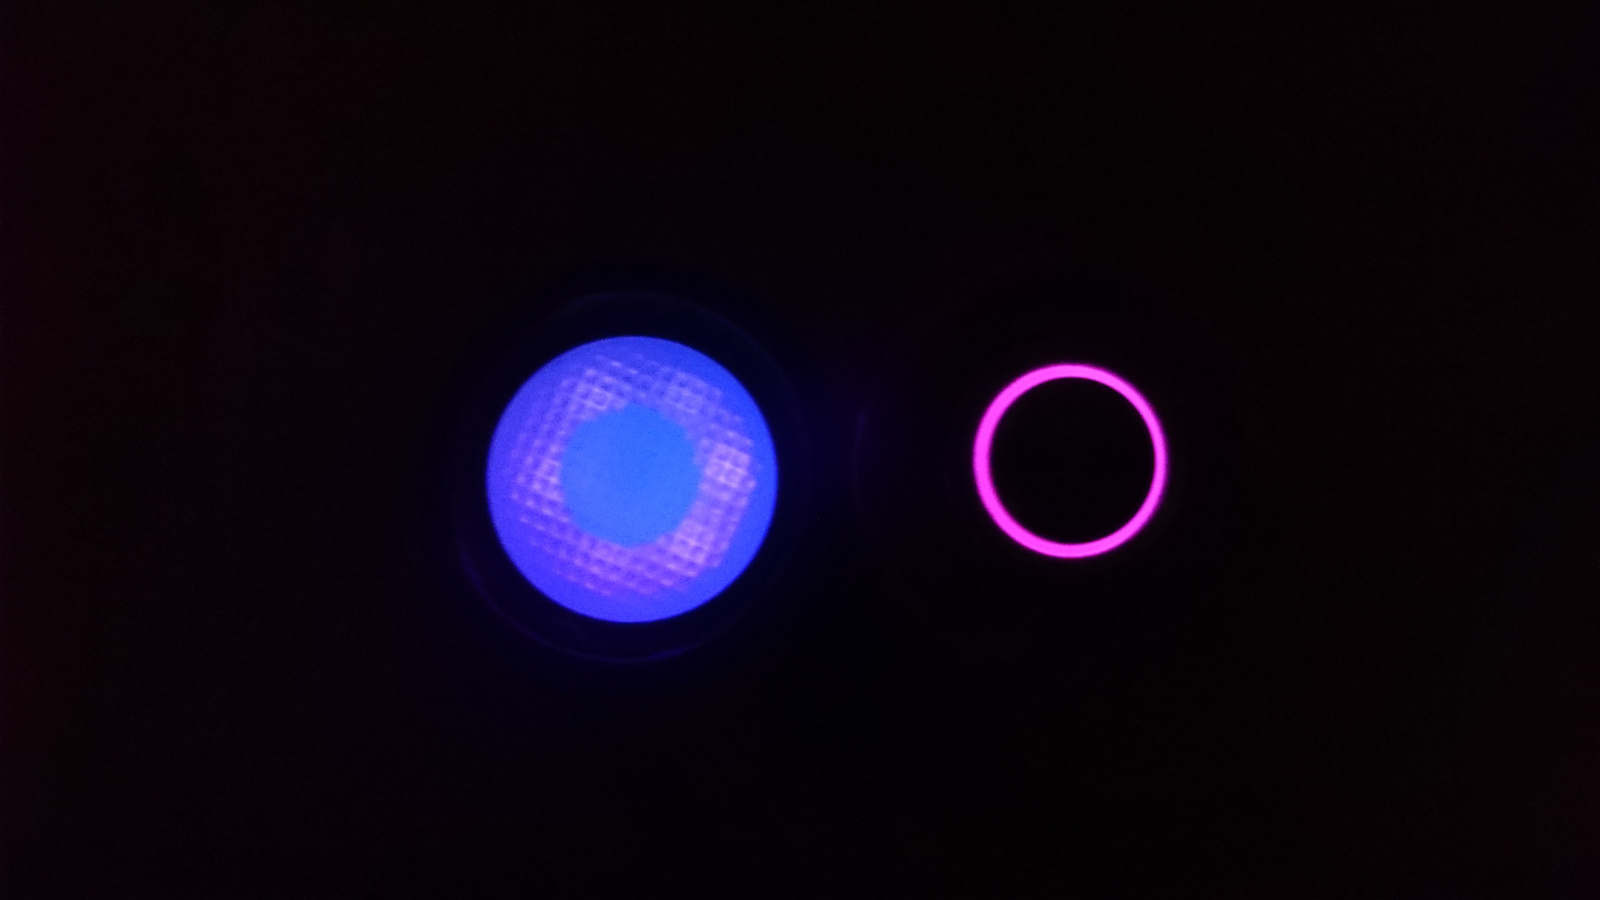
Today I have another Clear S2+ which got biscotti and 1K bleeder. With stock lighted switch it was not good. And even with 10K resistors at switch pcb. I now going to try 22K for each LED. And If it works Anybody can tell Simon the info. I only had success with high forward voltage LEDs in switches like Green, blue, white, pink and purple. I can’t set correct resistors for yellow or red ones with biscotti.
Edit: Clear S2+ with biscotti, 1K bleeder on driver and 22K instead of 330 Ohm at each LED on the original lighted switch board and everything works fine. Firmware and switch light too.
So it is not really a problem of the firmware but of the driver?
If the driver has no bleeder resistor the lightened tailcap may work or not (and the firmware/UI may work or not)?