Xtar S1
Xtar has made flashlights, batteries and chargers for some time, including very large lights (D30 and D31). This time the light is a 3 led light with some high power XM-L leds, this makes it one of the most powerful led lights on the market today.
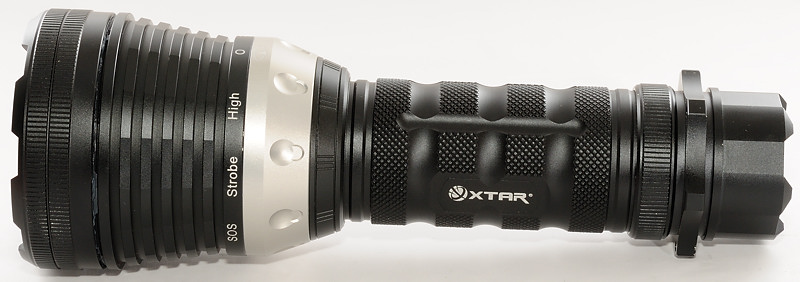
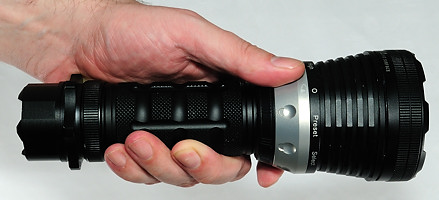
The user interface for this light is a ring, there is no on/off switch, this is also handled by the ring. The light is made of aluminum with hard-anodized (Type 3) finish.
This is a test release and Xtar will do some modifications to the final version of the light. My copy of the light was without any box, accessories or instructions.
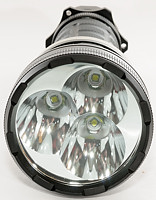
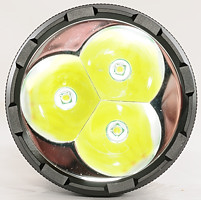
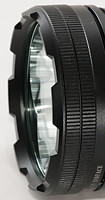
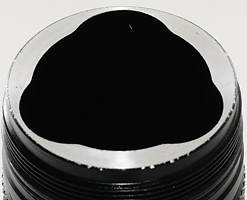
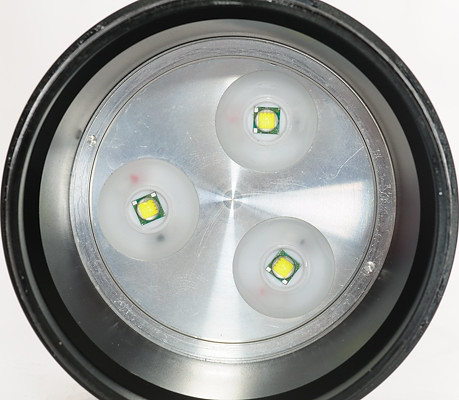
The light uses a smooth tri-reflector with 3 XM-L leds.
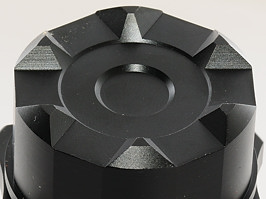
The head is a large heatsink, this is probably a good idea with 3 leds.
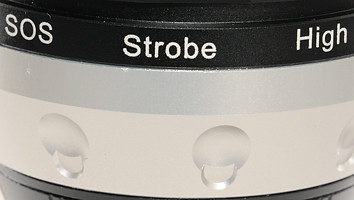
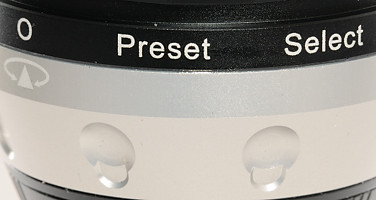
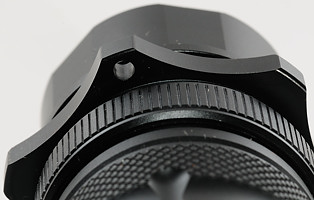
Just below the heat sink is the ring, it has 6 active positions, it is possible to turn it to 4 other position, but they do not have any function. The ring has clicks, but they do not prevent setting the ring between two settings. It is possible to use the light one-handed, but some knurling or other structure with a good grip on the ring would have been nice.

Here are all the positions, the "Preset" is a user selected brightness and "Select" is used to select the brightness with.
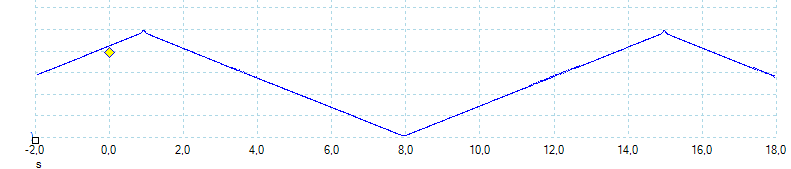
When turning to the "Select" position the brightness will start going up and down, this is a linear ramp that takes 14 second for a cycle. It is difficult to select exactly the lowest brightness setting, because it only stays there a fraction of a second. When turning back to "Preset" the brightness at that point is remembered.
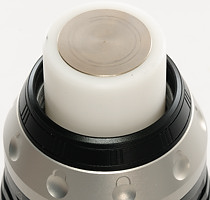
The backside of the head has the battery connections, this is just a large metal plate, i.e. all 3 batteries are in parallel and the light does not work with flat top batteries!
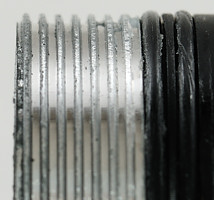
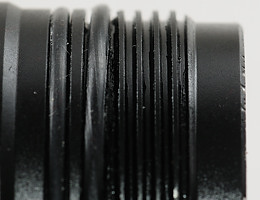
The battery tube has square cut threads and dual o-rings to seal the light. The tail thread is anodized, making it possible to lock out the light.
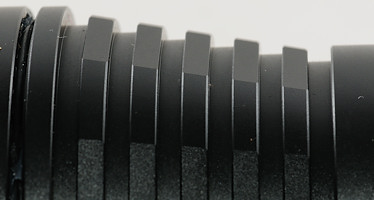
The body has knurling to improve the grip and with the large head and ring on the tailcap a hand cannot slide off the light.
On the tailcap is a ring with hole for a lanyard. The back of the tailcap has some bumps, and the light can easily tail stand.
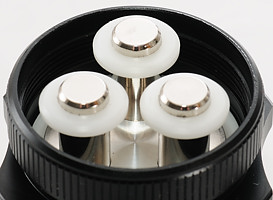
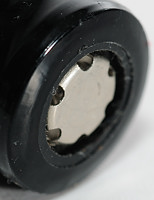
Inside the tailcap is the battery connections, the 3 pillars has heavy springs behind them and the assembly with the pillars can rotate. This is necessary when mounting the tailcap.
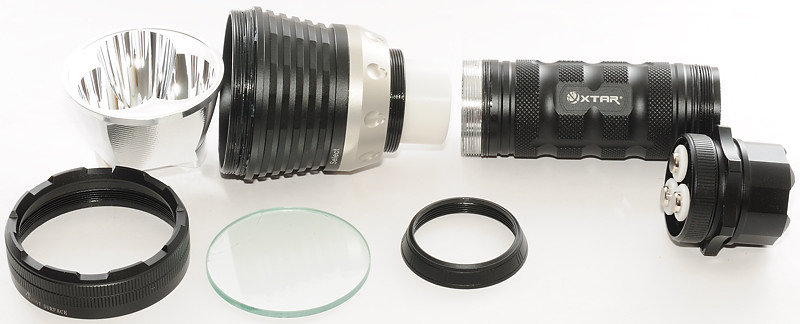
Here is all the part the light can be disassembled in without tools.
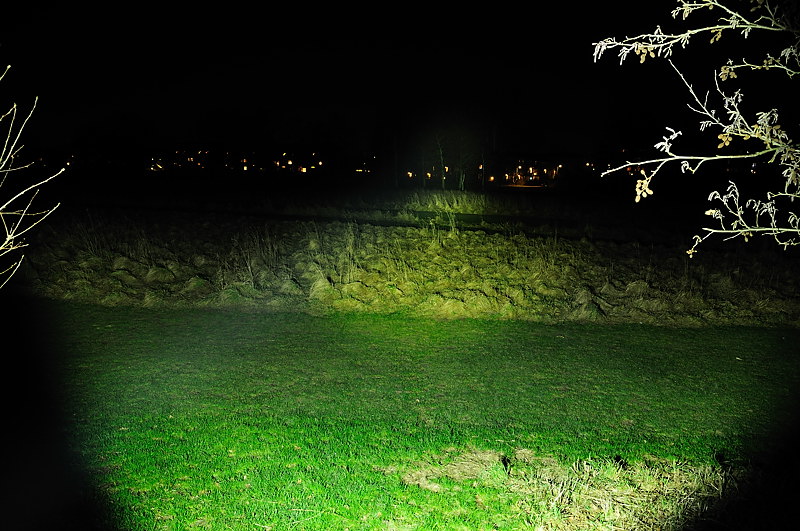
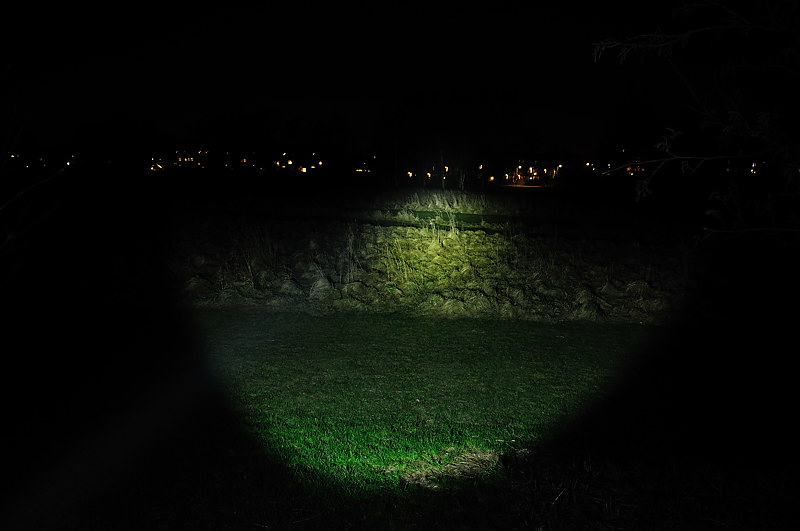
The light is one of the brightest led lights at the current time and it also has a good throw. I could have wished for a better user interface, either a slight delay at low or a couple of fixed levels, instead of the freely adjustable brightness. The size of the light is much better than a light with string of D cells.
The light has a standby current, that will drain the batteries in about 10 months, this makes it a good idea to loosen the tailcap when not using the light.
Technical specification and measurements
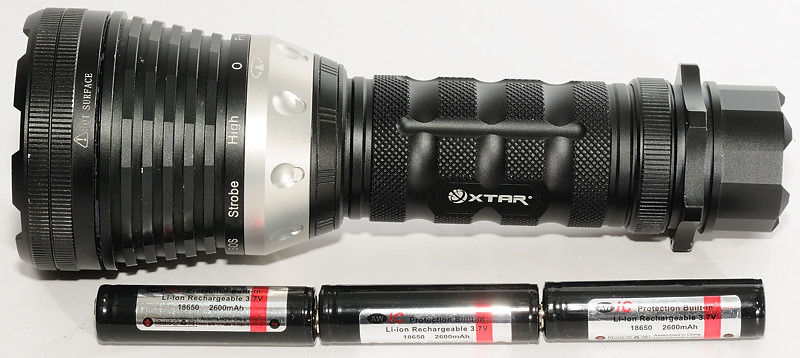
The light is rated for use with 3x18650, but can also work on one or two at lower brightness. The light works fine with all protected 18650 batteries, but unprotected are a bit too short.
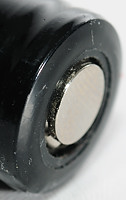
The light requires button top batteries, to fit my AW batteries into the light I had to use some small magnets. This is not recommended, but I did not have 3 of any other type batteries.
Measured size and weight:
Length: 240 mm
Diameter: 46.8 mm to 83.2 mm
Weight: 1027 gram with AW18650-26.
The light uses a 3 Cree XM-L U2 leds.

In the above table I have collected all modes including two user selected modes. The current is measured at 3.7 volt. All the estimated runtimes are with a 18650 2600mAh LiIon battery. The estimated lumen is scale from a estimated maximum of 2000 lumens.
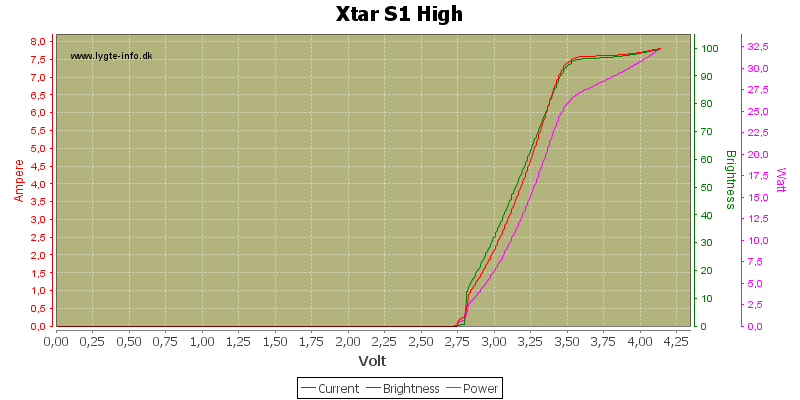
The first voltage sweep is done in high mode. The light is only stabilized above 3.5 volt and this is with a linear current generator. Easy battery has to supply 2.5 ampere and above 3.5 volt for max. brightness. In my battery test look at the 3.4 volt or 3.6 volt discharge chart, the battery with longest cyan and yellow bars will keep this light at maximum output for the longest time.
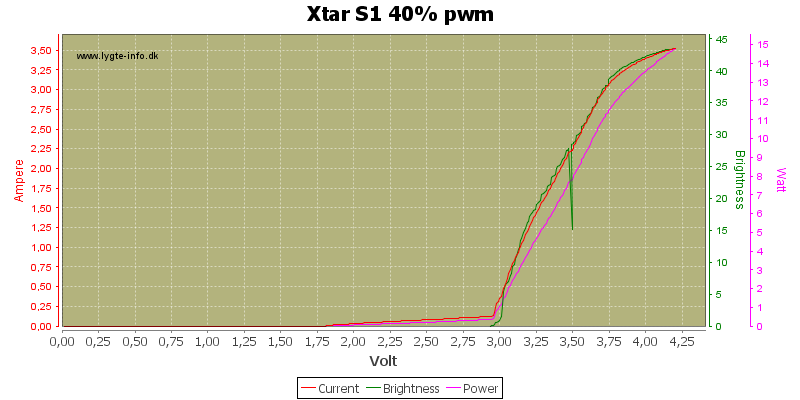
Reducing the brightness to 40% pwm reduces the power consumption. Strange enough the lowest voltage does rise to 3 volt.
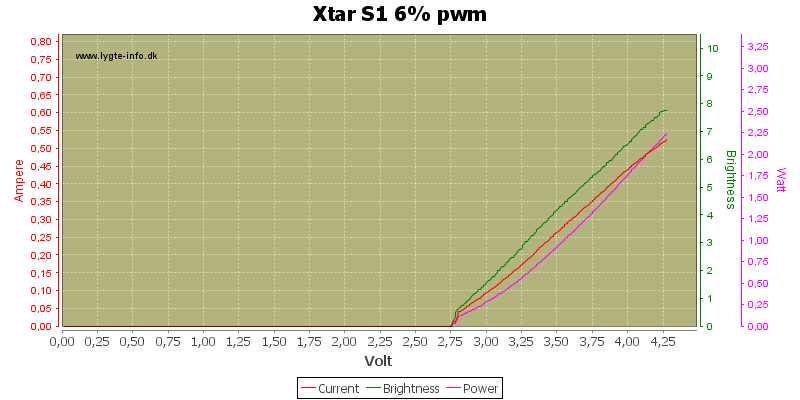
Somewhere near minimum brightness.
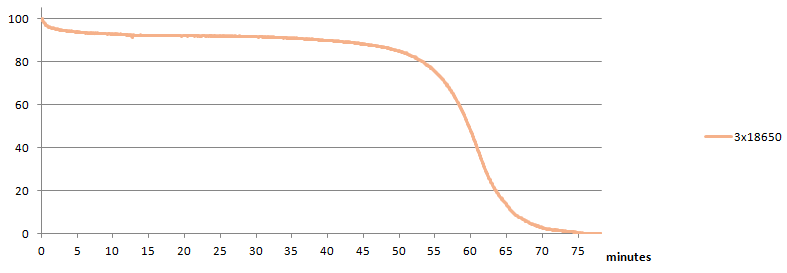
Using 2600 mAh batteries does keep the voltage high enough to get nearly stable output from the light.
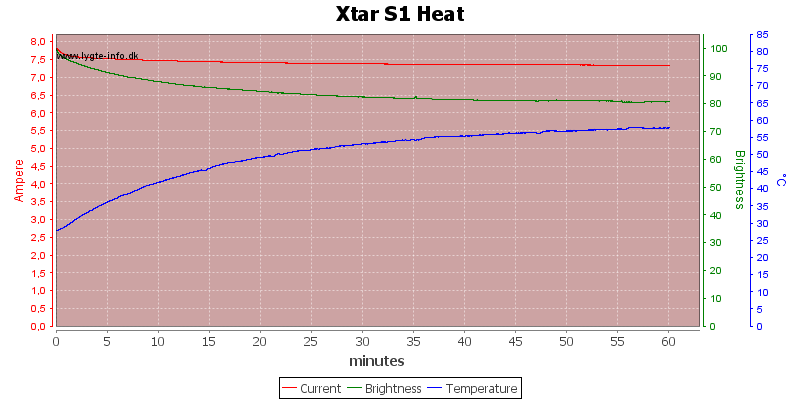
To see how this light handles the heat, I did a run on my test bench with a temperature sensor on the light. The light has a nearly stable current, independent of temperature. The drop in brightness is due to heating of the leds, this is normal and the leds are rated for it.
Note: My test does not simulate actual usage conditions, but are done on a test bench with only the head of the light and no cooling airflow, i.e. the light will get hotter than during normal use.
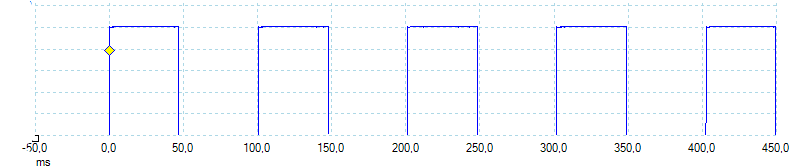
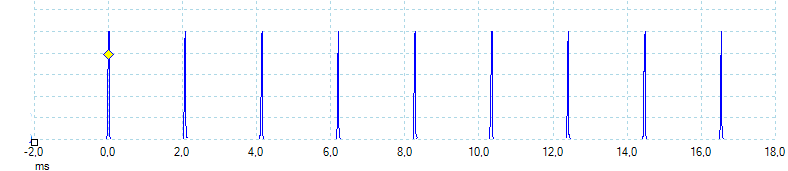
The strobe is 9.9 Hz and has a 47% duty cycle. It runs at full brightness.
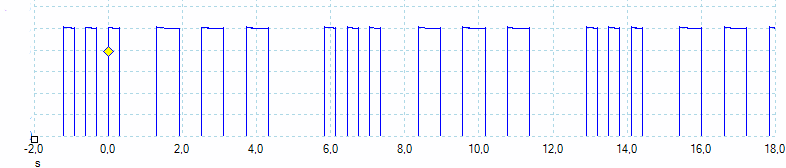
SOS is not really a SOS, it only sends SO, the last S is missing.
The light uses pwm at 486 Hz to control brightness, here is something near the lowest setting.
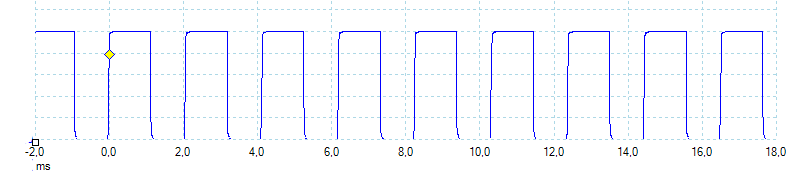
And pwm at about 60% brightness.
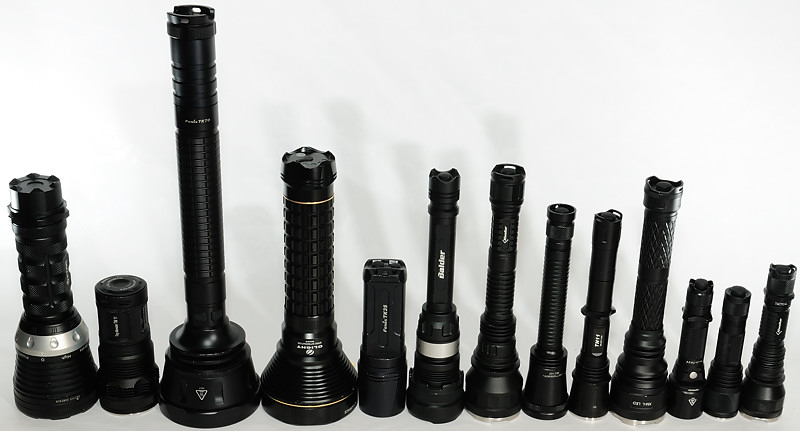
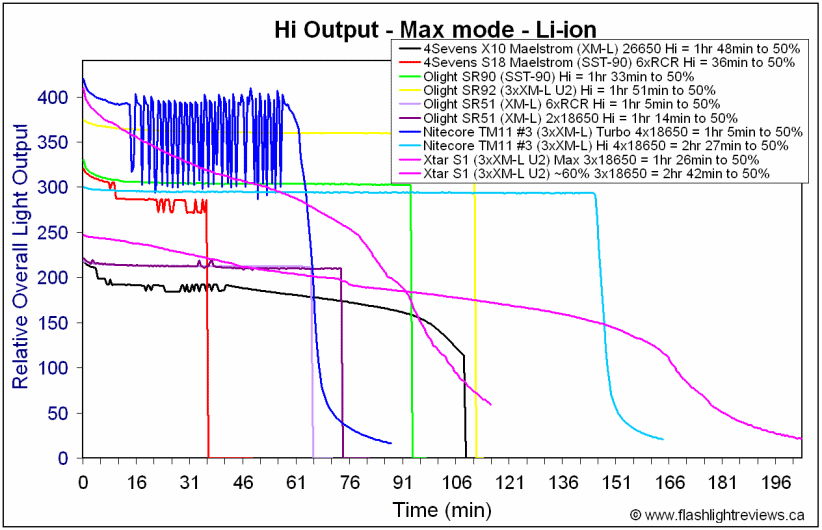
Comparison to other Flashlights
Xtar S1, NiteCore TM11, Fenix TK70:

Olight SR92, Fenix TK35, Balder BD4:

For the full comparison to other lights with graphs and beamshots see here
Notes
The light was supplied by Xtar for review.
Update for a good review!
Can you show a pic off the leds without the reflector please.
It's interesting to note that HKJ gives a flatter representation of the output curve. Anyway, it's approx 80% at 60 mins or ard there.
When at 60 mins it's more like 40% 2100
I will do that later today.
I wonder if there are differences in the driver between the two review models (with 3 and 7 second adjust slope) or is it just due to batteries?
The temperature of the light can also affect this (See my heat chart), I do my runtime with forced airflow on the light.
Ok i stand corrected, 55 mins is 80%, that's the "knee".
I really do not understand you sometimes?
Your temperature result is good. I see that you have forced airflow, so it's approx 45 deg C @ 13-14 min. I started off at the same temperature as you did, and I got 49 deg C @ 12th min. Nil airflow.
After the Sky Ray 3800 incident, i have sort of stopped doing full bore runs. I must have done > 20 full bore runs on XTAR 2600, Solarforce 2400, TF 2400, NCR18650 on that light. Luckily when the driver got a dead short i was doing protected cells and not NCR18650. Definitely i'd be looking at some expensive repairs to my decor then. (area full of tempered glass!)
At the 55th minute, the output is 80% (I misread it a little to be the 60th minute). The "knee" refers to an important aspect of any graph and this represents where something is really useful. For example, Mitro refers to Sanyo 2600 cells to have the best knee in his discharge graphs. If you dabble in hifi/audio, a frequency graph has got to have a lower cut off point and it is usually the f3 or -3dB point before the graph really dives. In the above graph, we choose 80% and it is the point where the graph really dives after that.
Should have clarified that technical part for you. Hope that helps....
You must not confuse the heat test with the runtime test, they are done separately and with very different test conditions and purpose.
The runtime is with forced airflow and a normal battery load, this is a simulation of actual use conditions (Light in hand and moved around).
In the heat test the light is tied down in the test bench and supplied with power from a bench power supply (Adjusted to average battery voltage i.e. 3.7 volt for LiIon), the purpose is to see how the light handles high temperature, secondary how good the cooling is.
It does not look like the S1 has any temperature throttling and the led does get hot, but not dangerous hot (The XM-L datasheet has a curve with relative output depending on temperature).
I see...I am looking at the blue graph actually. So I am getting a bit hotter temperatures but not a lot. Usually i am not worried about the LEDs, in my experience it is usually the driver that cooks first. heh...
Here it is:
So it's regulated after all? :| So selfbuils sample was DD? :|

The strange thing is that on Med and Low mode I can still see that DD-like curve, so dunno it's heat related. Strange :|
It is some sort of regulation, but it does not work as well on the lover brightness, yes this is strange.
As can also be seen from the heat test, heat will reduce output considerable, but I do believe that Selfbuild uses a fan for runtime (like me).
Yup, agreed with heat related problems for HI, but on Low modes I dunno heat will affect :| Xtar need to polish that :bigsmile:
Great review anyway ;) :crown:
Yes, and all pictures in the review are hosted on that size.
Just wanted to say thanks for all!!
( and what happens with your XTAR torches? so many review samples you got for free :D )