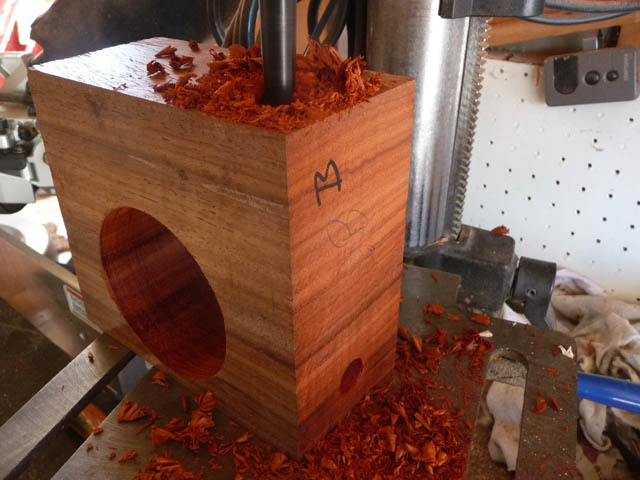
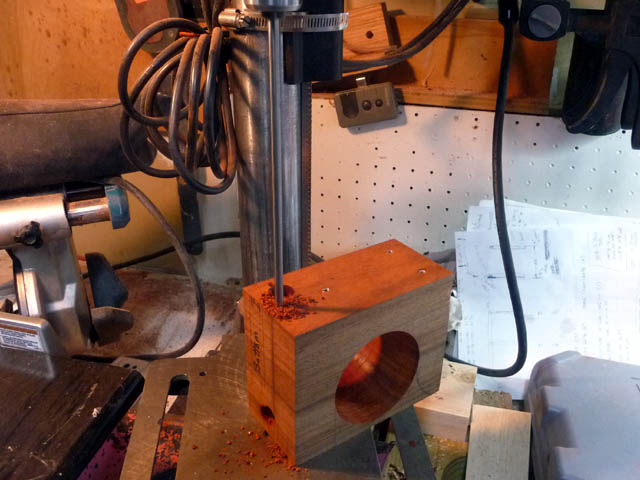
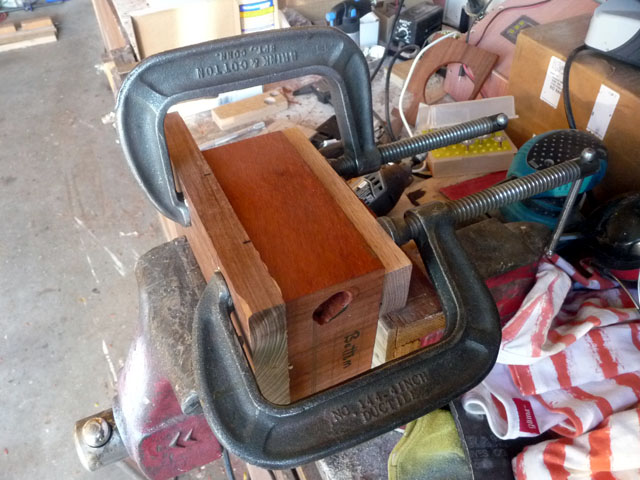
That’s some drill bit! And a nice chunk of wood :+1:
The drill bit is a Forstner bit, invented about 150 years ago by a Benjamin Forstner. Usually they do not have a toothed rim like this one, just a circular rim. They are meant to cut/drill a flat bottomed hole. The flat bottom holes have a slight dimple in the center where the centering spur protrudes slightly. This one was specifically sold as a clock making bit… drilling a recess in a wood blank for a small battery powered analog clock movement. With a drill press you can drill overlapping holes, even drill at an angle if the work piece is clamped down to the table.
What CRX said. The block of wood is a lot bigger than it looks in the first picture on my phone.
nice start .keen to see the result
Progress measured in small increments…
I needed some more holes, so…
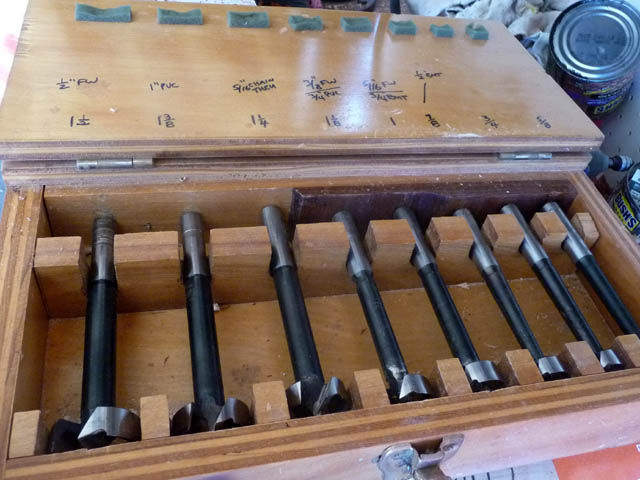
My under 2 inch forstner bits
Two holes done and my newly arrived Q8 ![]()

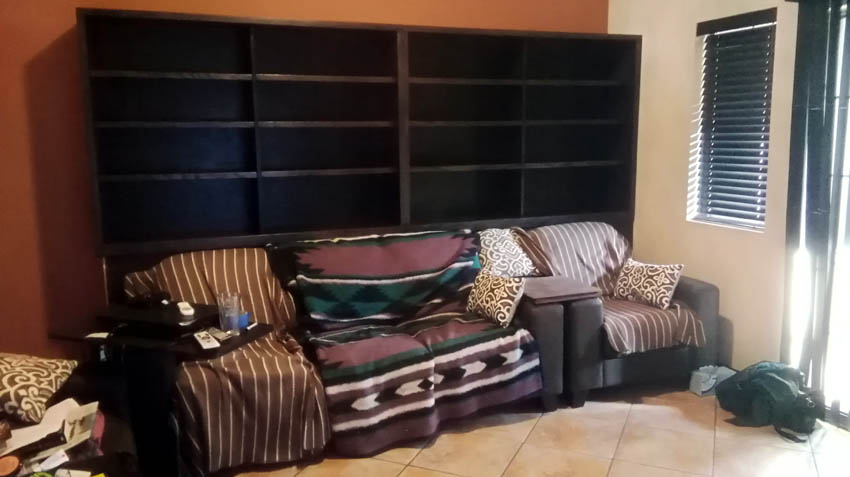
3/4 of the bookshelves project done. 1/4 to go as a corner cabinet to the left. Then I’ll be free to do the waiting flashlight stuff unimpeded till the next (inevitable) project.
Wow wow, wood is so last year ![]() just kidding, I’m looking forwards to seeing the built!
just kidding, I’m looking forwards to seeing the built!
Are you filling the bookcases full of flashlights? ![]()
If it was my own, probably. But I’m building them for our son’s place. FYI, they will end up with sliding Japanese Shoji doors. They look a little like a window with a lattice framework. Instead of transparent glass traditionally they use translucent paper. We will be using a laminated paper for greater longevity. LED strip lighting will be run behind the lip of each shelf. They will be dimmable.
There will be real books. ![]() Who knows what else? Maybe a Q8 if I can bring myself to give one of mine away. :person_facepalming:
Who knows what else? Maybe a Q8 if I can bring myself to give one of mine away. :person_facepalming:
Back to this years contest entry….
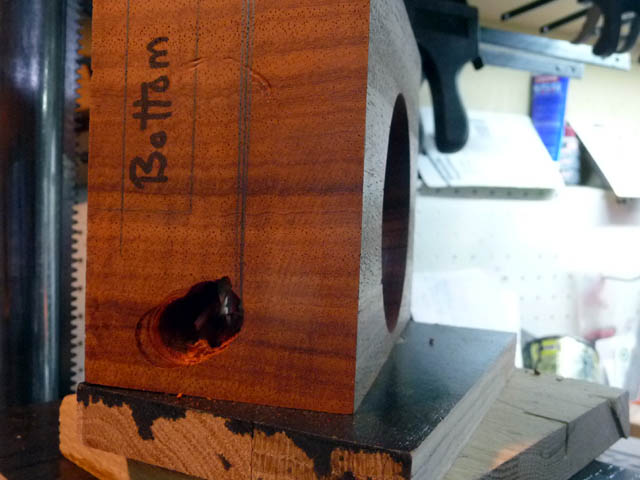
More holes needed…
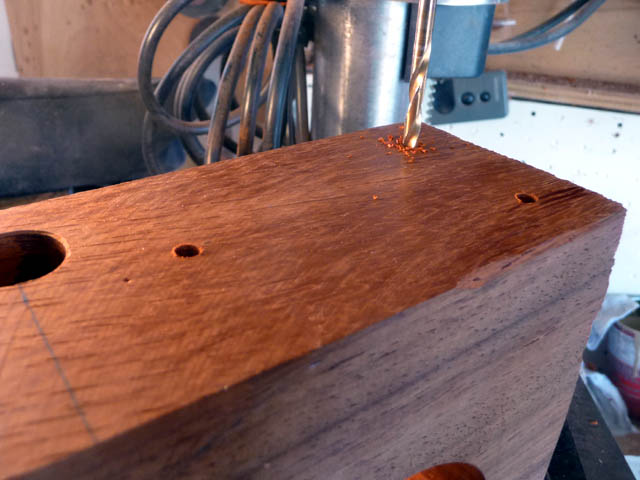
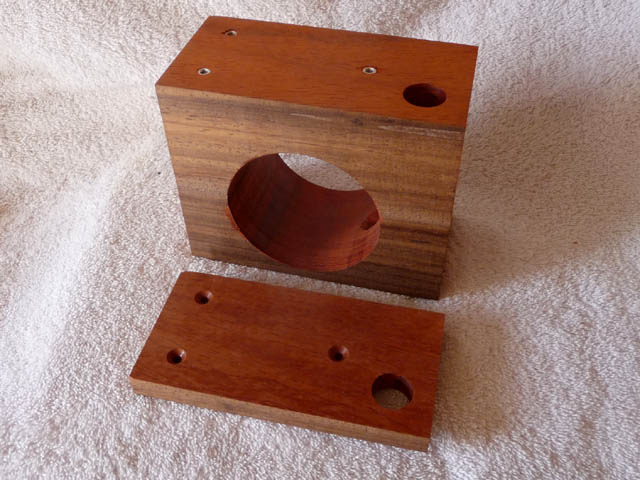
After drilling those three holes I sliced off a slab with the table saw. Then drilled out the holes in the block and pressed some aluminum threaded inserts into place.
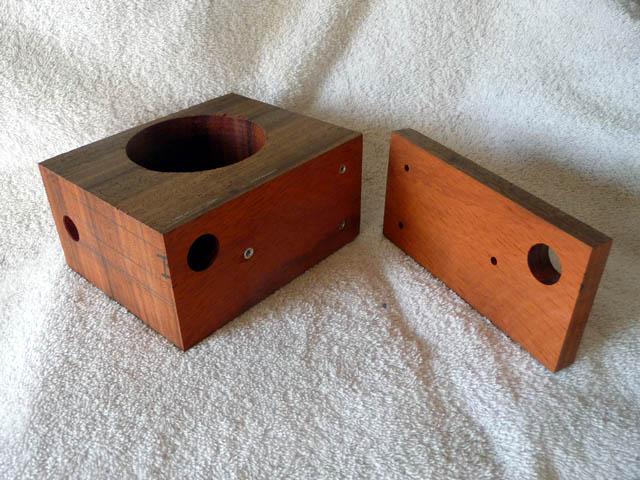
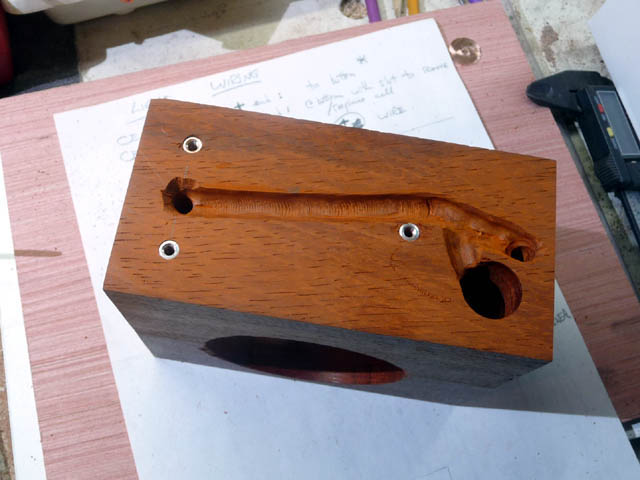
Another view of the block and plate. When completed the plate will be mounted back onto the block face.
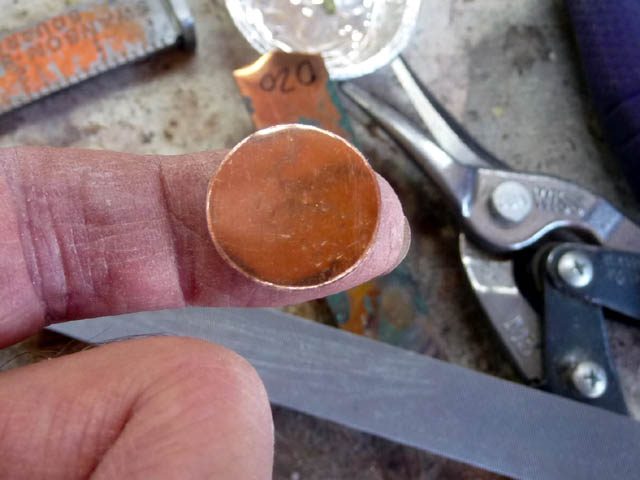
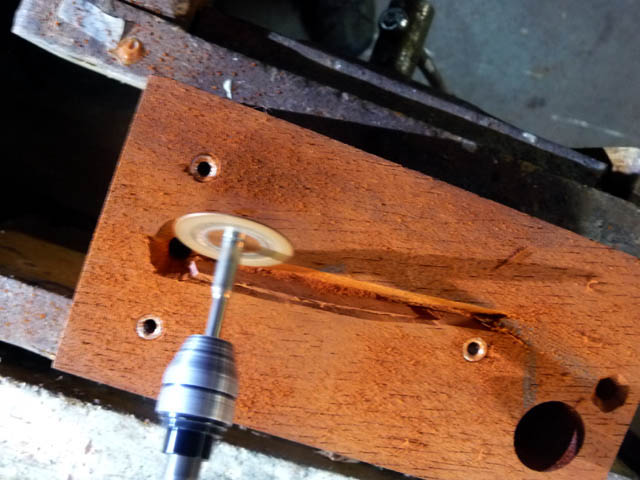
I need a round copper disc, 3/4 inch in diameter for a cell contact. Using aviation snips I cut one from a scrap of 0.020” copper. This is the rough blank.
A file was used to remove the excess and round it off
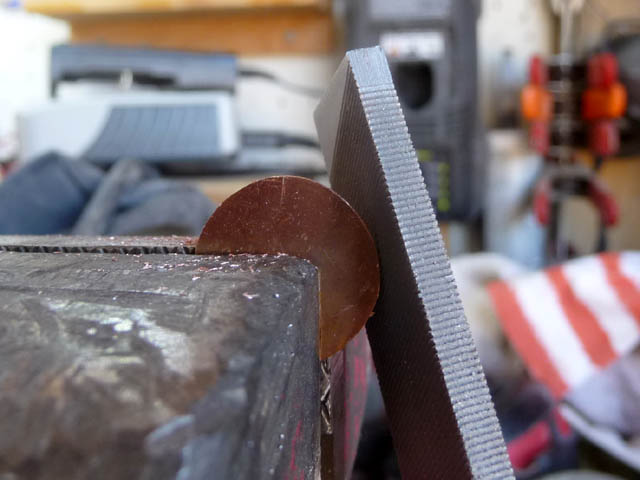
That is a piece of 3/4” walnut dowel used to check roundness and size. Looks okay to me.

More later.
Holes and grooves…
Using a very long 1/4” bradpoint bit
The drill tore out at the bottom a little, but that is going to be hidden from view, so it never really happened ![]()
I need some grooves to run wires in. Never tried this before so here goes…
As well as the Dremel cutting wheel I used a Dremel cutting burr and a small Dremel drum sander.
More to come another day.
Very nice Don. Do you glue the threaded aluminium in or just press fit it? I’m learning lots about different drill bits as well. :+1:
It is a tight slip fit. I use a bench vice to slowly squeeze them into place. I did not use any glue on these as I don’t think I’ll ever torque the screws heavily enough to worry. When I feel the need to lock them more securely I use a triangular file and file a small groove down the length of the aluminum insert. Then when it is in place a drive a small brad, or finishing nail into that groove. It locks very well.
I used to have some special cyanoacrylate glue that was made to allow making a slip fit. Made by StarLoc, Wet one side like the wood hole, drive in the insert and in about 5 minutes it would set. I still have the empty bottle, but have not found anything like it. Haven’t looked hard though. I bought it from a UK seller a couple years ago.
Good to see some more progress, Don :+1:
I’m back in Aus after spending the last week or so in the US on vacation, & have a lot of catching up to do; both reading BLF, & working on my DIY build….
…that reminds me, MRsDNF wanted some Drag Week pics….
Yes please. ![]()
FYI MtnDon, a US penny is 3/4” diameter, and if you get an older one (what was it… pre-1982?) it is nearly pure copper (at least as pure as that plate you cut out, probably.) Once you sand it down flat, it is nice for this kind of thing.
I remembered that late last night. ![]() It would be a very nice fit. Yes, pre ’82 are 95% copper. Oh well, maybe I’ll look for one for the other end.
It would be a very nice fit. Yes, pre ’82 are 95% copper. Oh well, maybe I’ll look for one for the other end.
Some days are better than others; some worse than most. Today was one of those oops days I suspect most of us have experienced from time to time.
Rather than starting with a new block of padauk I am making a slight redesign to cover, do away with the oops. I sliced of some of one side and have a slab of something brown glued and clamped. I say something brown as I have no recollection what it is. It’s not American walnut. The glued up laminate is on the left. The wood on the right is just a clamp block. Tomorrow I’ll trim the excess and then slice off just enough to return the block to its former thickness. Then carry on.
The contrast between red/orange and brown should look fine. I hope it looks planned. ![]()
To add insult to injury I misplaced the wonderfully round piece of copper sheet I made. It seems to have been swallowed up the the gremlins. :person_facepalming: So I found two 1976 pennys and filed away the design on the tailside. I’ll use those rather than carve and file some more sheet goods.
I’m sure that color contrast will look perfectly planned when all is finished! ![]()
Back on track tonight. ![]()
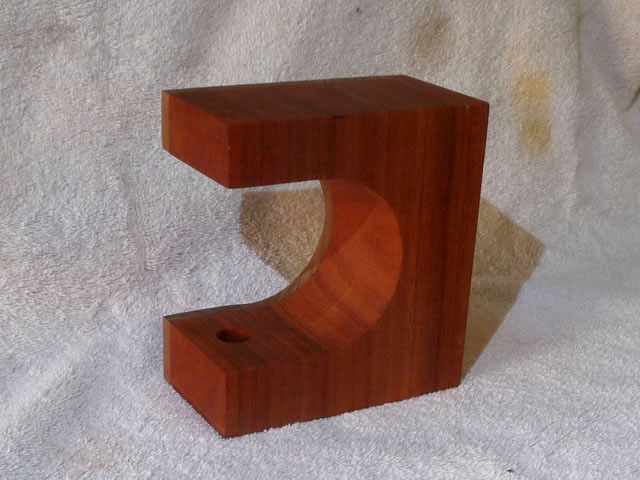
I trimmed off the glued on ‘brown’ wood. I made an “O” into a “U”. ![]() I removed a portion of the wall that encompassed the large diameter hole using the table saw, then a file and a sanding block. The block edges will be radiused next.
I removed a portion of the wall that encompassed the large diameter hole using the table saw, then a file and a sanding block. The block edges will be radiused next.
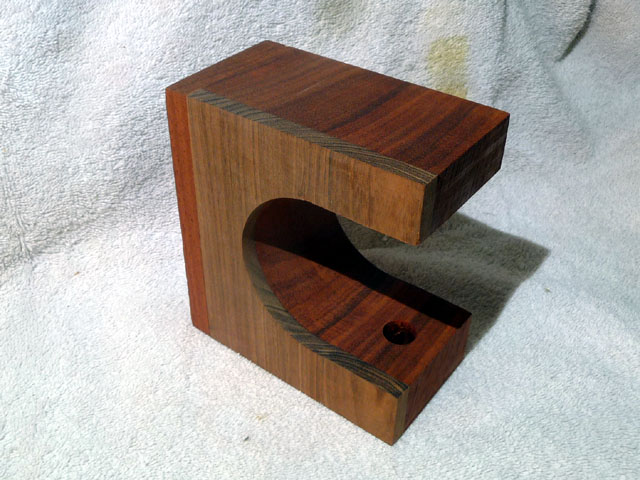
Here’s the side with the glued in ‘brown’ wood.
The removable access plate that I refer to as the back.
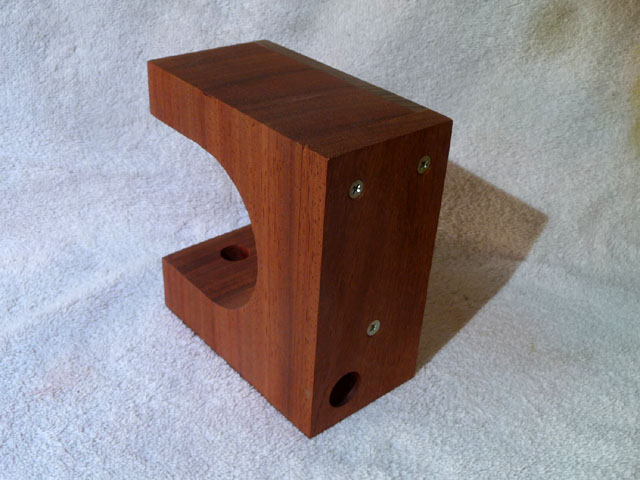
I tend to hang onto things. The 8-32 screws that secure the back are aluminum chassis screws from way back when we raced 1/10 and 1/12 scale cars. The screws are from my box of left over Associated RC10 parts. The heads are a little rough on those; final assembly will be with “brand new” 33 year old screws.
Looks really good Don. I only see a C though, no flashlight.
Did you get the better halves towel put away before she knew what you were doing with it? ![]()