Nice testing! Didn't realize the tint shift on low modes, using just the 7135 - that's strange...
Do this and you should get ~7,000 at start, ~6,500 at 30 seconds:
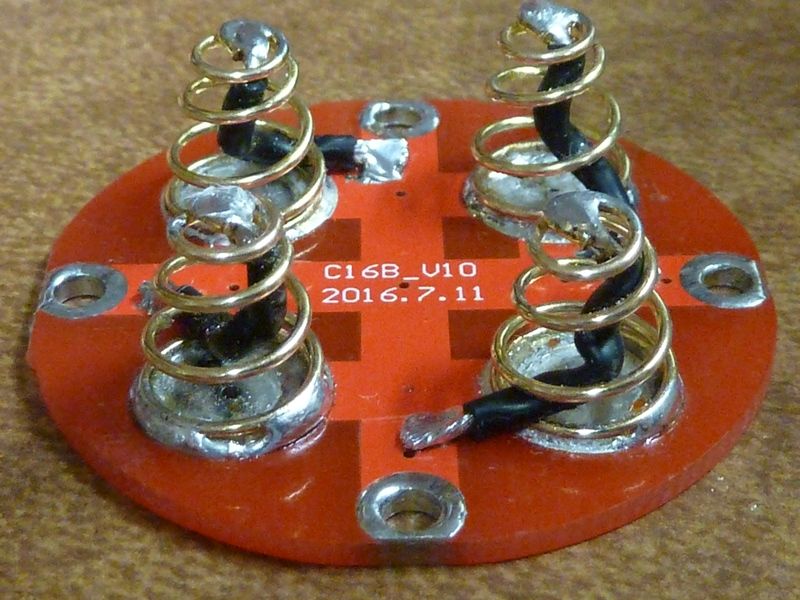
Notice I added solder on the rings around the screw holes? This is it ensure positive contact to bare shelves where the threads are located. The exposed rings (without the added solder) are actually lower than the surrounding solder mask so I don't see good contact there. Clean/sand those shelves, add light layer of NO-OX-ID. Who cares about conductivity of the screws (poor conductors anyway) when you have much better metal to metal contact from the screw holes to the battery tube. Also drill out the driver mount holes to 1/8", get rid of any burrs in all threaded holes, tail and driver mount threaded holes.
Tinning those rings helps make then do what they were supposed to do. It's also the shortest path from the springs (bypass in this case) to the battery tube. Also totally removes any need for conductivity through the screws.
Solder, under good contact pressure, to bare aluminium, as with this mod, starts off pretty well for conduction, but longer term maybe less so, as oxidation perhaps creeps in. You could smear a small dab of some vaseline or battery terminal grease, or silicone grease on it first, as you would on the lead posts of a car battery, to keep the air out, and ensure it holds up long-term.
I do the same with crimp connections, being used to using “grease filled crimps” in critical aerospace applications.
Thanks Tom E. Do you happen to know what the difference in resistance/current your spring bypasses have vs a “standard” spring bypass directly to the base of of the springs?
This works very well. I've had a SunWayMan style UltraFire 3 XM-l2 emitter light just sitting around for months now. I still had not decided what I wanted to do with it.
Out of the box with 4 fresh 30q's I got 2500 to 2700 lumen. I just did this spring bypass just to see how much it would help the much cheaper made UltraFire. 3480 lumen after spring mod. Nothing else at all, just bypassed the springs...
What is up with those beamshots? The MF01 floods much less then I see here in the garden
MF01 is like 180 degree flood, Q8 has a tighter hotspot, et on the beamshots the MF01 looks like having less flood??
The MF01 will probably be brighter at 180 degress, but I’m not using a fisheye lens which would show that. I would think that the Q8 has brighter spill on less steep angles but cuts off before the MF01.
The pics don’t show the spill cutoff point so you can’t compare it. Neither light is overexposing the camera, but the MF01 spill is too dim to be clearly visible on the picture (too high a dynamic range).
well it is funny, take those pics of that (cool) BBQ house.
The MF01 seems to have way less flood and spill then the Q8. in my yard it would looks exactly opposite with the MF01 lighting up all from my feet to center of view, but raching not as far as the Q8.
You see the boards from the terras the pics are taken from, the Q8 lights them much brighter, and they are very close by.
As a matter of fact, the MF01 lights these boards least of all (while it is the light with the most ridiculous flood I own, seems like shining backwards sometimes )
Miller, you think the MF-01 is floody? Check an Olight X7 :partying_face:
Because of the TIRs the MF01 will have a wide beam but still fairly directional, while the X7 with small very shallow reflectors a large percentage of the light goes into its enormous wide spill.
Again, the MF01 has wider spill, it’s just dim while the Q8 spill is quite bright and stops abruptly. The boards in the picture are not right in front of you so they are lit by the Q8 spill very well.