Not a flashlight, but I changed my fog lights from 4000K to 2600K ![]()


Sorry if it’s offtopic, but it makes me happy and I wanted to share it…
Not a flashlight, but I changed my fog lights from 4000K to 2600K ![]()
Sorry if it’s offtopic, but it makes me happy and I wanted to share it…
Emisar D4, RGB + White:

The 5 channel full ramping driver (FET+1 for white, red+green+blue) with 2 additional resistors for ultra low white moonlight and red indicator light, color channels pretty overdriven for about 1.5 Amps at each color XP-E2 (NOT recommended though):

Very nice beam:


Even nicer rosy beam with all LEDs on max current, about 1500 lumen (white LED is XP-G2):
Wonderful! That is a cool driver.
I had made a similar light two years ago with the DrJones RGBW driver, a Dsche quad board with some cuts, and a re-build Solarstorm SC02 (and it is still one of my favourites!), but the D4 makes it way easier.
Thanks, it were your posts about the color driver with D882 which made me build this driver. I’m using this light as EDC for about 3 weeks now and it’s the best EDC I ever had.
Thats one amazing clever mod Flashy Mike. Well done. ![]()
My adventures with that driver felt quite lonely, I do not think after me anyone has ever tried to use it like that. But i’m glad it inspired at least you ![]()
Way cool, great out-of-the-box thinking guys, well done! ![]()
Very nice :+1:
That’s interesting… What is the driver? How does it do 1.5A per color instead of 350mA? Do the chips get hot burning off the wide voltage gap for color LEDs? How low can the color ramps go? What is the firmware and interface like?
This reminds me I should probably finish a few more details on my RGBA firmware. It’s not intended for flashlight use though; it makes patterns which look more appropriate in a lightsaber. The general idea is that the user can make their saber’s illumination pattern(s) unique in much the same manner that one builds new sounds on an analog synthesizer. Except, um, simplified to make it more accessible using a single button.

Driver is my own design, Attiny 841 with FET + 7135 for white channel and 3x D882 transistors, one for each color channel. Got inspired by Djozz’ posts about a simple RGB driver with this transistors which Richard sold a while ago and Kaidomain still sells. Maximum current through color LEDs is controlled by the base resistors, and the D882 indeed get pretty hot since they are seriously overdriven with 1.5 Amps. For ‘standard’ users I would suggest higher base resistor values for lower LED currents. But I’m using the light for about 3 weeks now in this configuration, often fully powered, without any problems.
In addition there are resistors from mcu i/o-ports to both white and red LED for ultralow pwm-less moon (with sleeping mcu e. g.) and red indicator light (using the red LED).
As you recognized the lowest color ramp value would still be pretty bright so I increased the pwm range for the lower ramp part (which lowers the pwm frequency of course), but pwm frequency is switched back to about 16 kHz with higher currents. Color LEDs brightness at lowest ramp value is now similar to lowest 7135 level with white LED. Ramping is completely smooth.
UI is a ramping one, similar to Narsil, with some gimmics and optimized for color cycling.
We all understand and respect that.
But not for too long ![]()
.
Thanks for sharing.
Wow that’s awesome! what driver or mods did you do to get it to pull that many amps?
A collegue of mine yesterday showed up with a golden oldie, an EastwardYJ J06. Brought memories back from my DX-forum days 7 years ago. He got it from a friend, it stopped working and if I could fix it. I asked if it is was ok to pimp it a bit,that was ok, but in that case his friend would get another flashlight and the pimped one would be his. ![]()
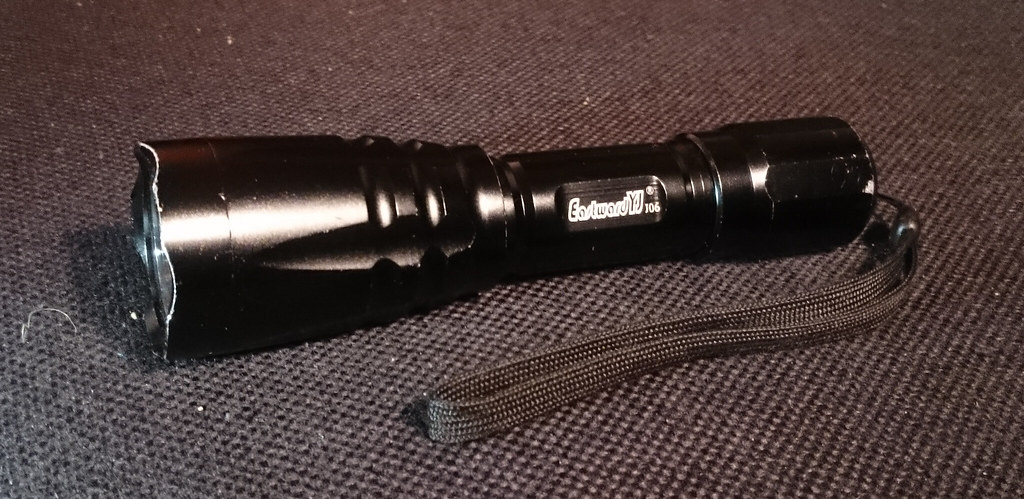
This light is still built like a tank, heavy brass pill and such, silky smooth threads, but it has a huge design flaw: upon closing the head and bezel (those actions are coupled, just like KD’s K2 host), the ledboard will rotate and shear the ledwires, it almost costed me a good LG battery when that happened twice before I finally caught what was going on. It was probably why the light failed in the first place because the driver spring was toast when I received the light.
So the mods were:
*bypassing the 0.5 Ohm current limiting resistor on the simple FET-based direct driver (East92-style). High-prettyhigh-strobe is good enough for him and a BLF-A6 driver would already be too complicated.
*replaced the XM-L with a LuxeonV on a 20mm KD DTP board.
*tapped M2 screw holes in the pill to fix the ledboard with two screws
*ream and flatten to size a plastic centerpiece to fit the Luxeon V led and reflector hole.
*bypass the springs
Now the beam is better (the stock light even had no center piece at all), the tint is better (matter of taste), the light is safe, and the output tripled to 1650 lumen @ 30 seconds.
As I noticed with my other Luxeon V builds: this led is rocksteady on output, hardly any temperature sag at all can be observed.
Nice mod djozz. I’ll take two please. ![]()
Modded my Lumintop Tool AA. 4.25A at the tail.
MTN-15DDm FET+1
Sanded down a 16mm copper MCPCB pulled from Astrolux S1
XP-L V6 3D


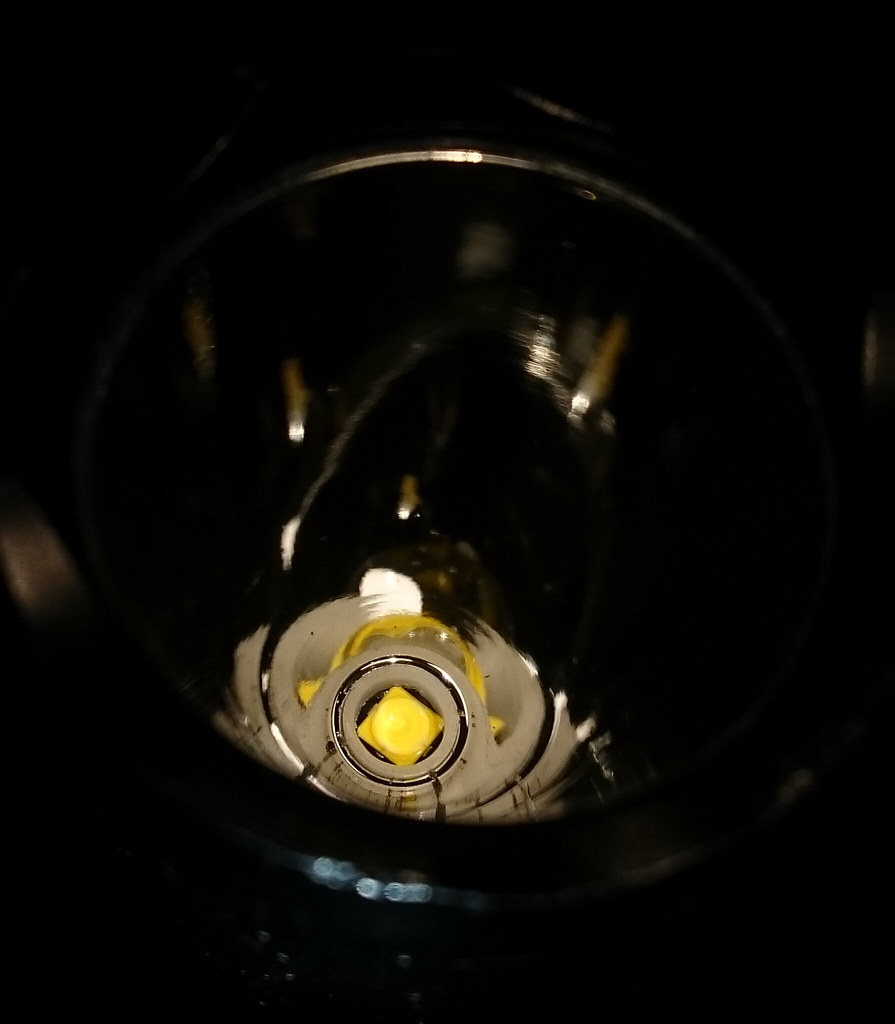
Changed the emitter in my Emisar D1 to a Luxeon V
I have tried a few Emitters in the D1:
XP-L HI V2 3A, didn’t really like the tint
Luminus SST-40 6500K domed and de-domed, de-dedomed had a great beam profile but the tint was to cold
XM-L2 T3 7A3 CRI90, best tint but the output was just too low
XP-L HI U6 5A3, nice tint but not the best output
XP-L HI V2 5D, great tint and output.
47’s PK Paladin ti now with XP-G2 3D emitters and reverse clicky tail switch. 1960lm at startup

.
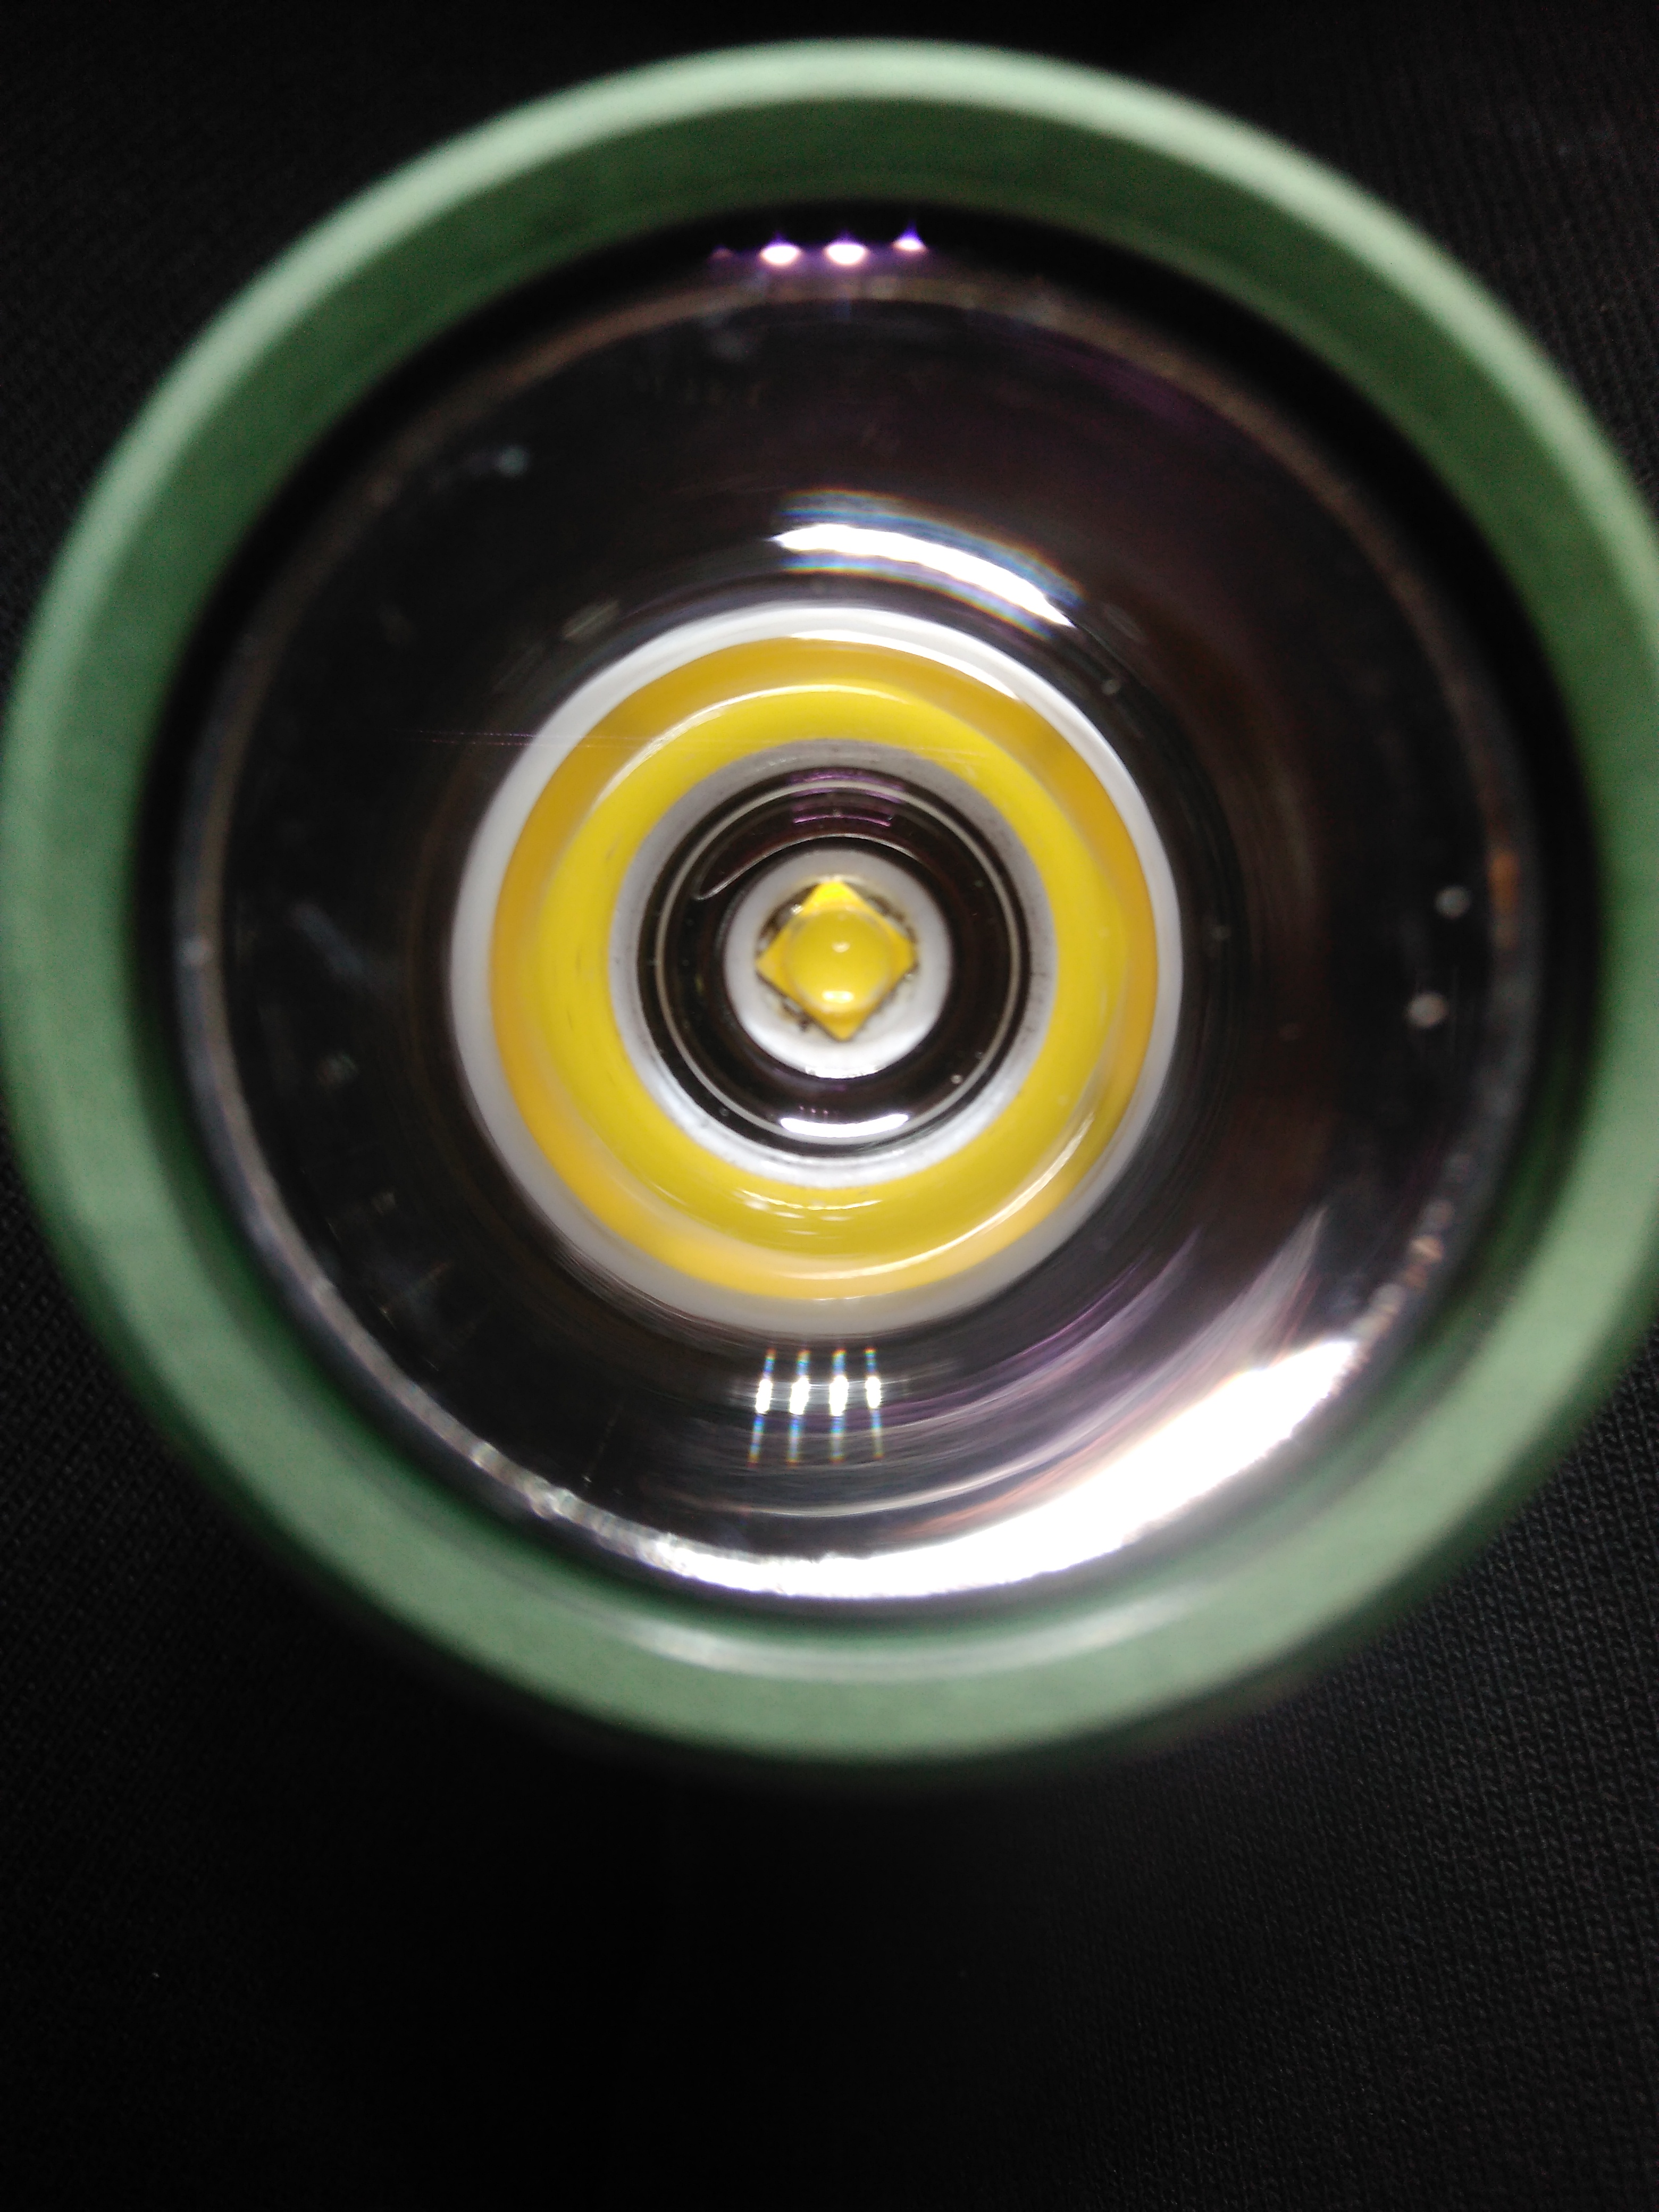
Fixed my Sofirn C8F (old version) today.
Changed dead XP-G3 on aluminium MCPCB with XP-L HI V3 3C on copper DTP MCPCB.
First time I reflowed more than 1 LED on 1 board. :innocent:
I don’t have anything good enough to heat mcpcb this size to right temperature, so I had to use electric stove and laser thermometer to get it right. :person_facepalming:


This is just flux marks, I cleaned them later but forgot to take a picture.

Moon

Low
Dust is on outside of glass, didn’t see it until now…
I don’t have good enough camera to do beamshots ![]()
Now this is what the tool AA should be!
Good job!


