Good experimentation :+1:
gchart, little late reaction but I was thinking about that too, since I don’t have a 3D printer I didn’t do anything with the idea till yesterday.
I needed a 3D print for my soldering microscope and I had to make a 3D drawing for it and found a shop in my area who could print for me, meanwhile I also make 3D model for the button, shop didn’t have clear filament so asked him to print in any color to test.
I don’t know if this is category mods, but here it goes.
EDIT added the file to: Convoy S2+ metal button replacement for lighted tail cap. by Sp4wN - Thingiverse
I picked up today and print was not really successful the thin part where the gasket comes was a mess, it is a small object after all.

I did trim the print and it works in my S2+

The guy who printed for me asked if I could add some pillars to it so it makes the print sturdy while printing, thus I added some side supports for inner side, if it is printed I will cut those supports.
Since it is only 12 minutes print, he will wait till he has something else to print and print this afterwards.
Here is the new model:

If it goes like this, I might buy a 3D printer….
He should have used “add supports” in slicer to make it print right.
Can you share with me both files so I can print and test it?
Sure XXX-Man, I don’t want to upload it somewhere since it is not fully tested, but I will PM you right now so we can exchange email addresses.
You have PM ![]()
I will print it as soon as I get files ![]()
You have got mail with files ![]()
Here it is ![]()
It fits good and on first try.
There is some work to remove supports but it’s not hard.
Settings I used:
Resolution: 0.1
Initial layer: 0.2
Infil: 20% (you should use more IMHO)
Supports: yes
Print time: about 5 minutes
You should post it on thingverse ![]()


Sorry for some weird color on pictures, my phone doesn’t like white LED strips ![]()
That is fast XXX-Man! Good work guys, that looks marvelous!
Nice, thanks for testing ![]() did you print v2 with supports?
did you print v2 with supports?
I will post on thingverse for sure, I will wait till I get mine transparent printed, so I can add some photo’s.
Meanwhile if anyone with 3D printer want the file let me know please.
Thanks djozz ![]() now I am almost sure to get a 3D printer in month or 2…
now I am almost sure to get a 3D printer in month or 2…
I would suggest printing in transparent colored filament.
Normal transparent looks kind of white when printed and doesn’t match my sand S2+
No, I printed V1. Sorry for not being clear.
I just selected “supports” in Cura to make them. I prefer slicer making supports.
You can use my photos if needed to show for now.
Thanks XXX-Man, I think best filament would be smoked transparant for the black buttons.
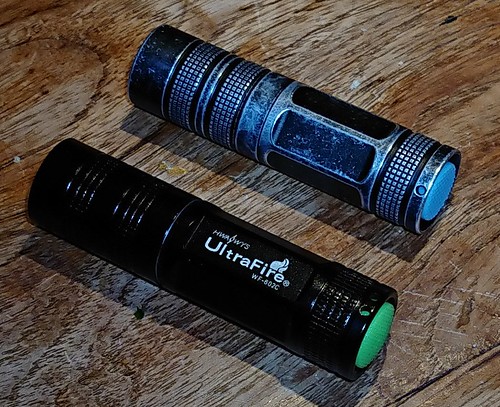
To make me feel better after a disappointing mod this morning, I refurbished an old abandoned 16340 EDC. It looks pretty worn but what is appealing is how small it is, virtually the same size as a EagleTac D25C.
It had a dedomed 219B 4000K and a 8x7135 AK-101 driver so it was nice already.
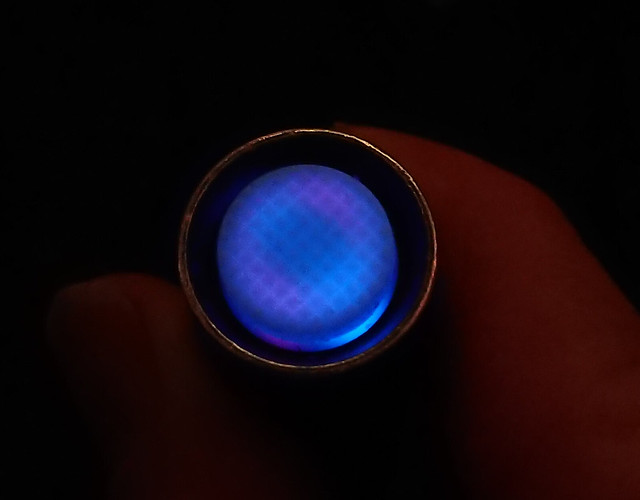
I changed the led for a 219B V1 4000K R9080, the driver for a BLF-A6 driver (added a 750 Ohm bleeder resistor), and I added a lighted tail with blue and red leds and a light blue cover. I had to decrease the diameter of both the switchboard and lighted ring to make it fit.
It does 500 lumen at startup, 400 at 30 seconds, so it has considerable heatsag. The 40 seconds fixed stepdown of the BLF-A6 driver is about appropriate. The tint and beam: :heart_eyes: of course.


cool!
![]()
Cute! Looks kinda like a shrunk-down S5.
It really looks beautiful with this worn ano and blue blue switch. It reminds me on my beloved 602c triple 219a. It was my favourite light to this date!
I would love to get one of this host for a new build but can’t find one anywhere. Especially blank like yours.
I know the feeling of failure/dissatisfaction/disappointment of mod or build. It really hurts :cry:
Looking great djozz :sunglasses:
Not sure if there is one.
I’m still new to 3D printing, I only have printer for 2 weeks.
This light is similar but quite a bit smaller even than the 602C. It was for sale for 8 dollar at Fasttech for some time and then disappeared. I modded one for myself and gave one away. Of course it can not soak up a lot of heat before overheating, but with some hand-sinking it can maintain 300 lumen.
Hmm you are right, there is not much, here one store: https://shop.3dfilaprint.com/filaprint-pet-g-black-transparent-175mm-3d-printer-filament-10939-p.asp but the example does not look transparent.