I wonder if this light would be more useful if each head was mounted on a ball mount so they could all tilt the same direction. That way you could get all the light one target off to the side. Or you could spread the beams slightly for a more area effect.
Very interesting light, with lots of potential for light painting art due to the moveable heads. Thanks for the review!
Max beam distance?
Two triples and two HI’s.
So we can turn on only the two triples for flood.
Or turn on only the two HI’s for throw.
Or turn on all 4 heads for max output/flood/throw.
I was hoping you like the idea… because I know you can do it. ![]()
From what I’m seeing we can turn on 1/2/3/4 heads separate or combined in any combination, so the driver is right for it. I have (recently) been looking for a driver that can do this for the BST, the NAGE clone was real close, but it only does 1/2/4. (I needed 2/2/4)
But making proper triple spacers to fit the heads wasn’t lookin good for me. After the past month trying to find a light or driver that worked like this I was kind of shocked when I saw this.
How do you scroll through the 5 levels? Taps or long press? Does it scroll through 5 levels and OFF for each switch pad?
Also is there a shortcut to all 4 heads ON? Or would you need to circle around and press each button for that?
I can’t hear the audio on your video, and can’t really tell what you’re doing with the switch…(but I know it was just to show the display)
The center pad is on/off, long press for off once on. It also controls blinkies through a double click, single clicks once in the blinkies menu scrolls through the blinkies, double click goes back to normal operation.
When on, the 4 arrow buttons turn on/off the 4 heads, the arrow pointing back to you is the top head, the arrow pointing away from you is the bottom head, left and right are left and right. If you’ve turned off any heads and turn the light off, when you turn it back on all 4 heads are back on by default.
So you can scroll through 5 modes with only one head, or any combination of the 4 heads, but the menu controls all heads simultaneously in any combination. So you can’t apply a different level to different heads in other words.
So click the center switch to turn the light on (if not locked out) It will come on in last mode memory. Scroll to the level desired, select which heads you want working while on. Turn it off in level 3 of 5 with only one head working and when you turn it back on it will be on level 3 of 5 with all 4 working.
When they sent me this, I was told it was the only one. More samples were being made for testing, but I haven’t heard what the status is on this.
Tell you what, spread the 4 heads at about 1/3 of their range to divide the spots and hit Strobe, MAN! Twist it in slow circles while it’s Strobing like this, pretty wicked stuff! lol
The individual reflectors appear to be approx 21mm in diameter and 21mm deep. The spot provided by these is pretty nice with low spill and no artifacts. There is a SS bezel on top of each glass lens, no AR coatings on the glass, so in theory it would be possible to open each head and gain access to the emitter’s as with the Terminator. I haven’t disassembled anything to date, only put the cells in it. It has built in charging and seems to function well so I’ve used this a couple of times and used an external charger a couple of times. The display window at one point showed 4.15V, each cell was at 4.16V on my MiBoxer C4-12. So the display readout seems pretty accurate.
I intend to see if the tail cap is glued on, perhaps do a spring bypass on the negative springs and see how it acts…
Wow this is a truly unique and innovative light. With mods (if moddable) as mentioned above, this would make for a super practical light that can be used in so many different scenarios.
Do we have an estimate of what the price will be?
Just looking online a see a price range of $145 - $155. That might be msrp. Or at least close.
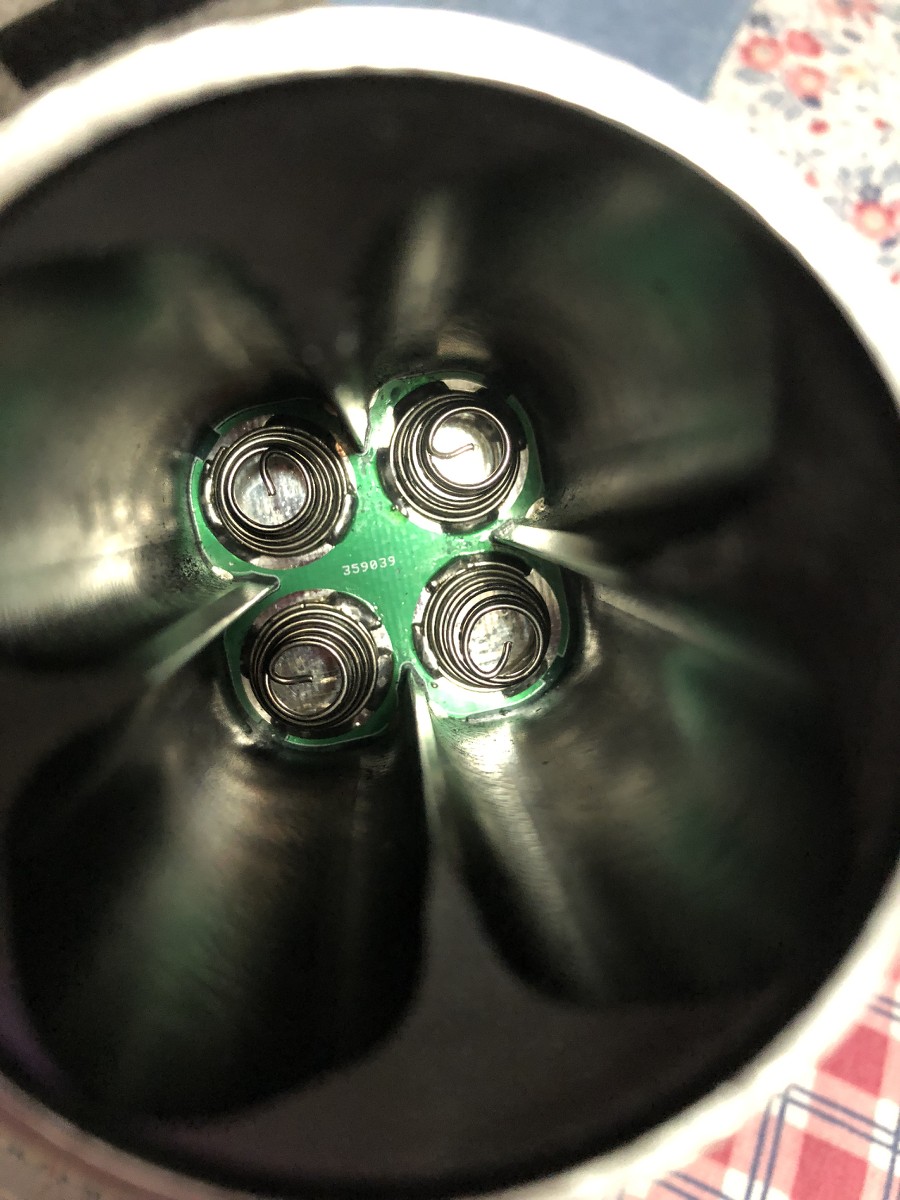
This sample has been tested extensively, as seen by the condition of the battery contact side of the driver…
I can’t budge the tail cap, I have large strap wrenches and gave it a pretty good go, got my neck hurting, but nothing doing. The springs on the tail pcb are large and long, would benefit substantially from bypasses I’m sure…
Will do more testing of all kinds before I try to break in… one of a kind and all that it is. ![]()
Remember, a little bit of heat might melt the glue without harming the light.
Those tail springs definitely need to be bypassed! What were they thinking? ![]()
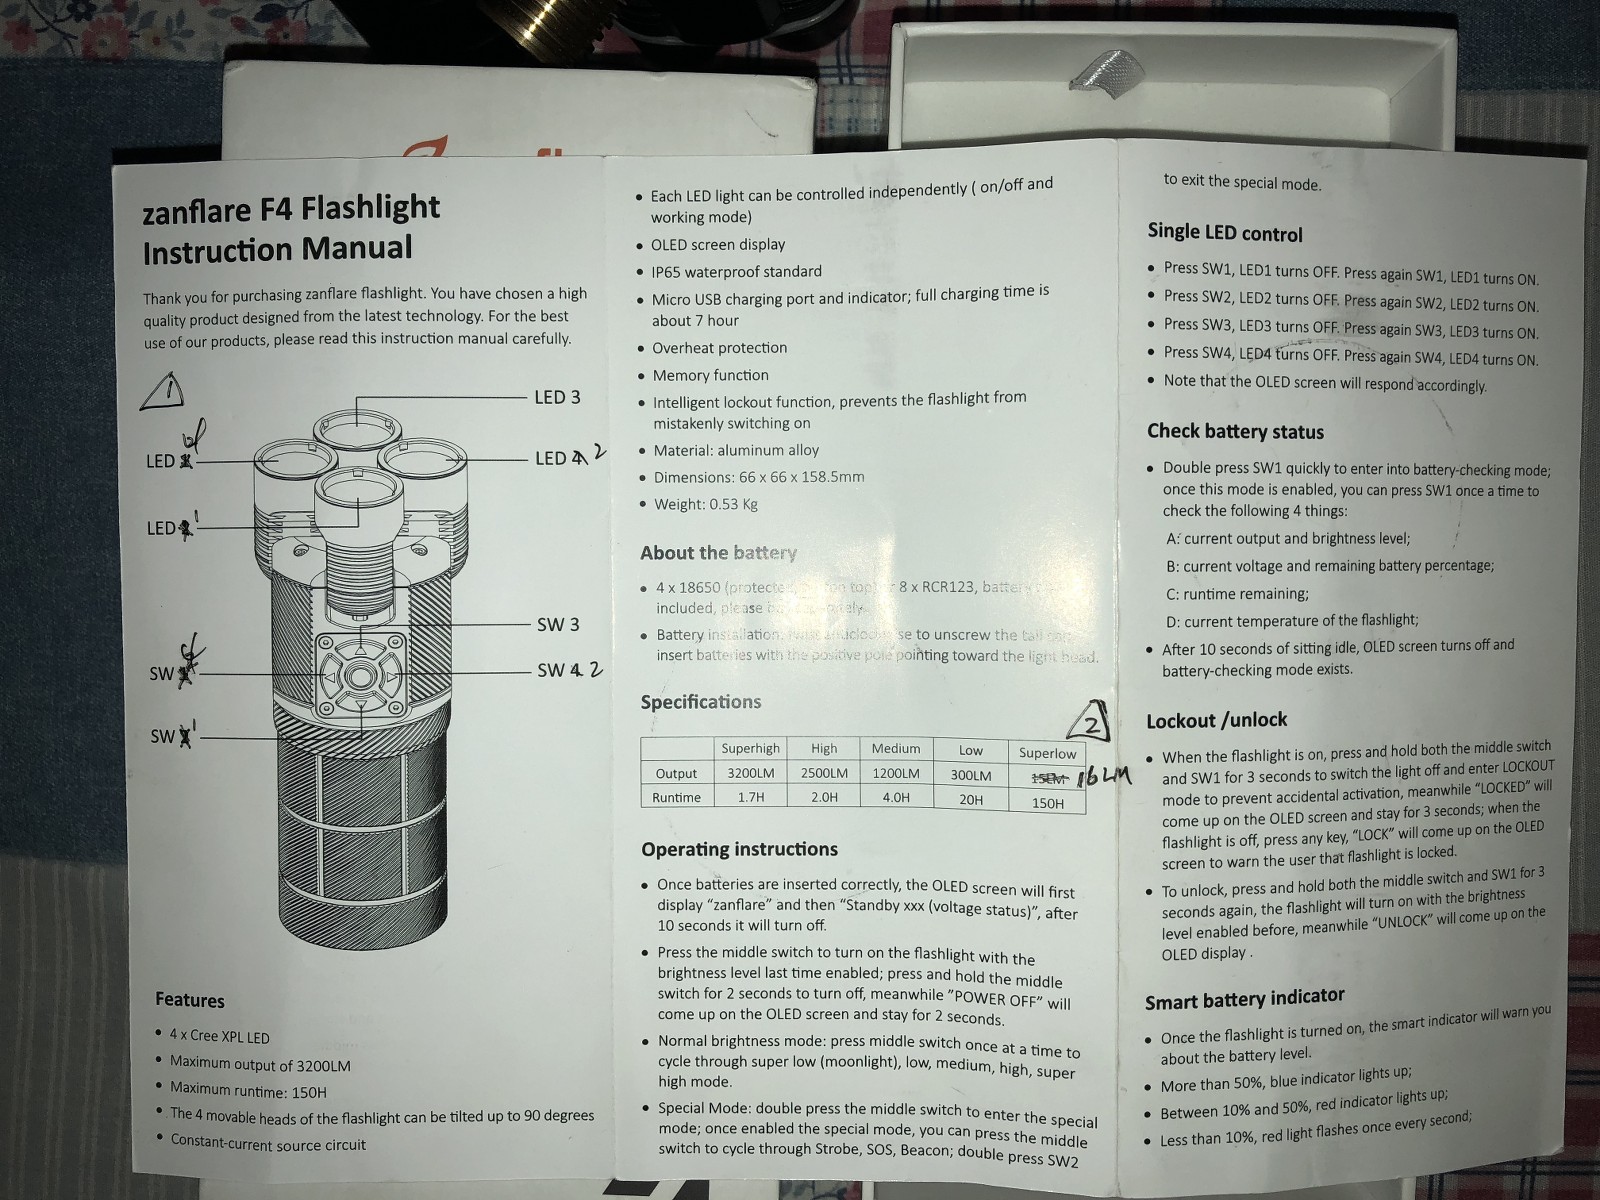
Like Jason says, that pricing is only visible in one or two places and probably MSRP, I certainly wasn’t given any idea, wasn’t even given a UI manual! The box it came in was fitted, but it was done by hand… a neat job but they seemed worried it was sub par and ensured me emphatically that the packaging would be much nicer on the production light. Never seen anyone so worried about the packaging on a prototype/sample/test light….
Edit: OR WAS I? There may be a manual with it here somewhere, now that I get to thinking on it, will see if I can find it….
Right David, but I’m not real good at doing things in little bit increments. ![]() hahahahahahahahaha
hahahahahahahahaha
On 4 cell parallel lights like this, I tend to completely remove the pcb with springs and solder better springs with bypasses directly to a thick copper disc, screw that back in for maximum ground. Don’t see the need for traces on a pcb at that junction, but that’s just me probably.
I never thought about that! Who needs PCB when you’ve got the option of solid copper sheet? I might have to mod my Q8 a little… just… a little… :smiling_imp:
Good, so for a flood/throw hybrid mod you can revert from TWO ON to ALL ON by turning off, then back on again.
.
The BST reflectors are aprox. 26mm diameter, so the Zanflre’s smaller heads may be easier modding for 2 triple heads with available parts: spacers, mcpcbs, optics for Convoy S series or Jaxman E2L.
Sorry for off topic but do you remember what it took to get the tail cap removed on a BST? I haven’t tried anything yet but I’m hoping a heat gun and strap wrenches will do it. I need to run bypasses and also look into doing your copper disc mod.
beam0, I’ve had it off as the springs are bypassed but I can’t budge it now. Pre-surgery and post-surgery, guess I’m a wuss now. ![]()
David, I put a solid copper disc in my Q8 and soldered the springs on, then screwed it down with brass screws. Had it really singing! Sold it though, to fund something I really really wanted…. and so it goes.
Tested it with the cells that were sitting in it when I sold it, sent the cells with it, it was making 10,902 lumens out the front with SST-40’s.
Thanks, at least I know it’s threaded.


