Very nice :+1:

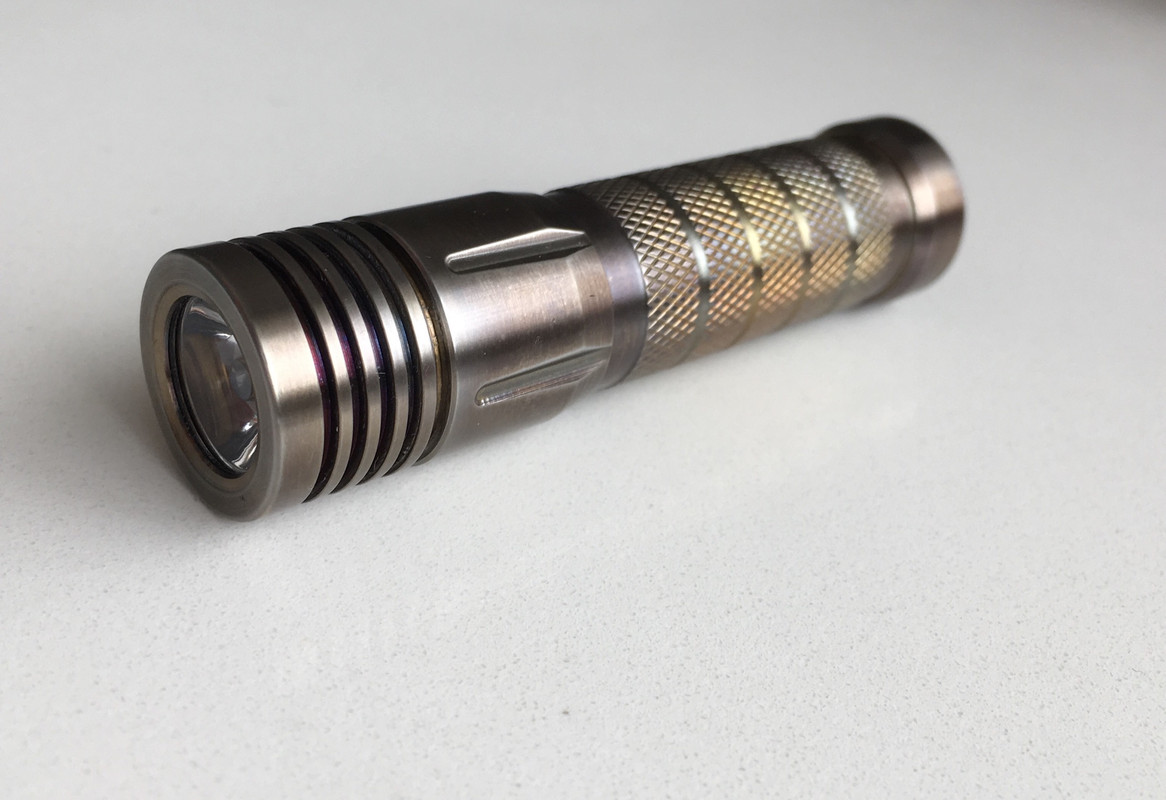
I reflowed a Nichia 219C D240 4000K 90+ CRI emitter onto a DTP copper MCPCB and put it in a “Forfar” derivative of the Thorfire VG10 I picked up on Amazon for ~$6.

I didn’t change anything else. The light came with a buck driver. The modes are well spaced, and the UI is acceptable with the forward clicky the light came with.
The most time consuming part was fitting a centering ring and getting it focused. I ended up with the stock XM-L ring, a small 3535 ring that fit inside, both lapped down. When that produced an ugly brownish spot in the middle of the beam, I built it back up with, ultimately four layers of kapton tape.
I’m really happy with the result.
The host is great. The only flaws are a divot in the center of the top of emitter shelf and the low-low-budget logo. With the copper MCPCB and modest power (~10W) I was content to fill the divot with thermal paste. As for the logo, unfortunately, they popped for the cost of laser engraving, rather than just printing, so I’m going to have to take off a bit of aluminum to get rid of it.
This is my third Nichia mod, and my second 90. I have 10 more 80 & 90 219C and 319A emitters, plus some 219b coming, so it won’t be my last.
Thnx! Its a fun way to change to a different look. Always liking the look of your graphite/resin mods also.
My triple SST-40 build is slowly inching forward. In retrospect, I’d have been better off rotating the sinkpads to make the electrical interconnects easier. At the time, though, I was more worried about having to get them aligned properly again.
I’d also have been better off going with my first pass at the interconnects, because I’m sure they were good enough. Instead, I went chasing some mercurial notion of “better.” I’m not even sure what it was — maybe, in part, ~equal-length circuits through each emitter?
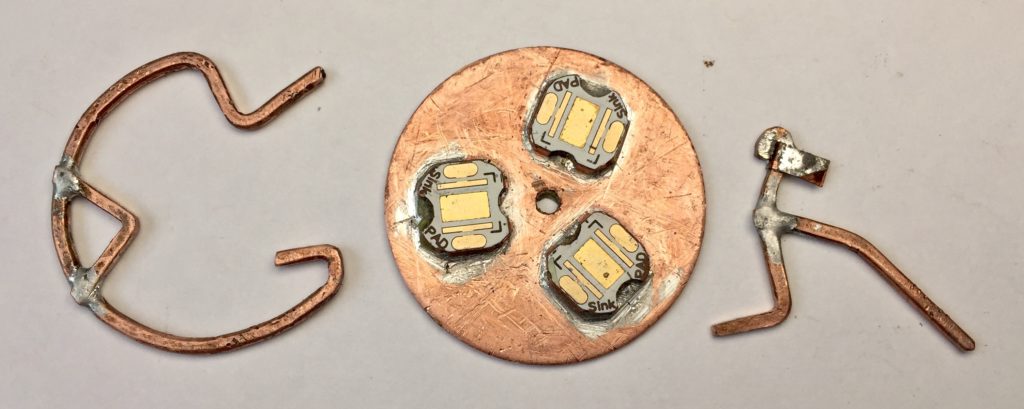

In the end, though, I hoped overkill would be good enough and used the solid 14 gauge conductors from scraps of residential electrical wiring.
To finish up I need to solder copper strips to the big conductors, dip them in epoxy or something for insulation, and then solder the strips to the MCPCB contacts and pot them onto the copper backing disk with some JB weld so I can reflow on the emitters.
Then I’m going to have to figure out and fabricate a spacer. I’m thinking some copper plumbing pipe, probably stuffed with lengths of coper wiring scraps running parallel. I’ll pot it with epoxy and then file and lap the ends flat for good contact with the MCPCB on one end, and the host body at the other.
Wow eas. That is a lot of miniature work there. Looking forward to seeing the rest of the build/mod. ![]()
Good experimentation there though I think you might revert to the dual ring variant.
There is a triple 5050 PCB available from oshpark that might be able to be beefed up a bit but maybe not the right size for you.
https://oshpark.com/profiles/scottyhazzard
I’ve been thinking of a small triple SST-40 too, I like them ![]()
I really wish they’d come out with neutral tint SST-40.
A nice 5000K. ![]()
A dual color temp ramping C8 Triple


Here is a proof of concept on the bench
and in action in the final light. I have since fixed the ramp since there is a tiny overlap between the two channels and it looks a ton more natural.
I think this video has the correct ramp in it. I made it for those unfamiliar with Crescendo
Staticz, nice build! But i can’t access your links
Plus one.
These should work
Awesome! I wanted to build something like that, triple with 1 red emitter and 2 white emitter. What driver did you use? Could you give some detail please? Thanks.
This is a “CWF Dragon” which is a FET+1 but instead of combing the two channels it has a separate pad for the 7135s. I then customized Crescendo where the ramp of the two channels isn’t completely parallel and the 7135 channel ramps up and then off then the FET channel ramps up and max. There is a couple frames of overlap between the two channels as it looks a bit odd with the hard switch to the FET channel from the 7135 and vice versa
In the process of changing the LED’s in a Tiny Monster TM16, took some fitting of 4 individual 20mm MCPCB’s and then I got em glued in with JB Weld (out of Arctic Alumina Thermal Adhesive) So tomorrow I will wire up the 4 XHP-35’s in parallel and see where it’s at. Should be considerably brighter with a tighter beam profile from the HI style 35’s. I aim to try keeping the thermal resistor in there somewhere so the stock driver functions as intended, will see how that works out.
I did this once before and was seeing around 7200 lumens, the TM16 comes with 4 XM-L2 in series so replacing them with 4 XHP-35 in Parallel actually works out pretty well. (or it did before, hope it does again. lol) In stock form with the XM-L2’s it’s making 4170 lumens with a semi-large hot spot.
Being forgetful as all get out, I had the MCPCB’s fitted and glued in before I realized they needed emitters on em. Sure would have been tough re-flowing the 35’s onto the bare boards after the JB Weld set up! lol :person_facepalming:
Yikes!!! :smiling_imp:
Quick and dirty inspired by djozz:

It’s 8 gauge solid copper “wire”
Tested w/ a LED4Power 12A driver and got 11.5A - I think that’s accurate enough?
Since I have to help my Aunt in the morning, I got the TM16 assembled this evening. Quad XHP-35 up and running, thermistor has glue drying to hold it in place. I really don’t enjoy soldering leads on those tiny things!
I have Convoy XP centering rings on the MCPCB’s at the moment to help hold pressure down onto the still setting MCPCB’s, those will either have to be shaved or removed to get proper focus so I know the beam isn’t correct as it stands, but it sure is bright! ![]() I’ll try it in the lightbox before I go to bed, give the dollop of JB Weld some time to set up on that little thermistor before I upend it into the box.
I’ll try it in the lightbox before I go to bed, give the dollop of JB Weld some time to set up on that little thermistor before I upend it into the box. ![]()
Ow the famous Dragon as I predict… unfortunately Charles didn’t sell single driver, 5 driver per lot which is very expensive. Very nice job anyway, and definitely sound complicated .

