They made everything locate off of everything else, the slots for the wire contacts, the hole for the screw that holds the MCPCB and reflector together, it all key’s together nicely. Even clears 18ga (but yes, keep it neat)
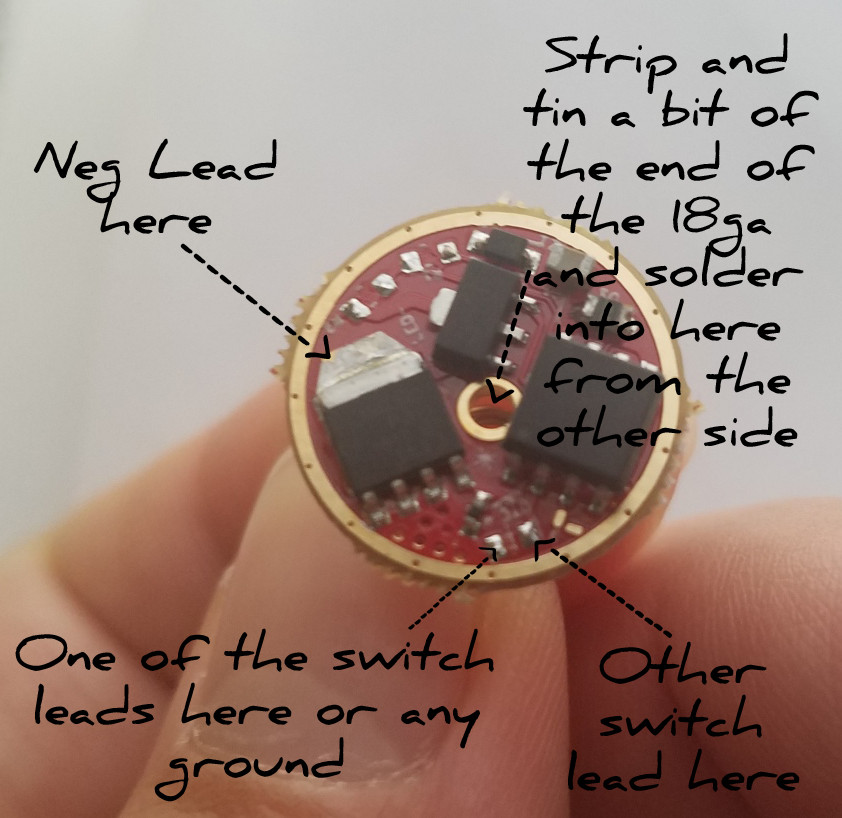
Run the wire from the MCPCB and leave em both long, run em out the end of the head. After you put the screw inside the head to snug the reflector/mcpcb assembly into the top you can then cut off and strip the two leads for the driver. Just tin the stripped end of the positive and solder it into the via. Solder the black one onto the pad, solder the switch leads to the driver, then sort of twist the driver/wires assembly down into the hole so the wires lay down in there. Press the driver into position and hold the end of the spring while you start the retaining ring. I like to hold the driver down in place until the retaining ring bottoms out, then watch that you don’t spin the driver too much more while you snug the ring down. Voila! Il Monstro!
Edit: You can use a screwdriver or pair of tweezers to wedge into the spring at the driver so it spreads open enough for you to get your soldering iron inside the spring, solder the 18ga wire into the via from inside the spring on the spring side, that way you won’t contact any components.
Richard should have both, I bought the 2” wide roll from Richard a long time ago, I cut a square piece off (2” x 2”) and overlay the entire base of the reflector, then use an XActo knife to cut out for the screw or emitter openings as applicable.
I like to use Arctic Alumina Thermal Adhesive, if you ever have to remove it you can heat it up with a hot air station or hold the soldering iron to the board and once heated up you can break the bond. Arctic Silver Epoxy is more permanent, similar to JB Weld in it’s tenacity.
Looks like Richard is out of town for the remainder of the week. I appreciate the links! I didn’t realize he stocked Kapton. I’m going to put in an order for the tape and wires… and for the time being, use 22ga and some Arctic Silver Compound to mitigate heat until I can get it set up just the way I want it. Hopefully I’ll get to post some beamshots tonight between it and my “regular” C8.
Oh and thank you big time for showing me where to connect everything!
Based on ability to transfer heat? I asked the same question last year: ” Thermal Adhesive vs Thermal Compound”:Thermal Adhesive vs Thermal Compound
As far as removing the MCPCB again later on down the road, definitely grease would be better for that. But I rarely go back and swap emitters once I build a light just the way I like it, so I just glue them assuming that it provides better heat transfer.
[quote=Yourrid
Based on ability to transfer heat? I asked the same question last year: ” Thermal Adhesive vs Thermal Compound”:Thermal Adhesive vs Thermal Compound
As far as removing the MCPCB again later on down the road, definitely grease would be better for that. But I rarely go back and swap emitters once I build a light just the way I like it, so I just glue them assuming that it provides better heat transfer.[/quote]
I needed to diassemble completely 3 times my Sofirn C8F modded light head because I got a faulty led.
My emitters. XP-L2. Two new and one used before. The one bad was at moon level even at turbo with the other two. Disassembled the light and reflowed again. I thought it was bad soldering. Outside of the light it was good. reassembled and worked for a few times but then moon from one led again. Disassembly and that one led only worked good if I pressed one corner of the dome. So it was some internal fault. Replaced with new led and now it is good.
This light has a screw that sucks the reflector down snug into the head, pressing the copper MCPCB tightly into the shelf… some thermal adhesive should work fine. Later, when you’ve gotten the larger wires and have it all figured out just exactly what to do, you can finalize it…
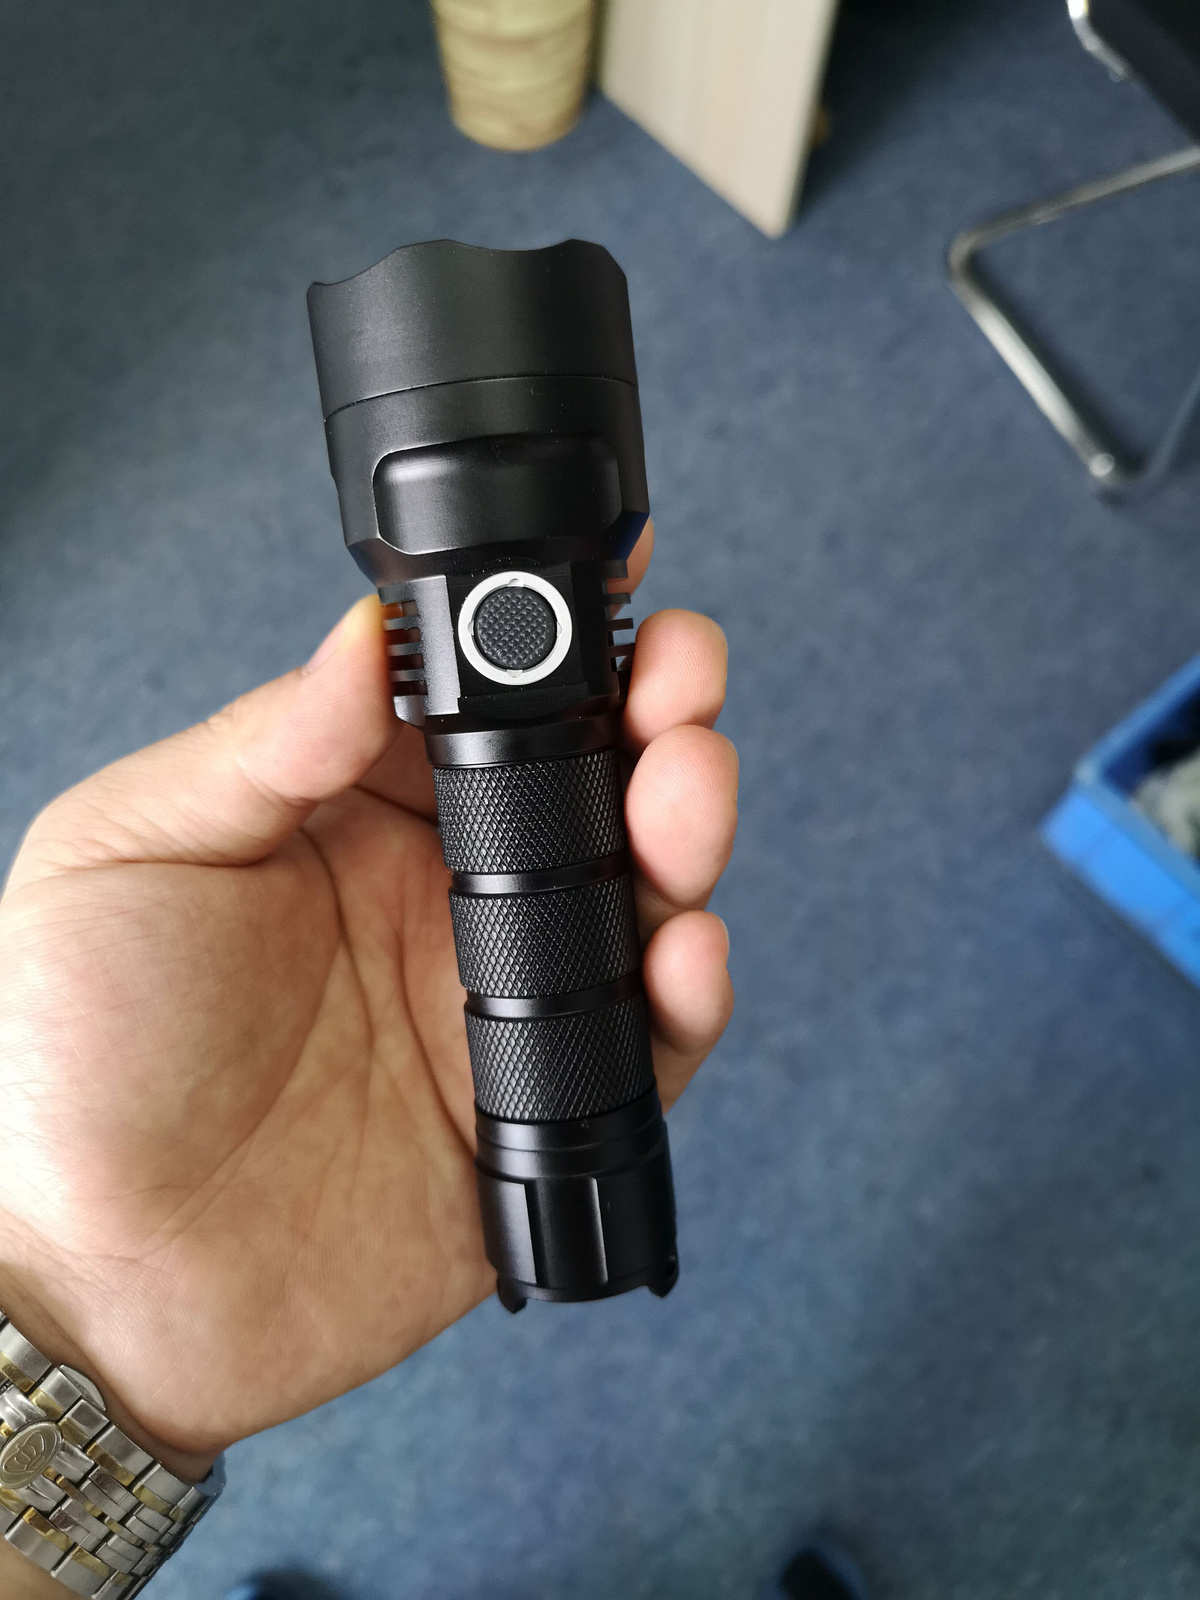
Of course I hoped that they abandoned the ‘C8-styling’ of the head and came up with a fresh new look, but they did not. It is exactly a C8F with 21700 tube and rather ugly tailcap design (very chinese to ‘stick to what is there already and sold well in the past’ ).
That said, the whole has a balanced look, the 21700 size suits the C8 head size better than the 18650 size did.
This looks nice, but I have to agree that they need to ditch the shiney anodizing. It looks cheap. The anodizing on the 18650 version is perfect. A flat/satin black finish with that sort of chalky powdery feel. I also agree, that tail cap is slightly disappointing, I just hope it can tail stand!
Completely agree the shiny anodizing makes it look like cheap bargain flashlights. The flat on the C8F looks alot better. Clear anodizing option would be nice too in the future.