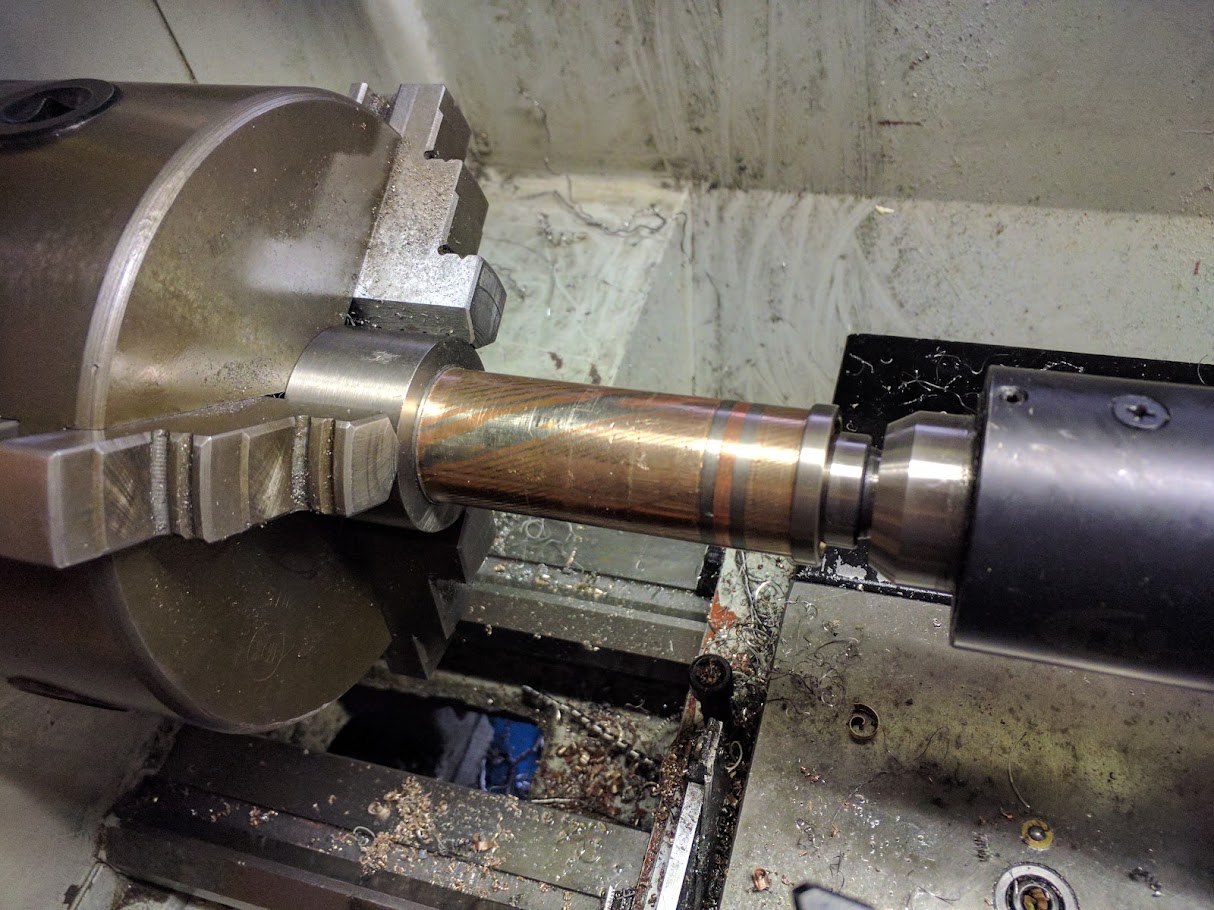
As illustrated here, this reduces radial stress a lot:
Have you tried HSS? General purpose carbide tooling tends to have some intentional cutting edge radius, this is okay for steel and high speeds but since both Cu and Ni work harden like crazy I’d go with the sharpest tooling possible, plus both Cu and Ni need a sufficiently positive rake angle* (>15°) so hand-ground HSS tooling might work better that GP carbide.
*The internal inserts are 15° positive I think which might be enough, but I’m not so sure about edge sharpness.
And what Kirill says is worth consideration, although grinding away copper will gum up any disc pretty fast and I’m not sure how I’d tackle milling an internal thread with a rotary tool in the toolpost, that would be hell to set up.
But… if you have some liberties with thread shape etc there’s a way I’m sure.
Aah yes, the ‘relaxing’ of metals. I think I read about that once but forgot all about it. I will think about how to do that without using the kitchen oven (the missus will have a fit).
I’ve never tried that threading method though I have seen it before too. Lots of advice there, cheers
It seems i’m back on that steep learning curve. Thanks for the help guys
Well, the “relaxing of the metal” aka “annealing” is done a lot differently for different metals. Steel is done like Kirill suggested above. But IIRC, Copper is annealed in a quench, which ironically is how steel gets hardened. Just heat cycling Copper doesn’t soften it. For other metals, it might be another method. So, you need to know exactly what’s in your Mokume-gane blend, and search for annealing process for that specific blend. It may be that the two metals in your bar are enough different in how they are annealed that effectively annealing the bar is impossible. Hopefully not.
I also stumbled upon the fact that Ni irreversibly forms very brittle compounds with sulfur at higher temperatures. If you plan on heating those pieces for annealing or stress relieving and are unsure whether there’s microscopic cracks, you might want to check if your cutting oil has high sulfur content (many GP cutting oils for steel do). Once it’s in such a crack, it’s probably in there for good.
Now that I’ve finished DavidEF’s build I can work on this again. Tadaah -
It still needs a bit of clean up and I can’t do much about the cracks on the front of the bezel but I reckon I can salvage this now The ti rings are press fit with epoxy. While I was waiting for the epoxy to cure I played around with one of the excess bezels for a different finish. I first put in on the wire wheel (on the bench grinder) then rigged up a vibration container half filled with broken glass and left the part in there for about 20 minutes. I’m curious to see how it looks when the copper patina’s up. I will not be doing this finish to the above light.
Unfortunately the front end (where the split was forming each time I cut off a piece for a bezel) just … kept… on………splitting It gives me some idea that it was the pressure from the chuck that caused this.
So I had to fit another hoop to the body.
At this stage I’m expecting this split to run from head to tail by the time I’m finished I can’t not make the light now. I feel like it’s a mental battle with myself much like a marathon runner who just wants to give up but can’t on principle
I cut some small threads for the driver retaining ring. 0.5mm the smallest I’ve done to date
Also made a retainer for the tail switch
I’ve been kinda busy of late so this build is going slow. I am also trying not to jump into the next move too fast for fear of messing it up even more.
Soo, true to form this light is being a pita even for the electronics. I reflowed the leds onto led4power’s mos-x board (is it called a ‘reflow’ when it’s the first time ? ) and couldn’t seem to get it right. Not enough solder paste, too much, something else yadda yadda… I reflowed the board 5 times I would check the leds with a multimeter and on the time they all lit up I thought all was good…. fitted it to the host and all soldered up - doesn’t work. More screwing around and I find that the leds ‘sometimes’ light up with the multimeter (no attempted reflowing in between). Long story short I’m wondering if it’s the mosfet that’s giving me grief. I’ll pm neven and ask him.
Very nice Pinkpanda. And you said it didn’t want to be built, looks awesome to me.
Just wondering if this is the final finish or are you going to heat treat it to bring out the two mokume colors.
Thanks guys. No I’ve got no more plans on the final finish, especially not heat treating because of the ti hoops holding it securely. I don’t want the different thermal expansions causing problems. If I get sick of waiting for the natural patina I might force it but at this stage I’m happy to wait.
Neven got back to me and suggested I do a full hook up with the driver to check the leds. So outside the pill - full hook up works > in the pill nada. Remove it, reinstall it 1-2 more times. I think I got the signal wires crossed over one of those times. Install again > switch stops working. The switch leds light up but clicking the button doesn’t change anything. The slightest pressure switches the gate. Change out the switch board. This one is also dysfunctional. Connecting while on is fine but clicking off the main leds switch to very low for a second or two then flash 3 times and off. Clicking thereafter the switch and light remain off.
WTF!!??? This light is driving me f@¢#1πg insane!
I swap the omten button on the switch boards. Connect it all up and it looks like I finally got it.
I think I prefer having to remake parts than deal with electronic issues. I can physically see what the issue is when it’s mechanical. Electronic issues I don’t understand and it’s more frustrating.
Aaanyway, light is fully functional now and I like the look of it. Might add a pocket clip one day. Will take some more pics of the finished light when I get home tonight.
Yeh, I’m glad it turned out as good as it did. Still a bit disappointed there’s a crack in the bezel but otherwise i’m happy with it. It’s pretty heavy for it’s size but that doesn’t bother me.


")


