I feel your pain pp.
The correct part looks real good. Just dont have a heart attack doing this, your to young. ![]()
I feel your pain pp.
The correct part looks real good. Just dont have a heart attack doing this, your to young. ![]()
No heart attacks. Just take it as a learning experience ![]()
One rather perforated head ![]()
I found one misaligned hole that breached the wall of another. I don’t know how many are like this. Hopefully it won’t affect it too much when I cut the taper on the head.
Pocket for driver and threaded for retaining ring

I’ve taken it out of the chuck now. Will work on some other parts before coming back to the head.
Made the driver retaining ring
Cut new threads at one end of the battery tube. You can see the old thread deeper in the tube.
Cut thread on the head for the bezel. You can see in this pic some kind of dent / mark on the inside. I have no idea how that happened ![]()
Made a bezel but didn’t cut off so I could use it as a mount for working the head

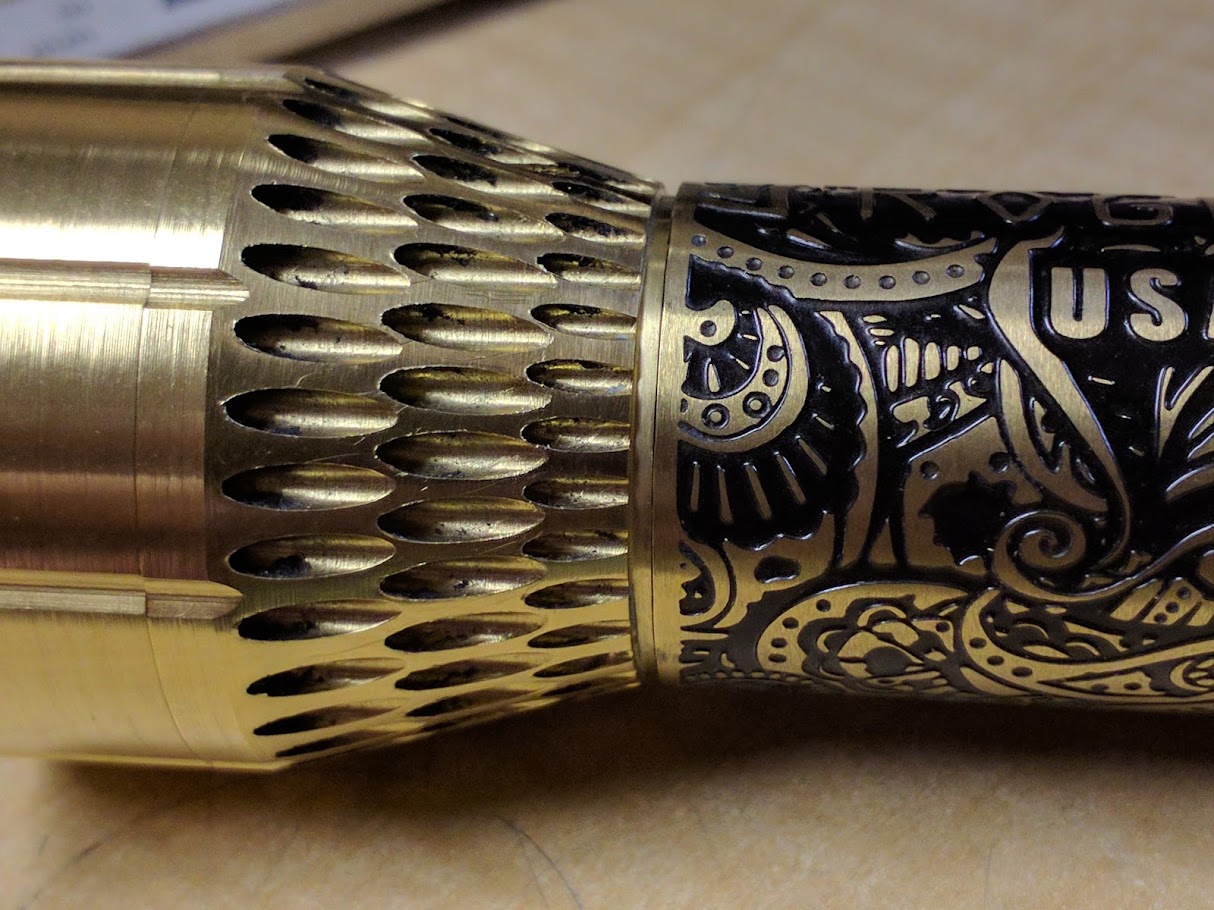
Next was the all important cut that exposed all the holes. I started tentative and the more it revealed the more I liked it. It produced some burrs which I kind of expected but didn’t know how much I would get with brass.


To clean up the burrs I tried a file but it wasn’t as effective as a drill bit and a knife. Yes. it was tedious…… very , very , ….tedious. By the hundredth hole I was starting to get good at it ![]()


Cut thread on the back end of the head and a test fit to the tube
I’m liken the look of it but I can tell it’s going to be a heavy sucker ![]()
Wow, that’s a lot of holes.
The final hole effect looks really cool, though ![]()
Amazing work!
Some nice ideas & work there ![]()
Wow, very very nice ! ![]()
Well, well, well. Very clever and well executed. ![]()
well done drilling all those holes, ![]()
what angle tip did you use on your bits
I use 135deg they seem to drill better without center punching
I really like the looks ![]() :+1:
:+1:
Amazing look! ![]()
Nice job!
Thanks guys ![]()
I did some work on the bezel. I know I shouldn’t cross a threaded with grooves but oh well. The user will just have to make sure it lines up properly ![]()


I’ve got to work out the tail section now. I’m having a good hard think about that because I have a part I want to use but it’s not so simple.
I’m really feeling this light. I too have modded my old mechanical vapes into flashlights, and have never came up with a good solution for the tail switch. Eager to see how you handle this. Keep up the good work!
Well done, PP. I’m always amazed at your creativity and excellent execution.
Thanks gchart. I’ve stalled for a bit trying to work out the tail. I have a design in mind but not sure how it will all fit together.
I have a little more to show but it’s not overly interesting at the moment. I’ve gotten past racking my brain on how to make this work and have started making it. I’ve come to the conclusion that I do not need the battery to be recessed in the tube so I’ve manipulated the head to screw a little further into the tube. I sometimes cut the driver and tail springs so they are only half as long but I won’t be doing that this time.

These two pics are the previous intended battery position and the new position (without depressing the driver spring)

I really wanted to use this button that I had leftover from another vape conversion. I did a little prototyping just to see exactly how much clearance I had to work with. It turned out to be too tight to have the contents inserted from the battery tube end of the tail cap so I’ve had to accept inserting everything from the back and having a retaining ring visible from the outside.


Prep’d the tube ready for the tail
Got the big lump of brass in the chuck again


That’s as far as I’ve gotten but at least I’ve gotten past my mental block I’ve got a plan so can hopefully soldier on from here.
Lots of holes in the end to match the head?
Yes, but it’ll only be one ring of holes
![]()
Man, you made me want a lathe ![]()