Got my light from Wallbuys at their New years sale for 28,11$. Looks nice. I might update with some “exterior” pictures later on, and how this mod will work out.
Modes (measured): 100% 50% 10%, Strobe, SOS
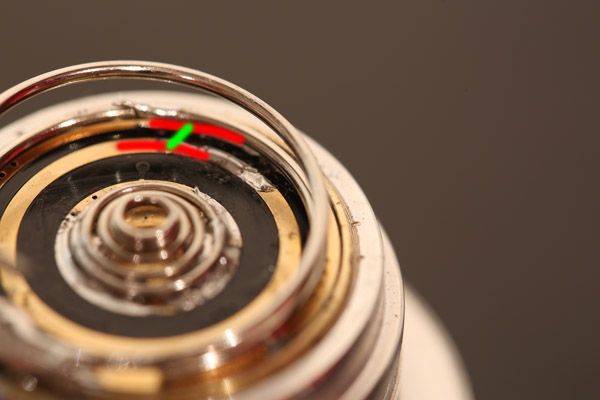
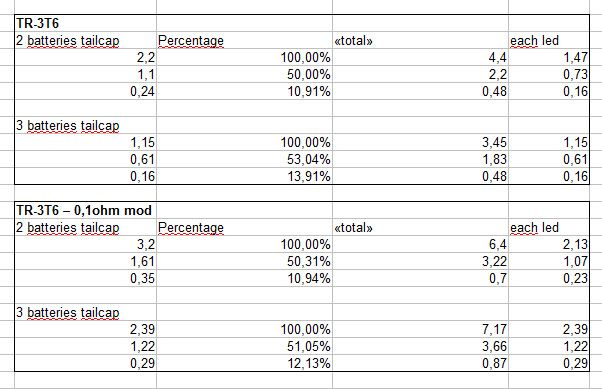
Stock tailcap measurements.
2 batteries: 2,2 amps on high. (2,2x2= 4,4 - 1,47 to each led)
3 batteries: 1,15 amps on high, (1,15x3= 3,45 –1,15 to each led)
Stock, it should be more powerful with two batteries.
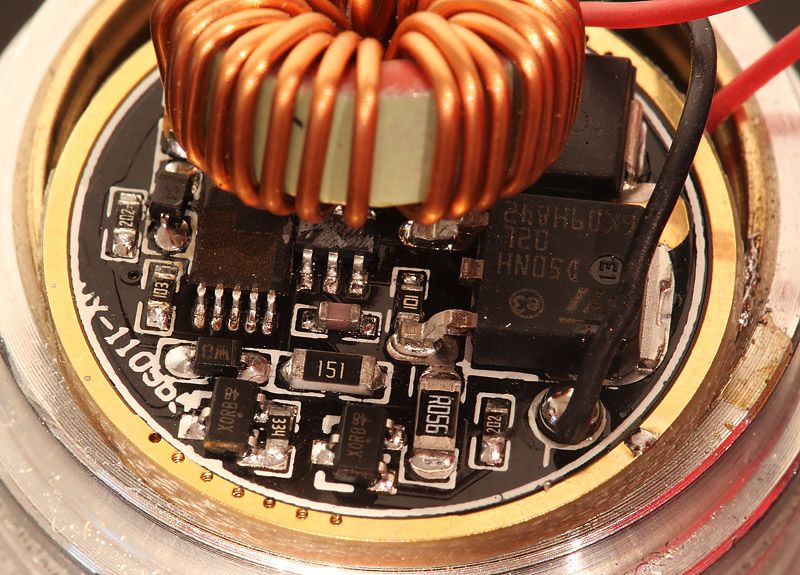
Lets see the driver:
Hmm, not the “typical” one.
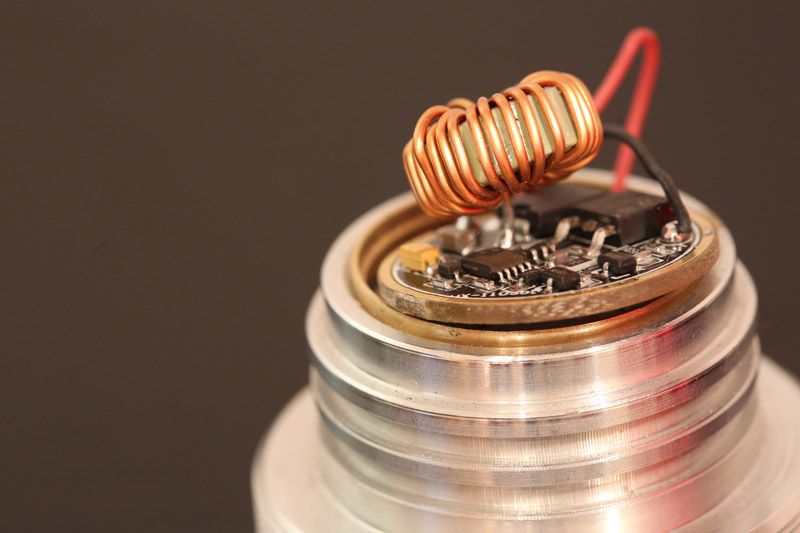
Better overlook:
My brother who works with small electronics helped me (okay, he did everything).
We/he tried som different stuff had had laying around. He had a powersupply for it, so did several tests with the light in pieces. Different resistors… To make the story short I believe he ended up with one 0,1ohm resistor with long “legs”. This is a temporary mod. Gonna see how it goes over some time.
I have ordered some neutral XM-Ls for this light. (4,18$ each when you buy 3 from fasttech. XM-Ls from this light will find their way into some colored Sipik68s).
I might try to get more juice out of it next time, and also make the mod nicer and safer. Currently, there will be about 1 month until intl-outdoor gets their 9A driver in stock. I would feel better if I knew there was a quality driver soon available if/when this will be modified harder.
I might be very close to the limit though. Same resistor with short legs did not work. Or it may be due to a short, or that it did not work to connect it to the big black thing. Time will tell if my brother experiments more on it the next time I open it up… If it has survived… :laughing:
Current setup:
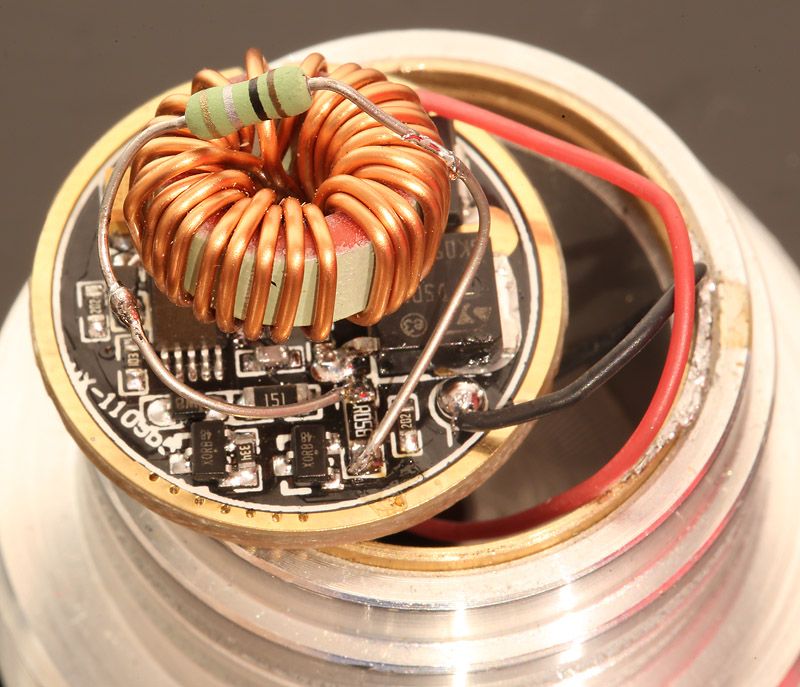
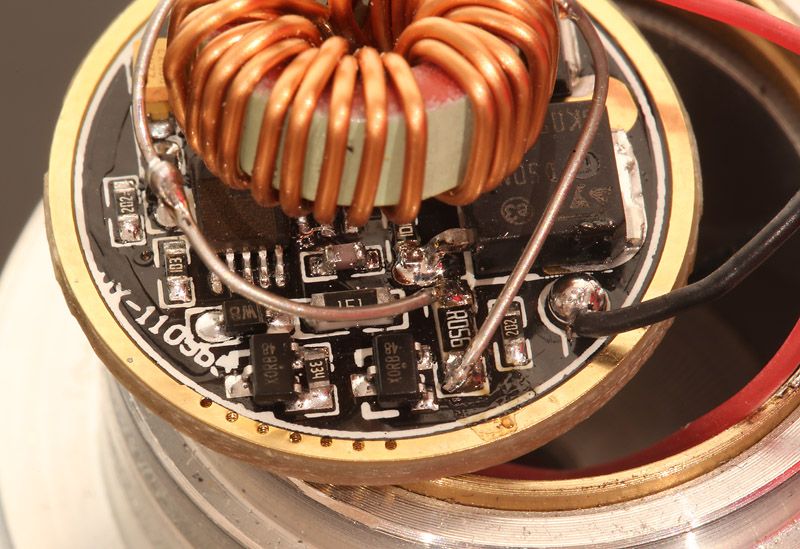
After mod:
2 batteries: 3,2 amps on high. (3,2x2= 6,4 - 2,13 to each led)
3 batteries: 2,39 amps on high, (2,39x3= 7,17 –2,39 to each led)
Now three batteries should make more light.
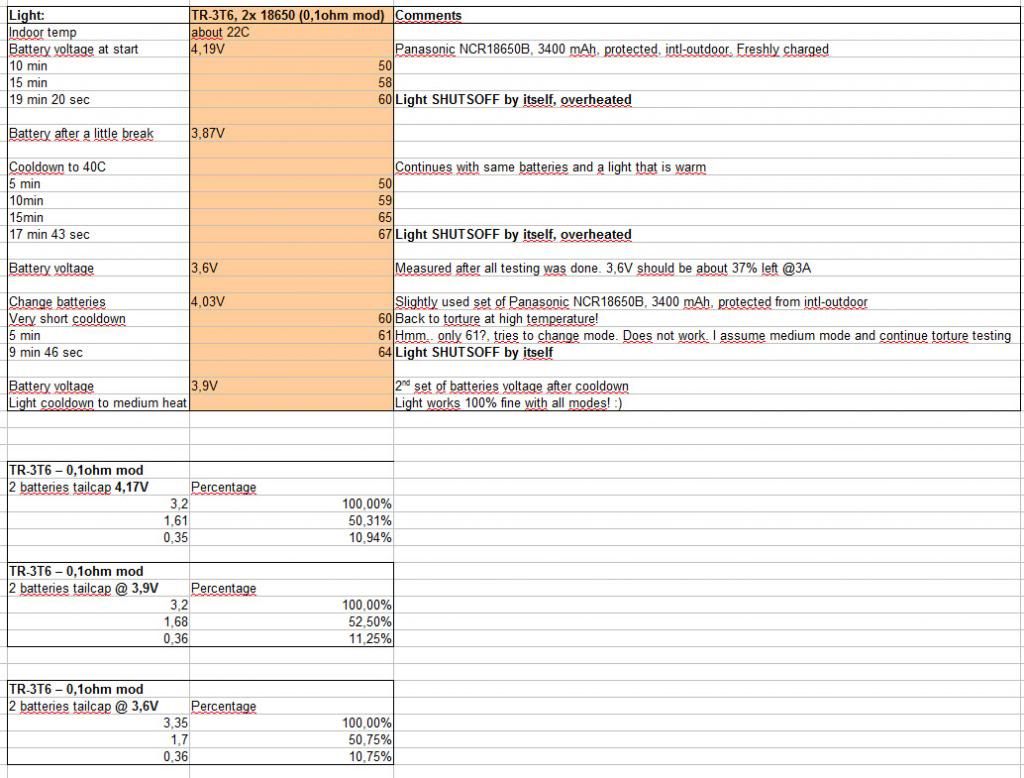
Have not tried any high temp/long runtime testing. Ill report back in the future. Especially if it dies. ![]()
For the record. 3 protected NCR 18650B 3400 mAh are a bit long so I will not tighten tailcap 100%. If I should tighten the last 1-1,5 mm I would squeeze the batteries a bit harder than I would like. With two batteries there is no problem. I might modify the light to fix the problem with 3 batteries. But I prefer to use 2, so again, time will tell…
First electronic mod done in one of my lights! ![]()
I would assume around 2200 lumen with three batteries. Not bad for a 28$ light.