Gentlemen,
Tired of always going to a party and someone else there has the same flashlight as you? Do you like bling but don't have the ching? Got an afternoon to spare? Read on...
(Quick summary: Here's how to make your own custom flashlight host using only a drill, hacksaw, sandpaper/file, and time)

Prologue: The plan here is to make a custom flashlight out of nothing more than 3/4" copper pipe and some spare parts using only hand tools, and without the use of a lathe. The end result won't have square cut threads, deep knurling, or an attack bezel, but will look like no other while being compact and have excellent heatsinking (and cost < $20 in parts).
So, the other day I was sitting around looking at my parts box. Flashlights are a fairly recent hobby of mine, but I noticed I've already amassed a bunch of little odds and ends. What better way to put them to use than to make something new! The only piece I had to buy was a length of copper 3/4" copper pipe from the local hardware store. For @$5 I got a couple feet of the stuff...more than enough to make a few mistakes and hopefully one or two good bodies. Wanting to give you folks a build that didn't require a lathe, the tricky part was going to be the head and tail, and consequently, how to get the batteries in and out. Let's start with the head:

I had in my box of wonders a brass nut. By threading it onto a bolt and chucking it up in my cordless drill, I was able to use a hand file to quickly bring it down to the correct diameter to fit inside the pipe. A dremel tool took care of the threads on the inside, and then a hacksaw separated my new bezel. This step actually went pretty fast, as brass is a wonderful material to work with. While filing down the nut, perform a fit-check every so often with the copper pipe. The idea is for it to be a very very tight fit. For example, when I was done I coated the outside of it with a thin layer of epoxy and then had to use small taps from a hammer to get it to seat in the end of the pipe.
Let's move onto the other end...the switch:
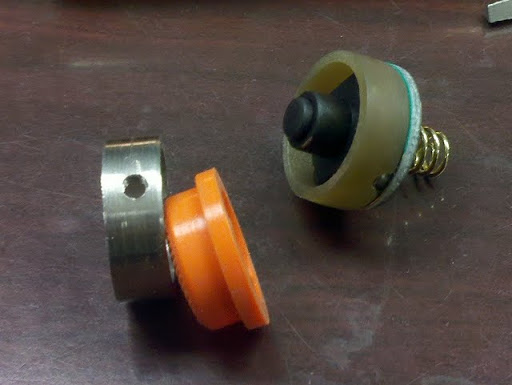
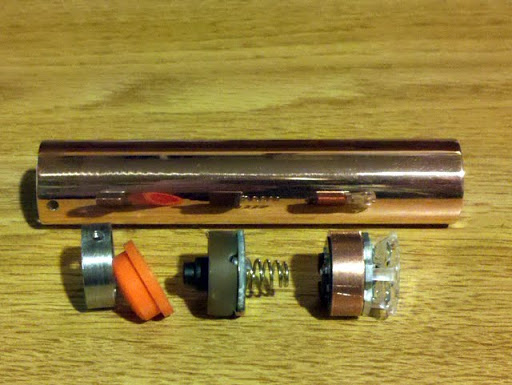
The pieces above comprise of a spare clicky switch (everyone has a few, right?), boot, and the SS retaining ring. Notice the tiny hole in the stainless steel ring...It is for a 6/32" set screw, which is how all of this is going to be put together. Unfortunately, I didn't have another brass ring, so I was stuck using what I had. That ring was made exactly the same as the one for the bezel, but took much much longer. Note that it is much wider than the brass bezel ring...this is to allow for the set screw. The brown ring acting as a spacer around the switch is actually a leftover maglite part:
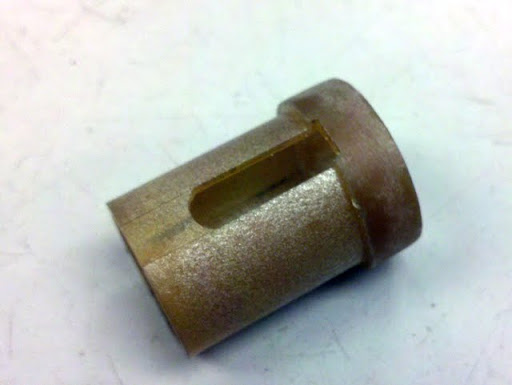
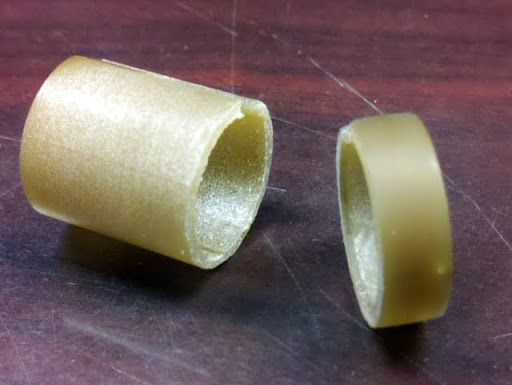
It was the leftover bulb tower off of my old C mag from one of my very first mods. As you can see in the above pictures, the part needed is the ring around the base. Once again, file the outer diameter until it slides easily into the copper pipe, then separate using a hacksaw. If you look at the picture above were it is installed on the switch, you'll see a tiny notch. There's actually one on each side, which allows for clearance around the switch solder joints.
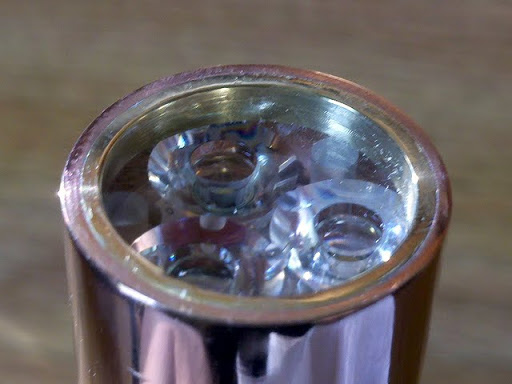
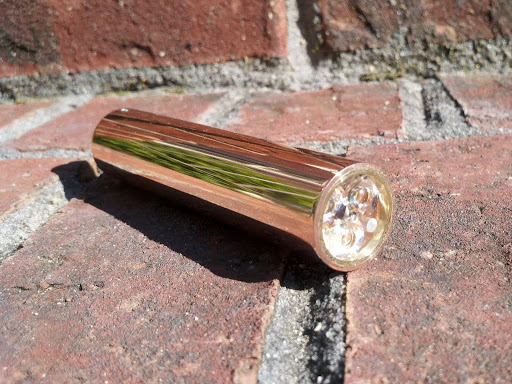
The neat thing about using the copper pipe is not only will it provide outstanding heatsinking, but a P60 pill will drop right in! In practice, it's actually a bit too loose, and needs to have a wrap or two of AL or CU foil around it. Also this is an ideal use for a TIR lens, since it too fits perfectly into the pipe and is retained by the homemade bezel.
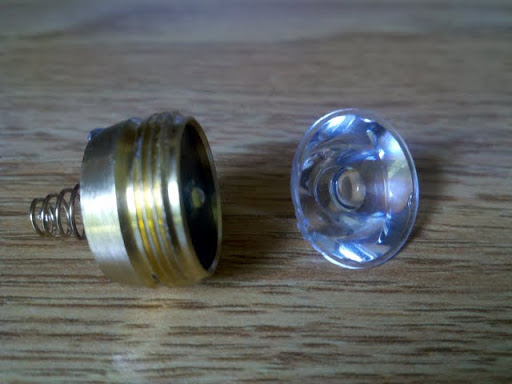
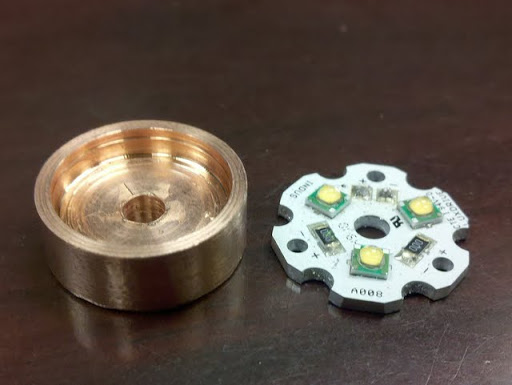
The TIR lens's can be purchased from LEDsupply.com for @ $1.30ea. This is what I originally used, but here's where I deviated from my own build. I've had an extra warm triple xp-g and custom copper heatsink that I made sitting around from when I was playing with the mini-match builds. I've been wanting to use this in a light for quite some time now, so it got the nod here. Note though, the P60 pill+TIR lens combo works quite well. With that out of the way, let's take a look at the components and how they'll all go together:
First, accurate measurements must be made and the copper pipe cut to correct length. Mine came in at 108mm. Also, now is a good time to perform the initial sanding. I used 320, 400, 600, 800, then 1000grit wet sandpaper. Conveniently enough they sell this as a variety pack dirt cheap at the local auto parts store in the paint section.
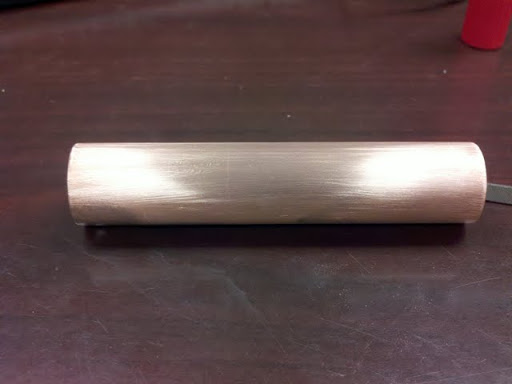
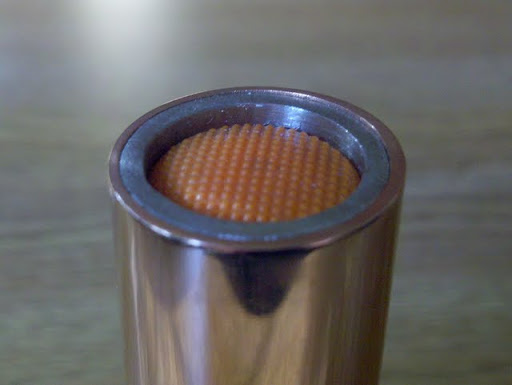
Above you can see how it looks after the initial sanding, and then how it looks just before final polish. The pill should be a snug fit yet still slide into the body from the tail and come to rest against the bezel. Here is where I used an 18650 battery with the ends taped up to help determine where I needed to drill the set screw hole. Basically I assembled everything, then marked, drilled, and tapped.
After a quick rubdown with metal polish, then a sealant wax, the body is basically finished. No, battery changes won't happen on the fly, and if you don't have an allen wrench with you it won't happen at all. Suprisingly though, using a setscrew to retain the end isn't as cumbersome as I was worried it may be. The tailcap spring helps push everything out once the screw is removed, and once the battery is swapped, it also helps provide reverse pressure as everything is pushed back in and the setscrew re-installed. (Note to self- not sure if my description of this process is coming across correctly...It's late, and these microbrews are tasty... if need be, I'll fix the description in the morning).
Let's take another look at the tail and bezel:
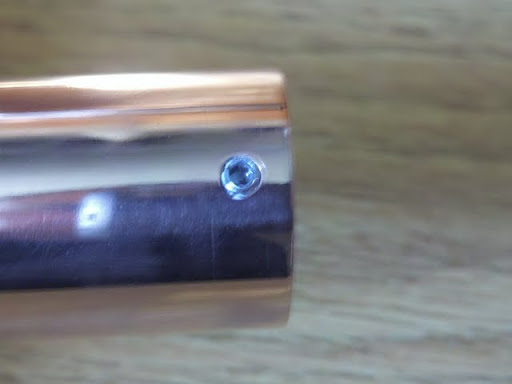
The setscrew almost disappears near the back side:
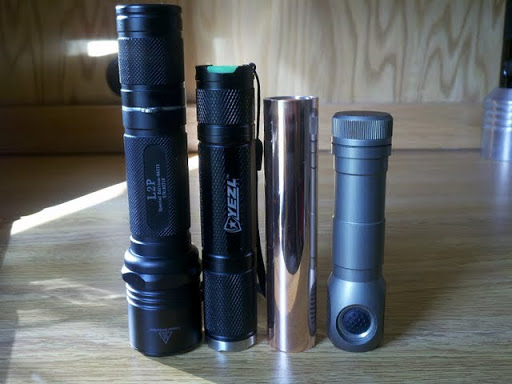
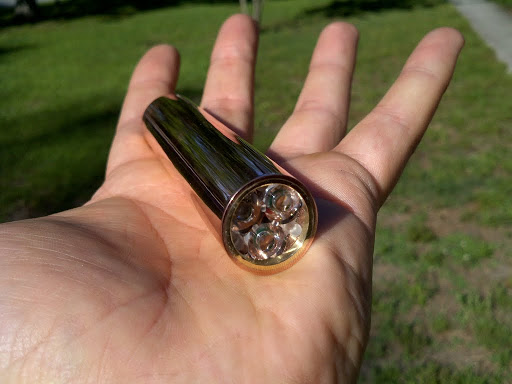
So, how does this homemade torch stack up against the competition? Here is a comparison between a Solarforce L2P, Yezl Z1X, my homemade torch, and a Zebralight SC60. If I'm not mistaken, it measures smaller than an S-mini, but not quite as compact as the zebra (although it's slimmer):
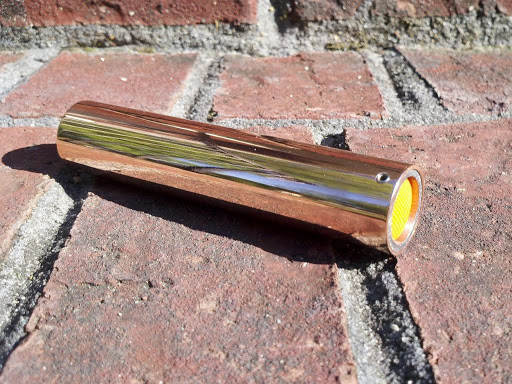
And a few more shots:
Epilogue: Well, it may not have knurling, lettering, or pointy spikes on it's head, but I kinda like it. Using a SB 2.8a driver with the warm triple xp-g, this 'lil Darlin puts out:
High: 606.3L
Med: 196.1L
Low: 30.5L
So, it's not the brightest mod I've done, but not to shabby either. More importantly, WOW.. I'm really diggin the warm emitters! After walking around outside the last few nights with it has made my cold white torches look positively dismal. That doesn't mean I'm abandoning them, for when it comes to an absurd amount of light they can't be beat. But for all around usage, I find myself leading toward the warm/neutrals. This means I have to eat crow on an early post I made about not "getting" the whole tint thing. I think it had to do with me being a "LumenNoob" when I got into this hobby - more lumens means more better, right?!? Funny how opinions change.
The plain style of this build may not appeal to everyone, but I was more hoping to coherently show what can be done with basic hand tools, spare parts, and a dab of ingenuity. Speaking of styling, since the finished product reminds me a lot of steam-punk, I think I'm going to make a few more with various styling twists (Sorry, I'll be using a lathe/mill for those ).
).
I hope some will find this useful...and as always, thanks for reading and humoring me.
-Match
