Project is on Hold, see Post #52.
No it's Not!!
You know how crazy I am, so here's another little taste. I love the suspense, but I know it makes some of you nuts when I do this.
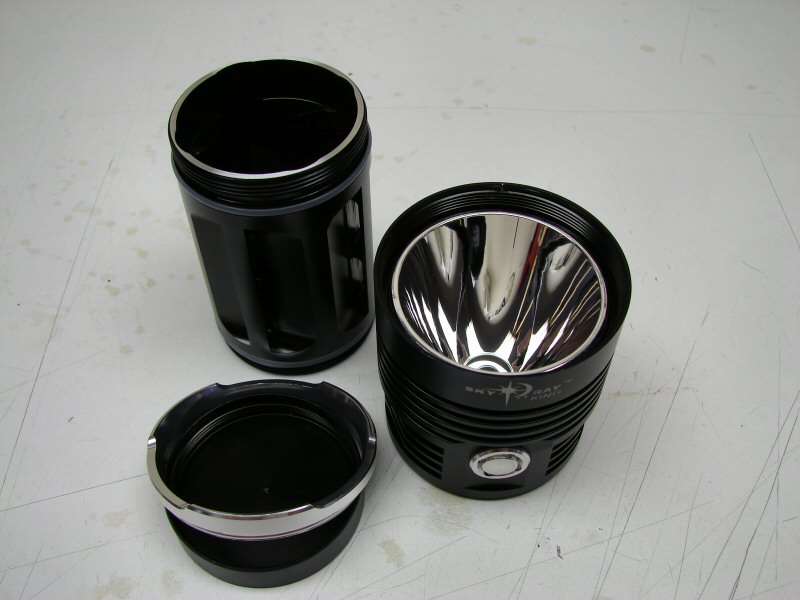
So what if I take a 52mm by 47mm XM-L reflector and throw it in an SRK, with a DrJones driver, an XM-L2 U2 and some "other batteries", (they need to be a little shorter than 18650 and they need to be NiMHs) and see what the heck happens.
This is all I have so far, I need to think the rest through.
05/03/2013
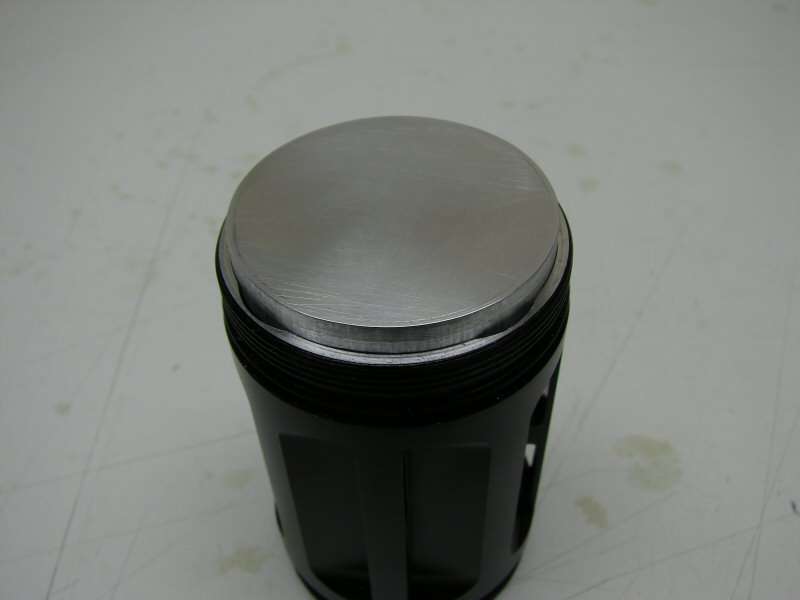
Well it took a day of hand work to make a 2" aluminum round into a 1.something" round for the heat sink, but it did come out round and it will be a press fit, so it should transfer heat good.

But.... now I have a problem. I have gotten the MT-G2 flu bug, courtesy of a certain AU member and I cannot decide if I want to do this,
Or This....
EDIT: The MT-G2 would not work as shown and I am not sure what I will do with the build for the moment.
05/06/2013
So I don't give up, I just needed to walk away for a bit.

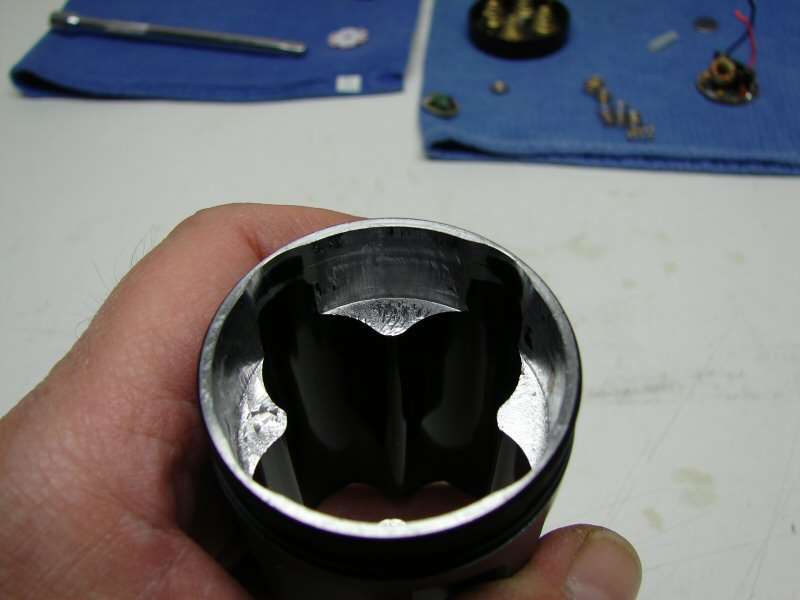
I needed to find a way to hold the reflector while I try to center it in the poorly made SRK. The larger ring is actually made to hold a lens. It is soft and hollow, just what I need to give the reflector something flexible, to center it.
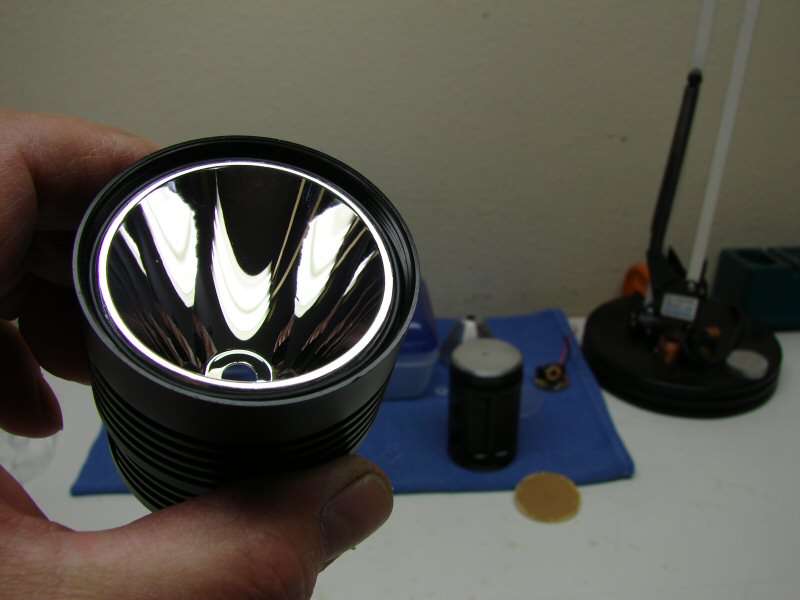
Now I can put in the lens and tighten everything down, while centering it best as I can.

It works out pretty good. When I screw the head on now, the ovality is minimal and I think I can get the head on over an XM-L2 led.
Originally, I was going to make a copper star and pin and solder the two together, with the pin going into the heat sink. Well, with the off center problem, I made the pin off center, which is not going to work now, so I just gave in and drilled for four pins. I have a copper star coming and I am going to reflow the led to the star and the star to the pins all at one time. I think that will give a fairly good heat transfer and even if it does not, I will feel like it's a good thing.
So now I wait again. DrJones is sending me yet another of his lumodrv drivers and the copper star is on the way.
The saga continues, but will it ever end?
05/07/2013
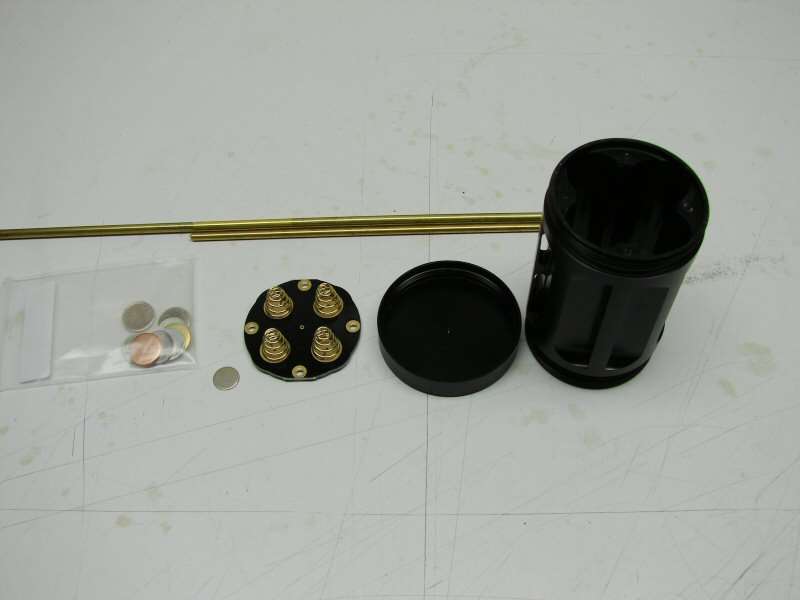
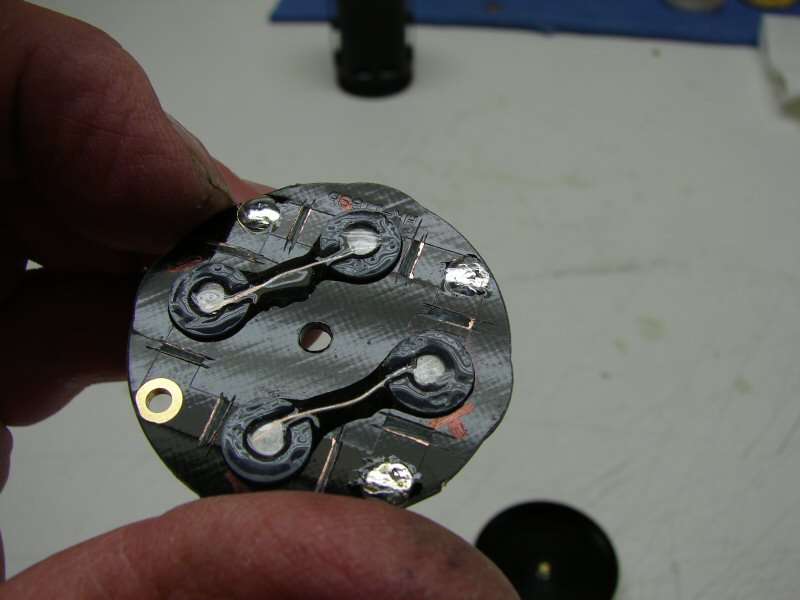
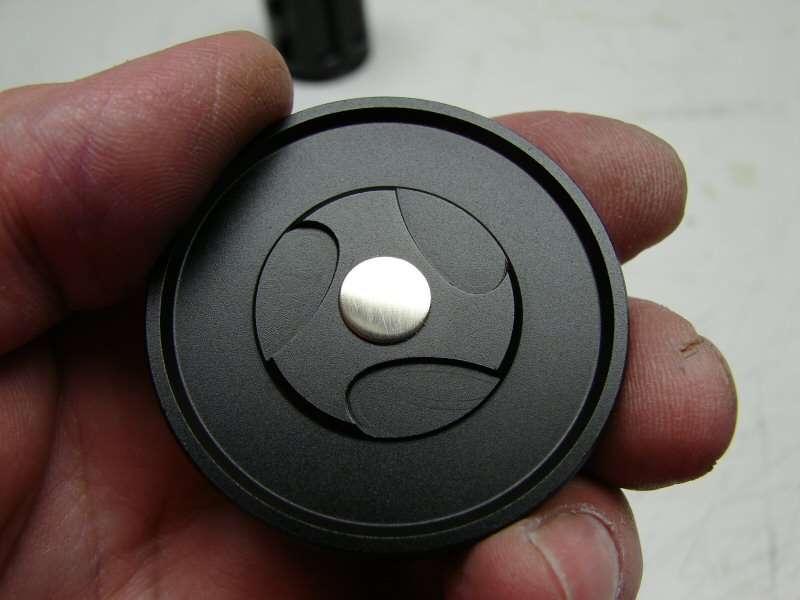
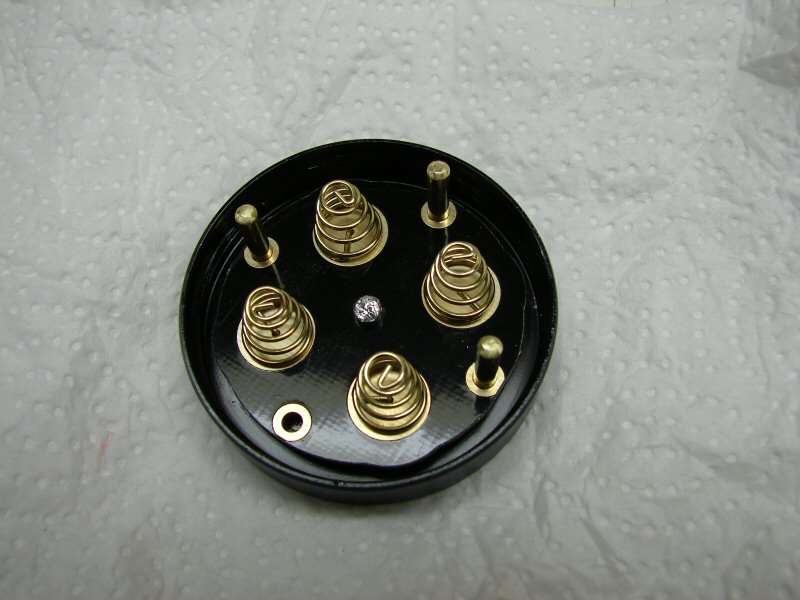
I decided to work on the upper contact plate and the tail cap with it's plate.
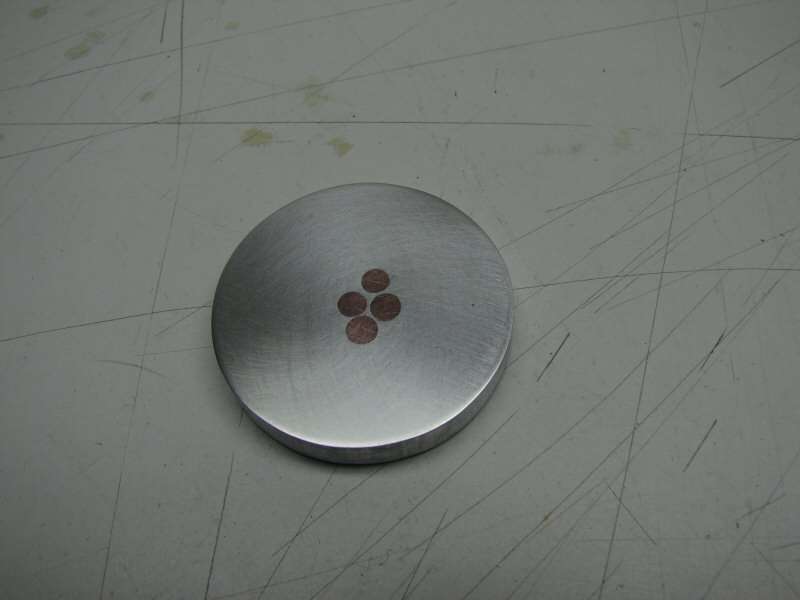
What are the rounds for?
The bottom contact plate has to be modified from Parallel to Series. We've done this before, haven't we?
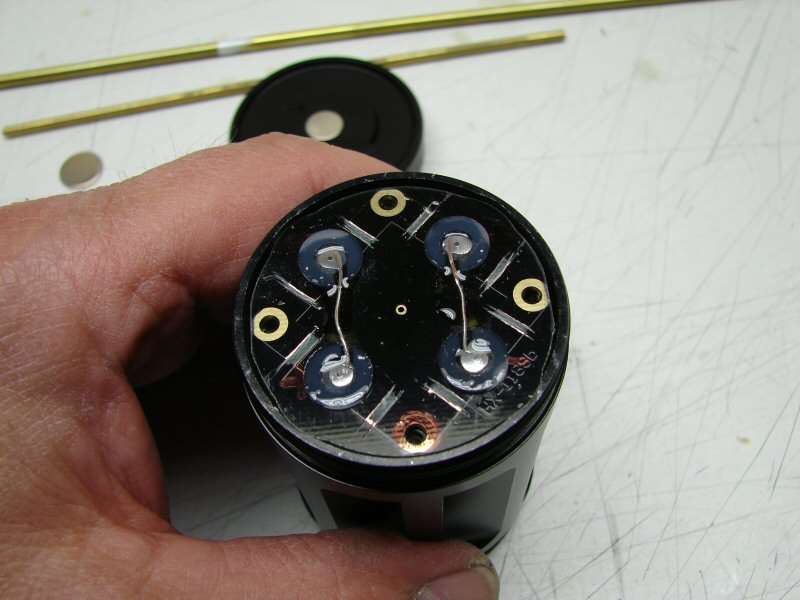
The modified plate is now in series. The four washers will help to keep the plate rotating smoothly against the tail cap. Yep, the only way to make this a tail loading light is to be able to remove the tail cap and the only way to make it easy is to make the assembly work like the EA8 Caveman, where the contact plate will rotate in the tail cap.
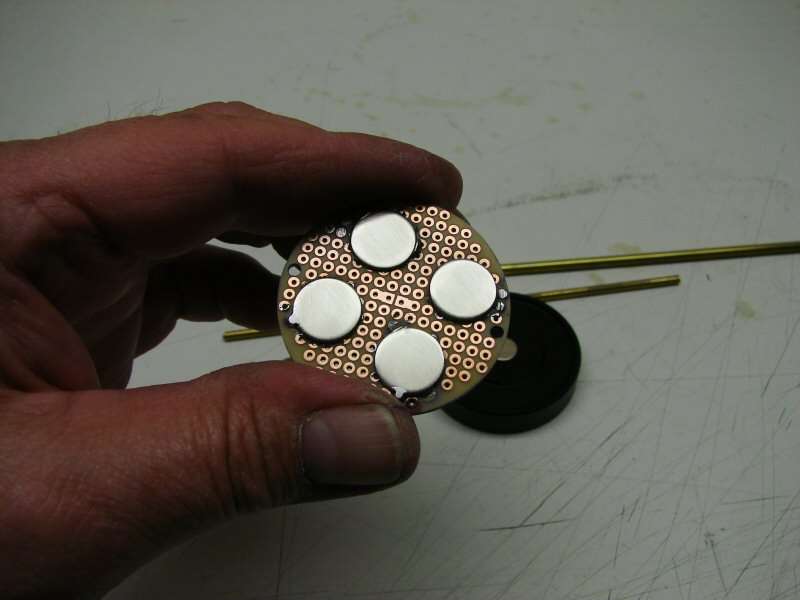
The upper contact plate is done just like before, with a Radio Shack board and Nickel Silver contacts.

Back side with the one jumper and +&- leads.
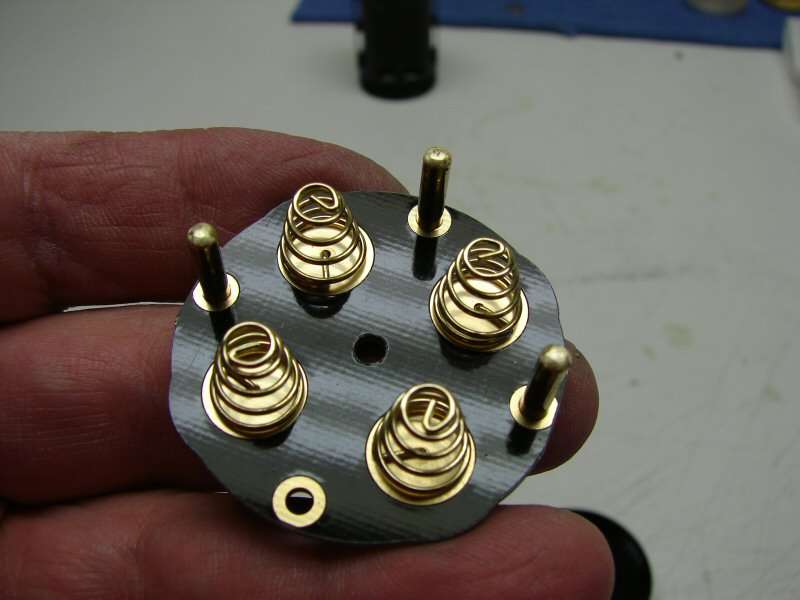
In order for the bottom contact plate to rotate it has to be hooked somehow to the tail cap. I will drill for a brass pin. The pin will fit through the tail cap and the contact plate will rotate on it. On top of the tail cap will be a Nickel Silver round, soldered to the brass pin and there will be a very short sleeve between the tail cap and contact plate, for a spacer. (that's the tubing) and another small piece of tubing will be soldered on for a cap so the contact plate stays on. Don't worry, I will have photos showing it in stages.
-------------------------------------------------------------------------------------------------
I had a little time today, to work on the tail cap. I think it came out rather well.
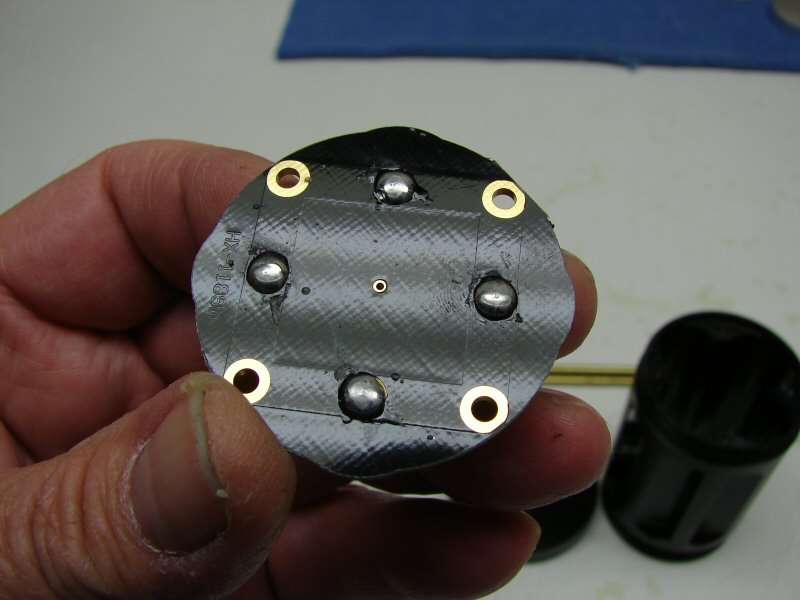
I am using 1/8" brass rod. I drilled out three of the holes used originally for screws. I rounded the ends of the rod and pushed them thru.
I soldered them to the contact holes that were already there. The fourth hole stays as is. With three pins you can't get it wrong. It can only go on one way.
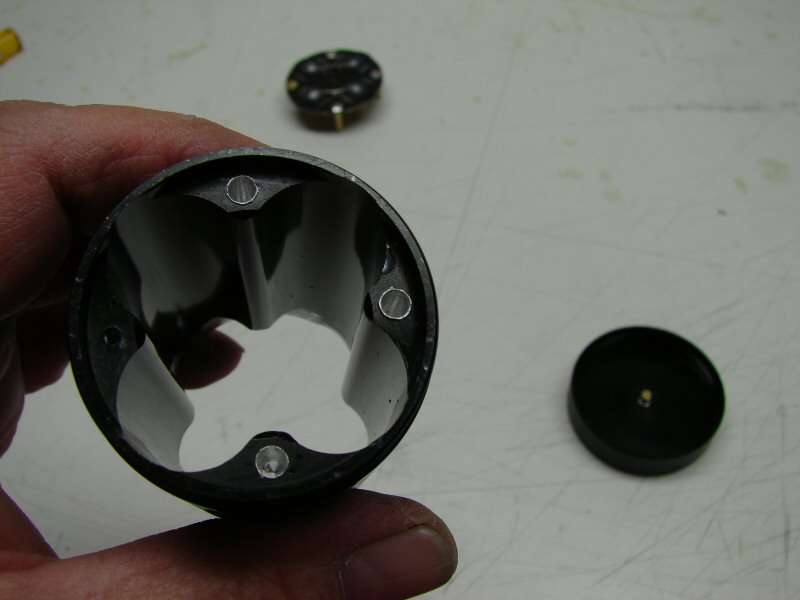
I drilled out three of the screw holes in the body, to 5/16", so the pins glide right in.
I used 1/8" brass rod again, in the tail cap. I drilled and pressed it in. Then I used a very short piece of brass tubing over the pin, to act as a spacer when the contact plate goes on and soldered it on. This keeps the plate off the tail cap just a little, so it will spin freely. I will also run just a dab of grease in the tail cap, so it lubes as the plate turns.
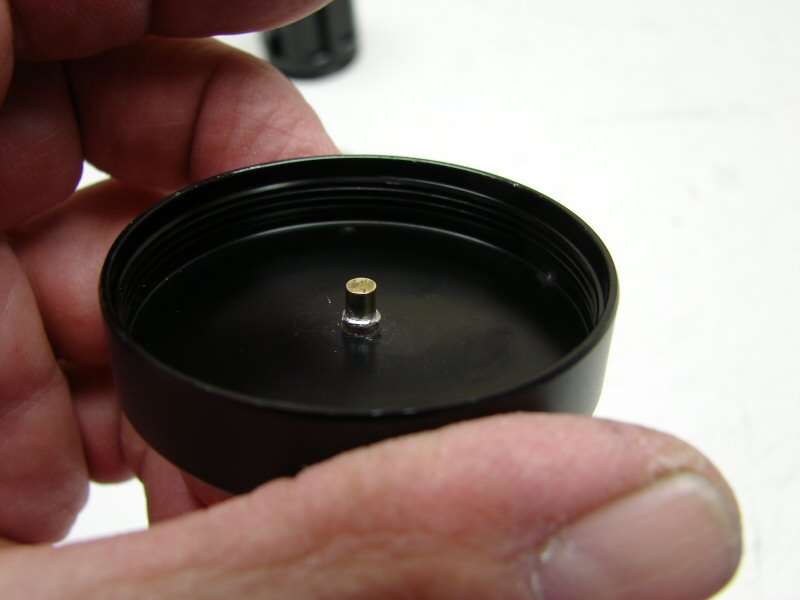
On the back side, I soldered on a Nickel Silver round, to the pin. With the spacer on the inside and this on the outside, the pin isn't going anywhere.
I put in the contact plate and used another small piece of brass tubing over the top and soldered it in place. Now the contact plate spins freely, but won't come off. Instant Nitecore Tail Cap. Hope they don't sue me.
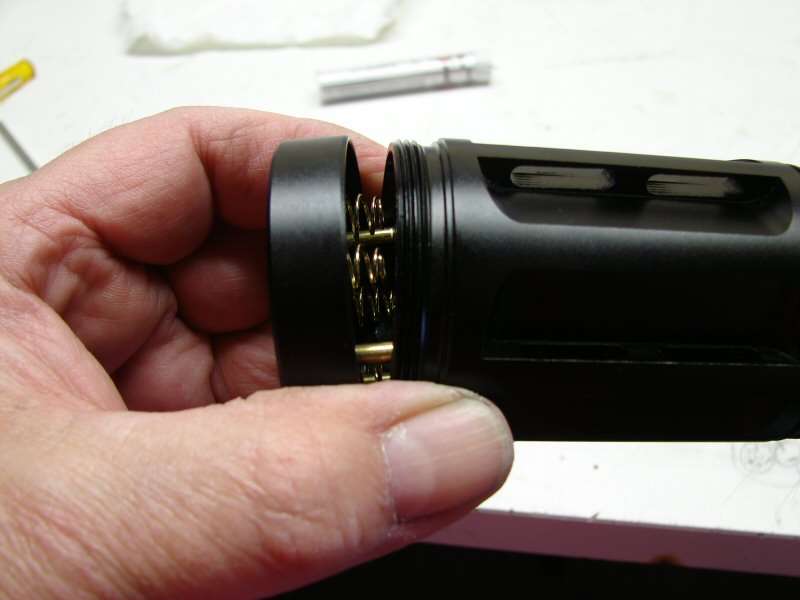
Just line up the pins, push and turn the tail cap on.
It works Great! Can't wait to try it out with the finished build.
--------------------------------------------------------------------------------------------------------------
05-10-2013
A little work has progressed, not much but a little.
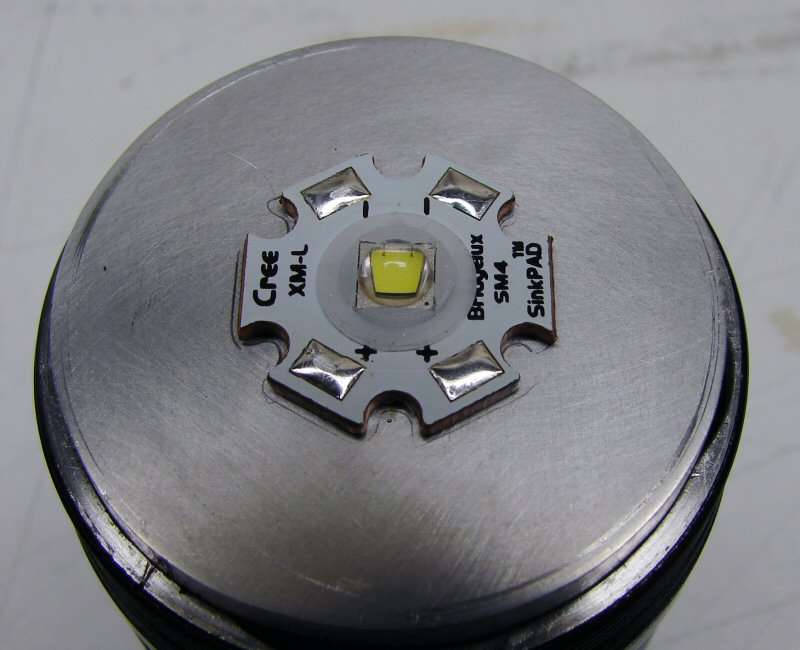
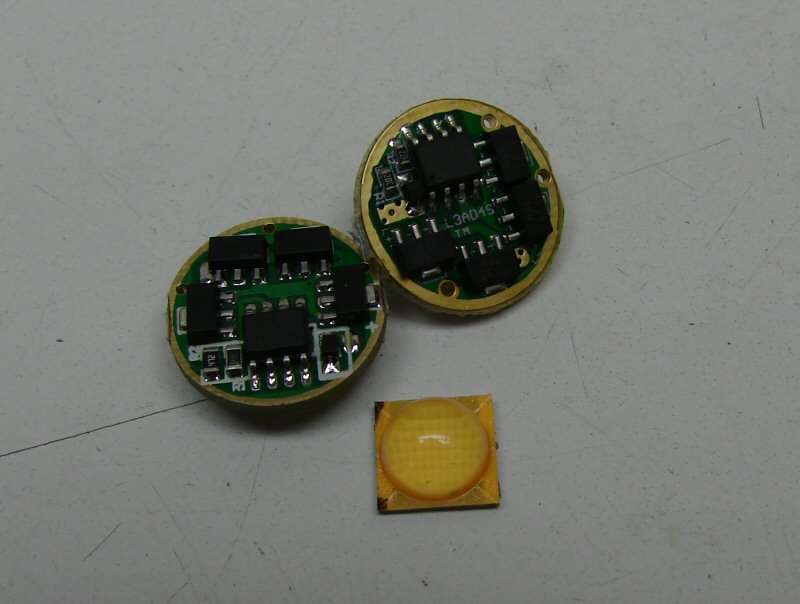
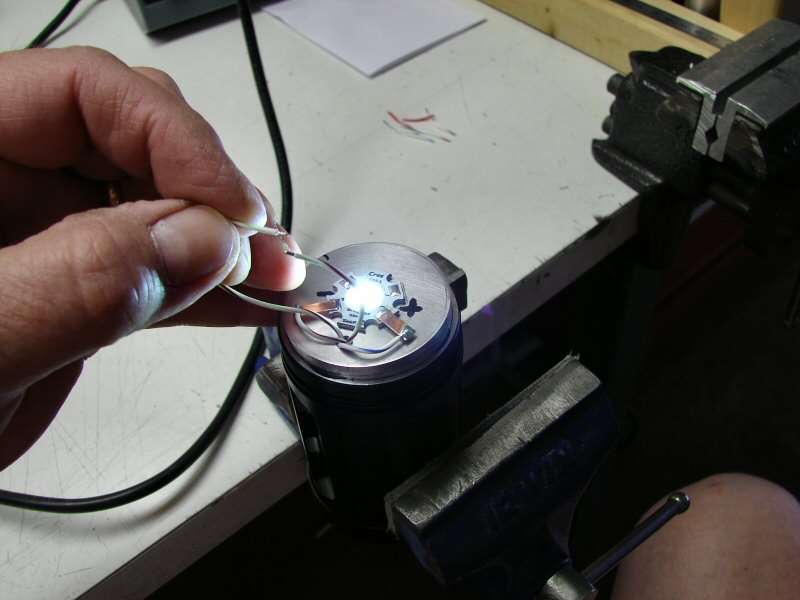
I got the copper SinkPad and I reflowed the XM-L2 to the star and the star to the heat sink all at one time. I tinned the bottom and top sides of the star and fluxed the led contacts as well as the copper pins in the heat sink. Then I put it in a vise and heated from underneath with my torch. Once the led flowed into place, I hit the underside of the heat sink with a can of compressed air turned upside down, so it would cool the heat sink quickly. Seemed to work fine except for my big error. It works fine and does not affect anything really, but I will let you figure out the error. Someone will catch it.
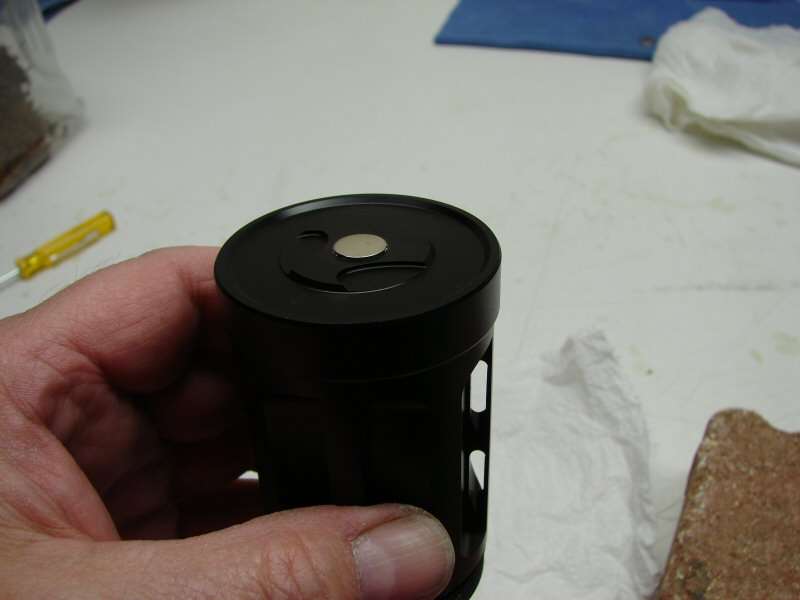
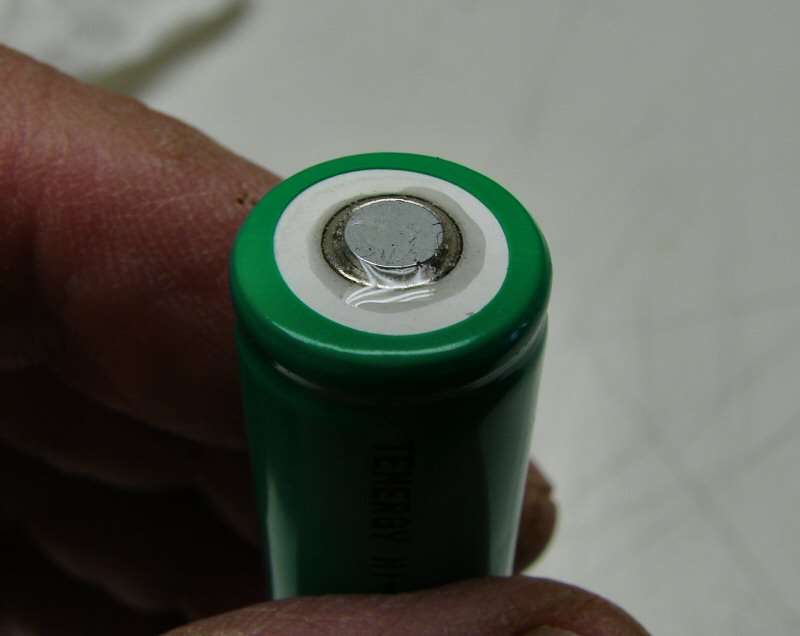
I got the "A" NiMH cells, but they are shorter than 18650 cells, so I used the drill press and an end mill bit to cut the shelf deeper, so the contact plate sits lower and that way the cells fit right with a magnet on each positive contact. This also leaves me more room for the driver, which was getting too close for comfort between the heat sink and contact plate.
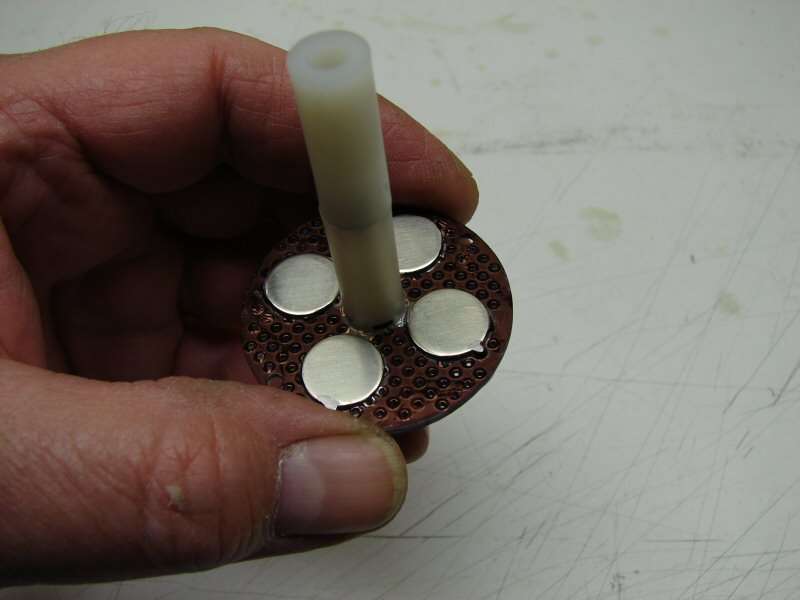
"A" NiMH cells are also smaller around, so I put in a center post that keeps the cells from shifting too much. I am just trying to keep the cells in place and not have them rattle around too much.
That's it till I get the driver, which is several days down the road.
---------------------------------------------------------------------------------------------------------------
05-14-2013
I finally got this light done. The driver came in yesterday, but I wasn't able to get it done till today.
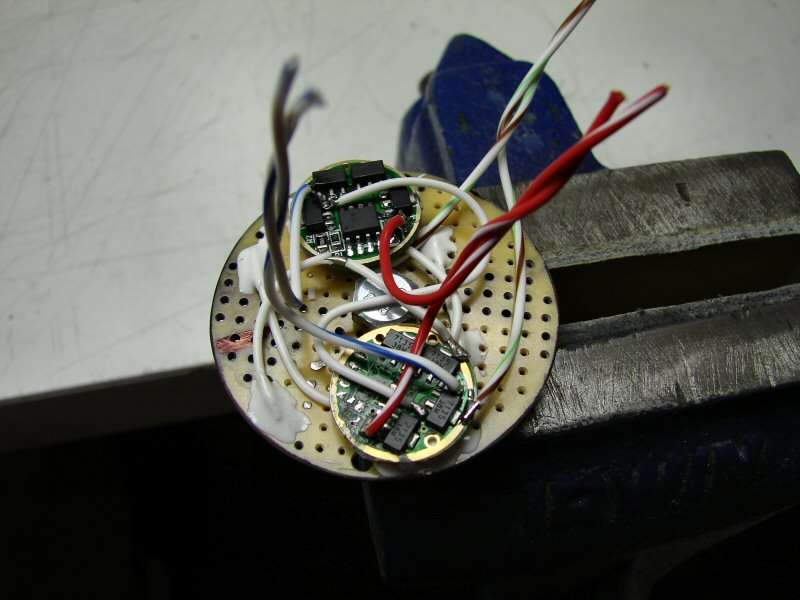
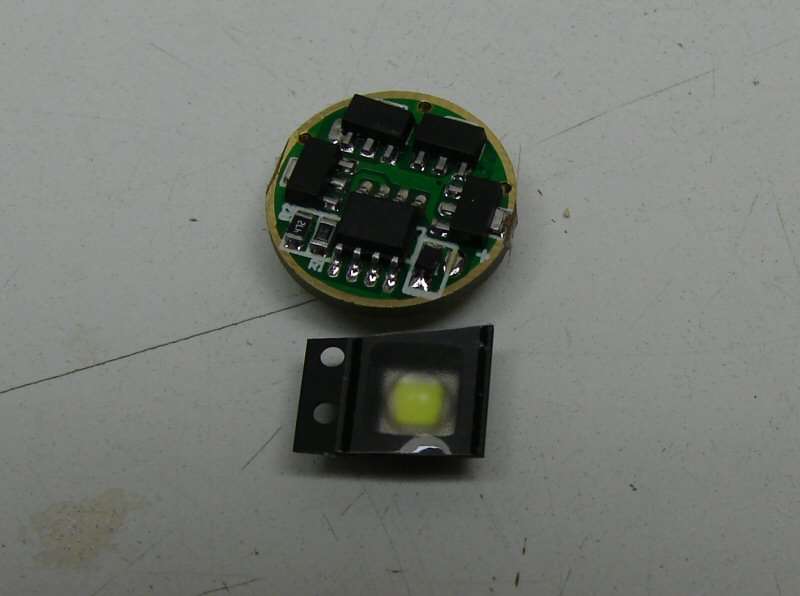
The DrJones driver and the extra chips driver are all wired up and ready to go. It's a total of 14 chips, (12 of them at 380mA and 2 of them at 350mA), so it hopefully will put out around 5 amps if I wired it right.
The drivers and top plate are in the body and I just wired the LED wires. The switch wires are yet to be done and that's another problem...
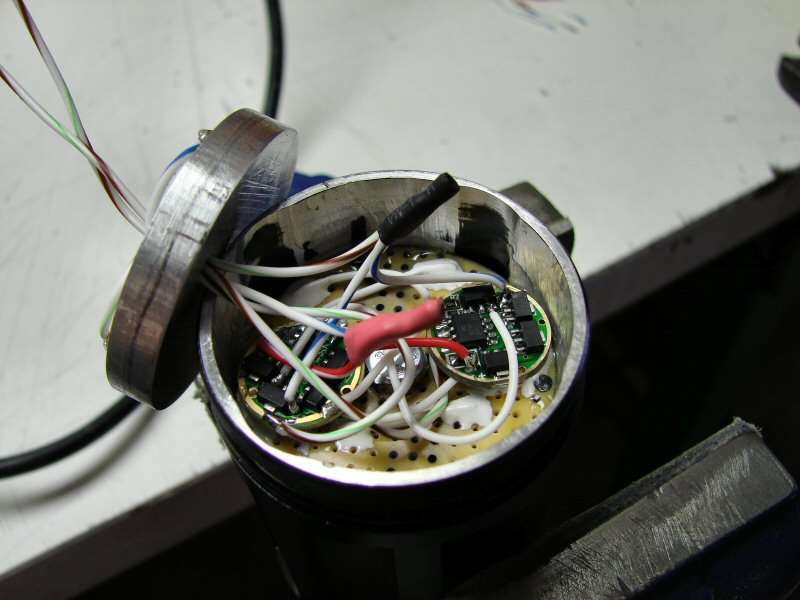
Testing - The assembly is done. I filled the cavity with Fujik. The copper tabs coming off the star are a necessity with the reflector I am using. If I don't do that, the reflector base hits the wires, so the copper lets the contacts be low enough to clear.
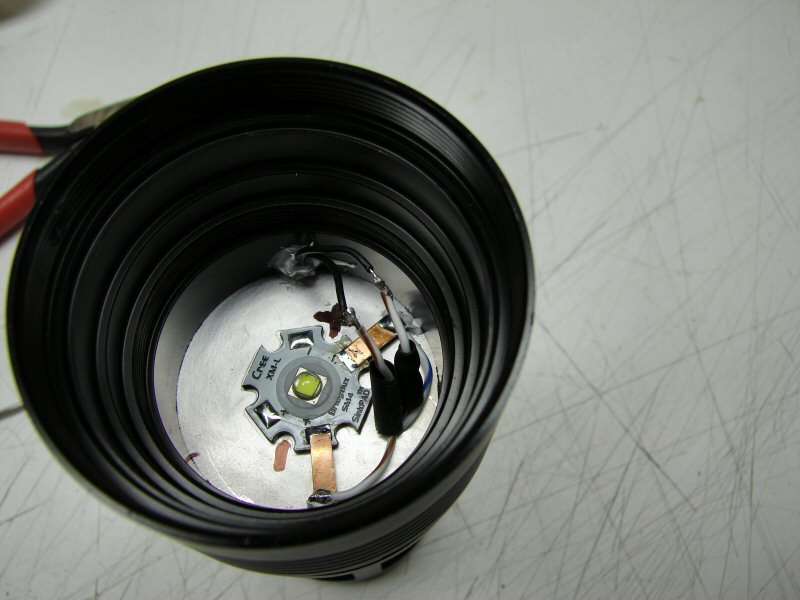
The problem with the switch is that the "pill" is now in the body, not the head and the switch is in the head, so I cannot wire the switch and then turn the head down or it would rip the wires off. I have to solder them after the head is in place, which means the head is now Nitecore'd. (It's locked down and can't come off).
I used epoxy to keep the magnets from shifting on the batteries.
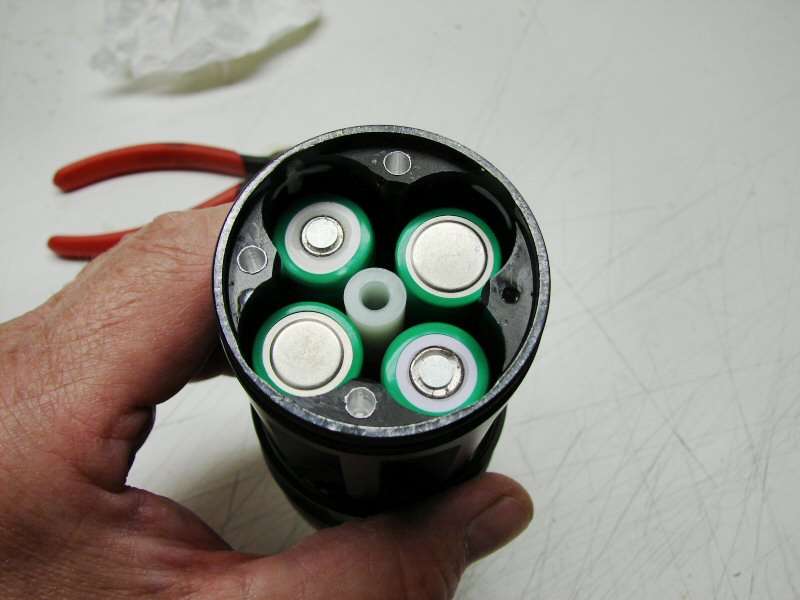
It's all set and ready to do beam shots tonight. I marked the body with +/- signs, so anyone would know which way the batteries need to go in.
Glam


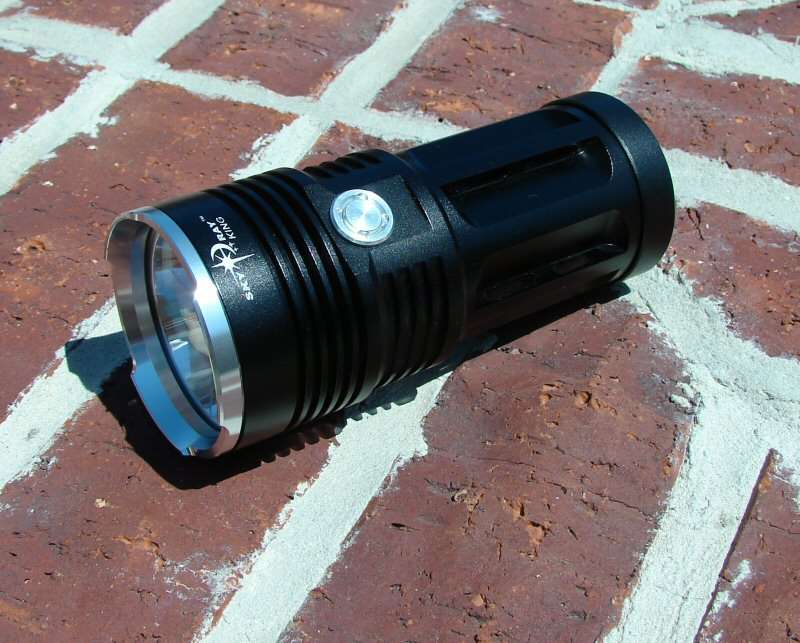
That's all folks!
I will do beam shots tonight, but since I tested in the garage, I can tell it's not going to be a thrower. More like a large spot with lots of spill. Oh well, it is still very bright and somewaht unique.
Beam Shots
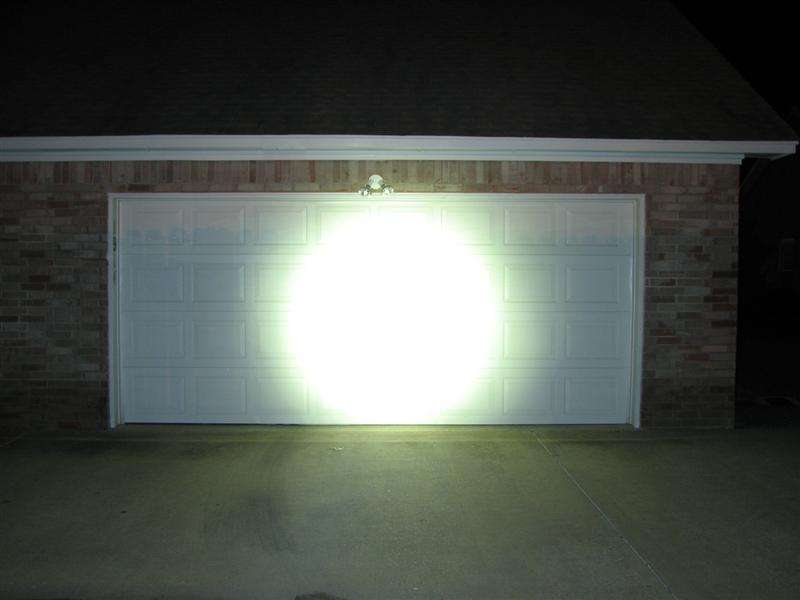
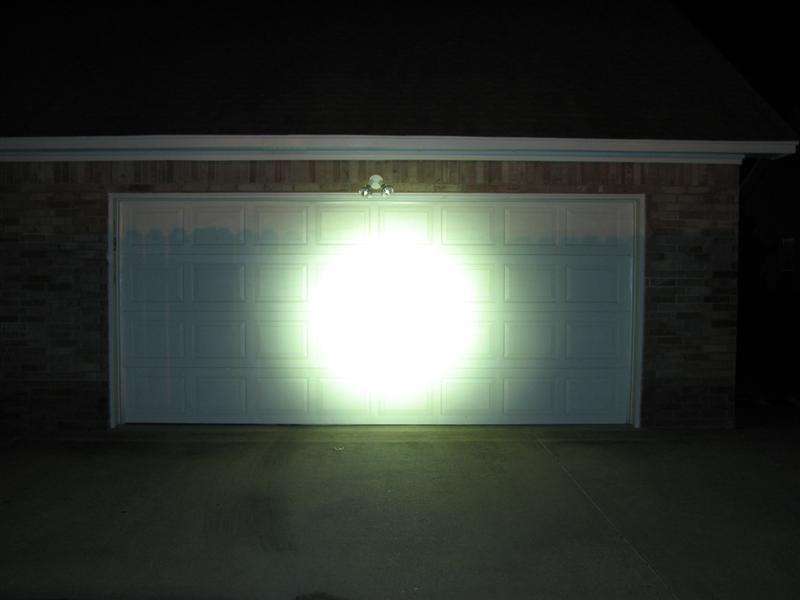
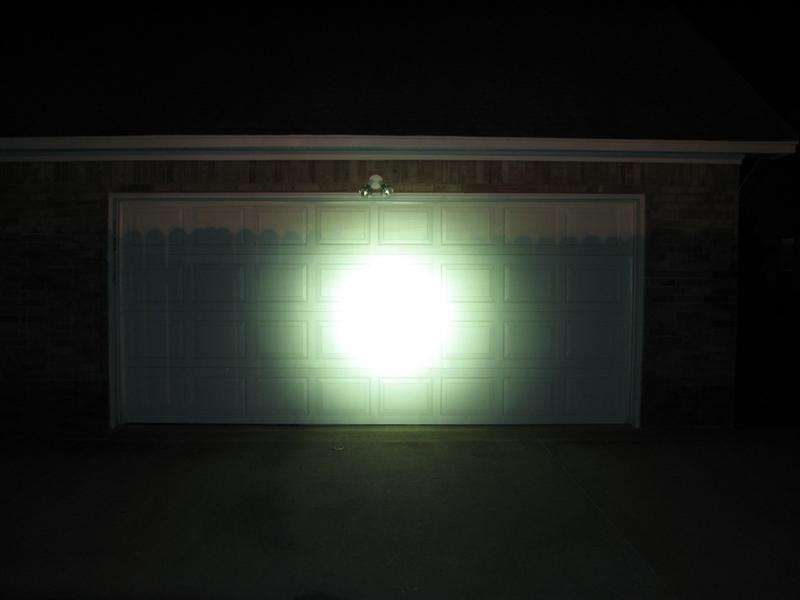
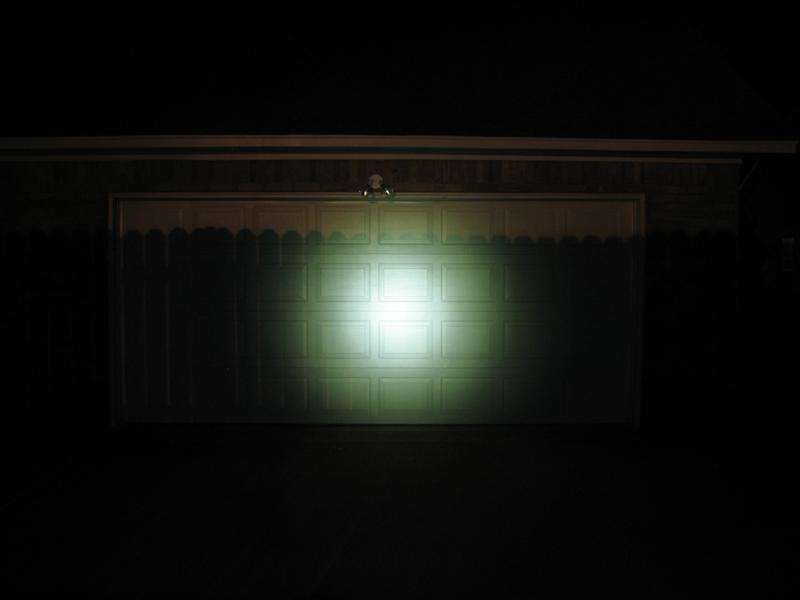
Four basic modes. My eyes do not see that much green, but the camera does. I had it on Daylight white balance, but I normally use auto white balance. I just forgot to set it before the shoot and I'm too lazy to do it all over again.
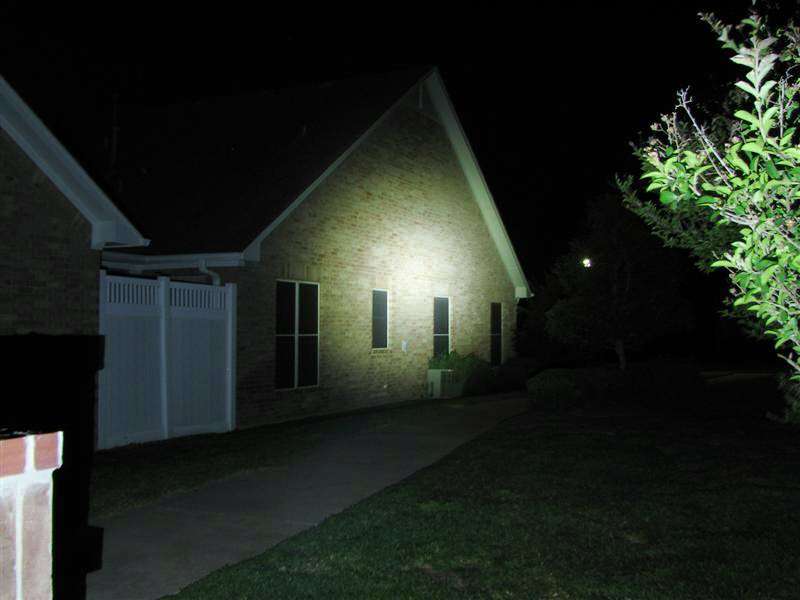
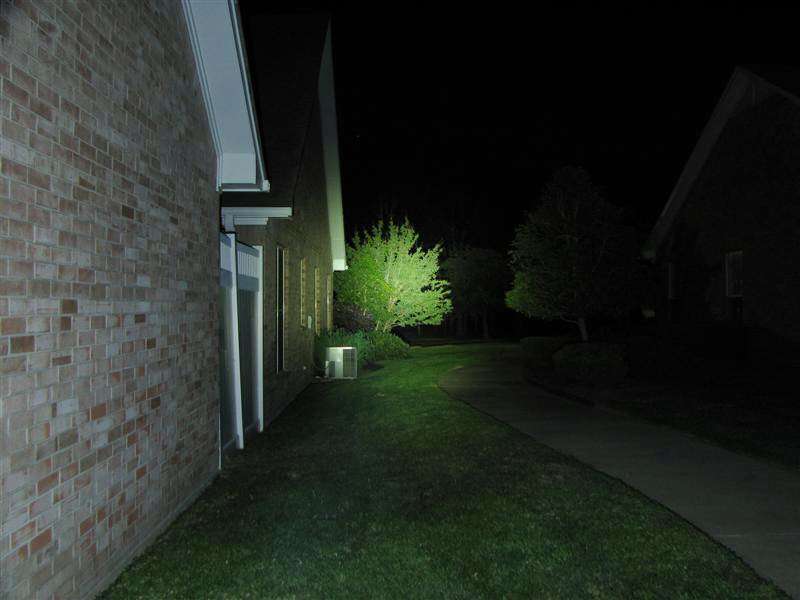
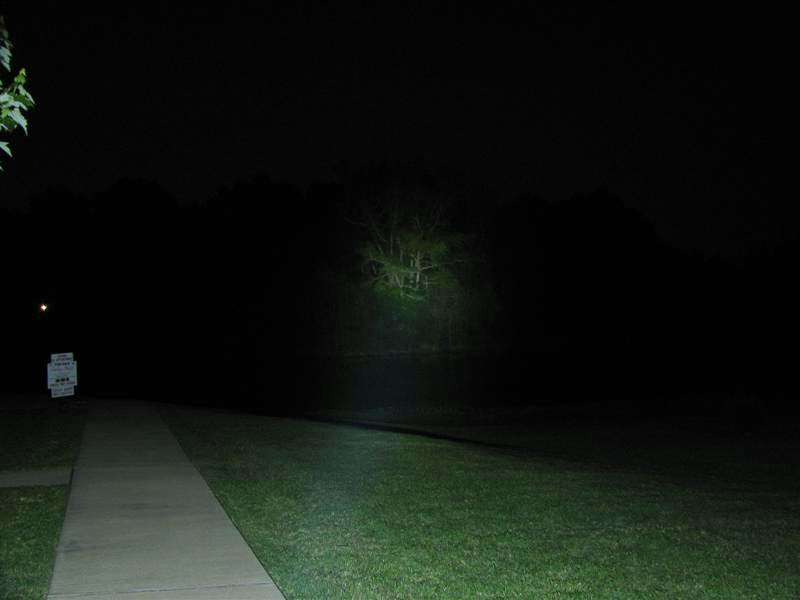
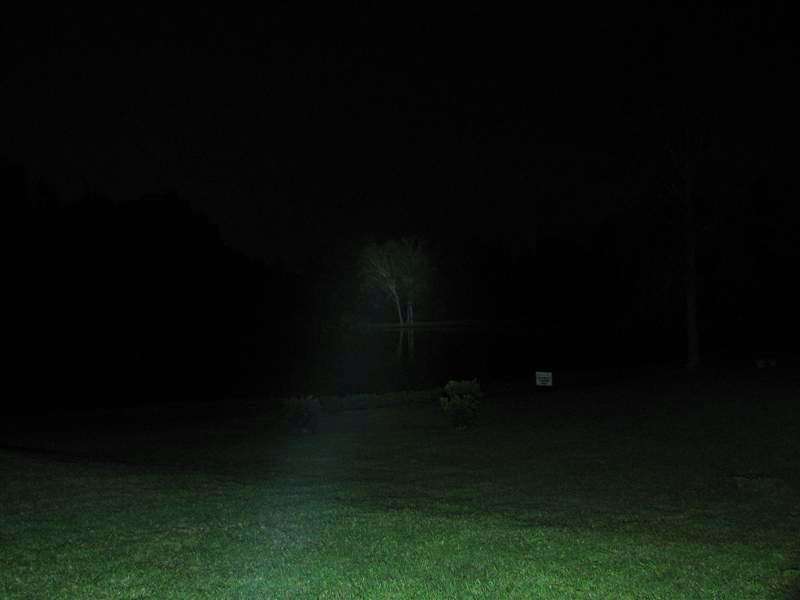
It's ok, but I was expecting more. I definitely do not care for that reflector with this XM-L2 led. It always has produced a tighter spot with the old XM-L leds. Go figure...
I ran the light on high for five minutes straight and it was only just warm to the touch. The whole body was warm, which tells me the heat sink is transferring heat well to the body, as I had hoped.
That's it. All done.
 but with so many hobby cells out there, I can use NiMHs that will take 30C draw and that’s a lot better than any Li-ions will, which means longer run times. (or it should).