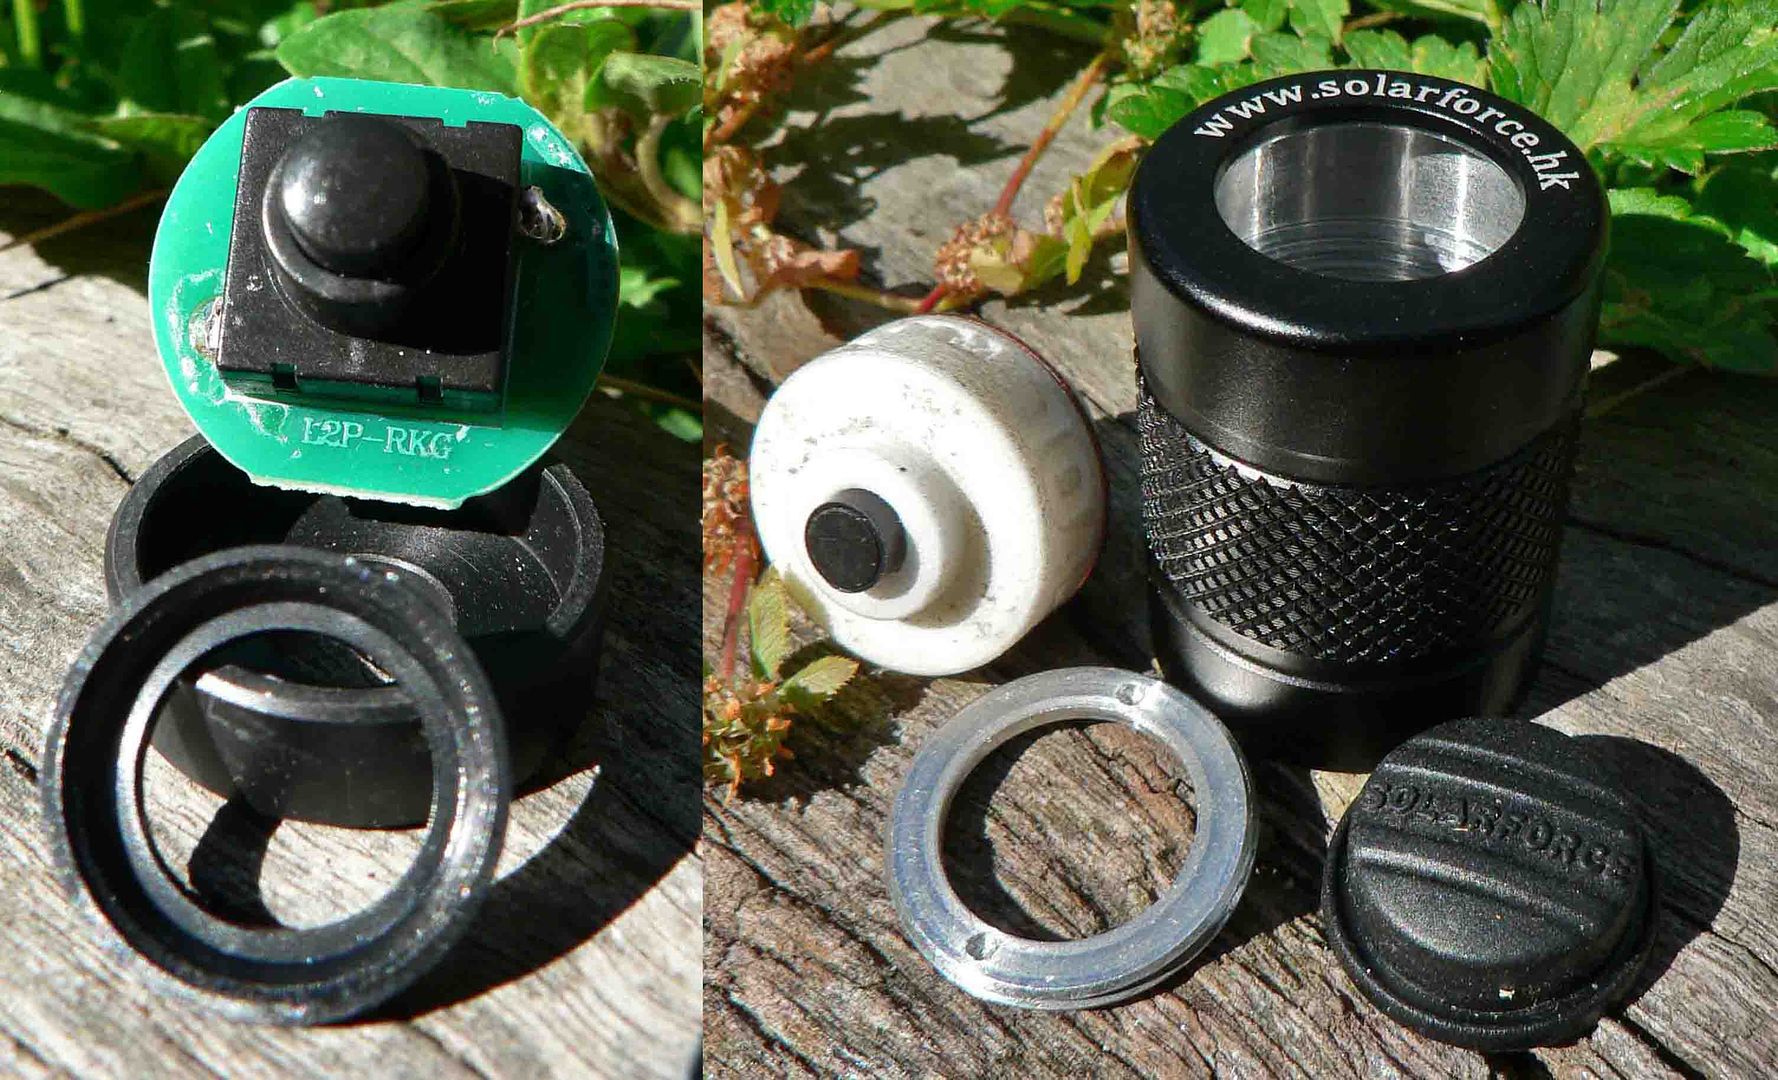
I tried to fit the switch as is into a stock L2P. I could not get it past the threads. The switch was wedged in, and I had to pry it out and sacrifice my rubber boot. In order for me to fit the switch as is into the L2P tail cap, I would have to sand or file some material off of the overall outside diameter of the Tofty switch. I plan on trying the switch in a few other different Solarforce tail caps that I have.
Sorry, I forgot that key detail. I could not get it into the L2T/ Tailstand or the new L2M tail piece. I have it in an S1.
Do you have a photo of an Solarforce S1 tailcap?
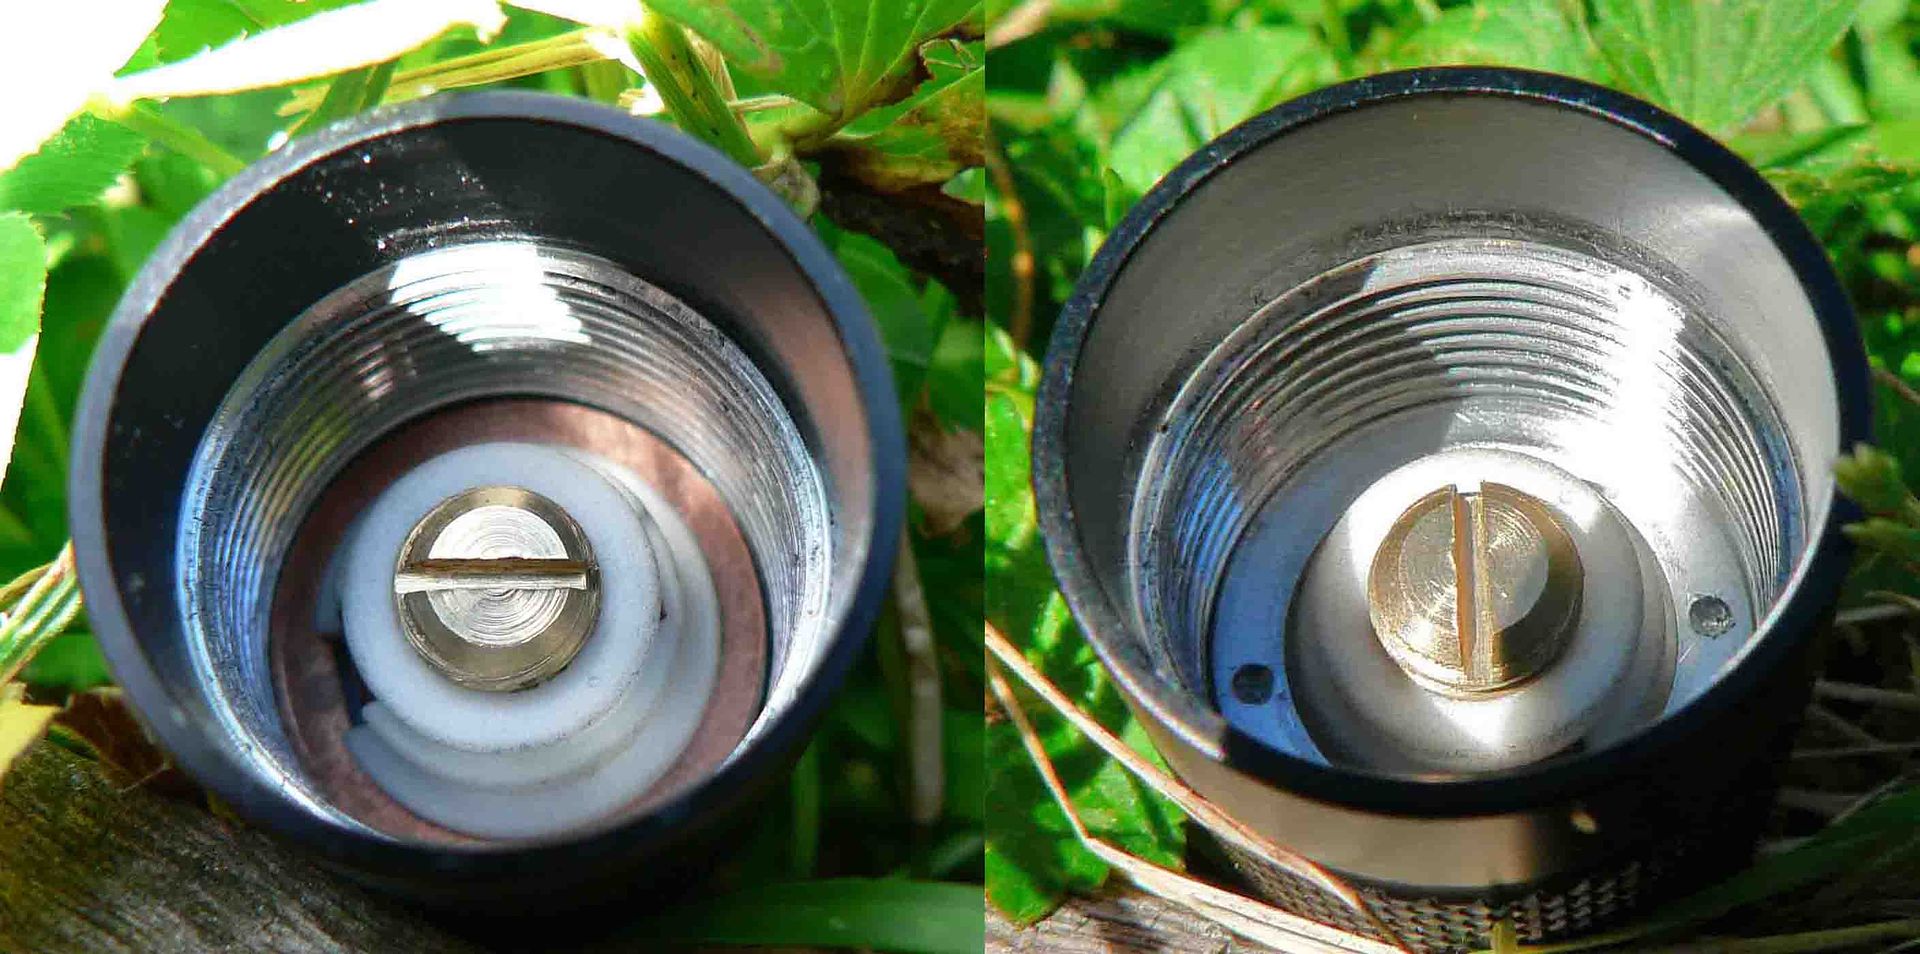
I was going to try to take some pics and get them posted of the switch and tail cap that I am thinking is either an S1 or an old tail from an L2P from the shiny anodizing era. I was playing with the light and trying to remember what photo posting company I have an account with when I noticed a flicker. Disassembled and re-assembled then cleaned several times with inconsistent results. The culprit is the rubber button cover. When I remove this completely and put the switch together and on the light, the flicker is gone. It makes no sense as the bottom of the switch has no conducting contacts and should work with or without the silicone rubber boot.
Perhaps the little nub in the boot is too long, partially depressing the switch and causing intermittent contact? Did you use a spacer between the switch and bottom of tail-cap?
Ok, I finally got it set up to do some endurance testing. I ran it through 3 hours worth of testing 1 click per 10 seconds for a total of 1080 clicks. Pictures of the setup are here.
http://imgur.com/a/yIrhc/embed
In the actual test I was holding some wires up to it (while watching TV of course), however as I only have 2 hands I cannot take pictures of it at the same time as holding the wires there.
Overall Review of the Switch:
I am truly blown away by this switch. It has survived over 1000 test clicks with current running through it and 24 hours of 10+ amps of current going through it. I have done everything I can to kill this switch, and failed miserably. The only damage I have managed to inflict on it is from the servo hitting it 1000 times (so the black part of the switch is slightly worn away as the servo always would hit it in the exact same place). I can honestly say this is the best flashlight switch I have ever used, even better than an experimental FET based switch I made a while back.
Once more of these are available, I'll need atleast one more for my collection. :D
Scaru. What a fantastic switch testing setup. Nice effort. Could you measure any resistance after all this?
Still measures 0.0 ohms. :)
thats pretty impressive! good work of figuring out a test rig scaru 
I've just tried this switch in the L2M and its a straight swap with the OEM switch. The fist picture shows the parts no longer used on the left and the parts used in the swap on the right. In my light there was about 1.5mm room between the rubber boot and the switch button. It worked perfectly.
On the left is the switch in the housing while the right picture is with the retaining ring screwed in. No adjustment was needed with the contact screw from when I had this fitted in the HD2010 tailcap. The light worked fine.
MrsDNF finished it first! That is exactly what my light switch in the Solarforce looked like- but refused to function reliably. But how?! There is nothing on the switch that could go wrong- so what was going wrong? I disassembled and reassembled tested continuity… Perfect! Ok put it in the light and nada! What the… ?! Take it apart clean the contacts check the battery 4.19 volts check the P-60 all systems go… Try an old switch works like a charm. One thing that I noticed was an 11th of an inch gap that was left between the cap and the body. I thought it odd and decided to cut down the brass rod the same amount after another frustrating round and as I was unscrewing the tail the light flickered to life. The battery was bottoming out and making contact with the driver and shorting on some part. So I carefully measured and then guesstimated about .12 to .15 inches and applied vise grips and dremel. Trying to dress those threads with my ham-handed tools was not easy by the way. Put all back together and Shazam! I bellowed a deep and hearty, “Moo ha, ha haaaa” and clicked away at my mighty little light. My wife was making an awesome short-rib stew with her back to me and she didn’t even turn around. She just shook her head and said, “Lights” and kept on cooking… In her defense the stew was undeniably awesome and perfectly matched with a Rex-Goliath Pinot Noir. So in this instance maybe she didn’t get how cool this is because she was concentrating and making art. But my neighbor 3 houses down and across the street should appreciate how powerful this light is as I have never lit his second floor game room better than from my driveway right now. He doesn’t even have to use his lights. But just in case he is not appreciative of all that goes into my little gift of light I’ll go in for tonight before he gets home. ![]()
Good to see a story have a happy ending, a very funny story at that. ![]()
I received the switch today. 1.5+ month of waiting, mainly due to Christmas.
It slotted in a Convoy C8 fine, with only a little play. It didn’t click though, so I switched in a boot with no raise. The second boot was meant for the Ronac’s Standoff, so it was a bit smaller. Though clickable, the light still didn’t turn on properly. There was momentary activation when the tailcap was half-screwed out. The metal retaining ring might be the problem.
The really really short (–0.5mm) spring on the pill-end didn’t help when combo-ed.
It’s the first night, which is to say I have high hopes of making the C8 and the 10A+ switch work together.
I took some pictures, and hope to upload them tomorrow.
It looks like you hit the nail on the head Jayc. It would seem that your C8 Convoy needs a longer spring on the driver end or a spring soldered onto the threaded contact of the switch itself. Thanks for letting us know how it fitted.
I am really looking forward to this switch…got some Solarforce tailcaps waiting for it! :heart_eyes:
Again a huge thank you to everyone who has helped out testing these switches.
I'll try and summarize all the testing results shortly after i check up with a couple of the testers, but it's mostly academic as i've already ordered quite a few switch bodies just after Christmas so they should be delivered soon.


Marshmallow! It’s so white and clean, it’s almost a shame to have it put in a greasy, dark place.
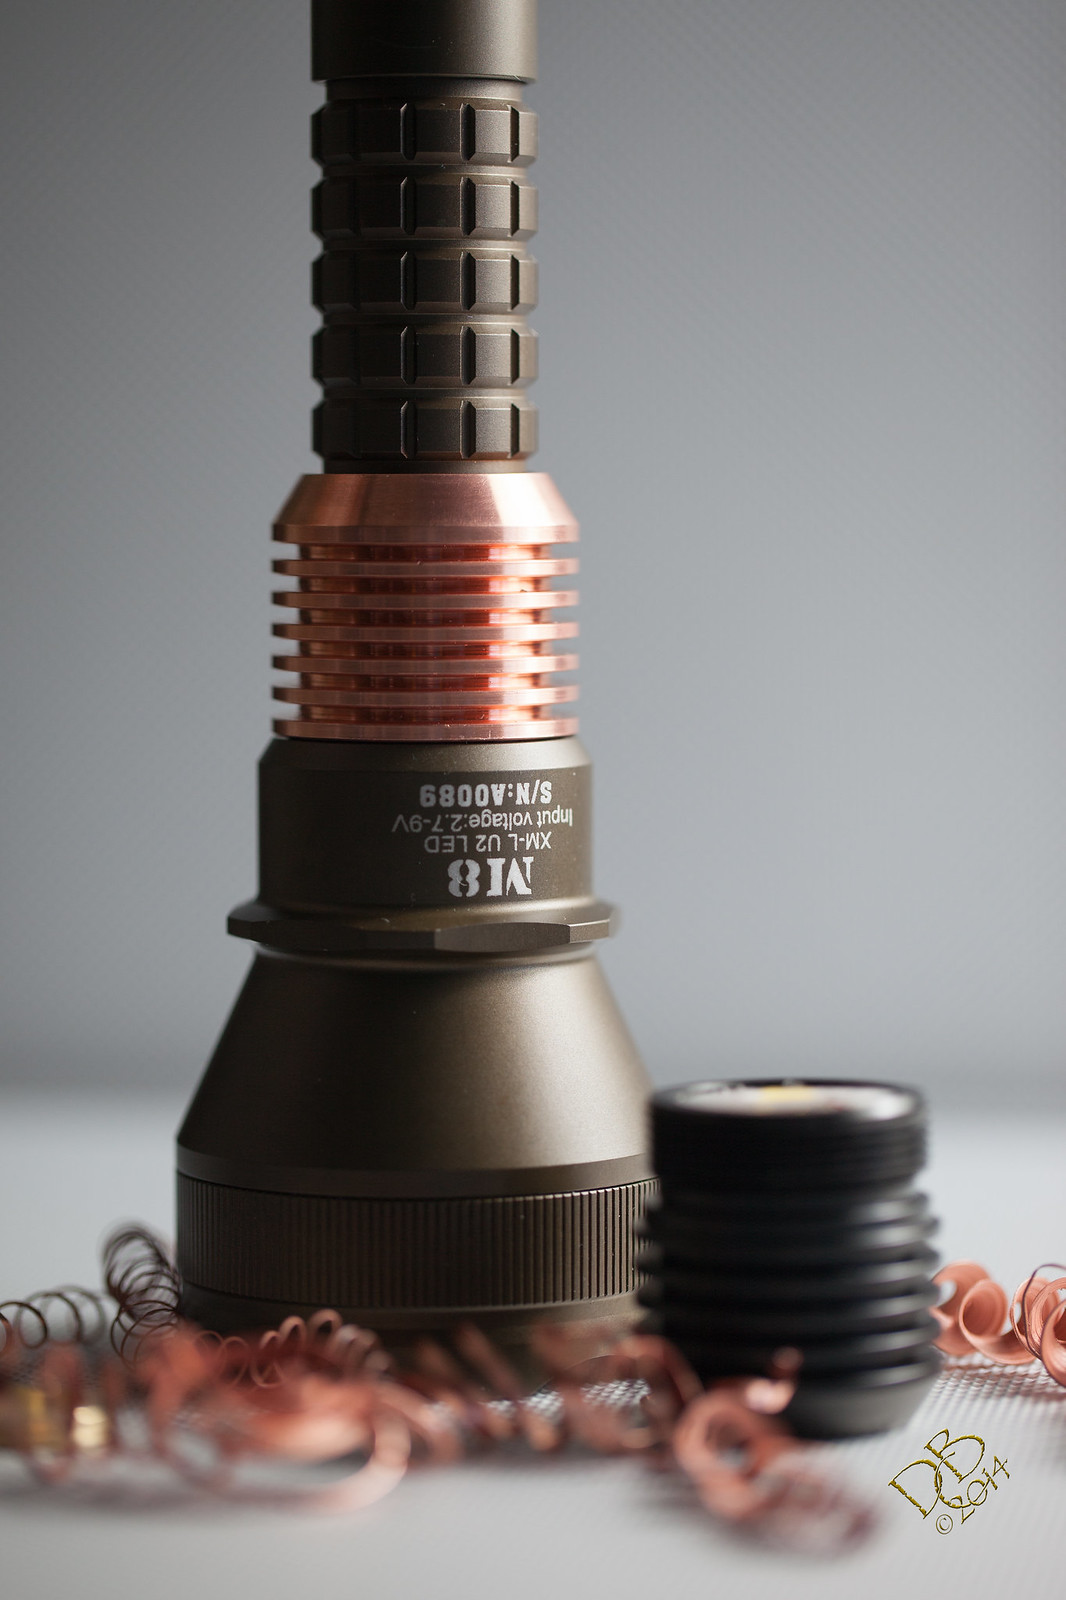
I have the 10A+ in my Solarforce M8, which just got a face lift and a comlplete rebuild. It’s now carrying Buckets 8 ounce copper finned pill/light engine with a new driver and 18 total chips. It makes 6.77A at the tail and pushes 3226 lumens OTF @ 30 seconds. ![]() The switch is fantastic! Easy to change modes with the reverse clicky, smooth operating and I know it’s going to be solidly reliable for a lot of uses. Confidence is the name of the game, and this one’s built like a tank, as is the rest of the light, so it’s very inspiring to use and a delight.
The switch is fantastic! Easy to change modes with the reverse clicky, smooth operating and I know it’s going to be solidly reliable for a lot of uses. Confidence is the name of the game, and this one’s built like a tank, as is the rest of the light, so it’s very inspiring to use and a delight.
Thank you for all your hard work with this! Absolutely love it!
I have a project in mind that requires a switch with these capabilities. Can you put me on the list of buyers for when they are available?
@Tofty: Is there any specifics like date or price on whether this will be available to purchase?
@DBCstm: Is the switch a straight swop-out with the M8 switch? Or is there some modification required?