UltraFire UF T80 XHP50 Review
A new torch recently released is the Ultrafire UF T80. The flashlight is equipped with a XHP50 LED and includes a stepless brightness adjustment and includes a USB charging port.
Being my first XHP50 LED flashlight, I was keen to see how well it performed. The specified 2,500 Lumen promised much, but read below to find out how it fared.
UltraFire UF-T80 Cree XHP50 2500 Lumens Stepless Adjusted USB Rechargeable LED Flashlight (3 x 18650)
(http://www.kaidomain.com/product/details.S024453).Sellers/Manufacturers Specs
Brand: |
UltraFire |
Model: |
UF-T80 |
Flashlight Material: |
Aluminum Alloy (Type III hard-anodized finish) |
Flashlight Color: |
Black |
Emitter Brand/Type: |
Cree |
Emitter BIN: |
XHP50 |
Color BIN: |
White |
Total Emitters: |
1 |
Battery Configurations: |
3 x 18650 Li-ion batteries (not included) |
Voltage Input: |
2.7V - 4.2V |
Switch Type: |
Clicky |
Switch Location: |
Middle of Flashlight |
Modes: |
Stepless Adjusted and Strobe |
Mode Memory: |
Yes |
Mode Arrangement: |
Stepless Adjusted (1% - 100%) and Press twice for Strobe |
Circuitry: |
Digital Regulated 2000mA Current Output |
Brightness: |
2500 lumens maximum brightness (manufacturer rated) |
Runtime: |
1 to 2 Hours (manufacturer rated) |
Lens: |
Coated Glass Lens |
Reflector: |
Aluminum Textured / OP Reflector |
Carrying Clip: |
- |
Carrying Strap: |
Yes |
Other Features: |
1. Waterproof IPX-4 Standard |
Dimension: |
135mm (L) x 47mm (Dia. of Head) x 47mm (Dia. of Body) |
Weight: |
270g (not include battery) |
Package Content: |
1 x UltraFire UF-T80 |
At the time of posting this review the flashlight was priced at $47.84 shipped.
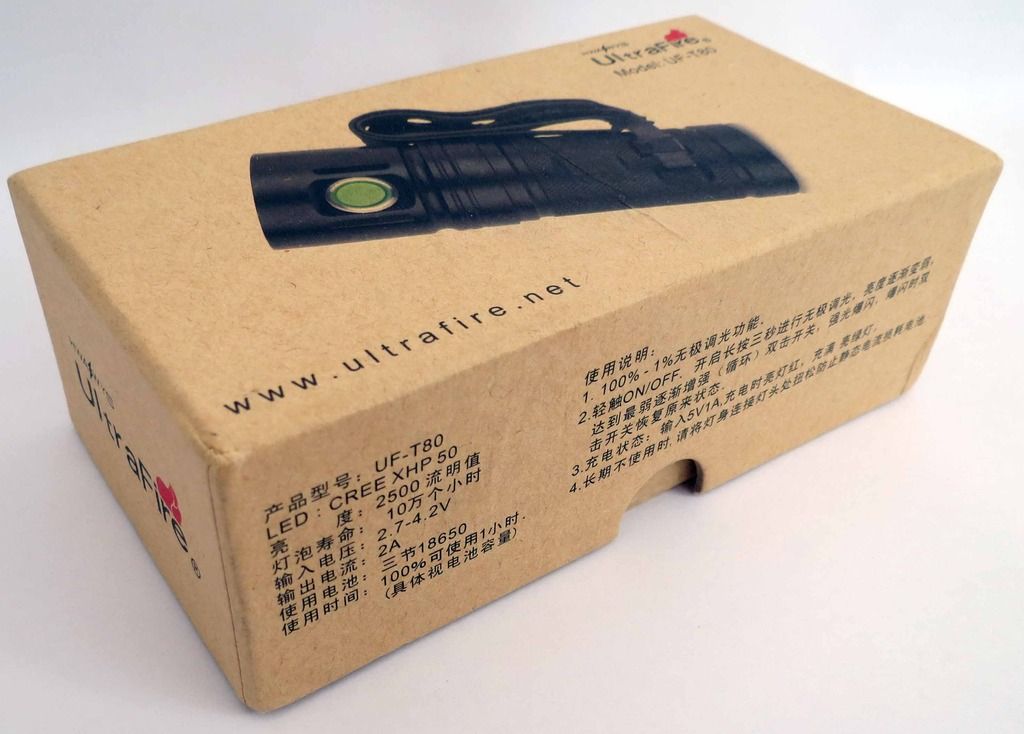
The flashlight arrived in a small brown box branded as Ultrafire and with a strap fitted. The description on the box includes specifications consistent with those in the product listing on the Kaidomain site.
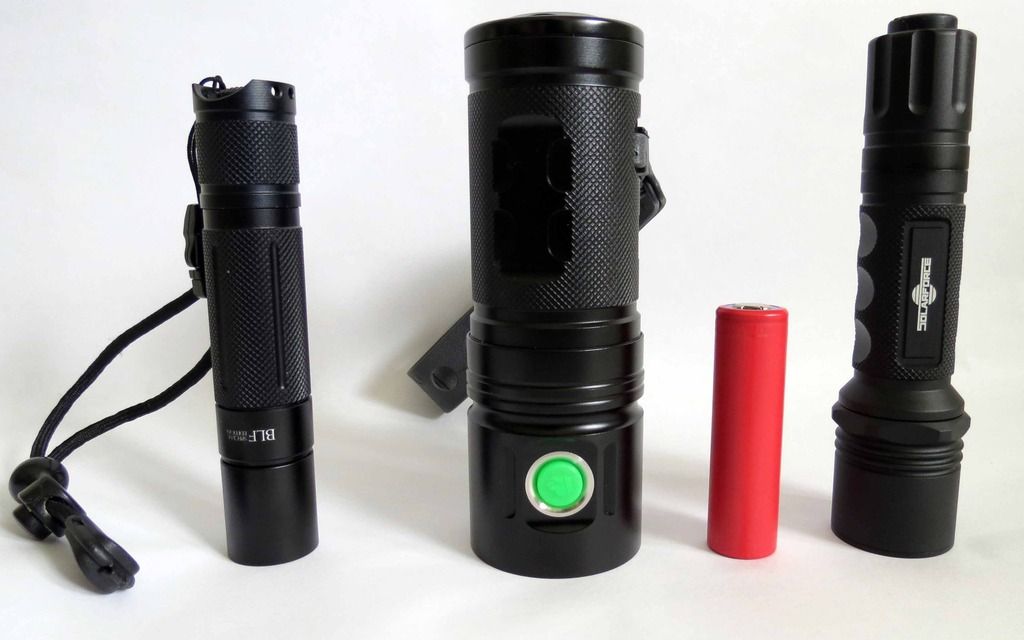
Below is a side by side comparison between the UF T80 and other torches.
Left - A6 BLF SE
Middle - UltraFire UF T80
Right -Solarforce L2N
Also shown is a NCR18650 battery,
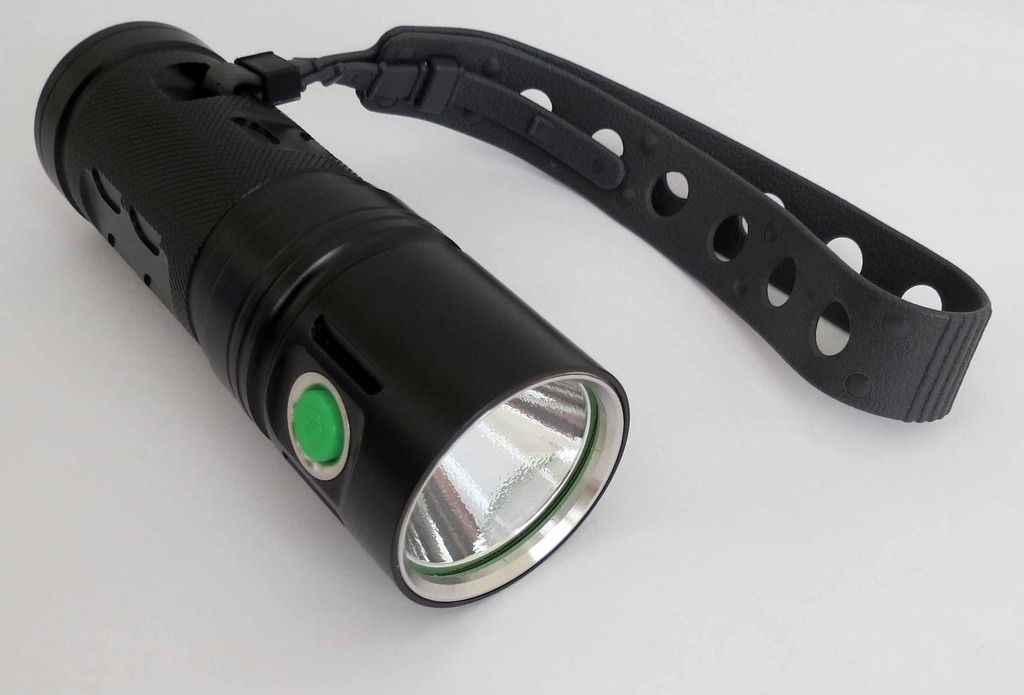
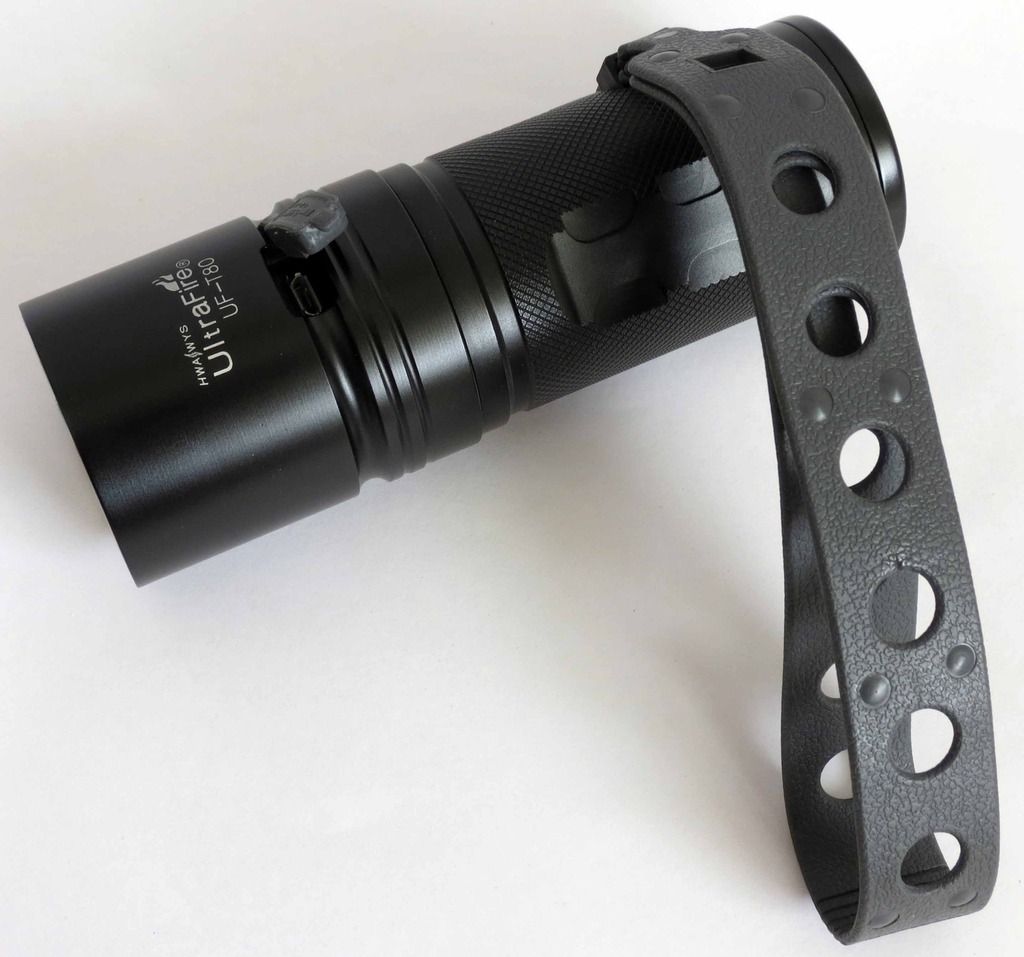
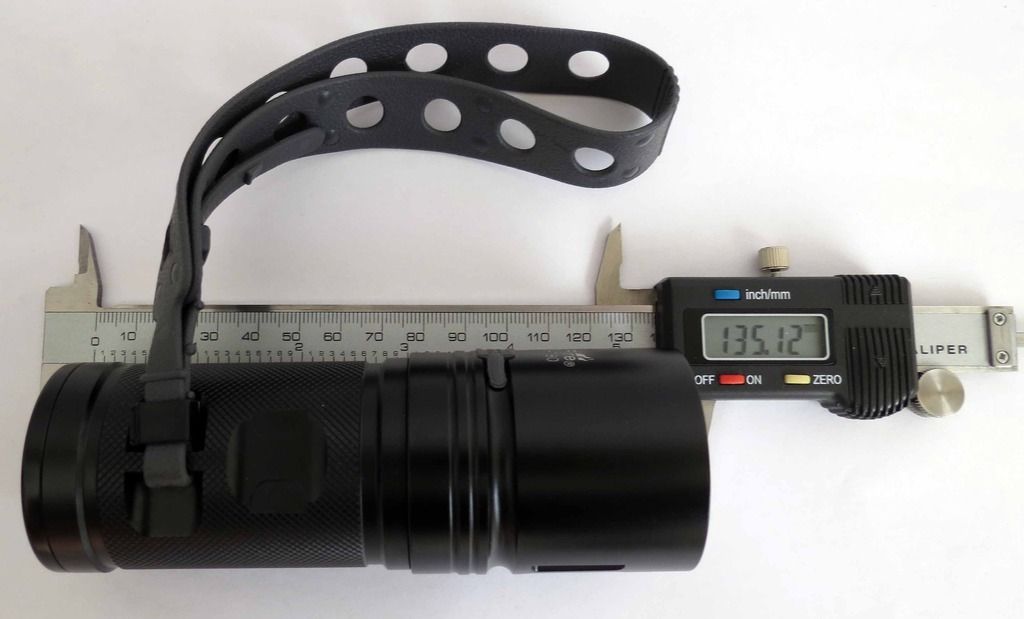
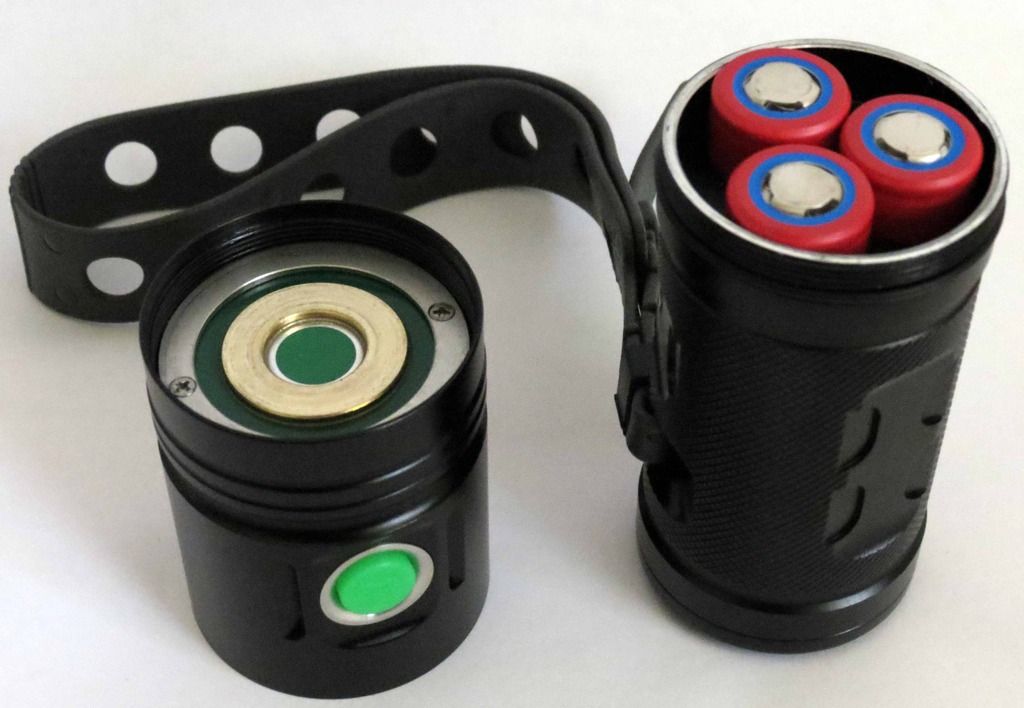
The flashlight comes with a large rubber/plastic strap fitted. It can be removed or adjusted in length.
Quality
The Quality is very good. The anodisation is well done and all components have good quality look and feel.
It doesn’t come across as a cheaply made product.
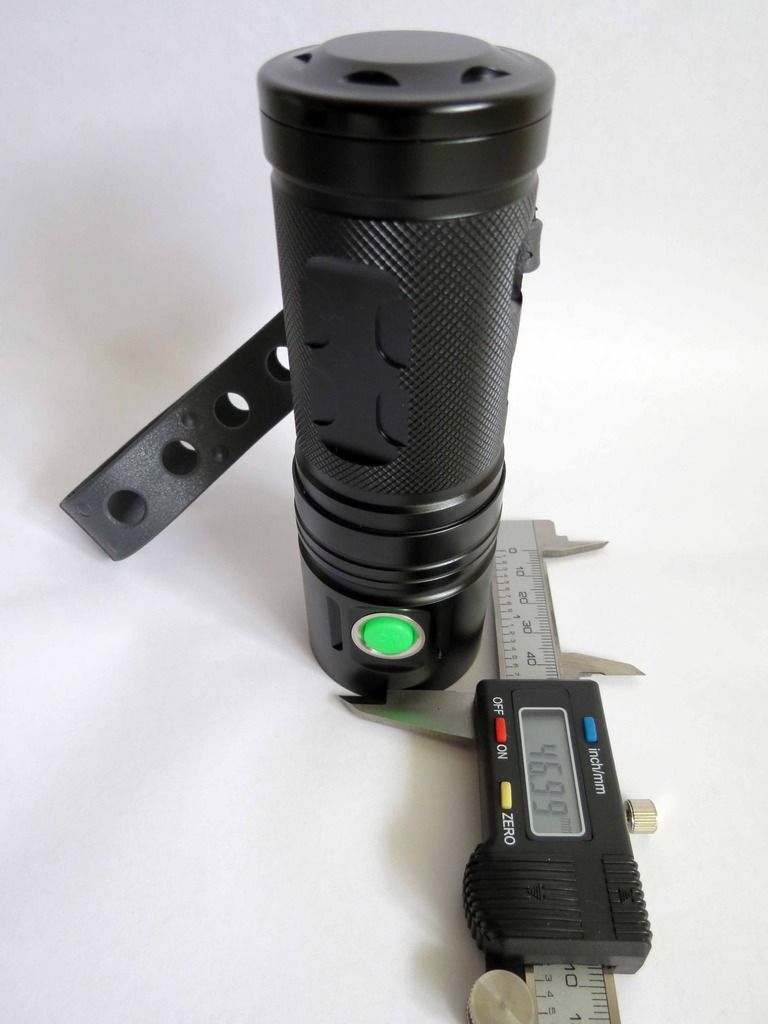
The dimensions of the torch are consistent with the product details. 135mm in length and 47mm in diameter.
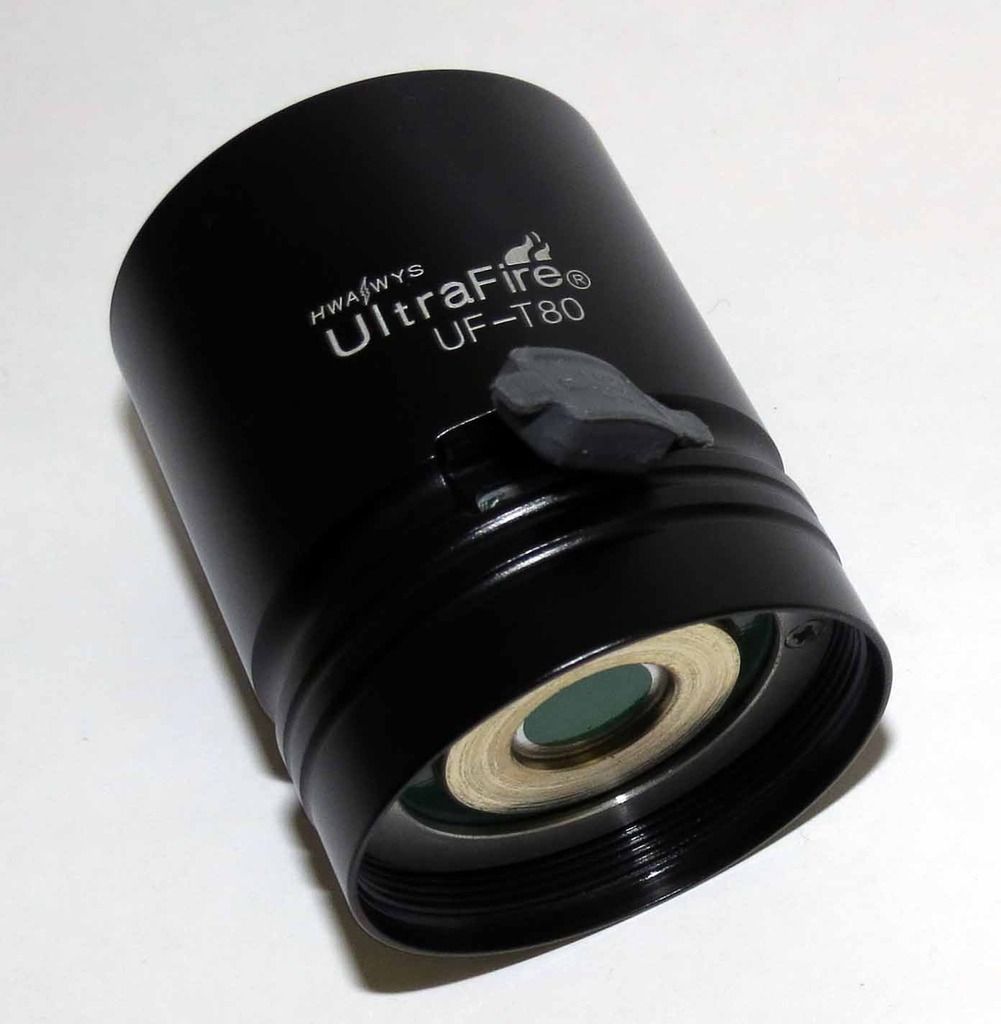
Below is a view of the LED and reflector. at the top of the reflector is a green glow in the dark ring.
The reflector appears to be aluminium however I could not remove the bezel to inspect carefully.

The anodisation is Type III according to the listing. It's smooth in finish.
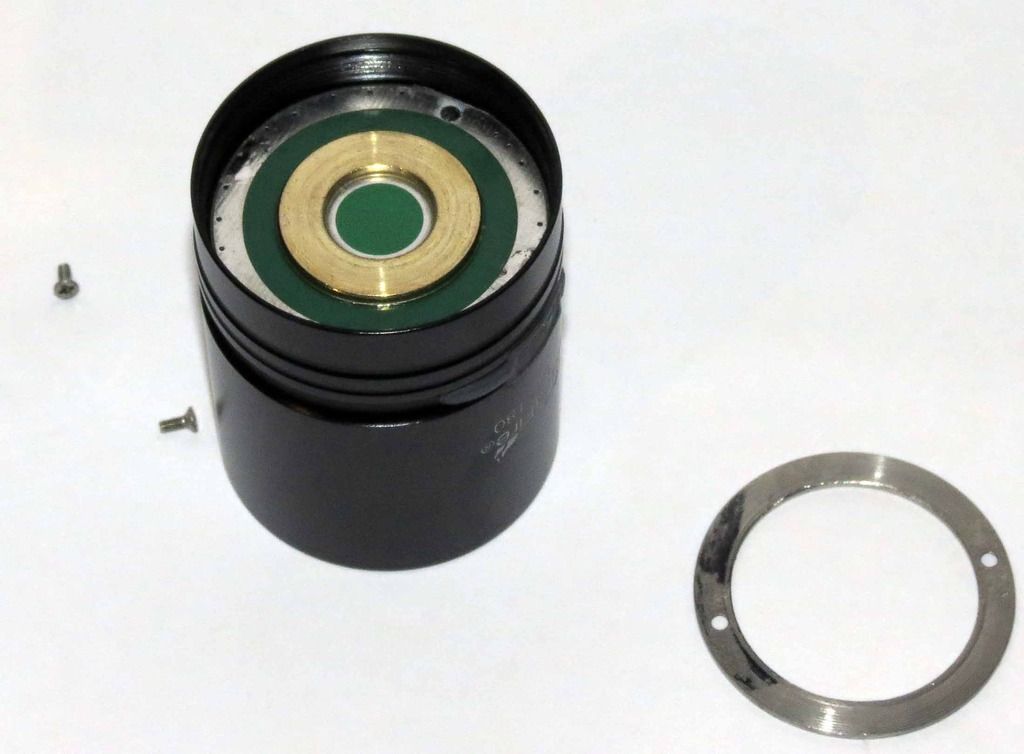
The head unscrews easily from the body. The inside of the head the Positive and negative terminals are not simply a PCB etched board, they are fitted discs.
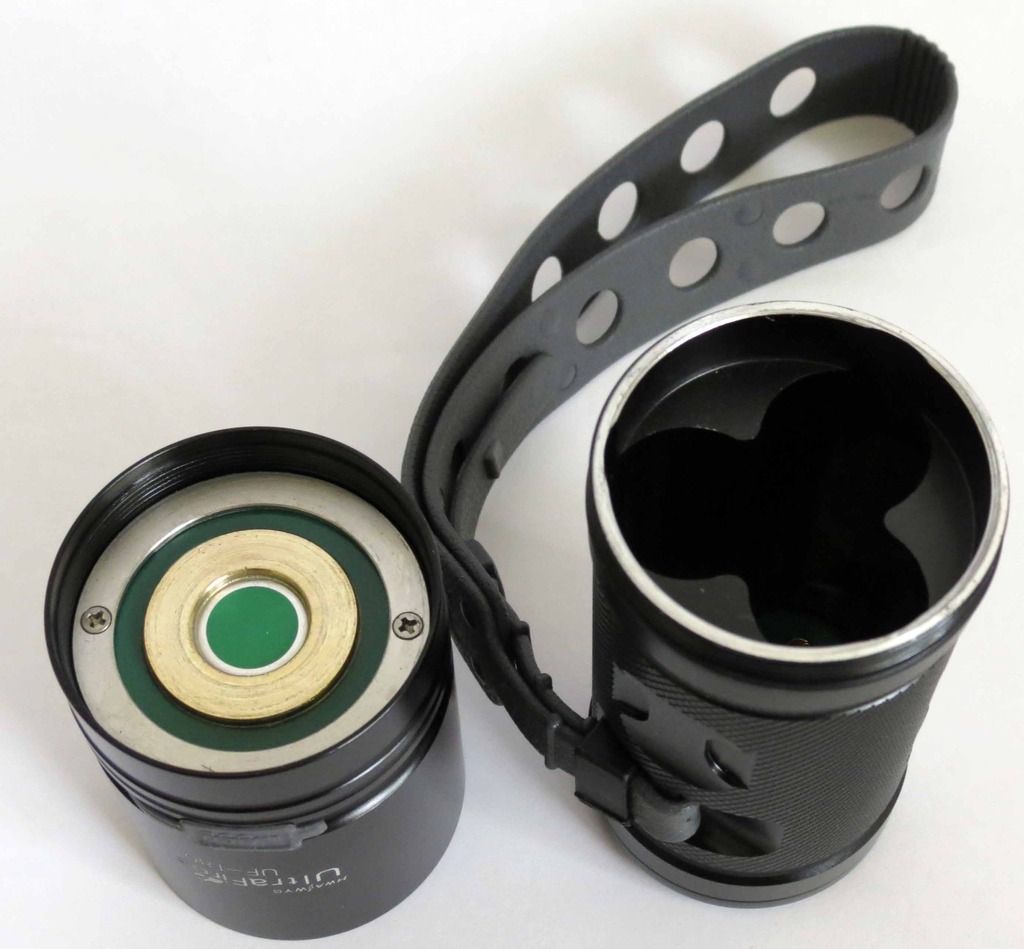
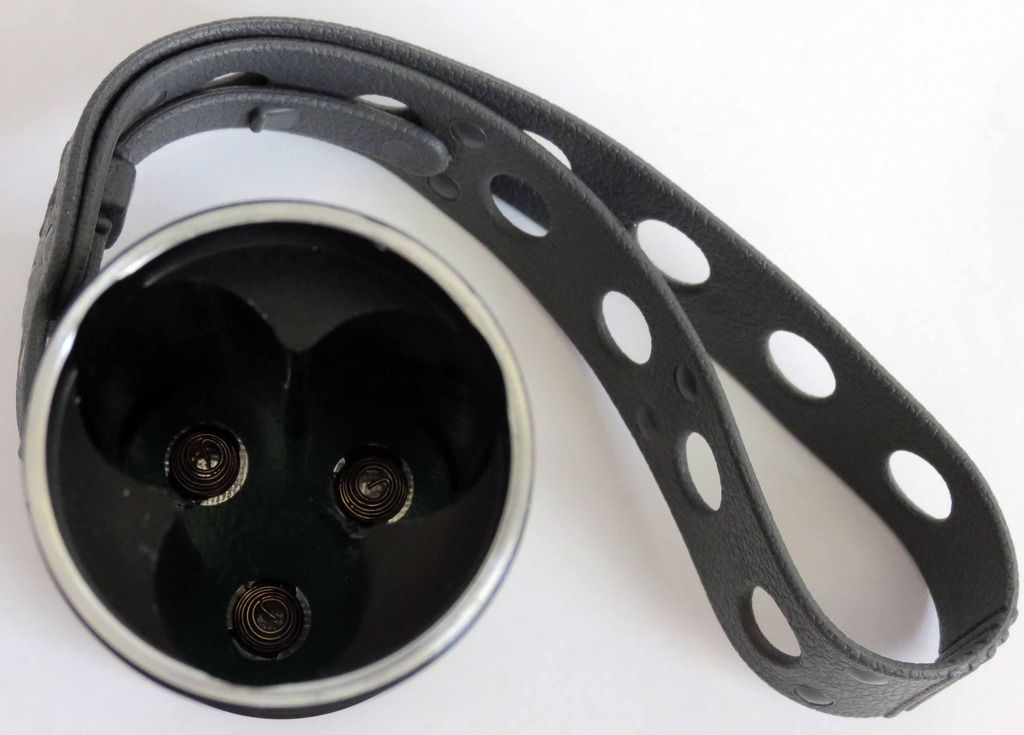
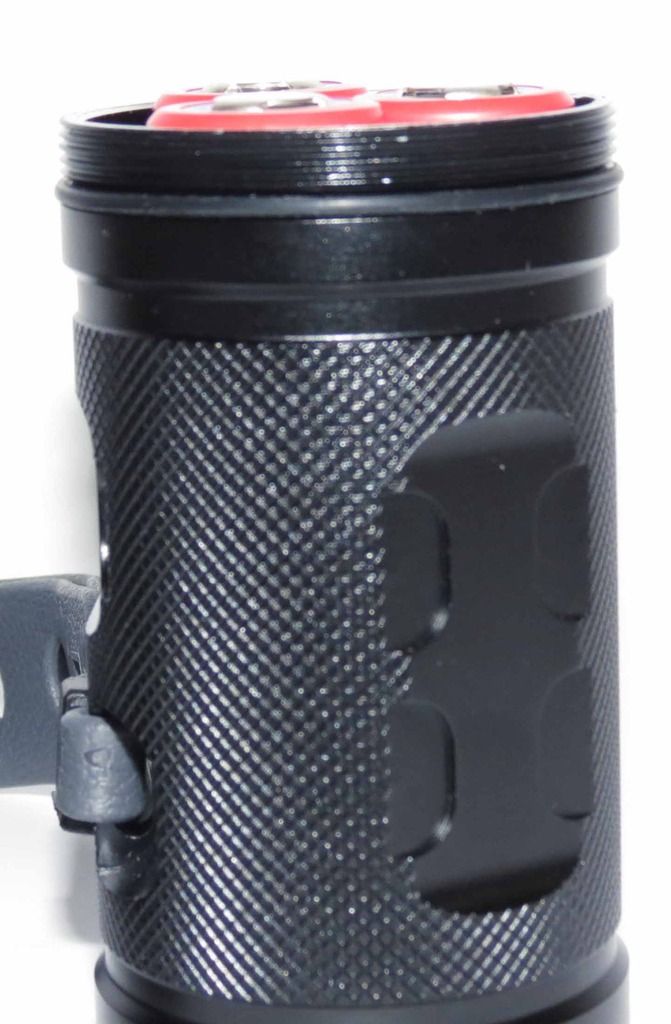
Below is a top view of the body showing the battery compartment.
The threads are good. Not quite square but not sharp. The threads were lubed well.

Below we see the batteries loaded into the main body of the flashlight. The batteries shown here are 3x3500mAh NCR18650GA (http://www.kaidomain.com/product/details.S024234).
These batteries are slightly longer than 65mm and work well in the torch. Prior to receiving delivery of the NCR18650GA I purchased I trialled 2 x LG HE4 cells in the flashlight.
As the battery configuration is 3P, I found that the flashlight also works well with either one or 2, 18650 cells inserted. I made sure that I used cells with a slightly raised button.
The LG HE4's have a flat top but the postive button is very slightly raised above the top of the cell. The NCR 18650GA cells have a raised button so are not a problem.
I did find that longer cells such as the Sanyo 26F (70mm) do not work. The problem here is that the body of the torch cannot be screwed in enough to enable contact between the
exposed top end rim and the negative contact in the head.
Below is a photo of the head of the torch revealing the USB charging port. The rubber cap is a tight fit and is well made.
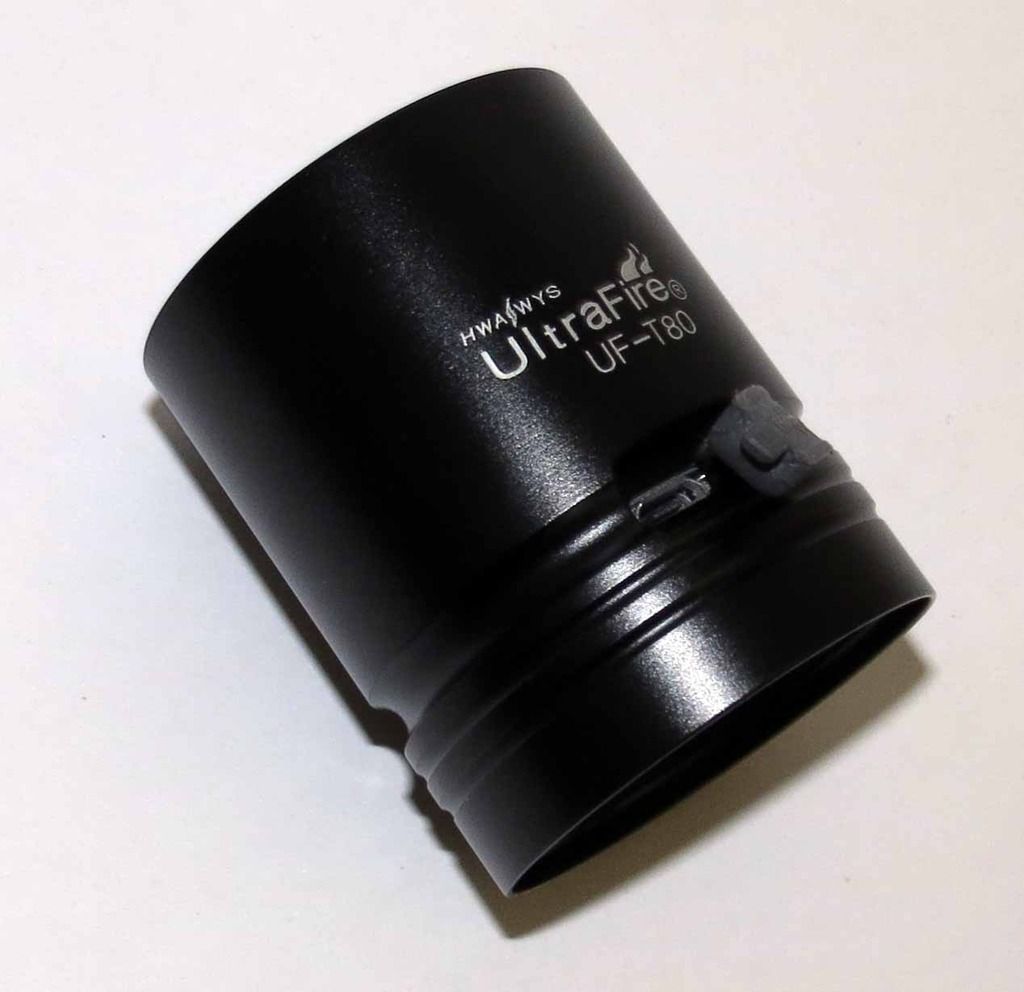
Another view of the port plug
I attempted to disassemble the head but found it's not as easy as I expected. As mentioned above I wasn't able to remove the bezel.
User Interface
The Flashlight is operated via a Green glow in the dark single push button switch located on the side of the head section.
TURN ON - One click press to turn on the flashlight. The brightness level initially is based on the memory mode.
VARY BRIGHTNESS LEVEL - Whilst the flashlight is on hold the button down to vary the brightness. If the last mode was HIGH, then brightness will reduce gradually with the button depressed.
If the last mode was LOW, the brightness will ramp. In both cases the ramp up or down seems linear.
Activate STROBE - Strobe is also included via a double tap of the button whilst the flashlight is on. To toggle back to the normal mode, another double tap is required.
The user interface works well. I sometimes wonder if I’ve adjusted the brightness to be spot on HIGH mode or if I’m just a little off. The same applies to low mode where you may just pass the absolute low level.
This is very minor as the ramp up/down through the brightness levels isn’t too quick. It works well. One minor issue noticed is a buzzing sound from the driver. The sound level is low and far from annoying, it’s just noticeable.
The buzzing occurs at all brightness levels.
Charging Function
The flashlight comes with a battery charging feature. On the side of the head is located a micro USB port that can be used to charge the loaded batteries.
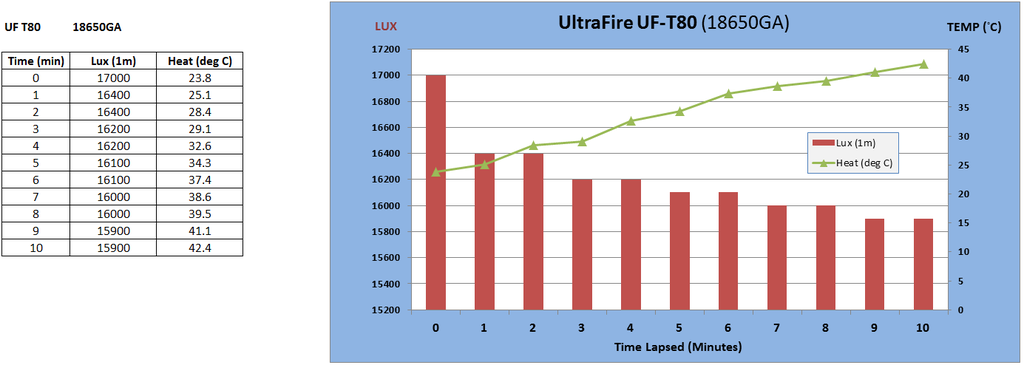
In this review a 10 Minute run on HIGH mode was performed to collect data on 1m LUX levels and body max temperatures.
At the commencement ofthe test run, the 3 x NCR18650GA battery terminal voltages were each measured at 4.20V. At the conclusion of the 10 minute run, the terminal voltages were measured and found to have dropped to 4.10V for each of the three batteries.
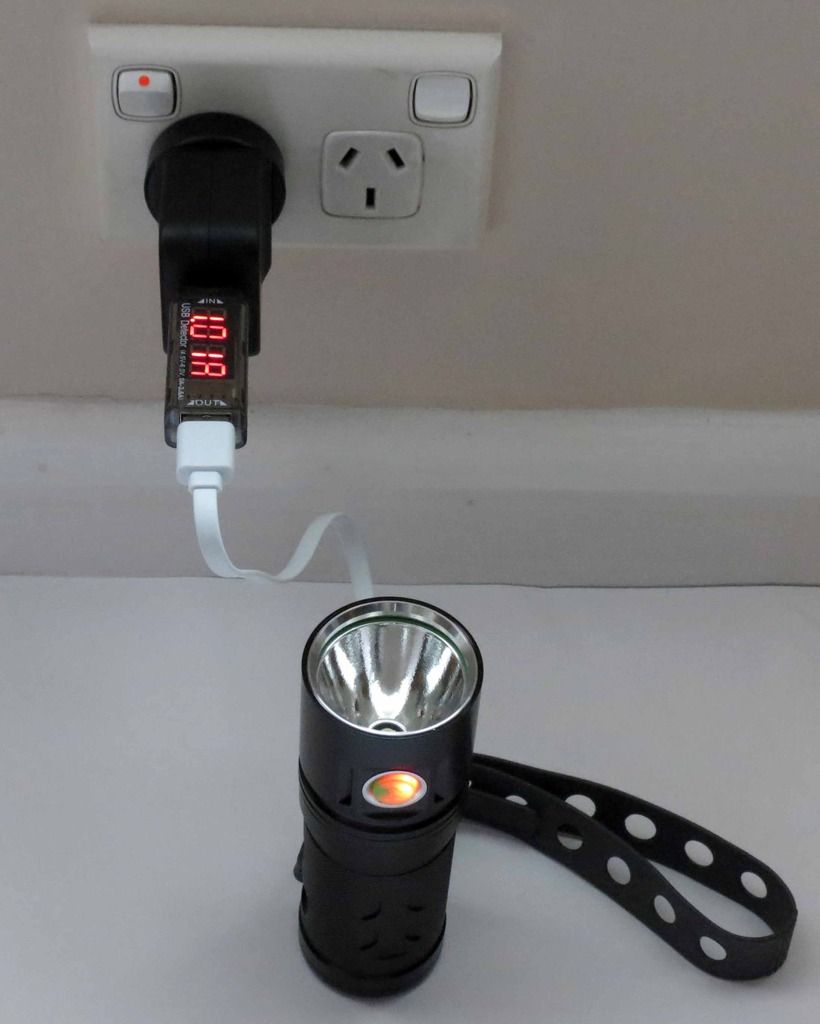
The photo below represents the start of the charge cycle with the 3 x NCR 18650GA batteries inserted into the Flashlight.
When charging the flashlight ON/OFF button lights up RED as shown below.
The starting voltage is 4.10V. Initial readings on the V101 were current at 1.01A and voltage 5.1V
Components used.
- Charger used for this test is a 2A (Google Nexus7 charger)
- Short USB charging cable (from Xiaomi 10400mhpower pack).
- XTAR V101 USB Voltage/Current Detector.
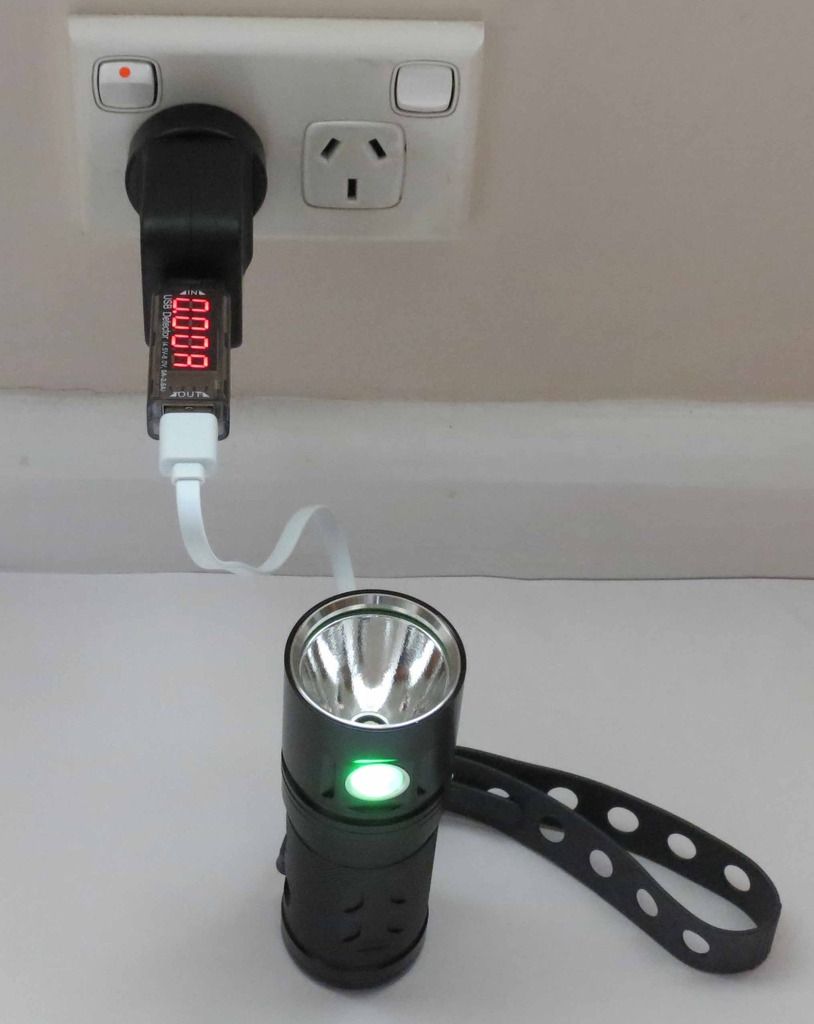
After approximately 90 minutes the charging cycle was completed. The flashlight ON/OFF button lights up green.
Final battery terminal voltage measure on each of the 3 x NCR18650GA is 4.18V. Slightly below what would ideal, but very close.
The current levels listed on the V101 gradually reduced over time over time,commencing at 1.01A (5.11V) then dropping down to 0.1A (5.14V) just prior to the charge cycle being completed.
The charge cycle is slow. A run time test of charging with more heavily depleted cells was not attempted. Based on this initial test it would like require 5+ hours to charge almost flat cells.
For me the charging feature here is useful when needed. My preference is to remove batteries from the flashlight and charge in a dedicated charger.
A more detailed assessment of the charging is not included in this review, only a simple assessment of the charging feature which demonstrates it works effectively.
Current Draw.
In the testing an attempt was made to test the current draw via use of,
- 3 x 18650 Battery holder with power leads, withNCR18650GA batteries fitted
- Digital Clamp Meter Uni-Trend UT203
The test was simply holding the positive and negative lead terminates on the head terminals/pads. The clamp meter was used on the red/positive lead.
The resultant reading on the meter was 3.76A which was more than I expected. A second test with the clamp in a different position saw a 4A result. This was higher than I expected.
More testing may be required here to confirm the results. The temperature measurements in the 10 minute run show the flashlight head heats up gradually over time which suggests current draw is not low.
I would suggest that current draw is between 3A and 4A which is impressive.
Performance
Three key tests were performed to assess the flashlight output. These were,
1. Outdoor Beam Photos.
2. 10 minute run of light level measurements (Lux @ 1m)
3. Indoor Ceiling Bounce comparison against other flashlights.
4. Wall Beam images
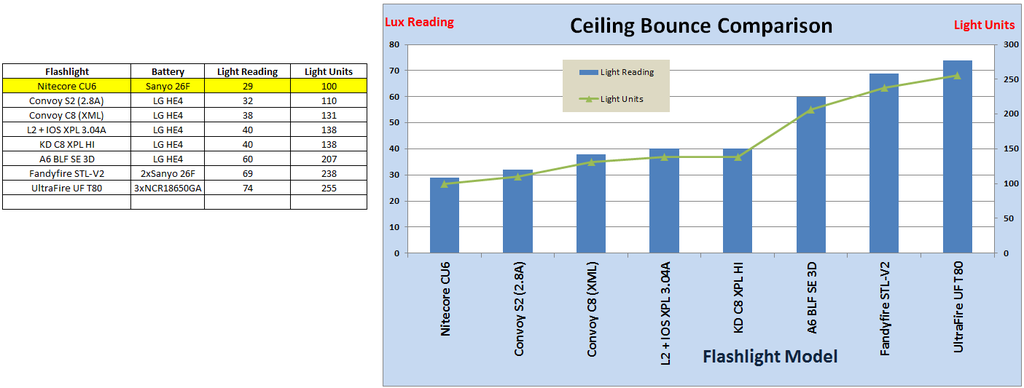
Indoor Ceiling Bounce comparison
The method used here was to test the ceiling bounce light levels for a group of flashlights to gain an understanding of the total light output. In time I'll build a sphere to do so, but prior to, I've adopted the ceiling bounce approach.
The results show that the UF T80 produces more light output than the next brightest flashlight in my possession the Fandyfire STL-V2 (3xT6). The A6 BLF SE flashlight may be producing approximately 1,100 lumen.
I would estimate then that the UF T80 produces in excess of 1,400 lumen.
10 minute Run on HIGH (Lux @ 1m)
Below are details of the results collected for a 10 minute run whilst the flashlight is on high mode. The Lux readings recorded at 1m are not high. This is expected as the flashlight output is more flood than throw.The temperature on the body increased at a constant rate. At the conclusion of the 10 minutes the flashlight was very warm to hold.
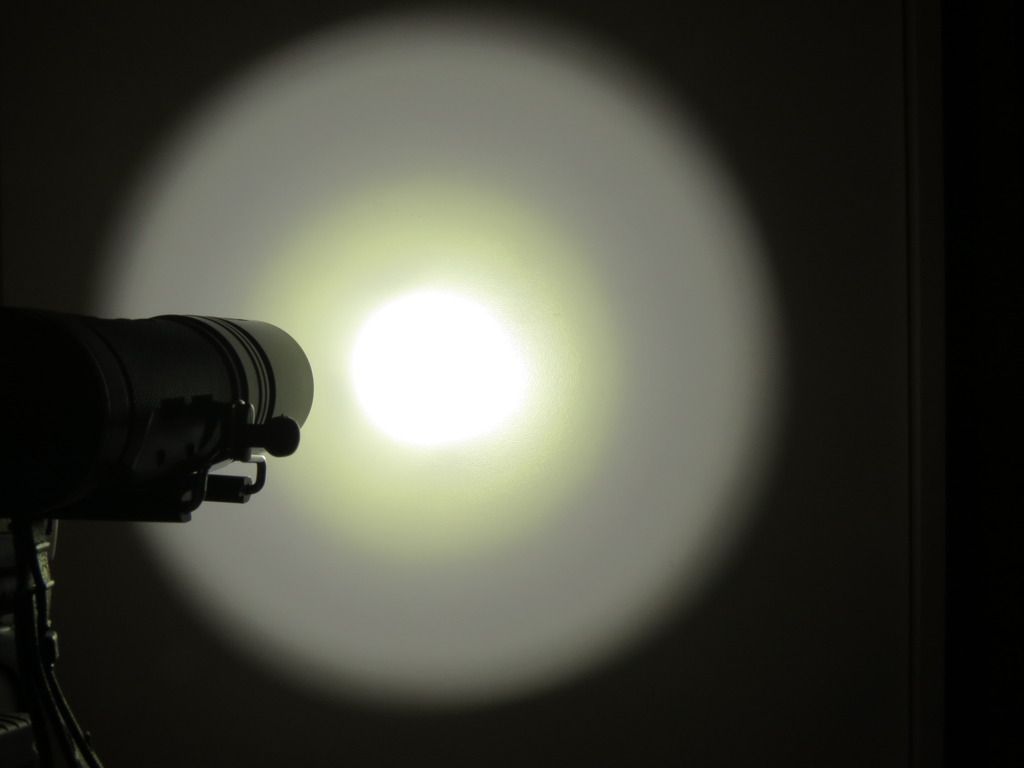
Wall Beam images
High Mode. The image presented includes a "yellow doughnut" around the centre hot spot. It's only visible when using producing a beam wall shot, so isn't a concern. The Hot spot and spill tint is on the cool side.
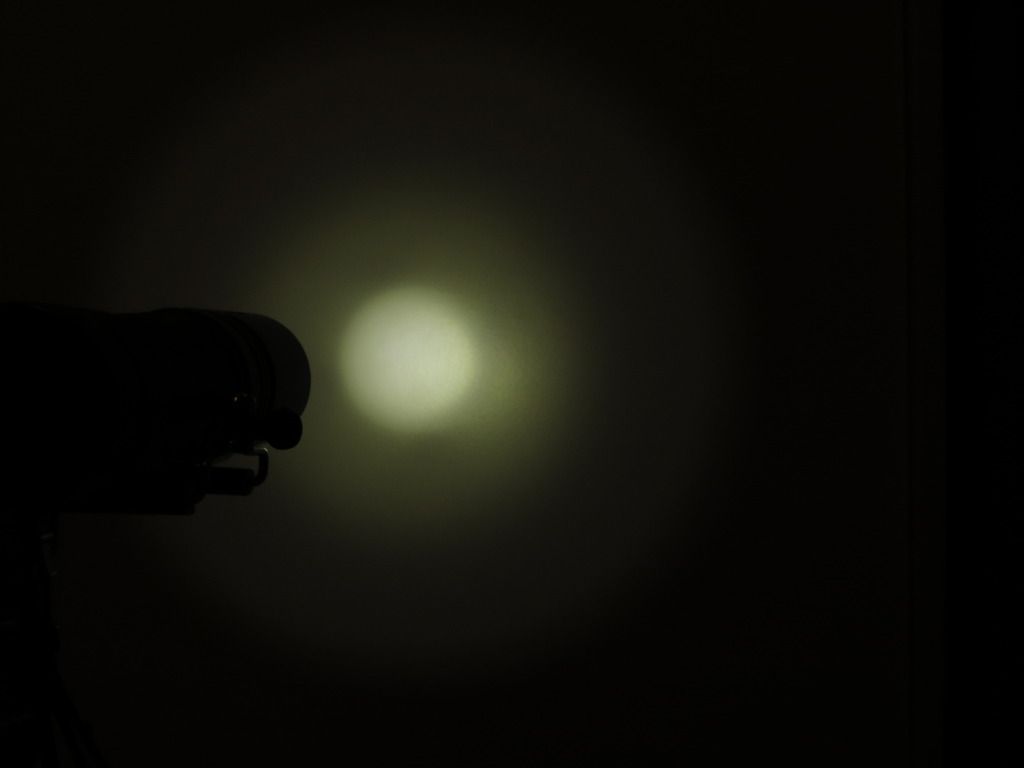
Low Mode Beam shot
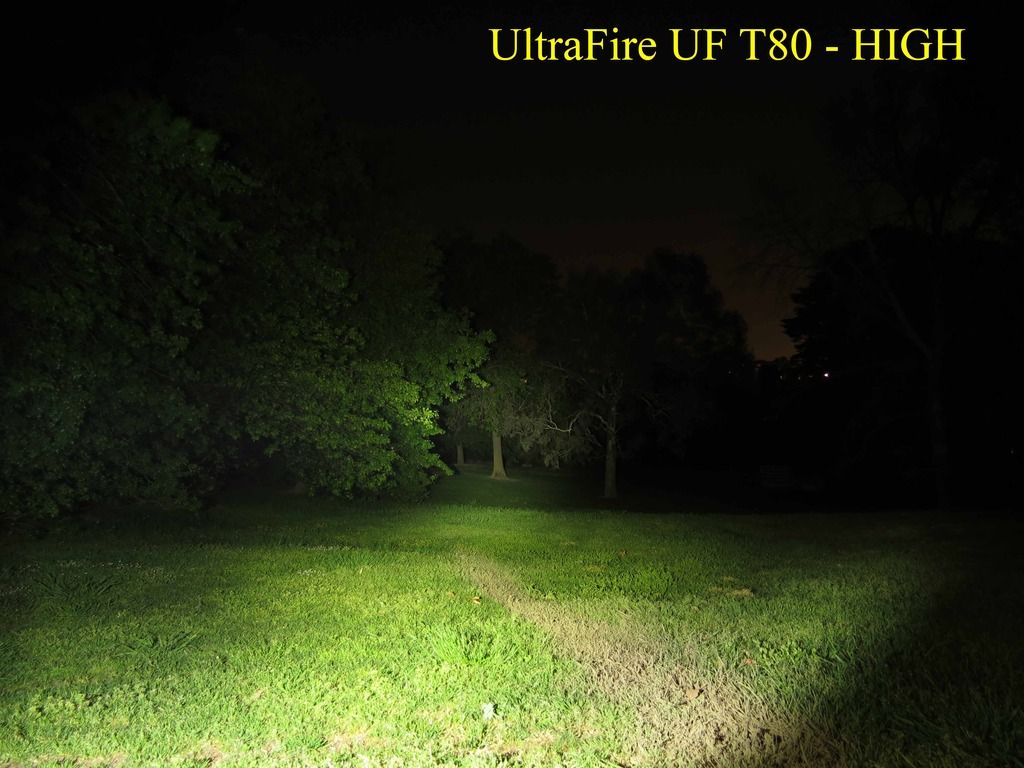
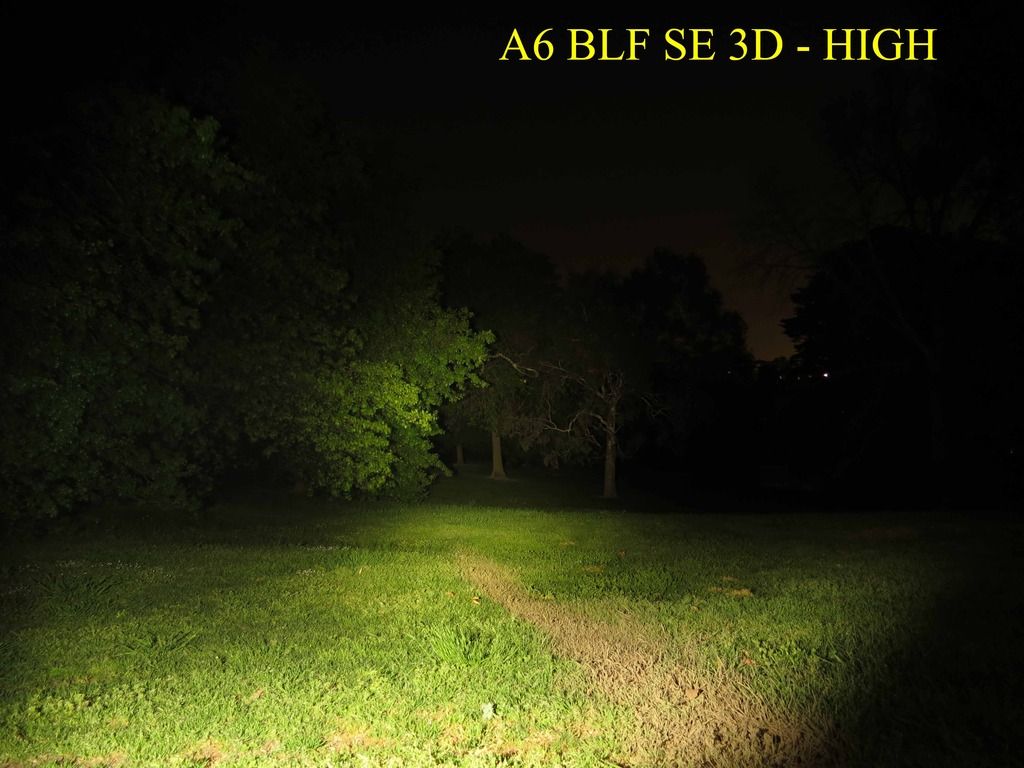
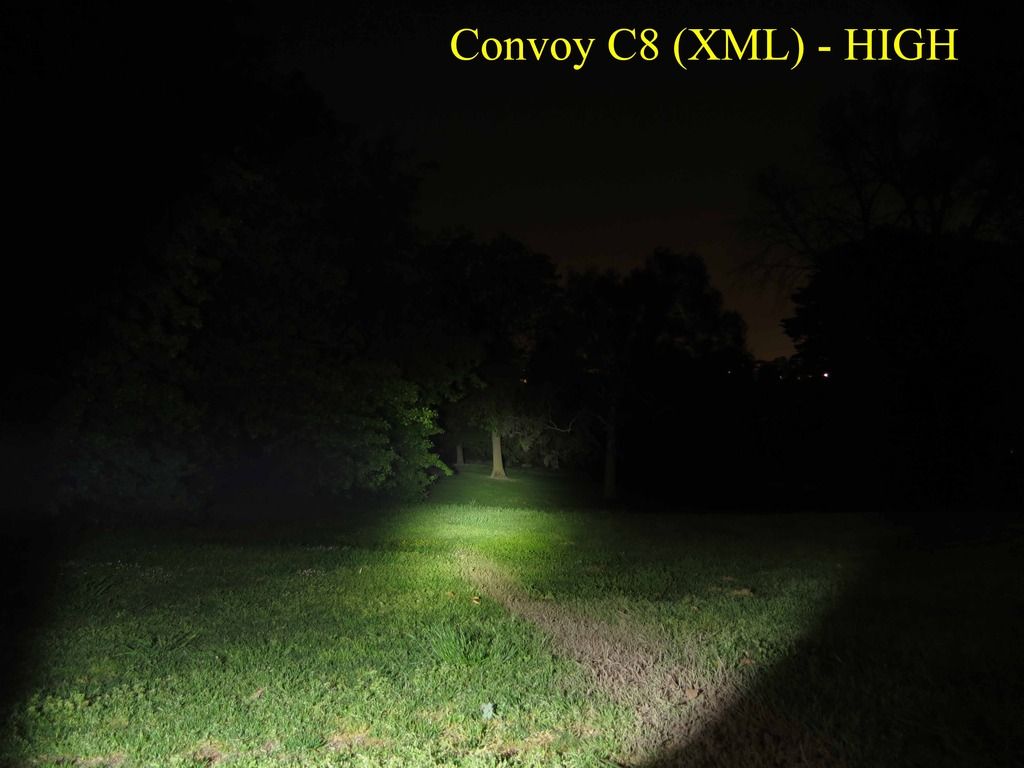
Outdoor Beam Photos
The outdoors shots were taken in a park land where the distant tree in the beam centre is approximately 60m (65yards) from the Flashlight. The three flashlights used here are,
1. UltraFire UF T80
2. A6 BLF SE 3D
3. Convoy C8 OP (XML Model)
The results show that the UF T80 and the A6 output is very similar. Visually the UF T80 has slightly more brightness and flood, but not by a large margin. Both would be considered a Floody flashlight as opposed to the C8 where we see the light is more concentrated at the hot spot. Both the UF T80 and A6 result in a higher overall light output than the C8.
Conclusion/Final Summary
Overall I’d consider the UltraFire UF-T80 a very good flashlight. This is the first 3x 18650 (3P) flashlight configuration I have used and am overall impressed with its quality and performance.
Light output is very good to excellent, producing lots of light for its size. The XHP50 is driven well with a battery drain current exceeding 3A.
Pros
- Excellent Quality
- Battery charging function
- Very good Flood
- Light output is very good to excellent for its size. (est >1400 lumen)
- 3 x 18650 design provides longer run time
- UI is simple and works well
- Strobe it’s available but hidden.
Cons (all minor)
- Throwing range is ok
- Wrist Strap is large. Some may prefer a simpler lanyard.
- On High there is a noticeable yellow doughnut.
- Buzzing of the driver.
- Battery charging function charges to 4.18V.
I hope you have enjoyed reading this review. Any questions or feedback would be appreciated. Thanks again to Kaidomain for supplying the flashlight for this review.