I told ya! I wasn’t exaggerating when I said they have the nicest customer service rep I’ve ever dealt with. I’m talking USA too. They sent me a personalized Christmas email when it had been more than a month than I had talked to anyone there. I guess the key is having the right email address. If anyone ever wanted the email just shoot me a PM and I’ll pass it along.
I finally started on my B158 last night. I’m a big fan so far. I did a gas-dedomed XP-G2 S2 1D from FT and the tint came out really nice. Also a FET+1 driver of course. Just by the unscientific measurement of pointing both hotspots at a wall from 15ft and comparing, the throw seems quite a bit better than my Jacob A60 with the same specs. That’s before it’s even done. I still have to install the lighted tailcap and bypass the tail spring, center the emitter (it’s pretty far off center right now), and paint the pill-top black to cut down some of the ugly reflections. I’ll have to measure amps after the Clamp Meter GB comes through.
Did everyone else use the white plastic centering ring or just get rid of it? I am using it for now, just to hold the emitter down.
I also use white centering ring off course. It is far easier to put a dab of artic silver under led mcpcb than to solder to pill and then you see it is a just bit off center. No difference in performance in my book and I tried both.
Yeah I don’t like semi/permanent thermal glues either, I normally use Ceramique II. I just didn’t know if that ring was causing some of the beam “blemishes” since it sticks up above the emitter.
I have soldered the board to the pill btw. Before heating, I used two pieces of a match between board and side of the pill to keep the board centered while the solder melted.
My lights get used to “show off” indoors more than anything (I live in a city apartment, and don’t get out as much as I would like to) and ugly beams don’t impress
When I am actually outside with them, it doesn’t matter nearly as much.
Suit yourself guys. I have mirror foil on the order. I plan to put it around emitter and in combination with precolimator lenses I plan to get spill effect and pump bit more lumens. As for the black paint: once when even tiny particle of paint gets on led burnout follows :) Maybe that will not happen to you... Maybe it will happen to lets say your buyer if you are selling some.
Selling is too stressful. I sell things that I don’t want anymore, but I rarely buy things for the purpose of selling. I can accept when something doesn’t work perfectly, but i wouldn’t sell something like that. It drives me nuts.
I received my red light b158 yesterday. I am having a hard time removing the driver. How do you remove it? And also the mcpcb is difficult to remove because it’s glued to the pill.
- Take one tiny nail and put it through +- wire holes
- Take heat gun (or butane torch) in right hand(or vice versa if you are left handed) and start heating from bottom side of the driver
- At the same time time try to press (bit harder) nail from upper side of the pill (U can use hammer or whatever you want here like lets say some wood)
- Take needle nose pliers and put it in a holes of led mcpcb and twitch left or right :)
Same methode than Luminarium iaculator, except i didnt use heat, the nail i used had a blunt rounded point, i tilted it when inserting it in the wire hole so it would rest on the outer part of the driver/contact plate where it meets the wall of the pill to avoid damaging any component, a small deliberate blow on the nail head with a hammer was all it took to free the driver.
Hello everybody
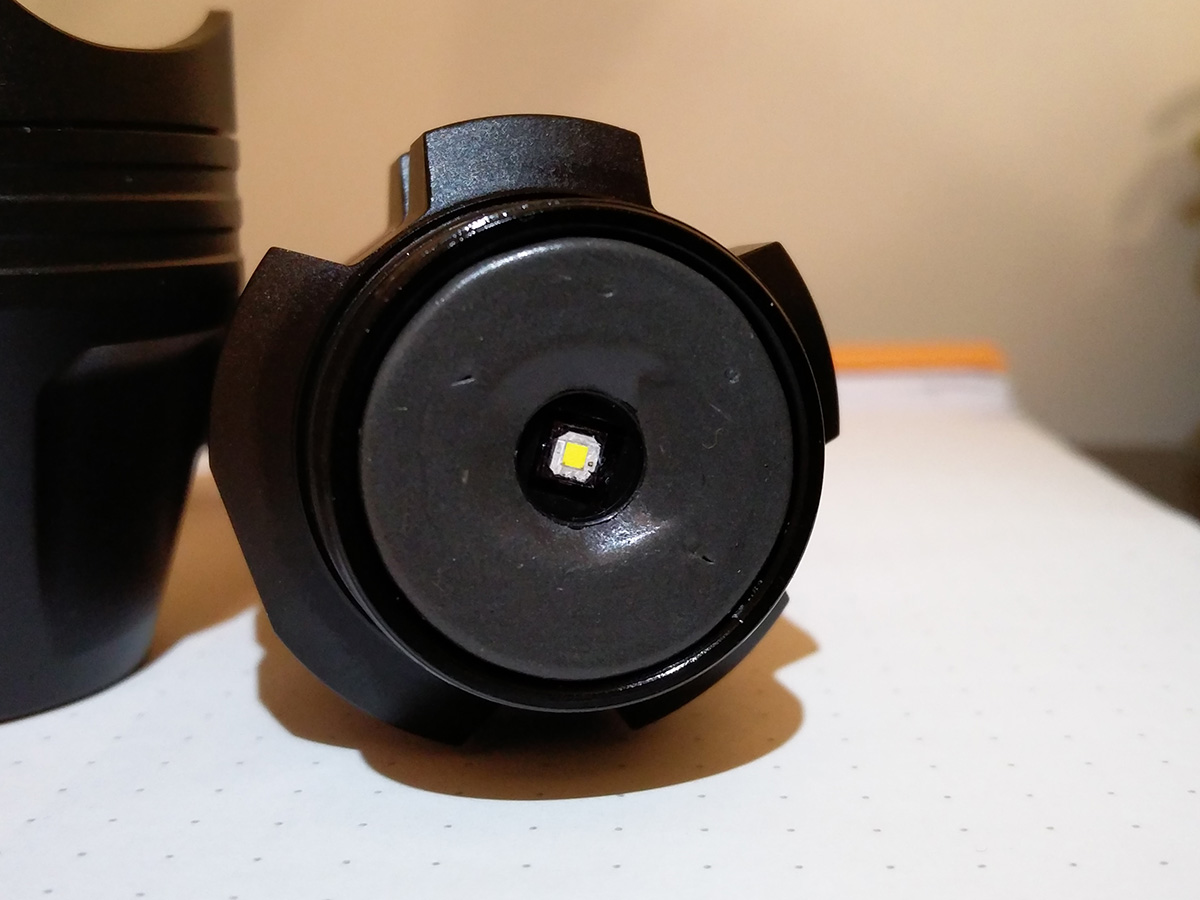
This is my first proper zoomy and my first attempt to dedome a led. And it all worked out beautifully
XP-G2 S4 2B dedomed with arctic silver, BLF A6 A17DD-L from BG, 18AWG wires everywhere and I’m reading 4,5A in the tail.
Since I didn’t have heat resistant paint I used black marker and sugru around the led. It should be heat resistant to 180°C (356°F). It’s not pitch black and not 100% matte finish, but I wanted to try it out anyway. Black permanent marker leaves way more reflective surface. The plastic ring is underneath, so it should be 100% reversible, if need be.
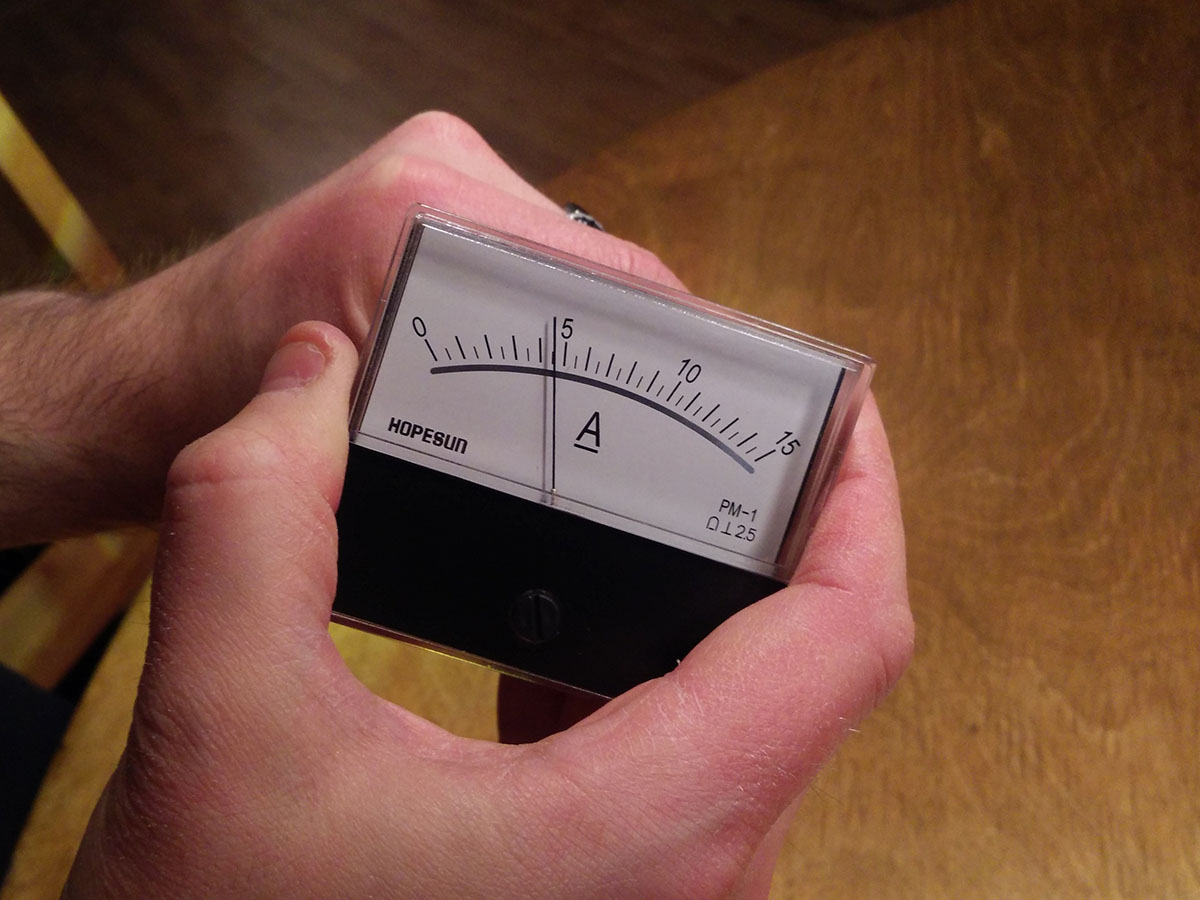
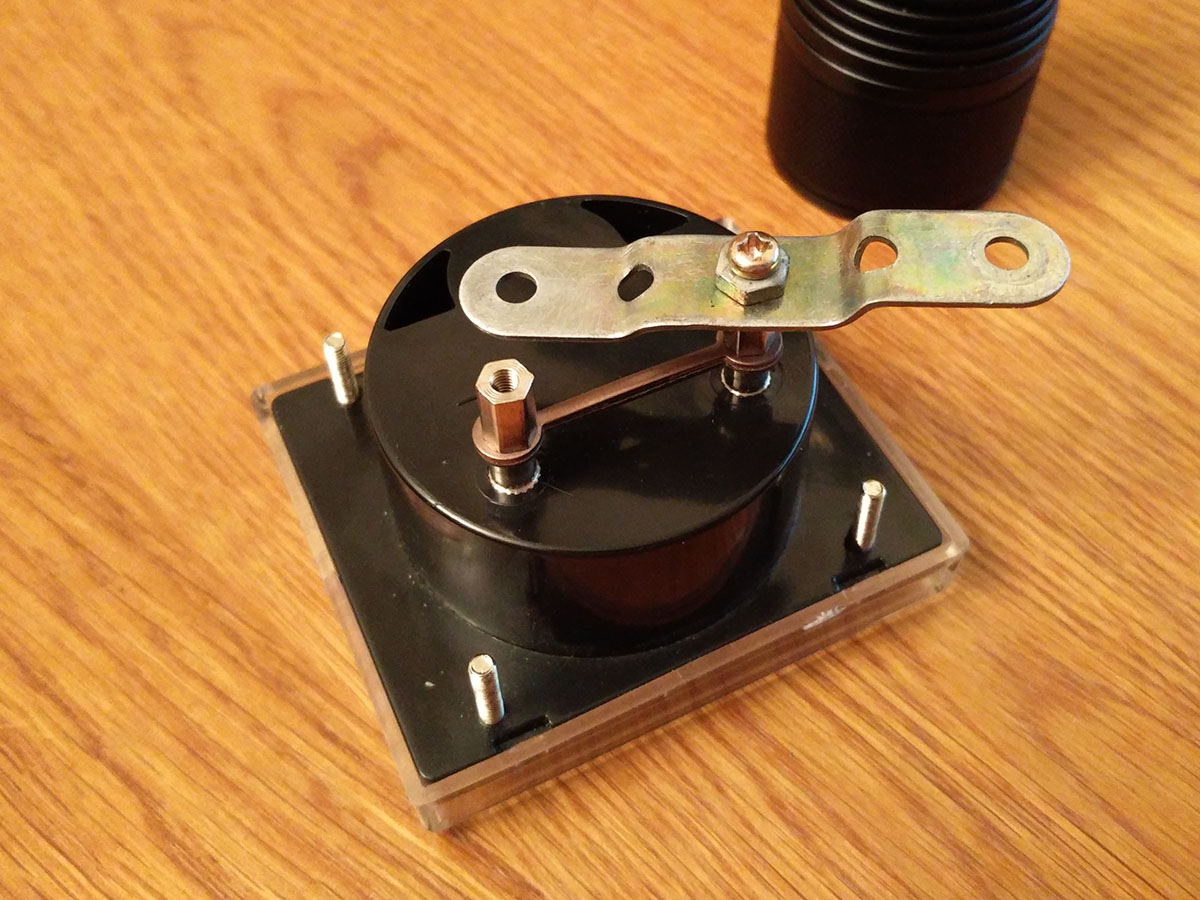
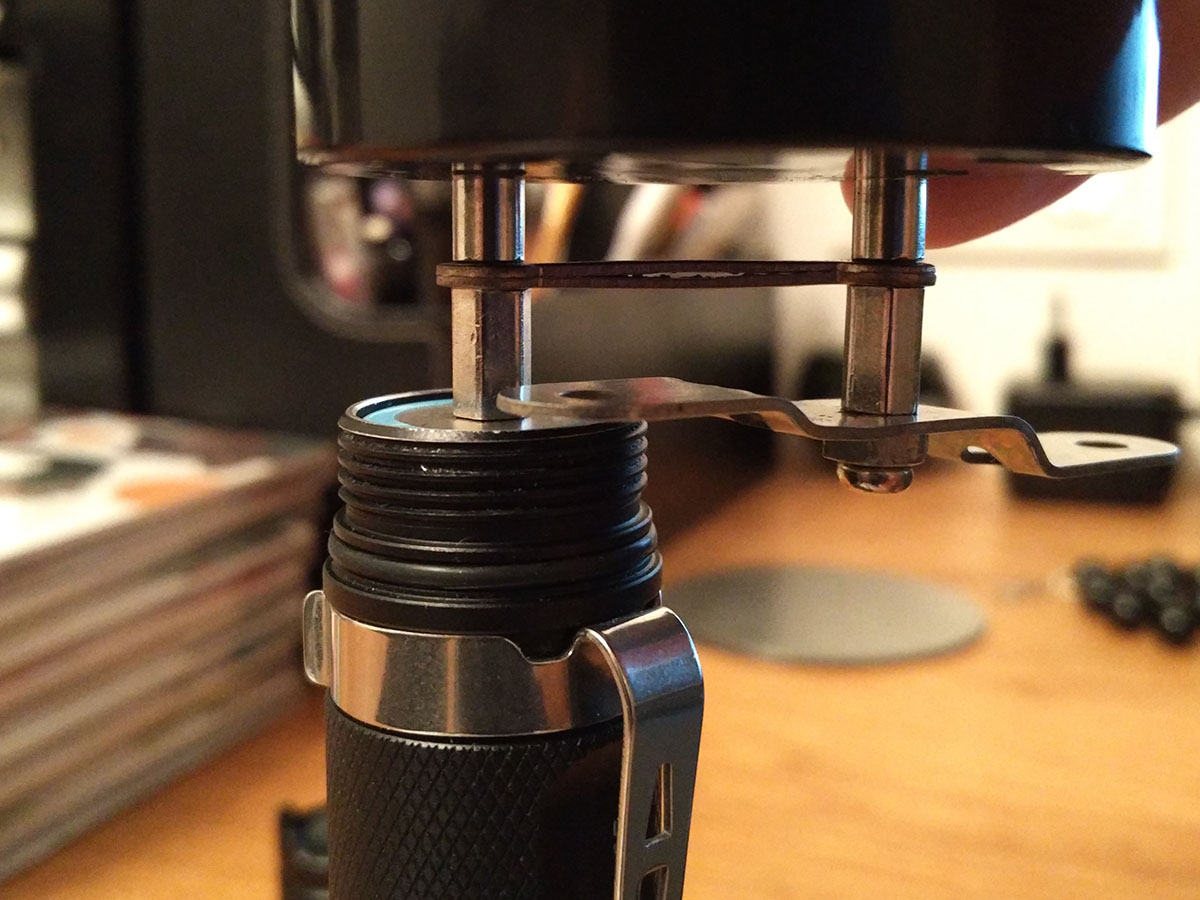
And some pictures of my badass amp reading setup featuring X6 in the last picture
Nice :) Your A readings encourages me that my uni-t clamp meter readings could be correct. Which battery did you used?
Really interesting way of tail current readings with analogue meter.
Did you noticed lower A readings when gently pressed? (gentle press on battery - and exposed aluminum = lower A readings, fair and hard press = higher readings)