The reamer did not turn up before the weekend so unless I come up with plan C things may be quiet. I’ll have to get back onto drawing the inside of the head and start machining the insides. I hear my lathe protesting from here.
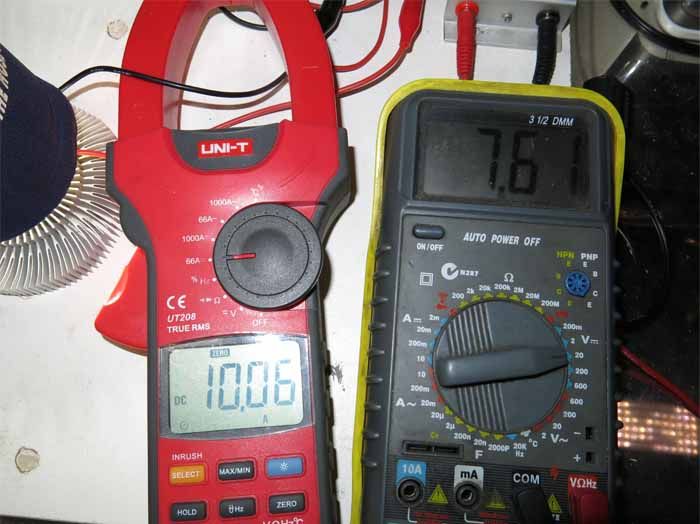
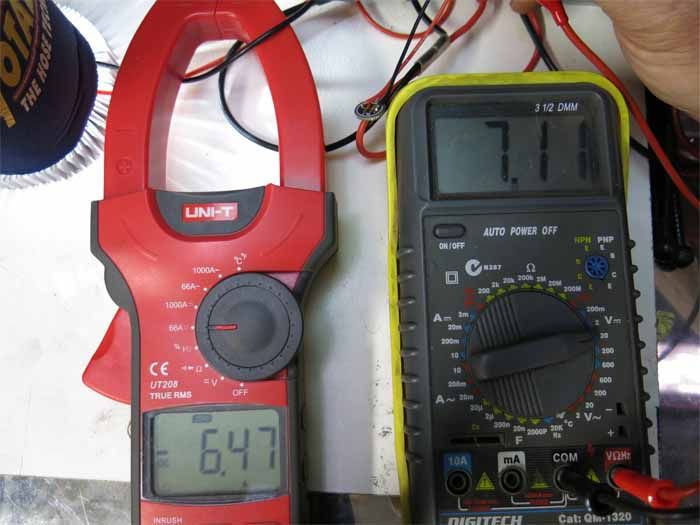
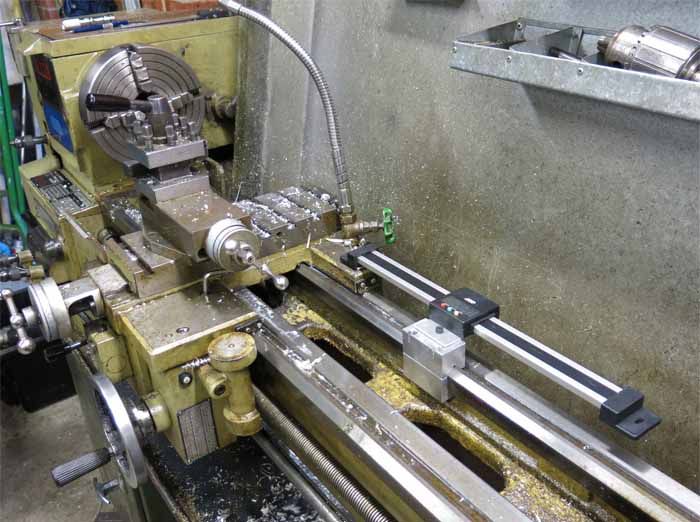
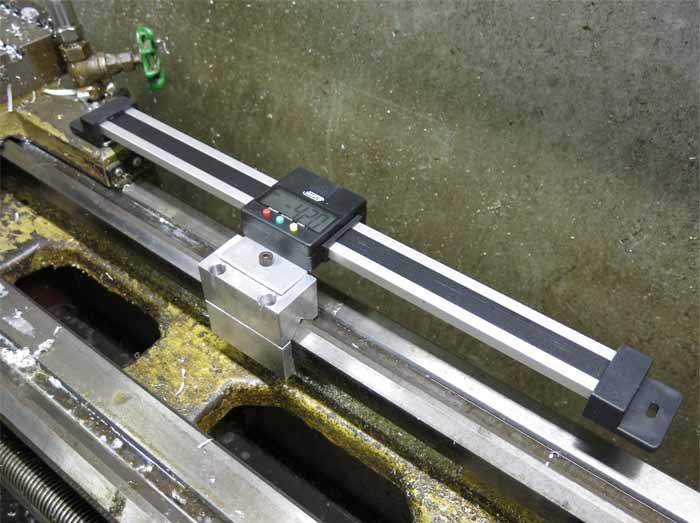
Just a couple of mods for the lathe today. I have used texta marks on the carriage hand wheel to know how far it’s travelled. This is ok most of the time but useless the rest of the time. The graduations here are 1mm travel.
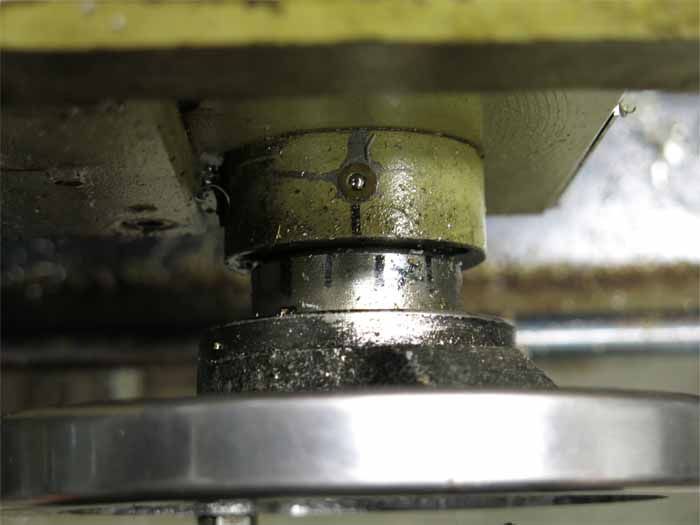
There was a sale on at a machinery house the other day so picked up this digital readout. The day was spent making up removable brackets to mount the digital readout.
I suppose there is no exuse for stuffing up now.
Must be time for a nap. I got tired reading the last few posts. Thanks for the idea guys. :weary:
That’s a handy little addition to a lathe MRsDNF! I like that mount you machines out. Nice!!
I like those wheel marks too. It’s amazing in a shop how we sometimes just have to take a simple way out for a project or two. There never seems to be an end to making tools so we cn make parts.
Now get to work!! Your wife says your naps are getting longer and longer!!!
I’ve been doing a little. Cutting wood, sweeping the shed, it just does not stop. The sacked assistants wont get of the heater vents so not much hope sickin them onto me.
Heres Jack. He managed to drag himself by two legs from the heater vent to here. :person_facepalming:
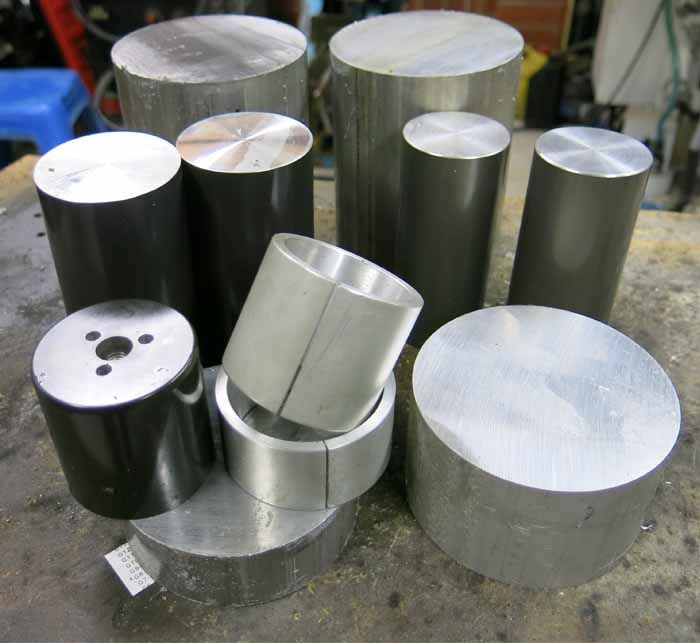
I had enough time today to do lots of hacksawing and a little machining. The Large pieces are 100mm diameter 130mm long for the head (hopefully this will be around the right length as I have not designed the head yet as I dont know what the driver will be), and enough 100mm left for the bezel and working down are the battery tubes MK2 which are 60mm and 50mm in diameter.
The pieces with the slots will hopefully stop the battery tubes being damaged by the jaws in the four jaw chuck as they will be held offset to bore the holes for the batteries.
Now time for that lie down. :weary:
Geeeeeeeze! I hope folks realize how much skill it takes just to do the setup on those parts. Setting up a job like that ONCE is a chore and takes skill on top of skill on top of EXPERIENCE!!! Lets see…. 2 tubes @ 3 setups per tube…. that’s 6…. if the other end is made the same… that is 12 setup procedures on two parts. Yep… time for another nap!!! SUPER Nice work!!!
Nice work. Yea, offset turning takes a good bit of time to setup. You use a 4 jaw chuck and measure with a drop indicator to determine how far off center you are. Rotate the part under the drop indicator. You want to see double your target offset value as the indicators total length of travel. The part needs to be centered in two axes though, not just the one.
Just a “little” tedious? Haha! Those four jaw chucks can drive a guy batty sometimes.
The process goes like this: adjust, adjust, readjust, adjust because your other adjustment screwed up your last adjustment, adjust again, readjust, adjust again because your other adjustment screwed up your last adjustment, adjust, adjust again.
Lunch time.
Continue to adjust, readjust, adjust because your other adjustment screwed up your last adjustment, adjust again, readjust, adjust again because your other adjustment screwed up your last adjustment, adjust, adjust again.
I’ll bet there are as many methods of setting up a 4 jaw as there are machinist. About 40 years ago… Oh Lord! Really??? That hurt. Anyway… I bought my first little “Craftsman” lathe. It came only with an independent 4 jaw chuck. I recall trying desperately to learn how to set that up. It wasn’t that I didn’t have an indicator, calipers, or micrometers… I didn’t know what they were!!! I had a lathe and a chunk of steel I “Thought” I had fashioned into a cutting tool.
Oh good grief… I need to start celebrating the 4th early now with a splash of bourbon on some ice. I should never have thought about that!!! :person_facepalming: It’s all your fault Hoop!! :innocent: