2x18650 XM-L Headlamp dissection/modding

I bought this headlamp on ebay:

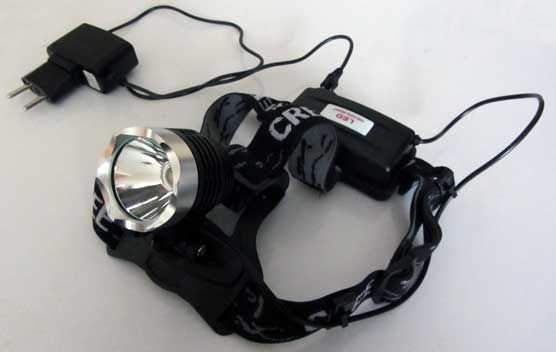
It is a XM-L T6 emitter with 2x18650 batteries in parallel on the back of your head.
I assumed the driver sits in the lamphead and is maybe a “regular” flashlight driver.
Unfortunately the board is under the two 18650 in the back of the holder:

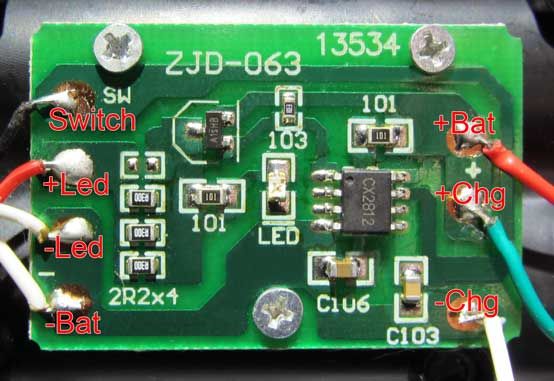
If i understand this circuit correctly the lamp is direct driven with PWM modes:

- controller: CX812

  • Mos-Fet: A1SHB

What i don’t get are the 2R2x4 resistors (3x0.3Ohm parallel)
Anyone an idea what they are for?
Current restriction?

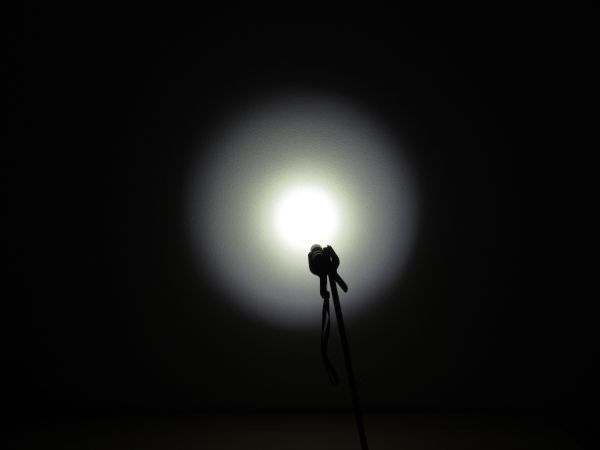
I measured some stuff while on high mode:
Battery Voltage: 3.86V
Board-in Voltage: 3.76V
Board-out Voltage: 3.39V
2R2x4 Voltage: 0.16V
Emitter Voltage: 3.00V
Battery/Board-out Current: 1.40A

what i intend to do:

- first i’ll replace the wires from the batteries to the board, 0.1V drop on ~3cm at 1.4A is not a sign of good/thick enough a connection.

- i’d really like to replace the wires from the holder to the lamphead as well but i didn’t manage to unscrew the pill (yet)

- get some more power to the lamp: change the 2R2x4 resistors? but first i’d like to know if this Mos-Fet can drive more than 1.4A

  • if there is enough space in the head i’d like to strip the driver from the battery-holder and put a nice flashlight driver in the head!

What do you think?
Can i boost the LED to the 3A it deserves?
Has anyone a tip how to unscrew the pill without some split ring pliers?

update 23.Nov:
I managed to disassemble the head, found some info about the components and made some first (temporary) improvements.
The CX812 controller is a dedicated LED controller (from china):

  • Operating voltage: 2.5V-5.5V
  • Operating current: <1mA
  • Operating temperature: ≤ 85 ℃
  • Maximum static power consumption: 0.5UA
  • Maximum output current: 10Ma

Pin Description:
1: LED1 signal output
2: LED2 signal output
3: LED3 signal output
4: GND
5: MOD1: modes selection
6: MOD2: modes selection
7: KEY: switch
8: VDD

the mode selection should allow high, low, flash, slow flash and SOS.
But that’s what mine does (both open is standard):

  • 0,0: high - low - flash - off
  • +,0: high - low - off
  • 0,+: high - off - off
  • : high - off

the A1SHB (SI2301DS) is a MosFet with max. current 2.5A
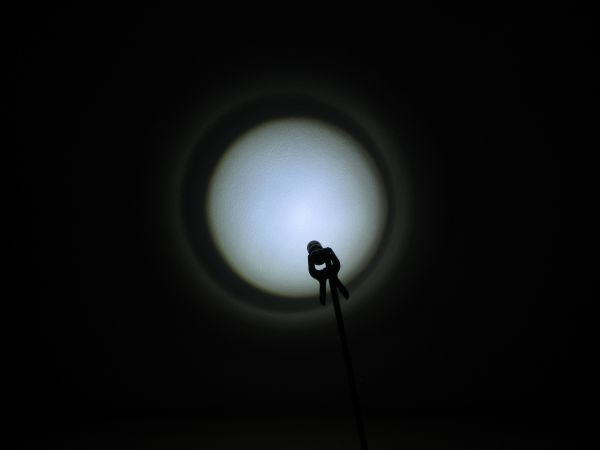
what i’ve done

- replaced the wires from batt to board (0.75mm2/AWG18)

  • temporary wires from board to head (0.75mm2/AWG18)
    -> result: current is up from 1.4A to 2.3A (530lm to 760lm)

what next:

- i am near the 2.5A max current of the MosFet therefor i won’t change the 2R2×4 resistors.

- i’m looking for some silicone wires to permanently connect the lamphead with the bat. holder

  • maybe later think about putting a flashlight driver in the head

Tests:
my first runtime test with the included red “4200mAh” UltraFire:
~1.5h on high (1.5h*1.4A=2100mAh /2cells = 1050mAh)

Beamshots:
Headlamp original: high - low

Headlamp Action-LED-Lights OP reflector : high - low

Headlamp Action-LED-Lights wideangle lens : high - low

Headlamp with OP and wideangle lens: high - low

Xeno E03: high - med -low

3mode SK68 clone flood: high - low

3mode SK68 clone throw: high - low

comment:
the wideangle beamshot looks quite ugly on a white wall but outside it is not really noticeable and i like the beam profile better.
i’ll add some outside shots later, but at the moment the lamp is in pieces :wink:

Interesting design. What do you think of the rest of the package, when not considering the underdriven emitter?

i’d say it is a good balanced system :wink:

- the included batteries are not very good, but 1.5h runtime on high is really ok

- the wires from battery to board and from board to lamp are too thin, but again at “only” 1.4A it works just fine

- the lamphead gets quite warm so there is some heatsinking going on there

  • the brightness is good for a headlamp, i can see where i am going, i just want a turbo mode that makes use of the 2batteries and the XM-L…
    and maybe sets some trees on fire 8)

what i don’t like:

- the included charger takes a long time to charge, but since i take the batteries out and charge in my Nitecore i4 this is no problem for me
(in fact that is why i chose this light: i was looking for bike-lights for a friend and found out that most of them can be used as headlamp as well. but i don’t trust the 4x18650 battery-packs for those lights, i wanted something with a holder where i could put in some better cells)

  • the beam profile: it has quite a narrow hotspot. That’s just not useful for a headlamp, when i walk in the forest with a narrow-beam headlamp it gets really weird. Because the light is so close to my eyes i get “tunnel-vision”. It’s like i’m watching a movie of someone else walking in the woods but i’m not really there. Useful for spooky situations but not really for everynight use :Sp

the beam is much more useful with the OP reflector and wide-angle lens, wait for beamshots…

all in all i don’t regret buying it, especially since it was only $20. it is a good light and hopefully it will get even better.
And to be honest i kind of like that it’s not perfect, if i can make it better by myself i will love it even more.

The “300 ohm” resistors are 0.3 ohm (the “R” is a decimal point). Three in parallel make 0.1 ohms. They are the current sense resistors.

Thanks pyro!
I really should have figured that out myself: 0.16V (on 2R2×4) / 1.4A = 0.11Ohm

But i don’t see how they “sense” the current, i guess you could feed the voltage-drop over 2R2×4 back to the controller and regulate the Mos-Fet(?) accordingly but i don’t see any such connections.

Maybe i should search for some information about this CX812 and A1SHB

"Sense" is just the term used for resistor being wired in series with the circuit.

Really nice to mod this, the circuit is clear as day, plus real estate is not a problem.

Another 0.1ohm (bigger watt resistor) should double your current to 2.8... just nice.

could it be that easy? :slight_smile:

i just studied the XM-L datasheet and found out that the Uf @3A is indeed 3.35V.
That’s exactly what i measured as Board-out Voltage (3.39V).
Now i think it’s just the stupid bad wires to the lamphead.

If i loose 0.1V from the batteries to the board i could easily loose 0.25V to the head if they used the same wires, this would bring the voltage down to 3.1V which is Uf for 1.5A!

Now all i need is a creative tool to unscrew that pill and replace the wires.

That CX2812 looks like it is a buck converter (aka BP2812). I assume those two batteries are in series. There should be an inductor on the other side of the board. It is a constant current driver and will compensate automatically for any losses in the wiring.

The batteries are parallel and there is nothing on the backside of the board.

This is a “stupid” driver:

- the “controller” (CX2812) can turn the LED on or off (modes or brightness via PCM) but i guess that is what all LED controllers do :wink:

  • the LED is direct driven (with some current restriction via 2R2×4)

i could replace the Mos-Fet(?) with 8xAMC7135 for 3A current regulation and remove 2R2×4, but that would get really messy.

great info. looks like it has good modding possibilities.

did you get the head apart yet. i would be curious to know what the thermal pathway looks like in this light. and if there is enough room for a more traditional driver in the head. you may find it has a higher amp draw with different batteries.

thanks

yeeeaaaah…. i got the head apart!

i don’t know much about thermal sinking but this doesn’t look that good to me.
the emitter sits on a aluminum pill which has only ~2mm height contact with the body (at ~32mm diameter).
The screw-down ring is also aluminum: outer diam. 35mm, inner diam. 25.5mm, 2.7mm thick.

i’ll add some pictures later.

added beamshots and updated OP:

what i’ve done

- replaced the wires from batt to board (0.75mm2/AWG18)

  • temporary wires from board to head (0.75mm2/AWG18)
    -> result: current is up from 1.4A to 2.3A (530lm to 760lm)

that’s what i’m talkin about. nice work . a couple bucks and a little creativity turn a cheap light into a darn good light.

last info for a while….

I replaced the wire to the led and when i put the reflector in it shorted the connection and the mosfet went up in smoke :bigsmile:

I could replace the mosfet but that is exactly the excuse i was looking for to pursuit my idea to place a flashlight driver in the head.

I ordered a Nanjg 105C, some clickies and additional parts from DX.
Stay tuned for a new beginning in a month :wink:

http://www.buyincoins.com/new_en/details/new-1800-lumens-cree-xml-t6-led-headlamp-rechargeable-headlight-2x-18650-kc-002b-product-22790.html

Buy 2 and it's only $12.13/piece

I got 1 of those before for $20 from ebay and it's a good light, so I ordered 2 more.

EDIT:

The ones from buyincoins are little bit lower quality :(

thanks for the deal alert. they are showing SMO reflector in one photo and OP in another. wonder which one you would get? any ideas on where to get replacement reflectors for these lights?

see beamshots in my second post, http://www.action-led-lights.com has OP reflector and wideangle lens.

The reflector fits, but is a bit wider at the base.
I was not careful and touched the soldering on the led, that’s what killed the mosfet :wink:

Most likely SMO.

However, I measured 800mA to the led on high. I was planning to mode it with 2000-2500mA driver without the flash or with 2 mode groups 1 with and 1 without the flash. Maybe mine has a different driver. How did your modding come up? I did not take the driver out yet. I am not sure how to place the switch back on the new driver. Isn’t the switch on the same board as the driver?