Opening up a Crelant 7G9 to access the emitter area

Does anyone know how, or had or heard of how to get access to the 7G9's emitter? I got to the driver and am updating it, but want to replace the LED with an XM-L2 U2 (I have a few on order). As TurboBB said in his review, the lens appears to be behind a ledge and maybe glued as well, so it seems like the only way is from the rear and can't see where the head comes apart exactly. There's probably glue or something, but I don't even know where a joint is. The 7G9 is built like a tank and can really throw - it's a great host.

01/26/2013 Update: I just went ahead and tried a technique suggested by vinh (from CPF). It worked, but after some surface nicks and a few attempts. See details below.

I posted this in ryansoh3's thread here on a 7G9 mod - adding more details/information here.

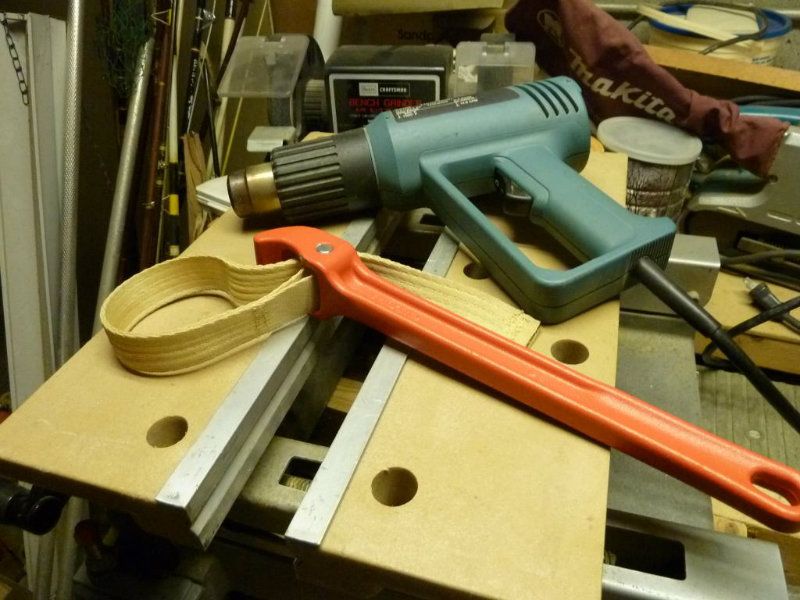
This was more difficult than I thought, but who knows, maybe other lights have the same problems. I was only able to slightly move it after applying heat via a heat gun, but then, still couldn't get it off. At this point, I wasn't sure if it was threaded or press fit. So, at home I tried the freezer, then heat gun - but my vise is not that good. Tried the freezer/heat gun again, but this time taped the head with Gorilla tape, hoping to get a better grip with the strap wrench -- this combo seemed to work. Was able to finally get some movement and got it off. Pics below show it right after coming apart. Unfortunately I incurred some damage to the housing where it was in the vise - 2-3 layers of gorilla tape was not enough to protect it - tore right through it. Could clean it up with some filing and maybe touch-up paint - I'm not worrying about that now.

Ok, now that the hard part is over, I cleaned up the threads from the glue crap shown in the pics - cleaned up well, threads don't appear to be damaged, easily threads back on nice, the O-ring present is undamaged. Now I realize maybe why it's glued - it tightens further down then how it was originally, meaning Crelant probably adjusts the positioning (maybe the focus?) of the reflector fitting on the plastic covering the star, around the emitter, then locks it into position by gluing it - that's a potental problem if i want to keep this unglued.

I was able to remove the brass pill fine using the drilled holes from the top - its hugh, I mean really big and heavy!! The white plastic covering the star is next - looks like the star is only 16mm, but the plastic is a hard plastic, not soft, and chips if I try prying it off - think I'll drill or dremel it on the side to make a place to pry it up from - really hope that's not glued too and have to be carefult not to crack it. Once this is off and not damaged too bad, I'm done with full access to the emitter!!

--------------------------------------------------------------------------------------------------

Shows the hard remains of the glue on both sizes- not sure what it is... I had no idea if this would even come apart - went into this not knowing, just saw a gap in the outer host that appears to be joint position of some sort.

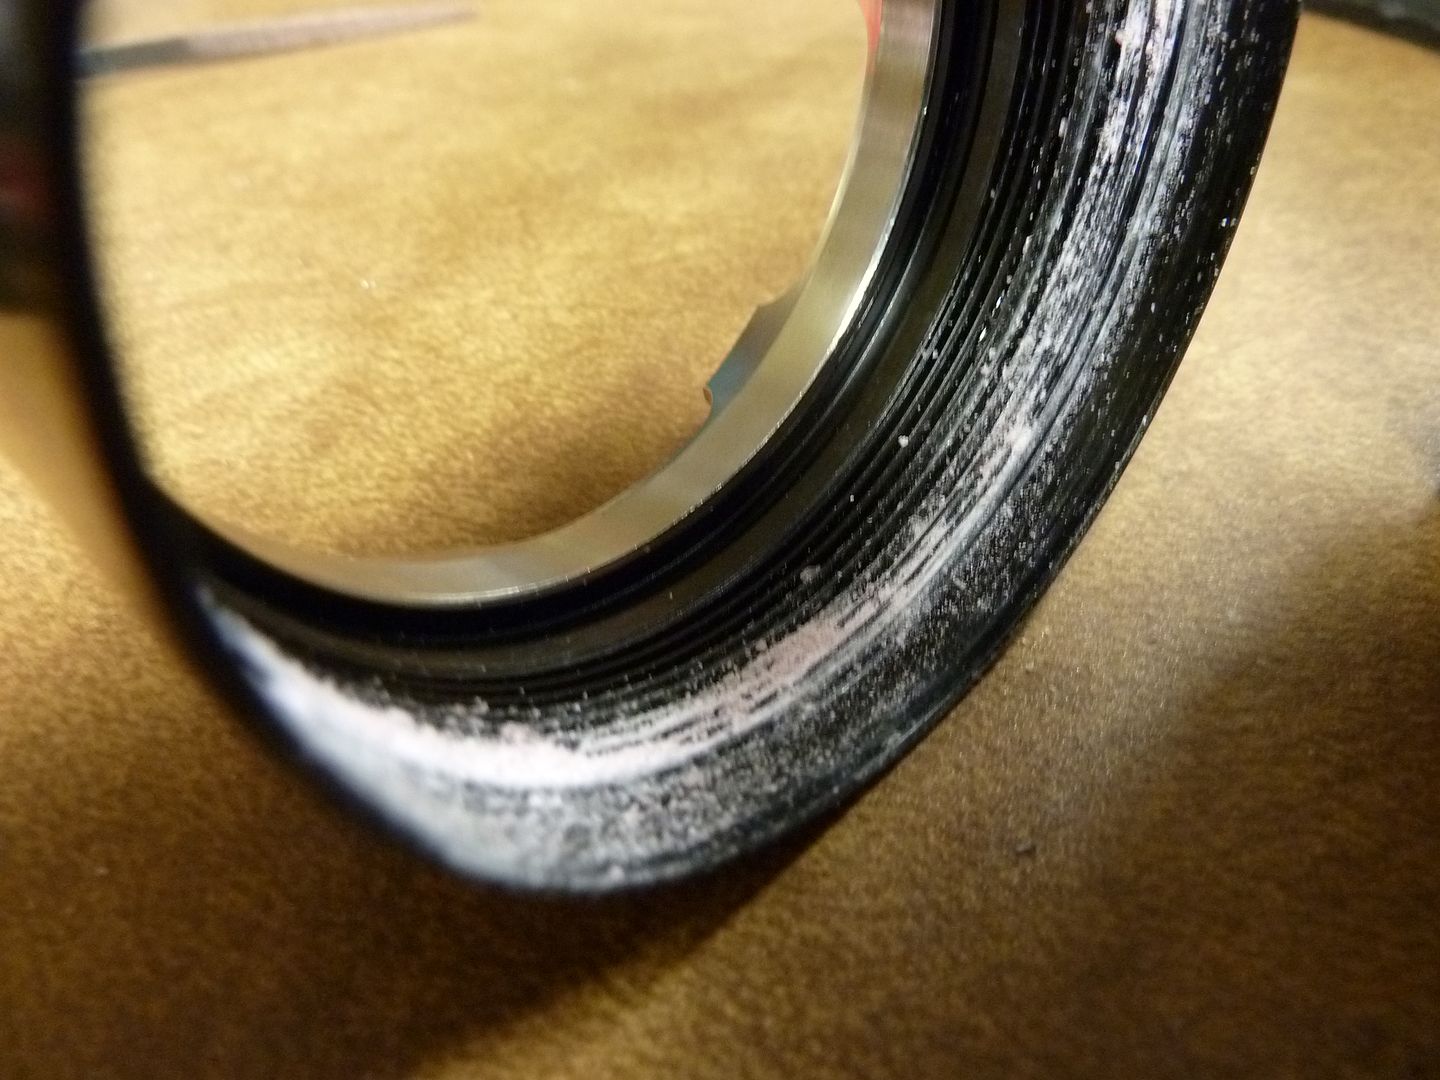
Close up view of the bezel threads:

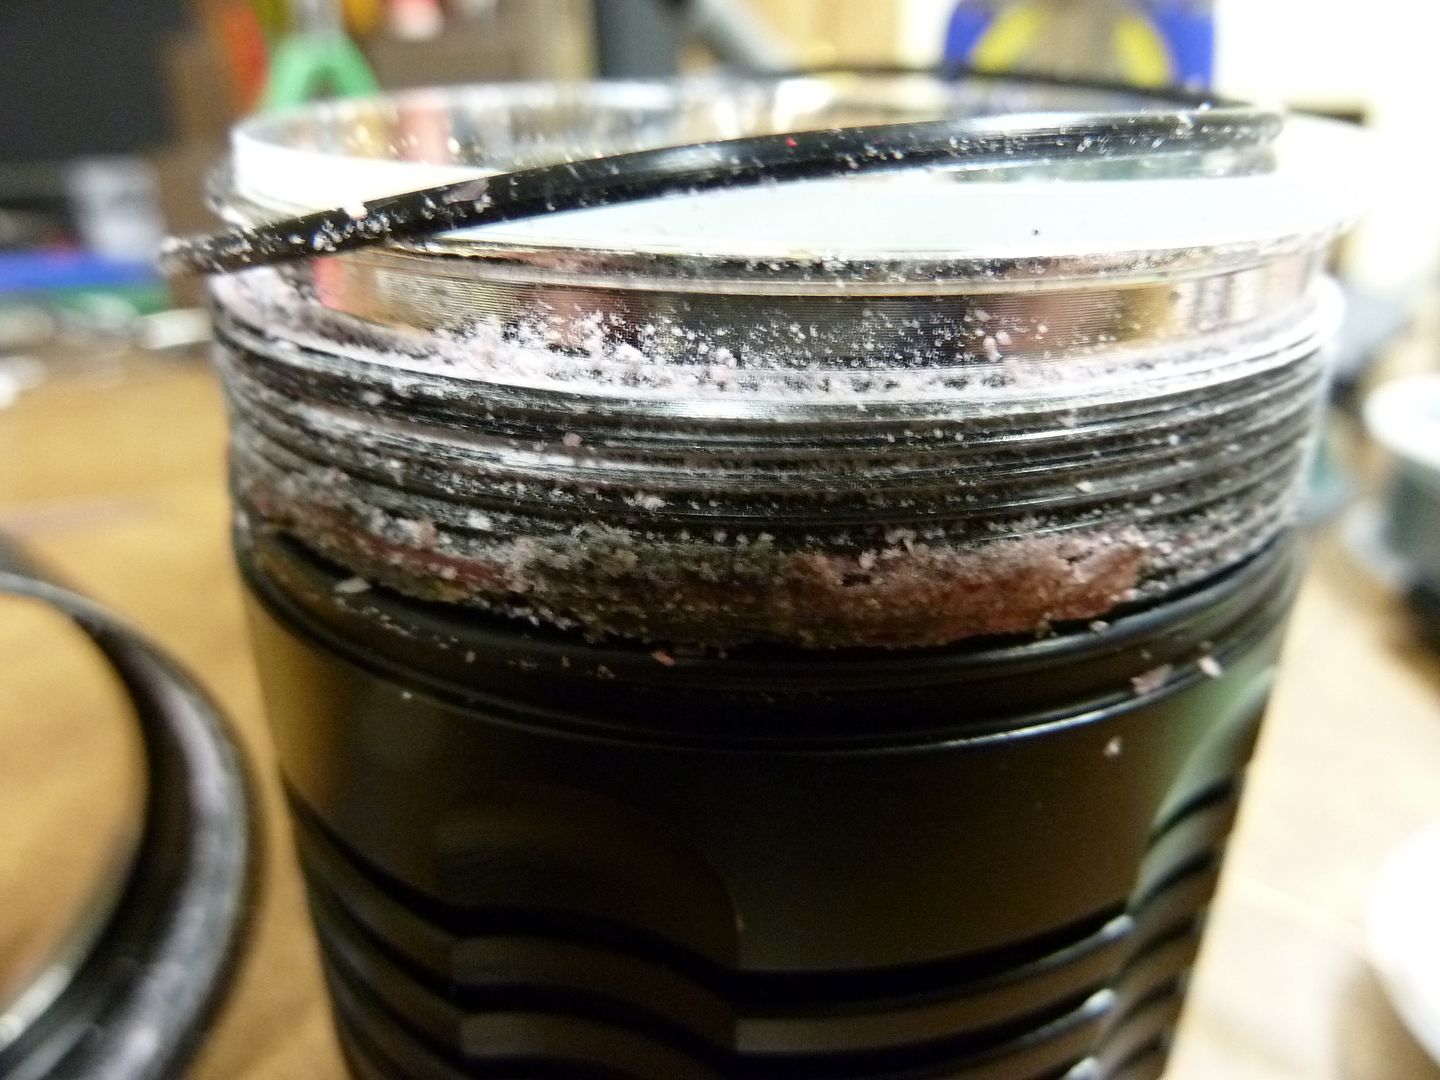
Close up view of the main body threads, abd caked up glue:

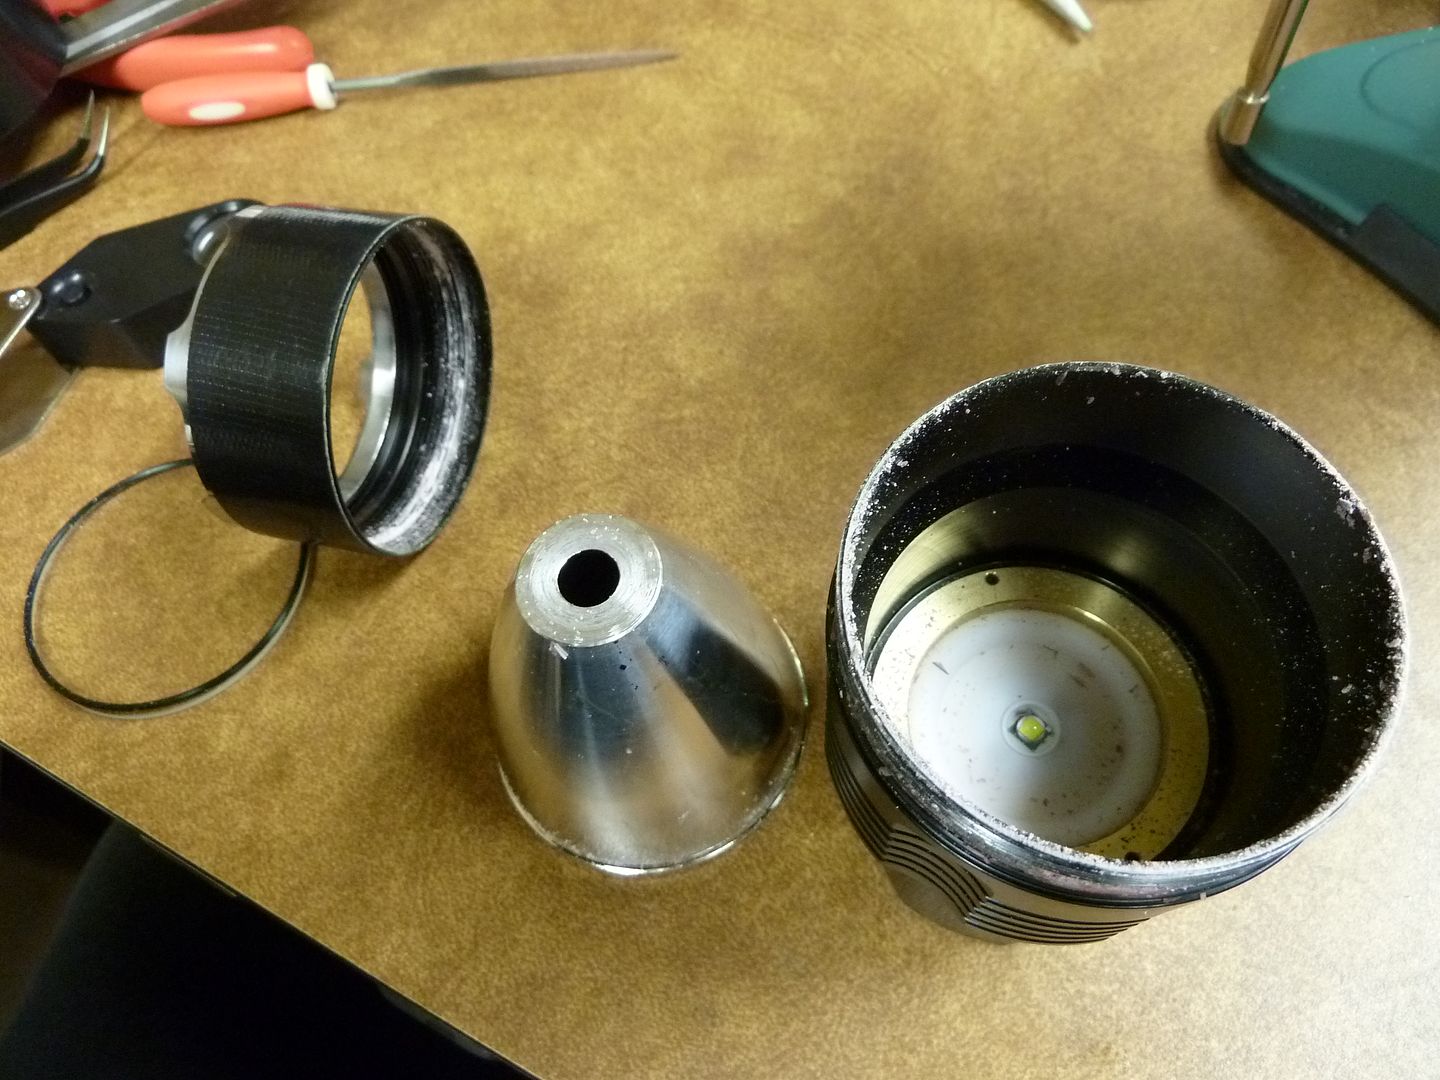
Pieces, showing the emitter/top of pill:

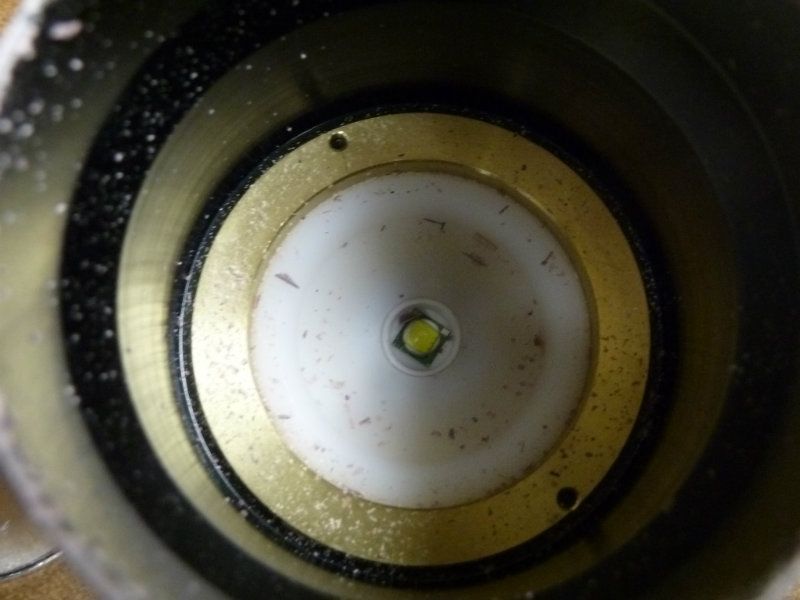
Close up of the emitter/top of pill. Ended up pretty easy to unscrew it using the 2 holes shown (no grease on the threads, but lots of threads, excellent contact surfaces for heat transfer):

The weapons that slain the beast:

Should have more to come...

Well done Tom, and thanks for PMing me about this.

I’ll give this a real try when I get some time … I’ve already scratched up the tailcap and body from trying to remove the tailcap, so what’s a few more gouges and scratches on the head?

Cheers mate!

Thanks Tom, we owe you a ton for this info.

I like your theory about Crelant gluing head to adjust the focus and then lock it.

If you ordered some Copper PCB’s from the GB, it would make a very nice replacement!

Just wondering, what makes this less of a thrower than a…. TN31? Does this have a smaller reflector or is the LED underdriven (stock)?

Perhaps I can replace the LED with an XP-G2 at 3 or so amps and turn it into a pencil thin beam spewer? :bigsmile:

Thanks again for your works!

Well I know the 7G9 is 3A stock and the TN31 is 3.5A stock - Crelant took the conservative path. I'm not familiar with the internals on the TN31, but they could be using a direct-path copper star, like SinkPAD, and better contact surface prep, better wires, etc. The 7G9 is using a 16mm star and it appears to be aluminum (ugh). Also, the reflector may be wider and deeper, not sure, but 1-2mm's can make a difference, as well as the curvature design. All the little things add up. A lens can make a difference as well - UCL lens are one of the best available, some rated at 99% transparent - I've measured the differences of a stock C8 lens verses a C8 w/UCL, another few percentages of improvement. All the details are extra costs and that could be why the TN31 costs more.

The emitter plastic holder looks very similar to the 7G5 I have just modded.

take a look here: https://budgetlightforum.com/t/-/12585 post #3

the white plastic on 7G5 is two pieces, a large ring and a smaller centering ring.

The large ring I drilled 3 equally spaced holes on the ext.edge and leveraged it out carefully.

the centering ring comes away easily after the large one.

Hope it helps

Thanks Rockspider - I took mine out by putting in 1 hole via small dremel near the edge - little messy maybe. Realized after could have maybe popped it off from a wire hole underneath.

Here's the details:

- simple 16mm aluminum star, nothing special

- no sign the brass pill surface under the star was prepped via any sanding or polishing at all. In fact the brass pill surface has identifiable concentric rings in the surface and slight inward dimple in the dead center, right under the emitter

- wires were ok, maybe 22-24 gauge, but the -LED wire on the star connection didn't look like all wires made it - the connections looked filed down, I guess so that big hard plastic piece could fit all the way down

- quality grease that looks like silver based, gray in color

The good thing is most of those issues can be improved upon in the rebuild :

- 20mm copper direct-thru star, SinkPAD (huge improvement - 200m is more surface area contact, direct-thru via copper - proven output increases)

- carefully prepped surface (some say it makes a big difference), sanding, polishing

- 22 gauge silver tinned teflon coated wires (shorter lengths)

- XM-L2 U2 1C (IlluminationSupply)

- driver driven at 4.2A (original was 3A, takes advantage of the heat mgt of this beast and slightly less heat output of the XM-L2)

- add more mass to the pill (using copper)

- same or equivalent grease

Can’t wait to see how this project evolves. I can’t believe all that thread-loc on the bezel, looks like it took Hercules to remove it. Upgrades should be fairly straight forward now.

Just finished the SinkPAD XM-L2 U2 1C mod in my 7G9 - Nanjg at 4.2A , Wow!!

How's this - 1264 lumens @start, 1248 lumens @30 secs

Very little drop, the least I've seen in 30 secs. Just got in the 1000-2500 grit variety pack sandpaper today, so prepped the surfaces - reflow'ed the XM-L2 on the gas stove in a pan (oh well).

Update:

Just measured lux @4.3 meters: 121 kcd.

All over, big improvement. Previously running the stock U2 w/Nanjg at 3.85A got 992 lumens, 1 measurement of lux calculated to 64.5 kcd.

Looks great! Nice job Tom!

Did you sand down the light’s heatsink as well?

Yep - sanded down both surfaces - bottom of star, top of pill. That pill area is brass and was full of concentric circles - sanded down pretty smooth, eliminated the rings. Othey guys posted detail of sanding - followed their advice. You really need to work your way to pretty fine, at least 1200-1500 - I went to 2000.

Well done mate - hard work and good components paid off!

The 7G9 is a fantastic host and design, just needed the extra ingenuity and TLC to make it amazing.

Thanks … waiting on your beamshots now mate. ;o)

Awesome job Tom! That’s a lot of lumens coming out of that light being a thrower. I’d like to see how it fairs against a TN-31 now.

Thanks for this guide again.

Looks like I need to do the same because I fried my LED during testing. :frowning:

I guess I’ll swap it with a Sinkpad and an XM-L2 just like your mod.

Cheers!

Sounds like this light will be a nice match for a TN31 now. My brother and I both have TN31’s. Both put out low 1100’s at 30sec. My brothers does 126k and mine does 122k. So likely your throw is dead even with most TN31’s and you will have a little more spill lighting up the area with the extra 100+ lumens.
Should be a sweet light now. Great job!

Hey Tom,

Just wondering if any damage occurred to the light when you heated it to loosen the threads?

I don’t have a heat gun so I wonder if a blow torch would work.

Cheers!

No damage, other than some bad cuts/rips into the aluminum from poor choice of how I mounted it in the vise. Also a hair dryer could be used on the max setting, though a torch may do a better job than a heat gun and make it easier.

Thanks.

If I do use a torch, I’m afraid that the anodizing will change color as others have baked their lights orange. :slight_smile:

Cheers.

Yep -was wondering bout that, but I think that's long durations, higher temps, not sure. Gords is the pro on that. I think if you kept the torch moving around the thread area, not staying in one spot, it would probably be safe - but I'm not talking from experience...

Cheers, this morning I tried to use two belt wrenches to open it up without heating it but to no avail.

I guess I do need to heat it up. Another silly question: are there o-rings and plastic components that can be damaged?

Thanks again.