The Sixfink is at it again – rough and dirty. Presenting "the hackjob"!

I guess the topic describes my latest mod pretty well.

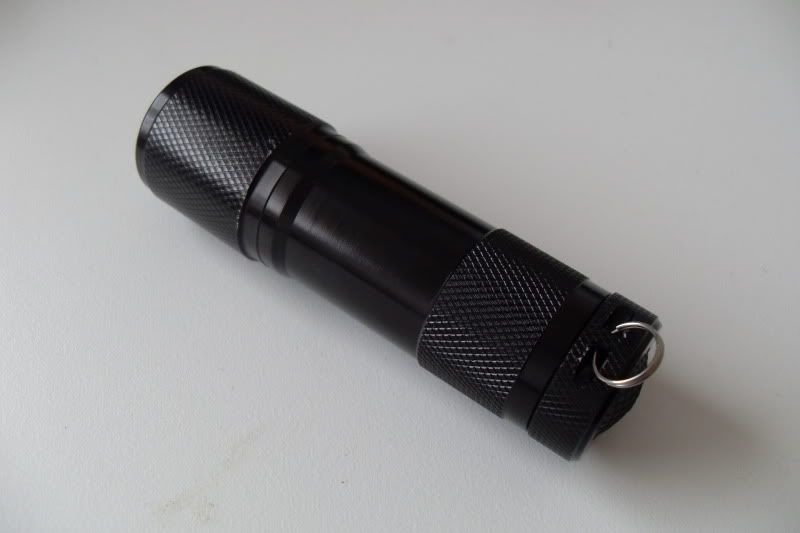
While shopping at ant-supplies ltd. for the long-desired SolarForce T4, it came to my attention that they also had their “budget-priced flashlights” back in stock – generic 3xAAA, multi-5mm LED cluster, thin-walled aluminum tubing and an anodization not worth writing home about. Also, advertizing said that the light could be stripped somewhat, so that was a plus for me as well.

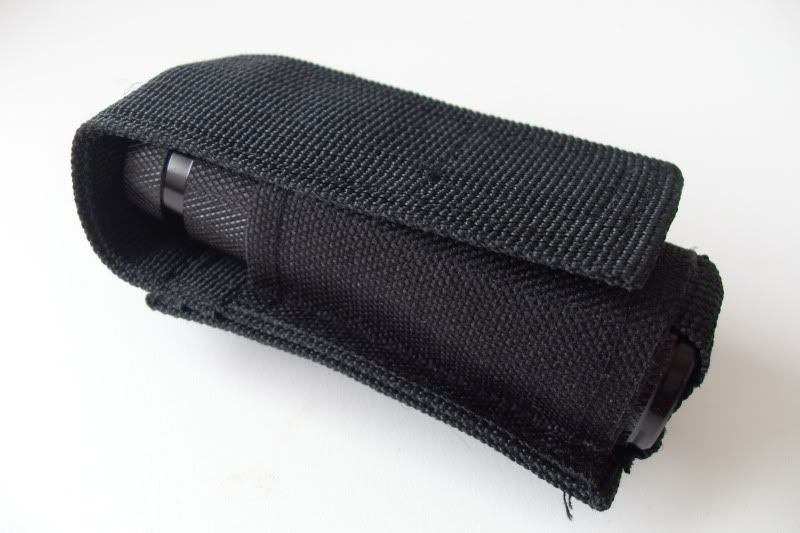
At £6.00GBP it wasn’t exactly as budget as it could have been, but it also came with a set of fresh alkalines and a neat little belt pouch, which turned out to be amazingly well-built. Not a bad deal IMHO!

So, into the shopping cart it went, and four business days later I received a package from South Wales.


The little torch performed as good as one may expect from a cheap 3xAAA light – after all, they’re just a board with some directly-driven 5mm emitters, some cells, a switch, a couple springs and O-rings. It’d have been fine as a backup lamp or something you lend out to other people, I even used it for lighting in the bathroom during a recent power outage.

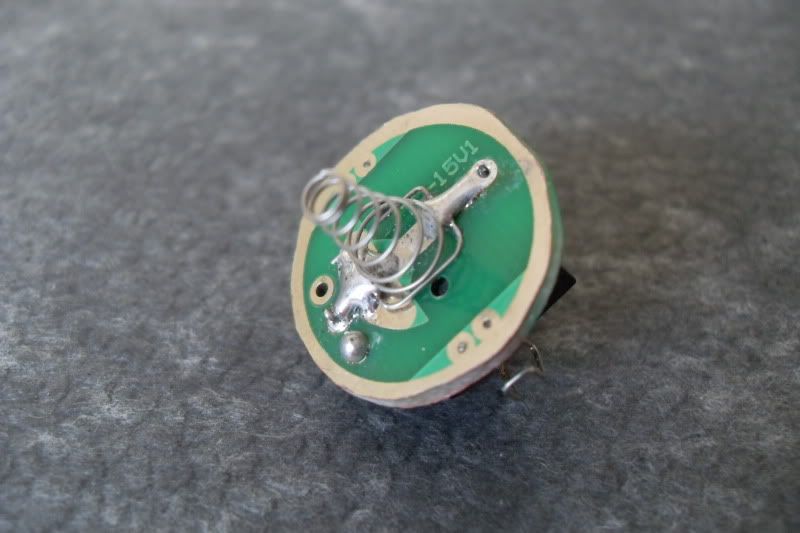
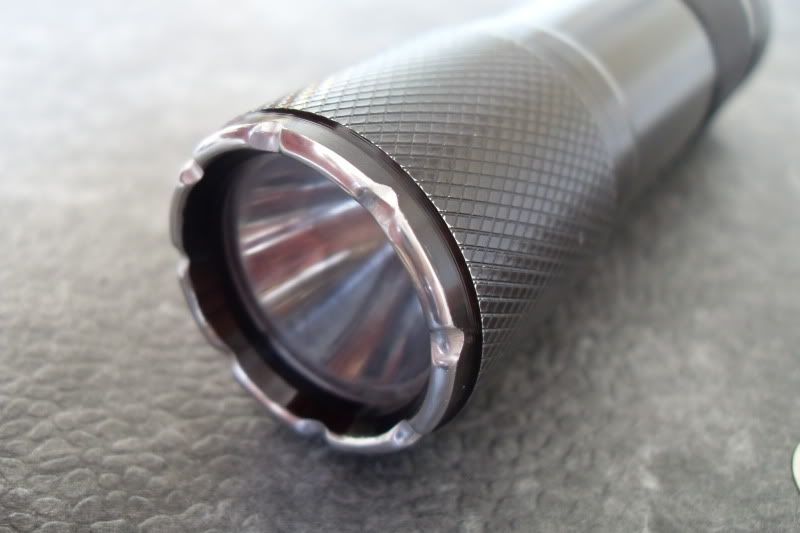
The emitter board and lens were held in place with a stamped-tin lockring which was easily impaired and discarded with a small screwdriver and a pair of pliers.


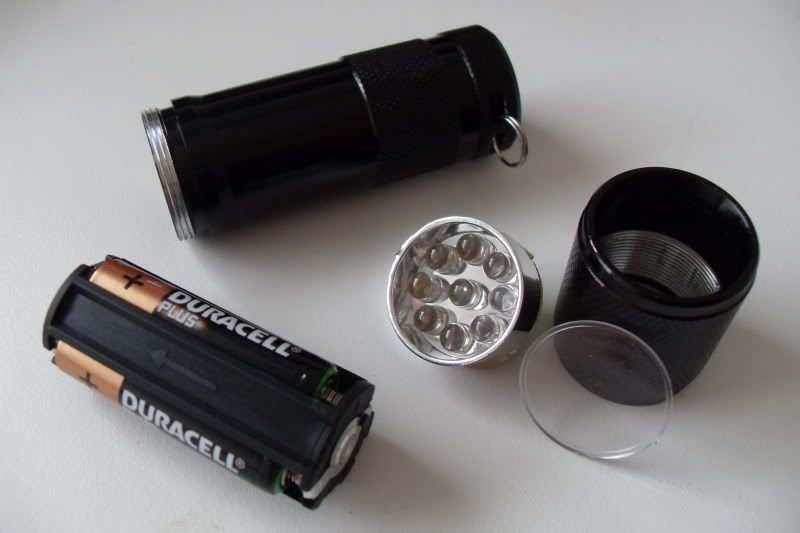
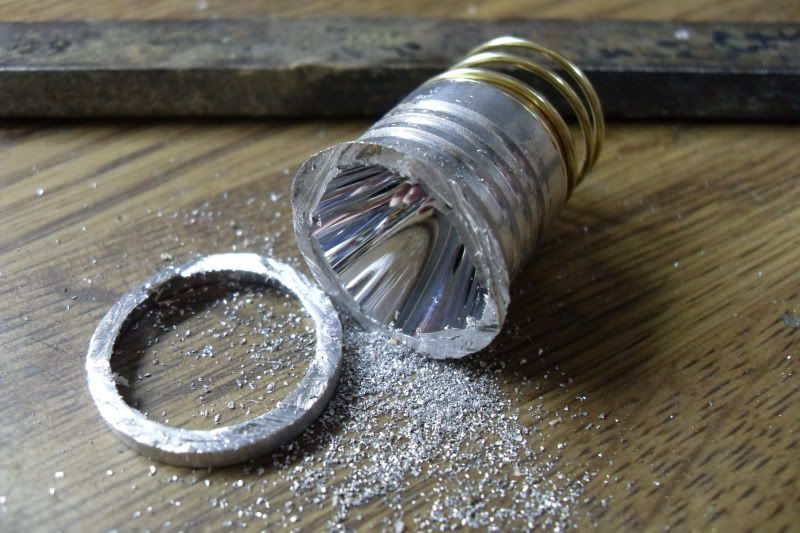
I still had the old SMO reflector left over from my other mod. Its reflective layer already becoming dull and full of fingerprints, I figured it’d be a top notch candidate for a crude hackjob – and indeed, I took a hacksaw to shorten the reflector enough to make it fit into the torch head. The rough edges were milled flat on a piece of wet sanding paper, later. The pill is the fabled $16.02 Manafont XM-L T6 single-mode 4.2V dropin - I purchased a whole bulk just for toying and modding.


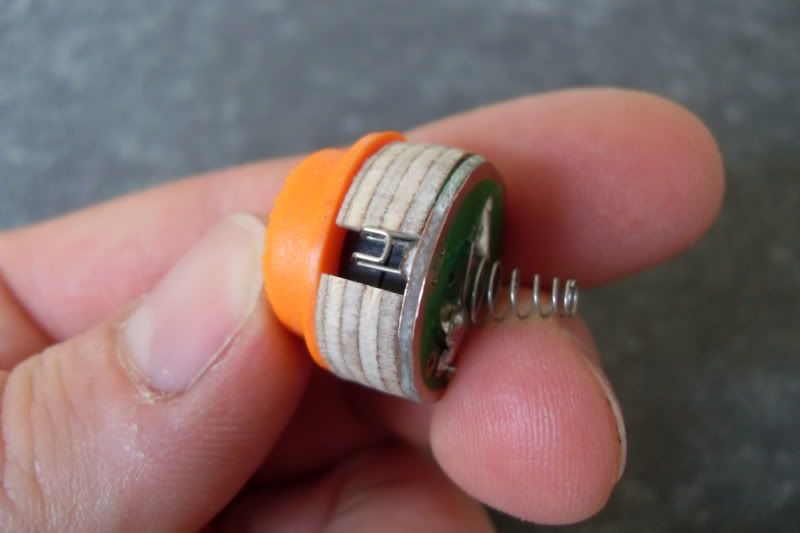
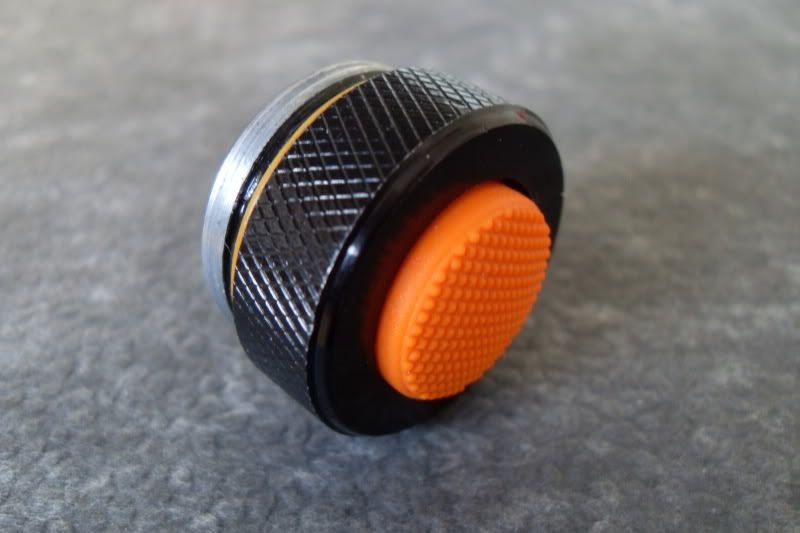
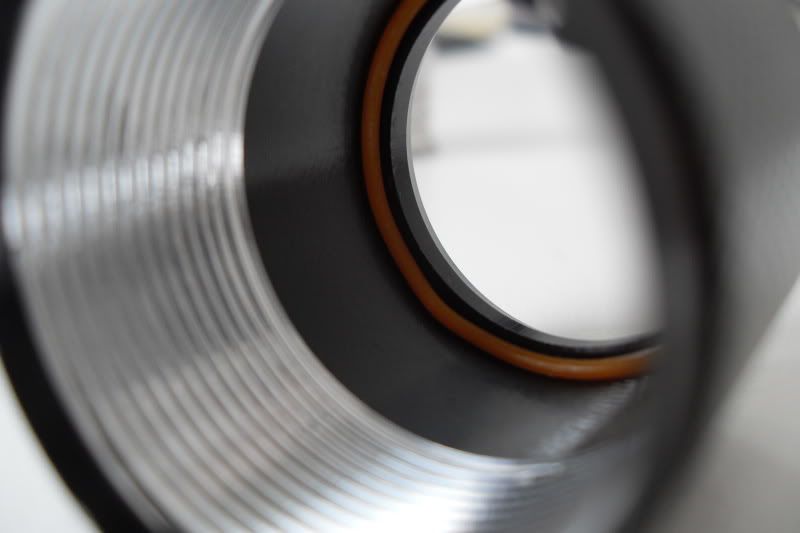
The lens came with no protection, so it received one of those super-thin orange O-rings.

Negative path to the pill is provided by scrunched-up aluminum foil. It also holds the dropin in place and dissipates heat to the head. This stuff really has 1001 uses.


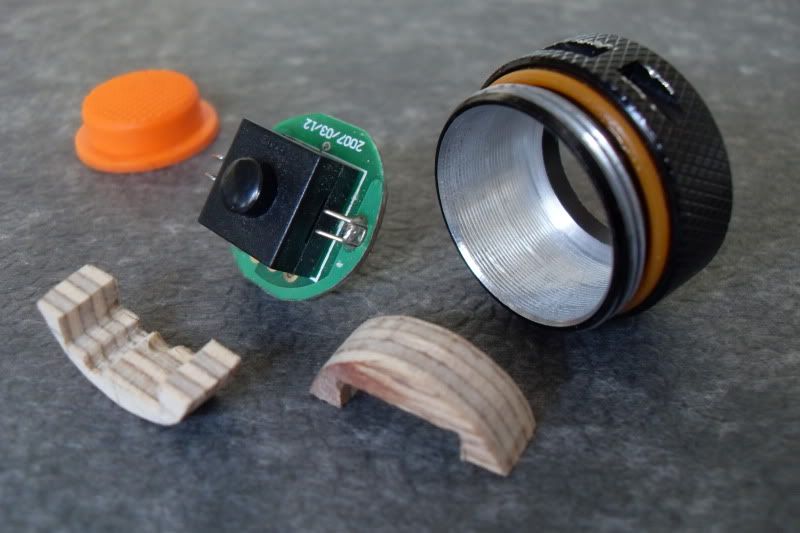
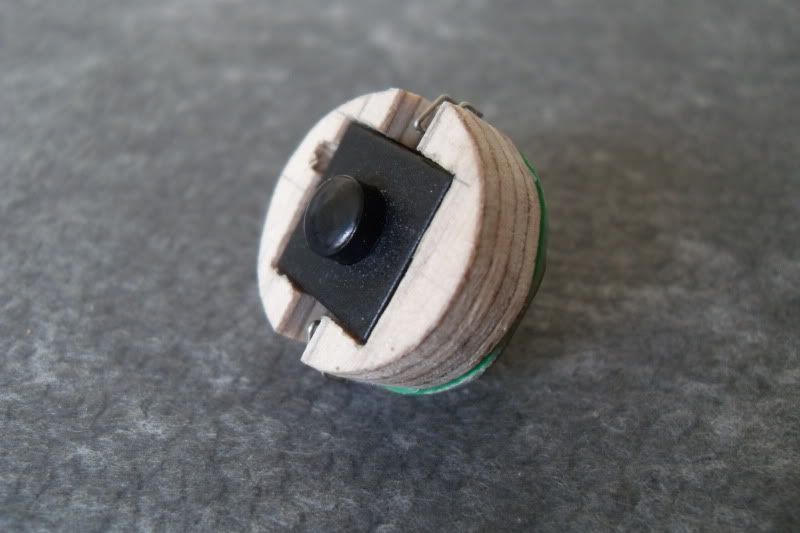
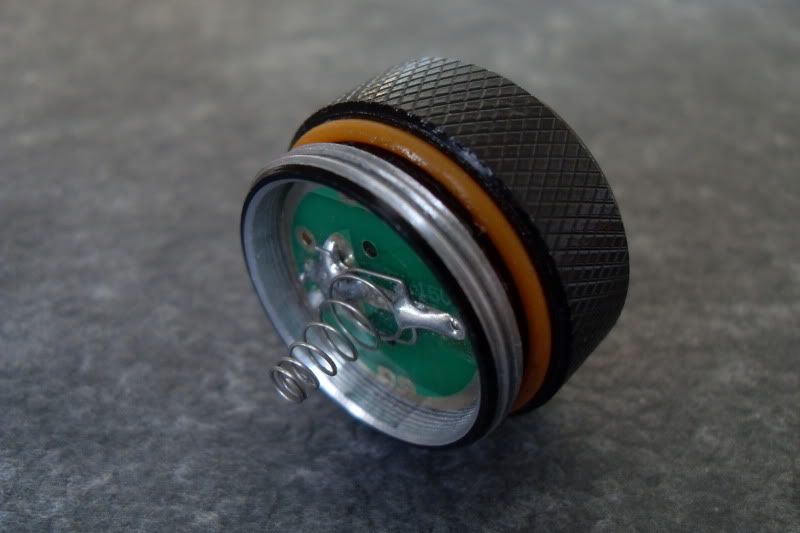
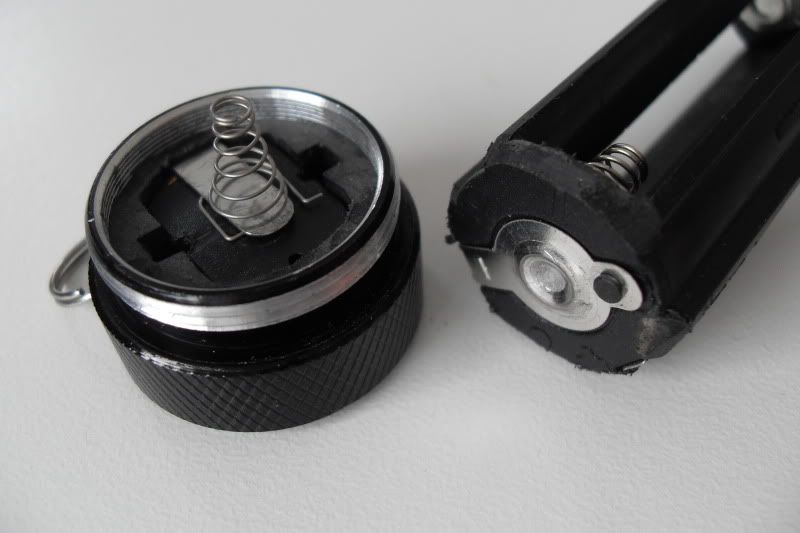
Length became an issue. I hadn’t really taken any measurements before and only relied on my guesswork, and now I was missing like 2mm. So, the shortened P60 dropin proved to be two millimeters too long, and the tailcap wouldn’t completely seat with the triple AAA magazine installed. Shortening both the positive contact spring of the dropin and the negative contact spring on the tailcap clicky didn’t help much, so I ended up disassembling the tailcap and grinding off about two millimeters from the plastic ring that held the switch in place. The original tailcap spring also had to go, it was replaced by a super-soft spring I had scavenged from my Samsung ES37 pocket camera which I had killed only two days before. Lastly, the rear corners of the cell holder had to be chamfered so it would fit into the recess of the tailcap.


Poor wall shots substitute proper beamshots – but you’ll get the picture. Left is my current EDC light, a mini@mag housing a terraLUX TLE-5 EX cree XR-E R2 @ 700mA, right one is the new hackjob. I forgot to measure amperage, but it’ll be in the ballpark of that other light I did some time ago. I guess hotspot and spill could be more defined, but then again I saved the good SMO reflector from the Manafont pill and used the old, much abused and less-than-perfect SolarForce reflector instead.


Complete build cost was $25.70USD ($16.02USD for the dropin, $9.68USD for the host, GBP exchange rate as of today), build time was less than an hour, including taking pictures. Remember, this light came with a holster and batteries, and now sports a regulated XM-L T6. Not too shabby.

Those 4.2V dropins really kick butt. As long as the torch head is spaceous enough, almost any older 3XAAA light can be updated this way.

Be creative!

Hi Sixfink, now you make me want to buy more drop-in for all those junk left over lights. Kids' college fund, here I come.

Nice! I can't believe that tail switch is holding up to the XM-L. You've definitely opened my eyes to new possibilities...

if the switch should fry, there's always room for a KAN-28, isn't it?

That's pretty ingenious, Sixfink. Good job! I have a few of those style of lights that I've never bothered to mod because I figured they weren't worth it...but what you've done is actually a pretty novel idea. Heaven knows I have enough spare drop-ins around....I'll have to try this out.

You can also use a 14500 in those inside a piece of clear tubing.

During a quick coffee break, I decided to skip the coffee and take a closer look at the switch. While the original one appears to be rather flimsy (and reeks terribly of plastic softeners), and probably not up to par as JohnnyMac just said, I found that a stock replacement SolarForce switch fits nicely after 30 seconds of grinding down the circumference of the board about half a millimeter, and bending in the little wire spring tabs just a hair.

The SolarForce spring was way too large and stiff, of course, so that had to go. I unsoldered it and the tiny, soft spring from the camera was soldered in place. Side note: a little bit of tinning compound, as used by plumbers, eased tinning of the camera spring greatly and made soldering a breeze.

I'll post more pictures when the new colored silicone switch boots from shiningbeam.com have arrived.

Update on "the hackjob"!

I took the darn little thing to work a couple of days ago, and it just came in handy to illuminate some dark stairs. Well-trodden sandstone stairs from the middle ages can be tricky enough in broad daylight, let alone at 02:00 in the morning. The torch provided plenty of flood due to the shortened reflector. Furthermore, handling it was a real pleasure. It has just the right size for my palm (much like a SolarForce L2 tube, but a good two-fifths shorter - just about the right length to provide light on tap without letting everybody know you're holding a flashlight in your hand all the time)

So, since it proved to be quite useful for me, I tried to button up some things I rushed when I stuffed that generic SolarForce reverse-clicky switch innards into the tailcap last time and fitted it with a really soft spring scavenged from my Samsung ES73 digital pocket camera:

The switch, with no support, was merely wiggling around in the tailcap, slanting from side to side each time I depressed the switch. Since I am still missing my lathe, but have a fretsaw handy, I fabbed up a spacer to hold the switch in its position. Of course I was lacking the proper materials as well, so I snatched up some textured coated board. This stuff is great; like aluminum foil, it has countless uses. I have even made carburetor spacers out of this very densely laminated plywood before. Here's a picture of the new components of the tailcap: SolarForce switch with new spring soldered in place, orange silicone 16mm boot, both halves of the plywood support spacer, and the cap itself, fitted with an orange silicone O-ring.

The spacer thingies - well, easy enough if you have a fretsaw, or alternatively carving knifes and plenty of time.

1st: cut out square center hole

2nd: cut out circumference

3rd: separating cut

4th: add notches where neccessary

Brian from shiningbeam sent me 16mm switch boots of various colors: black, GITD yellow and orange. I'd have liked GITD green, but the yellow looked a little bit awkwardly IMHO. Since I had already used the orange-colored silicone O-rings from antsupplies.co.uk throughout the torch, I figured to best follow the color scheme and take an orange switch boot. Doesn't look too cheasy; besides, I still have a black one if I grow tired of orange.

and there's the result... pretty boring, eh? A tailcap with a nerdy orange boot. ...well, it works. That's what counts.

here, things get a little more interesting: the business end of the switch, all snug and tight and sh*t.

In case you're wondering why I used the orange O-rings - well, that's easy. They were the tightest-fitting rings that wouldn't tear upon assembly. This light should really be waterproof! Heck, I should build another one and send it to the US of A to Foy so he can take it to the shower test that all lights tested by Foy have to pass.

With soooo incredibly much work on the tail, the front had to be taken care of, as well. A small round file (rat tail for ya UK blokes) came in handy for those mild crennelations. Not to stab people in the face, but to check if the light has been left on while placing it face-down on the table. Guess what, I've caught myself of doing that. That's why. Sanding and polishing is mandatory when "foying" a bezel, so that was done, too. Real smooth, absolutely no danger of accidentally cutting myself or slicing my pockets open.

Then, the light suddenly ceased to work properly. It was flickering constantly! Following my experience from automotive work, I looked for the culprit in the last major thing I had done - the tailswitch. I've had this thing apart now about a couple dozen times, with no results! I even wrapped the spacer in aluminum foil, suspecting a bad connection there. Bad connection, yes, but not in the tailcap. As it turned out, I had dropped the light a few times, and the reflector had come loose. After searching for the possible culprit for half an hour, I unscrewed the head - and both the reflector and the ring of crumpled-up aluminum foil that had held it in place fell out. I merely had to stuff it back in, and press it in with a pencil real good. Easy as that!

Next time on "the hackjob": fabricate a proper holddown from brass sheet to secure the aluminum crumpling around the reflector, and wipe the cheap plastic lens with mineral spirits to turn it into a diffusor lens instantly.

Look out for it on BLF, only!

Very nice hack job there sixfink.