Hi BLF,
A few days ago I got my hands on a Dell AT101W keyboard. When I took it apart, the datecode read 96, so it’s slightly younger than I am. I cleaned it up (it was just dusty, that’s all) but the only problem was that I didn’t have any PS/2 inputs because my only computer was a laptop.
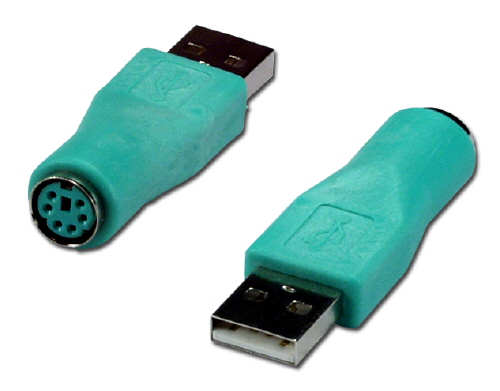
I couldn’t just buy a generic PS/2 to USB adapter because they are passive. They are meant for keyboards that naively support both protocols and the adapter merely made the PS/2 jack into a male USB. Older keyboards like this one only support only PS/2 so the passive adapters don’t work.
Passive adapter:
The way to approach this issue is to use an active PS/2 to USB converter. I did order one from FastTech, but I’ve heard that it has problems when recovering from sleep.
This is the one I got: https://www.fasttech.com/products/0/10003144/1234500
It will take a few weeks to get here, but I wanted to work on something that actively converts PS/2 to USB… and more. Why go through all the hassle with a 20 year old keyboard?
It’s a mechanical keyboard, unlike anything I’ve ever used. I have gone through around 4-5 keyboards, and they were all membrane based, including my Logitech K270 that I’m typing on. It’s starting to lose its wireless range even after a battery change, which is pretty frustrating.
Here is the AT101W, and the W means that it has a Windows key, unlike the Dell AT101.
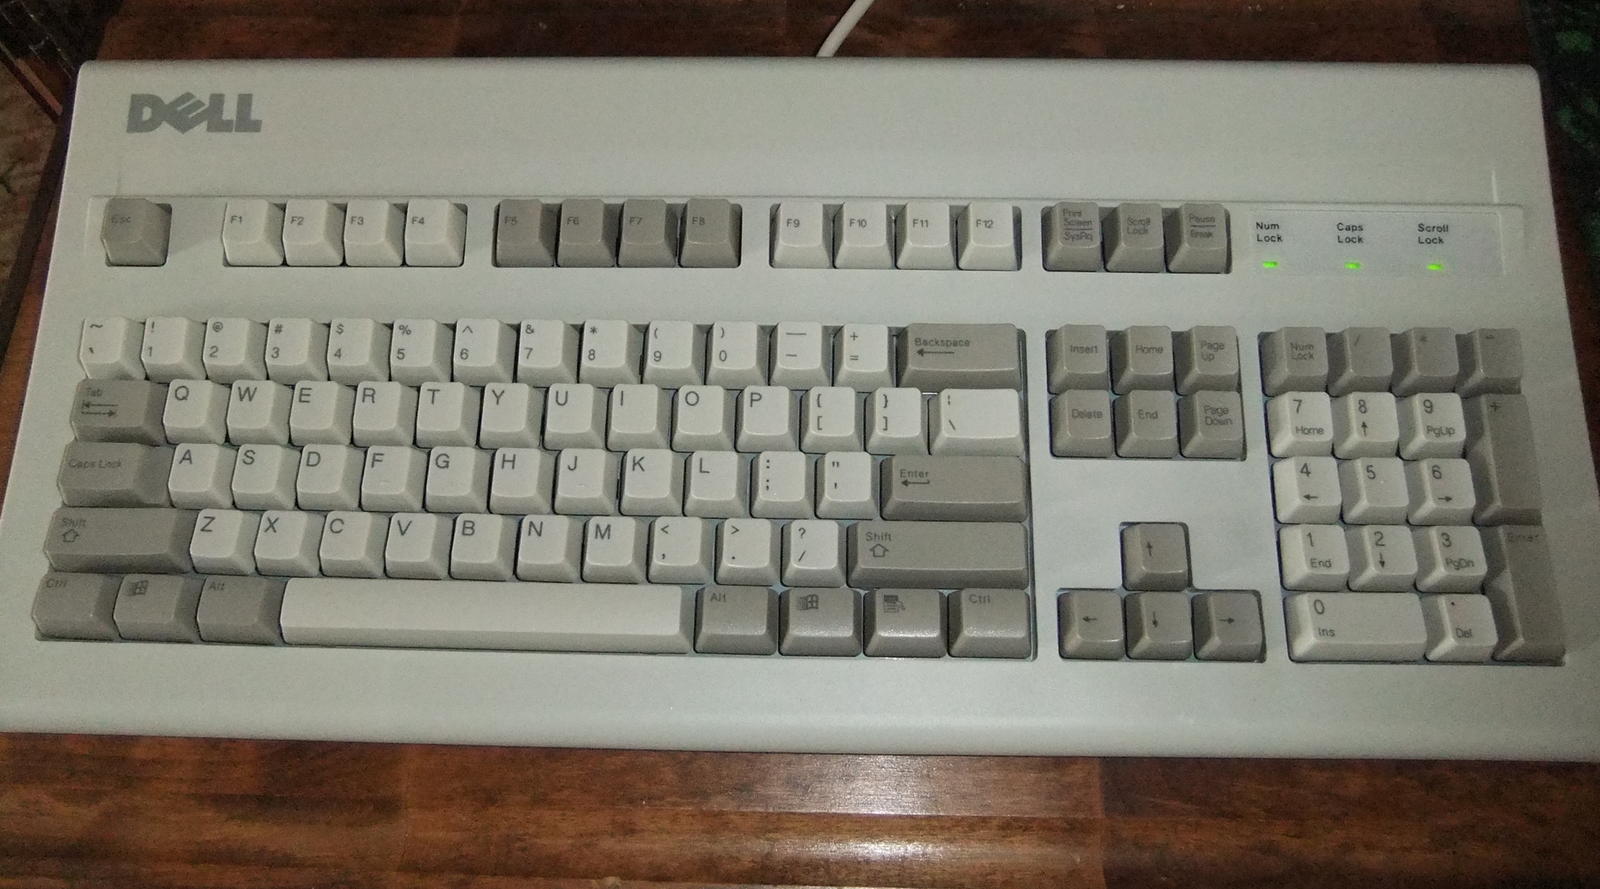
It has Alps Black switches for each of its 104 keys and is tactile but not clicky, meaning that you can feel when the key actuates but not not hear it distinctly like Cherry MX Blue with its distinct click. However, the AT101W is quite audible when the key bottoms out and comes back up. I’ll have to use it when my roommate’s not in the room, as it can get quite distracting especially when typing up essays or long posts like this.
I don’t play games however, although many gamers do prefer mechanical keyboards (especially the Cherry MX linear switches) because they have more feedback and many also support multiple keys being registered at the same time (N-key rollover).
One advantage of building my own PS/2 to USB converter is that I can program the controller to support extra function keys and key mapping. I use the multimedia keys on my Logitech keyboard (play/pause, mute, volume up, down, sleep, calculator) a lot and it would indeed be quite inconvenient without them. So I’m planning on mapping my own keys such as menu button + F1 = sleep, + F2 = mute, and so on.
geniekid at GeekHack (keyboard forum) did pretty much what I’m planning to do: Shortcake - a Dell AT101W mod
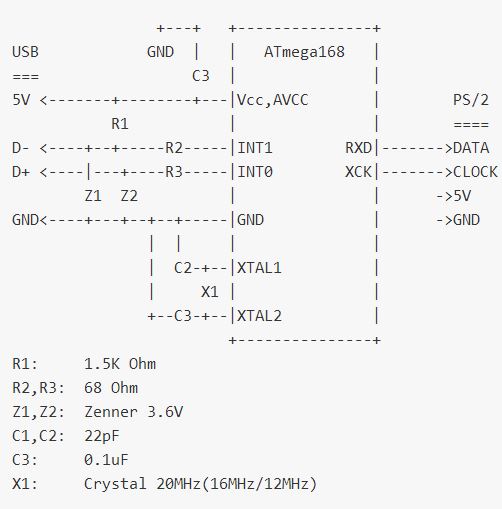
He put a Teensy board into the front bezel of the keyboard:
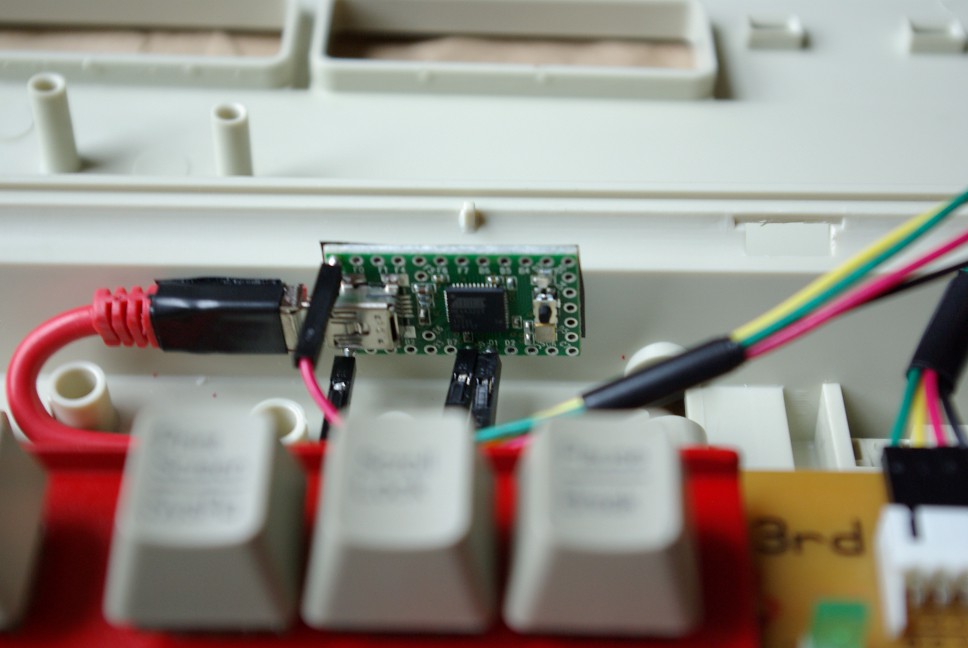
While I don’t plan to paint the metal frame, I’ll add the micro-controller into the keyboard and replace the PS/2 cable with a USB. Just like my other build threads, I’ll chronicle my progress here.
Table of contents
table(table#posts).
|Introduction|#0|
|MCU Bootloader|#1|
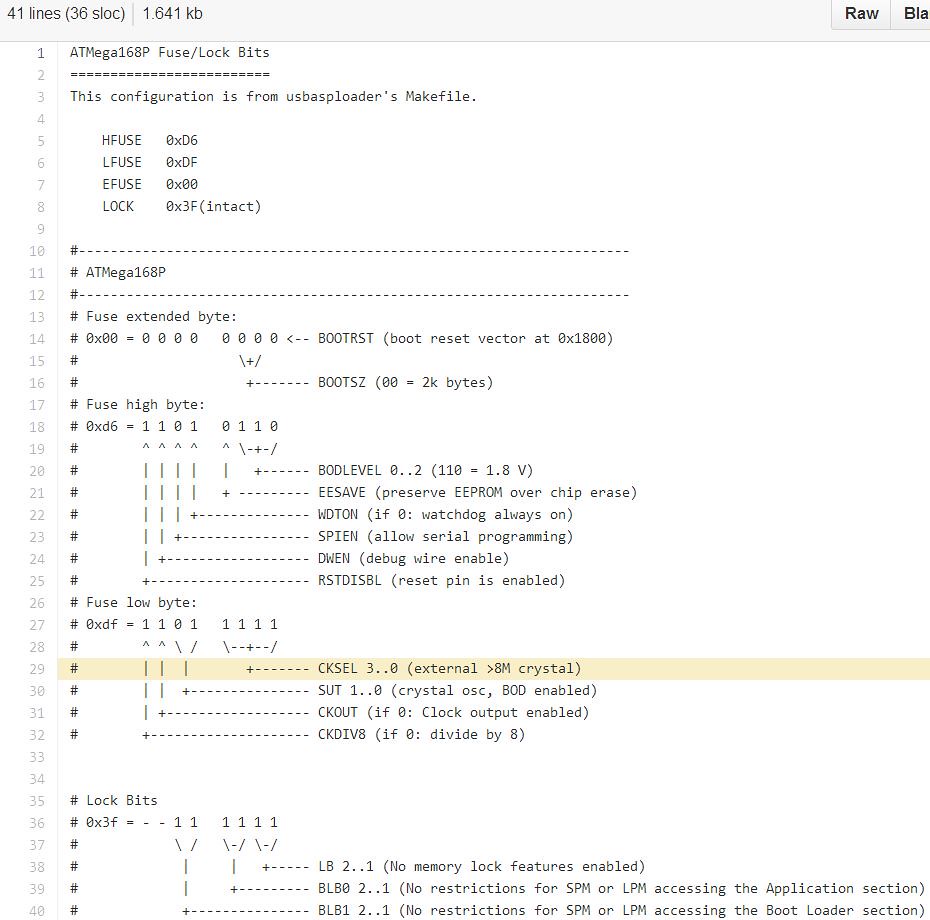
|Fuses|#17|
|It works!|#21|
|Video|#22|