Like a few members, I recently picked up a cheap SRK when it came on special. I think it was about 25 bucks with the promo code, & I thought; "why not - I'm basically getting 5 XM-L2's with a torch thrown in"...
I didn't expect too much, & was betting that it would be missing the LED Shelf....
My bet was right, thus the title for this mod.
Here's what you get;
A thin aluminium MCPCB, in this case held onto the reflector by a small piece of paper sticky tape.
The rest of the light is all standard fare - machining & finish is slightly above average, & driver is easily mod-able.
What you don't get, of course, is the all-important shelf, which is what I started on first;
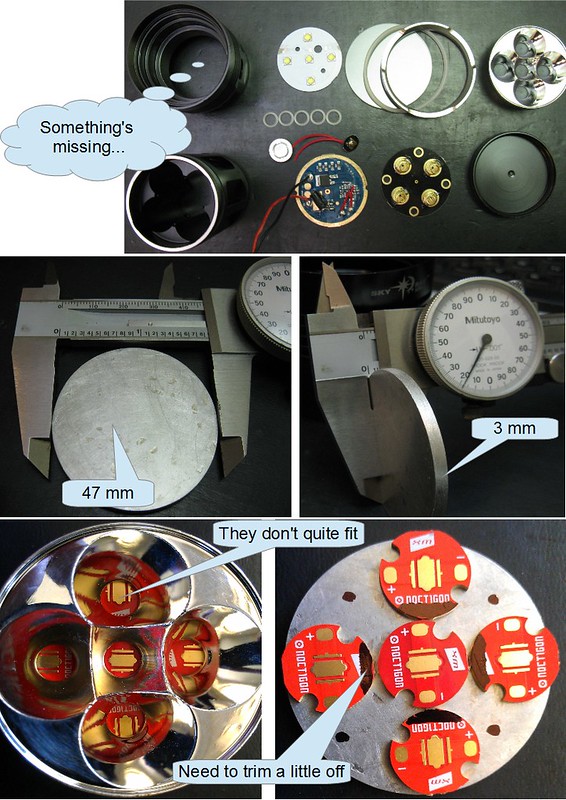
The body on this SRK clone isn't even threaded for a shelf, which actually made it easier to get a nice fit for the 47mm*3mm piece of aluminium, that I cut for a light interference fit.
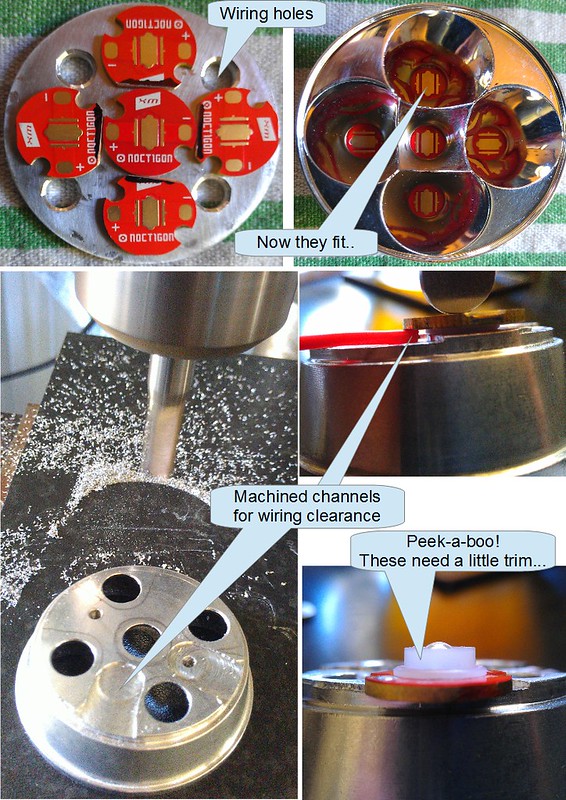
The stock MCPCB was replaced by 16mm Noctigons, which needed a little taking off them.
I also cut some channels into the underside of the reflector to give adequate clearance for the 22awg emitter wires.
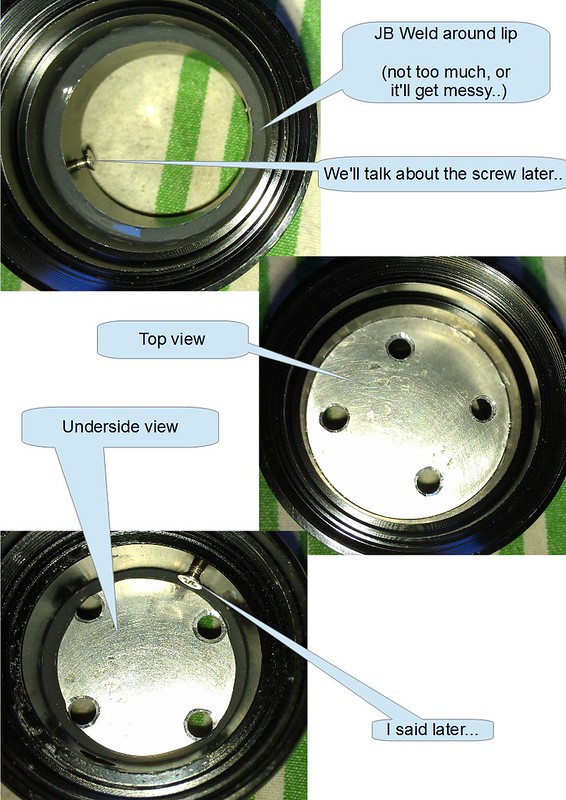
Once I was happy with the shelf, & had trial fitted everything, I installed it permanently with JB Weld.
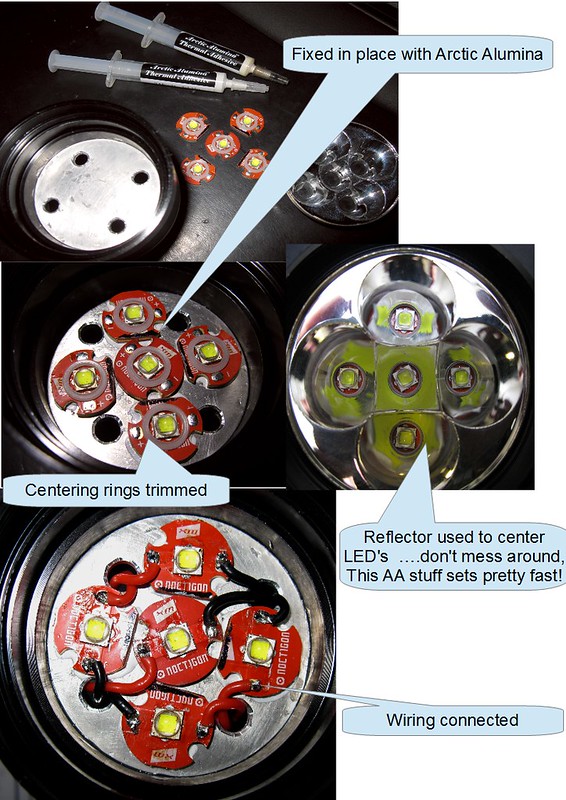
Letting the JB Weld set overnight, I re-flowed the emitters onto Noctigons, then secured them to the shelf with Arctic Alumina thermal adhesive, using the reflector to keep everything aligned.
After that had cured (which was not long at all! - nearly got caught out; started to go off when I was taking the photo below...), I attached the emitter wiring.
I moved on to the tail assembly for resistance mods;

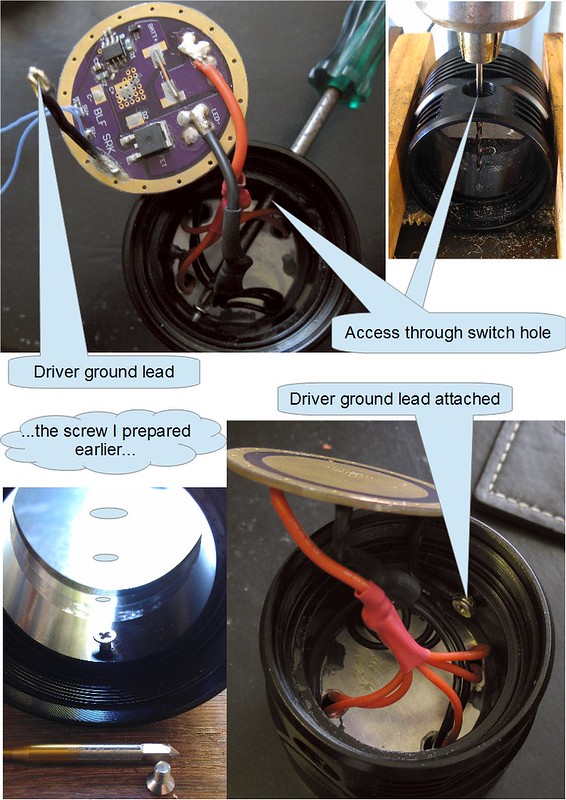
I replaced the stock driver with the BLF DD board, which I flashed with a tweaked version of STAR Momentary firmware.
Since this setup should pull some decent current, I wanted to have a dedicated ground wire for the driver, rather than just relying on the sandwich-fit.
The head is surprisingly thick (about 9mm) under the shelf, so I drilled & tapped a thread to accept a machine screw, to attach the driver ground wire.
The emitter leads were all joined to a single 18awg wire, before the driver, to keep things a little neater.
With the head finished & assembled, I removed some of the anodising from the inner thread for a better ground path, & the plan was to remove the anodising from the body threads with some caustic solution....
Well, I dunked it a little deep in the bath, so I ended up taking it all off....
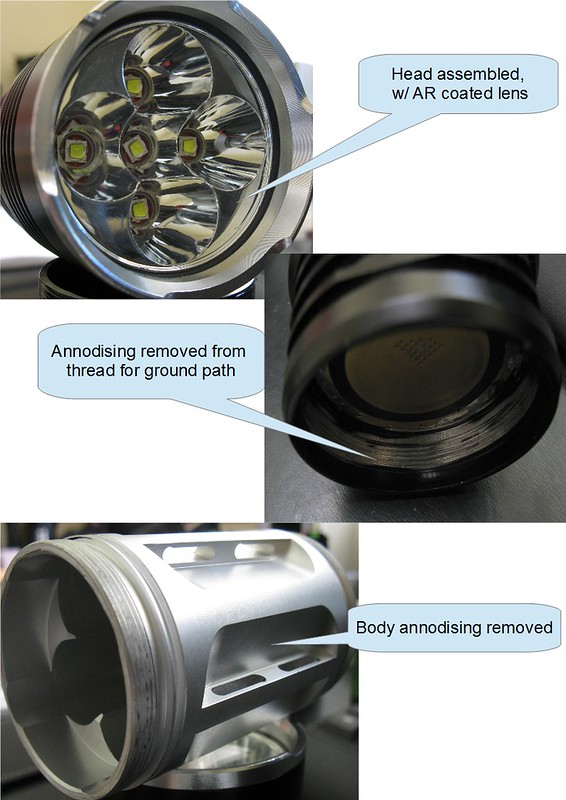
It turned out looking not too shabby;
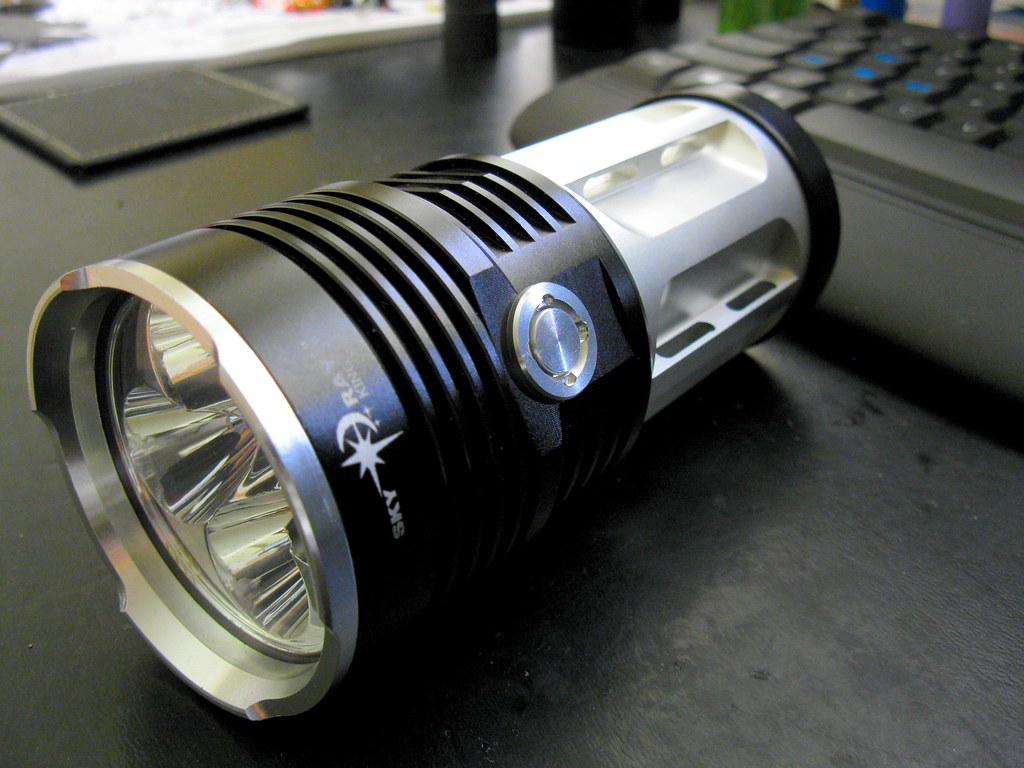
Testing with some laptop pulls, it's a major flooder, which is to be expected with the small reflectors.
The head gets hot very quickly, so the shelf is definitely doing it's job well. I popped the driver back out & re-flashed the firmware with a turbo step-down timer enabled....
It's now a great little light - my first SRK, now with the 'S' back in it.
:beer:
* --Update with performance comparison-- *
& the numbers are in…
All lights using either Samsung 25R’s or LG HE2’s at full charge.
Using the PVC pipe method, with a few known lights;
Eagle Eye X6 SE nw stock; 57k lx
Eagle Eye X6 SE cw w/resistance mods; 66k lx
Convoy S2+ Triple Nichia 219b DD; 80k lx
Convoy S2+ Triple XPL v5 DD; 180k lx
5*SRK modded; 370k lx
Yep, it's bright... :D