Had an old ummodded Sipik 58 laying around. Actually not even sure if it’s a real Sipik 58. It doesn’t say Sipik on it … might be a clone.

The Sipik 58 is a great light. It’s basically a Sipik 68, but fully knurled, smaller and with a more tubular shape better for pocket EDC. Until the #3 lights came out, the Sipik 58 was the smallest common AA sized zoom light available.
LED Lenser type optic
I decided to upgrade this light with an LED Lenser style lighthouse optic. LED lensers have a two-element optic consisting of a small aspheric lens in the center, coupled with a TIR at the edges. They have a wide deep pocket in the center in the back of the optic for the LED to retract into. In all zoomable LED Lensers except the 1xAAA ones, the LED is mounted on a raised post. The purpose of the post is to raise the LED enough so that the optic can surround it in both flood and spot positions.
A typical cheap zoomie with an aspheric lens can lose 50% or more of the LED’s total lumens when the light is cycled to spot mode. The LED emits its light in a wide cone, and in spot mode the lens is far enough from the LED that much of that cone hits the side of the bezel and is wasted. Since an LED Lenser optic surrounds the LED in all modes, this isn’t an issue. Output in lumens can be similar in both flood and spot.
Sourcing the new optic
First I needed a source of LED Lenser style optics. Spending $50+ for an LED Lenser just for the optic is a bit much. Coast lights can be had for around $10 with a similar optic, but I don’t like them because Coast intentionally chose to have different focal points for the two zones in the optic, greatly limiting throw.
Fortunately, I found this light at my local OSH for $8.99. The light itself is junk, but inside is an LED Lenser style optic with both zones at the same focal point. It’s every bit as good as the optics found on a $50+ Lenser. Incidentally, this optic is the same width as that in the Coast HP1 and would be a good choice if you want to upgrade that light. The focal length is longer than the HP1, so some modification to the housing or pill would be necessary, but you should be able to use the stock lens mount and post and wouldn’t have any issue aligning the lens and pillar.

Here’s a picture of the Sipik 58 clone with bezel off (lens removed) next to the stock bezel and the new LED Lenser style optic.

Mounting the optic
- New optic was wider at the top than the stock 18mm aspheric lens and wouldn’t fit into the light. I broke out the power drill with my favorite grinding bit and went to town on the inside of the bezel.
- After grinding it down I painted the inside of the bezel with black acrylic hobby paint. This paint isn’t very durable or heat resistant, but it’s “good enough” for this purpose where it won’t be exposed to friction on the outside of the light.
- Mounting the optic was a pain. I tried press-fitting it, which worked… until I dropped the light and it popped out. I ended up using grey stuff epoxy at the top edges of the bezel to keep it in place. First I tried putting the grey stuff just inside the bezel… bad idea. It made a mess of the optic when I tried to mount it. I scraped that out and got it mounted, but it looks a bit messy. I may stop by OSH to see if they have any more of these cheapie lights so I can try replacing the optic again.
- Next step was to center the optic. Unlike typical aspherics, LED Lenser optics are very sensitive to orientation. If not completely centered you’ll get reduced throw and a bad beam pattern in spot mode as the hotspots from both elements fail to light up. I took my “best guess” and eyeballed it.
Building the pillar - Since the original light did not use an LED Lenser optic, there was no pillar for the LED. Without a pillar, the optic cannot surround the LED and can’t fully enter flood mode. I use a relatively simple and easy to build pillar of my own design. This is the second time I’ve built a pillar using this method.
- I cut 4 strips of copper. Each strip is about as wide as an XPG emitter:
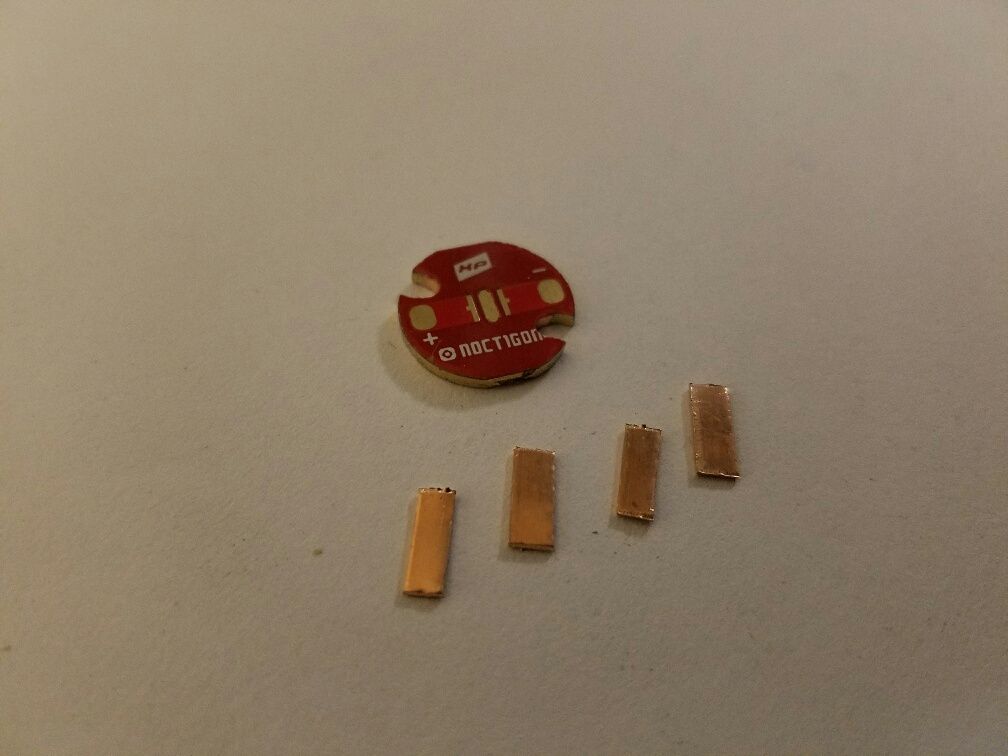
- I took two of the strips and spread a thin layer of arctic alumina epoxy along one side to serve as an insulator. I let that cure, then I added more arctic alumina and stuck a second piece of copper to the first, creating two pairs:
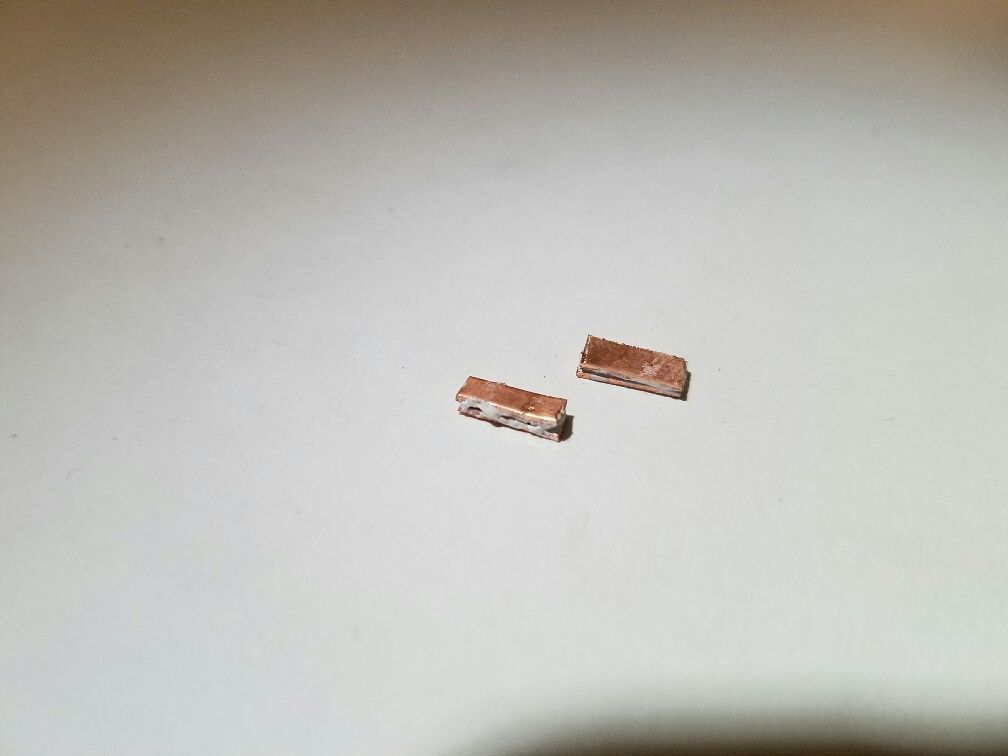
- Let that cure and glued the two pairs to each other with a small amount of arctic alumina. This created a sandwich of 4 layers of copper, with the outer 2 layers electrically insulated from the inner layers.
- Let it cure and filed the ends of the sandwich down to reveal the bare copper. This sandwich is the new pillar.
- I added solder paste to a standard 16mm Noctigon and stood the pillar on its end on the bondpads. The strips making up the pillar align with each of the bondpads for electrical connection.
- I added solder paste to the top of the pillar and sat the LED onto the top, again making sure each bondpad aligned with the appropriate strips on the star.
- Then it was just like a typical reflow: with the star in a wooden vise, heat the underside with my soldering iron until the solder at both the top and bottom of the pillar melted.
I like this pillar design because:
- Absolutely nothing hangs off the sides of the LED. The entire pillar, including electrical connections to the LED sits inside the LED footprint. There are no wires or cut down star hanging off the side to possibly rub against the optic.
- Heat conduction is excellent. Both the LED and pillar are soldered directly to the star and the pillar is mostly copper.
- It’s not hard to adjust. Pillar too long? Reflow and remove it and file it down. Pillar not straight, remove and file the bottom, etc.
The star with pillar and LED mounted:

Mounted into the light: Note that the white retaining ring is just for decoration. The star is actually screwed down to the copper heatsink, which is itself glued to the inside of the pill with arctic alumina.

A considerable amount of tweeking and adjustment was needed to get it just right. My first attempt at the pillar was too long so I had to remove it and cut it down. It’s also quite hard to get the pillar to stand completely straight. Even now it’s not quite right.
Additional mods I performed on this light - Of course there isn’t much point in spending the time on a mod like this without also doing some basic mods for greatly increased power:
- Driver upgrade - Replaced driver with 15mm FET driver with guppydrv firmware from Mountain Electronics.
- Heatsink added - Added copper heatsink to hollow pill
- Copper star added - Replaced stock 16mm aluminum star with copper Noctigon
- Emitter upgrade - to XPL HI 3D
Tested it. It works! Still not my throwiest 1x14500 light, but much improved from stock.
Here are some more pictures
Lens on (flood mode):


Spot mode. Not too visible in this picture, because I think I held the camera too close to the flashlight. However, the entire visible front section of the lens is yellow showing that the focus is more or less correct.

Flood mode. Nowhere near as wide as the flood of some of my modded aspherics. On the other hand, it is still considerably wider than a stock Sipik 68. About the same width as a typical LED Lenser and much brighter. 
Spot mode. Spot is quite wide, probably owing to the relatively short focal length compared to aspherics. It’s also fairly bright with decent throw. Much better than a Sipik 68. 
Still to do and additional mods I’m considering:
- Tweaking. Front edge of lens looks messy due to the epoxy that got behind the lens. I might try replacing this lens with a fresh one. Next time I’ll only apply epoxy from the front after the lens is in so no chance of anything getting to the back accidentally. Might also try tweaking the centering of the pillar a bit.
- Tailswitch spring bypass. Tailcap is actually a Sipik 68 tailcap (looks better on the 58). Stock switch is likely the same as newer Sipik 68s: Usually a single module press-fitted into the tail. Only way to get these things out is usually to press on the back of the button really hard, which often destroys the rubber boot. If I want a spring bypass I may need to completely rebuild all tailcap internals.
- Bore out body tube so it can fit an Efest 16500. More amps in the same amount of space; or
- Install tailcap e-switch. This requires filing a slot on the inside of the body tube and then running a small wire along it for an e-switch in the tailcap. Then replace driver with moppydrv e-switch firmware. This is a pretty ambitious and difficult type of mod. I did a similar mod, also on a Sipik 58, several years ago and got mixed results. However, with that experience under my belt I have some ideas on how to make this system work better.
- Remove anodizing and polish the bare aluminum. Sipik 58’s type II anodizing wears quickly and very rapidly looks like crap. However, polished Sipik 58s look beautiful.
UPDATE: I installed an e-switch in this light. See my build thread here .

