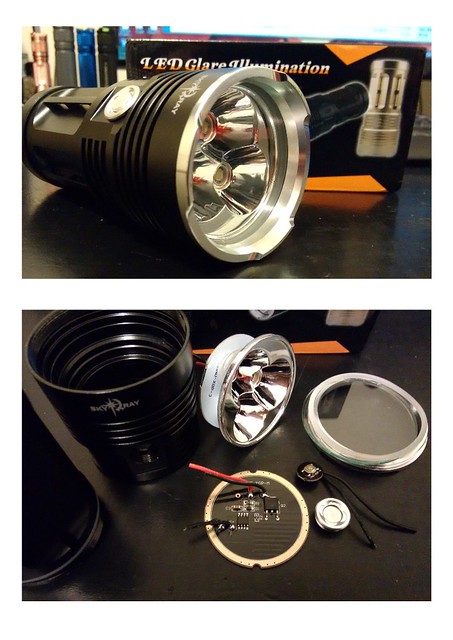
The SRK is seeing somewhat of a revival recently, but as we all know, it's nigh-on-impossible to find one now that hasn't had the Magic Wand of Cheapness waved over it during production.
I'd already tried my hand at building up a 5*SRK a while back, but with the advent of the M43, & better performing LED's now available, I wanted to have another crack at it.
I started out with a AU$20 3*SRK clone, which came with the obligatory Latticebright XML clones, chipped lens, & of course a distinct lack of thermal path.
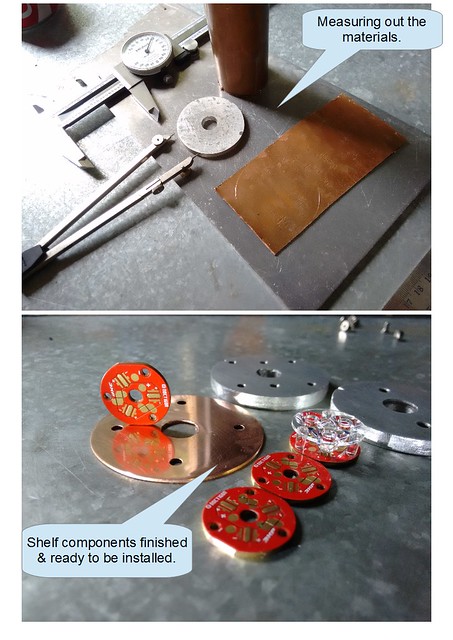
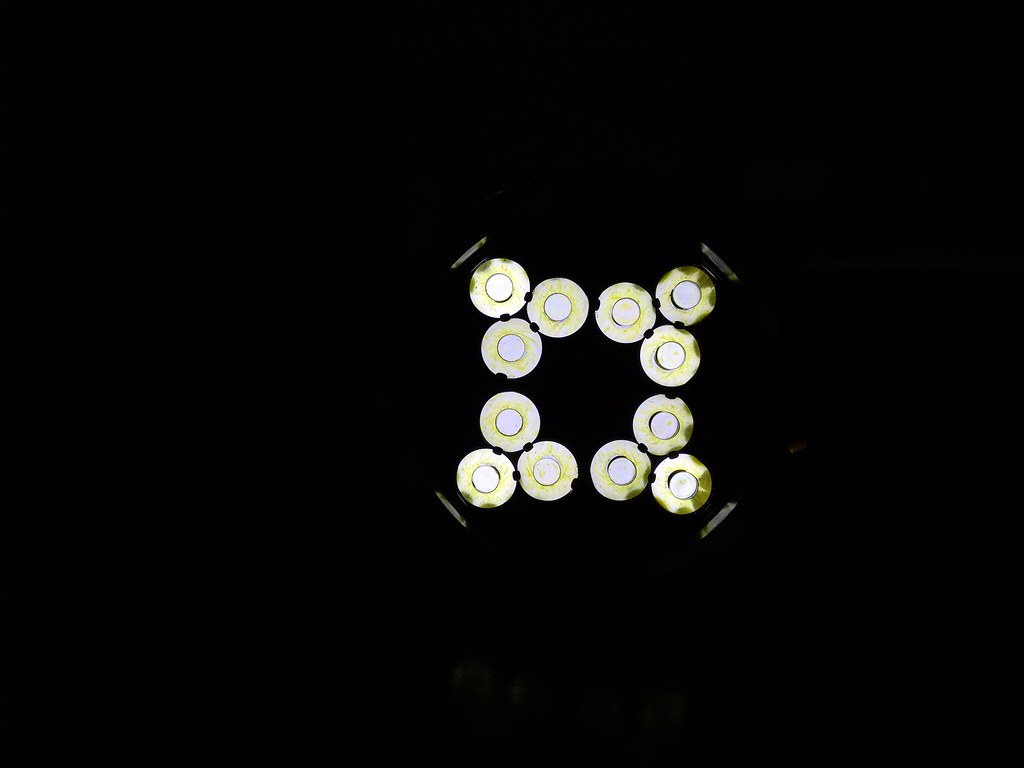
As I was planning to use 12 XP-G3 S5 2C's, I needed to put in something a little beefier than normal. I tore it down & measured the internals of the head, which had three distinct 'steps' in the location I needed the shelf.
I made two discs out of 5mm alloy, & one out of a thick-walled copper pipe that I cut & flattened. Each disc was cut & filed to fit the ID of it's respective step inside the head.
The middle disc was drilled & tapped, so as the top & bottom discs could be machine-screwed into it, to form one thick shelf.
All the parts were then test fitted & checked. An earth point for the driver was also tapped into the body opposite the e-switch hole.
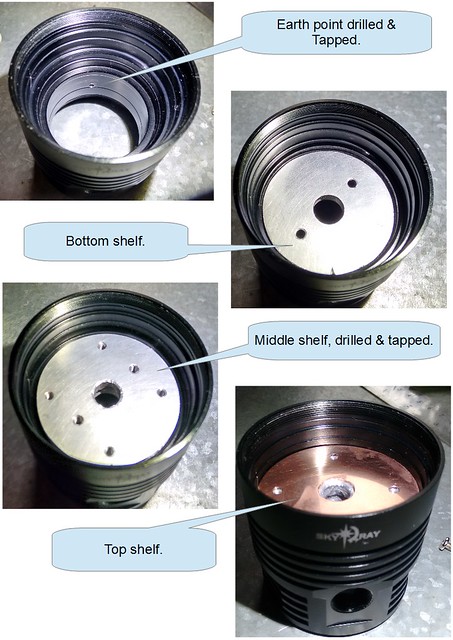
Each disc was then installed, & the assembly clamped together with machine screws from either side, & JB Weld was also used to permanently secure the shelf in place.
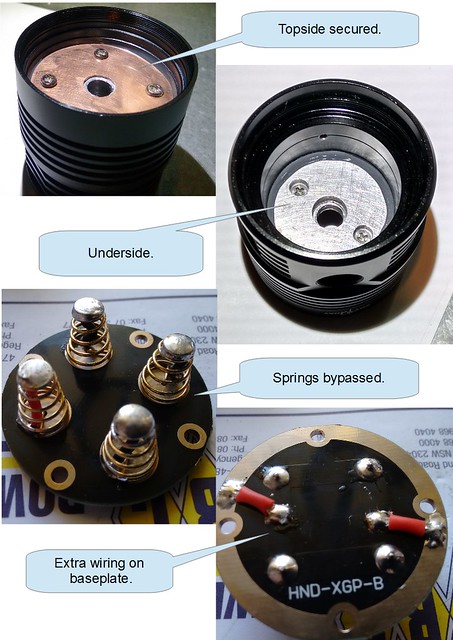
Whilst the JB weld was curing, I moved on to the electrics.
I then had the brilliant idea of dropping the triple boards over the tip of my soldering iron to flow the LED's & bridges on. It all seemed to go well, but I discovered later on (after assembling the light...) that I had overheated the LED's during reflow. Although they tested OK prior to assembly, they started to fail shortly after using the light for the first time.
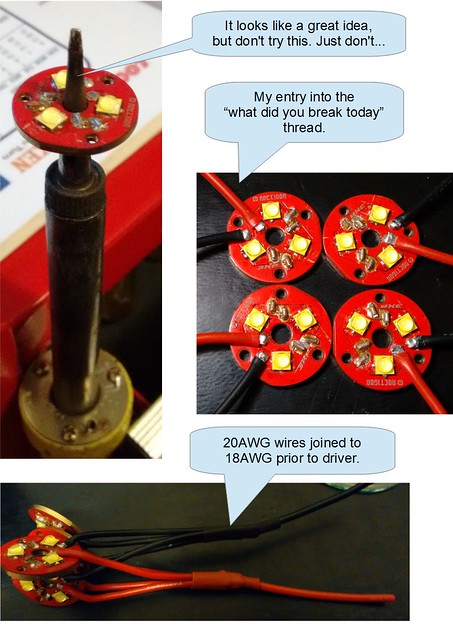
The wiring was threaded through the hole in the center of the shelf, & then the lapped triple boards were attached using thermal compound, & a small blob of Arctic Ceramique in the center hole of each board. I put the optics on, then used a weight to hold the boards in position until the Ceramique set.
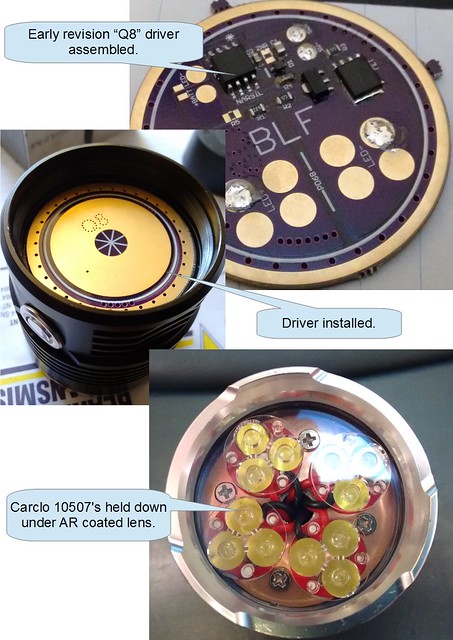
The new "Q8"/Narsil driver was assembled & installed, & finally an AR coated lens was used over the optics to clamp them down & seal the front of the head.
This is around about the time I discovered I had damaged the LED's, so it all had to come apart again, all of the wiring & LED's removed, triple boards cleaned up, etc, etc.....
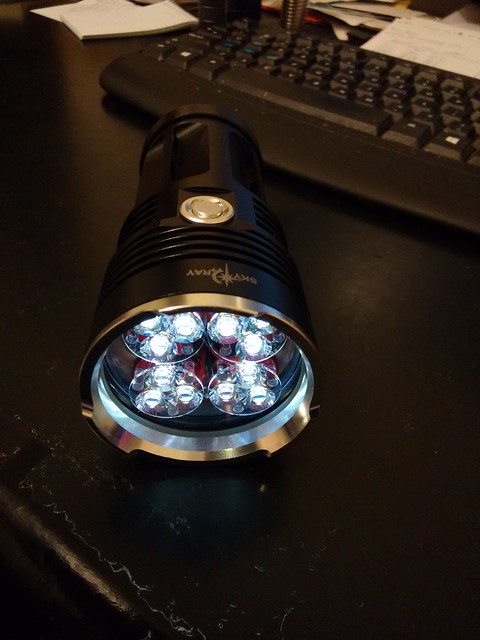
Fast forward another week, with a very helpful Moose shooting me some replacement LED's in the mail, & it's all back together again.
...& this time it works!
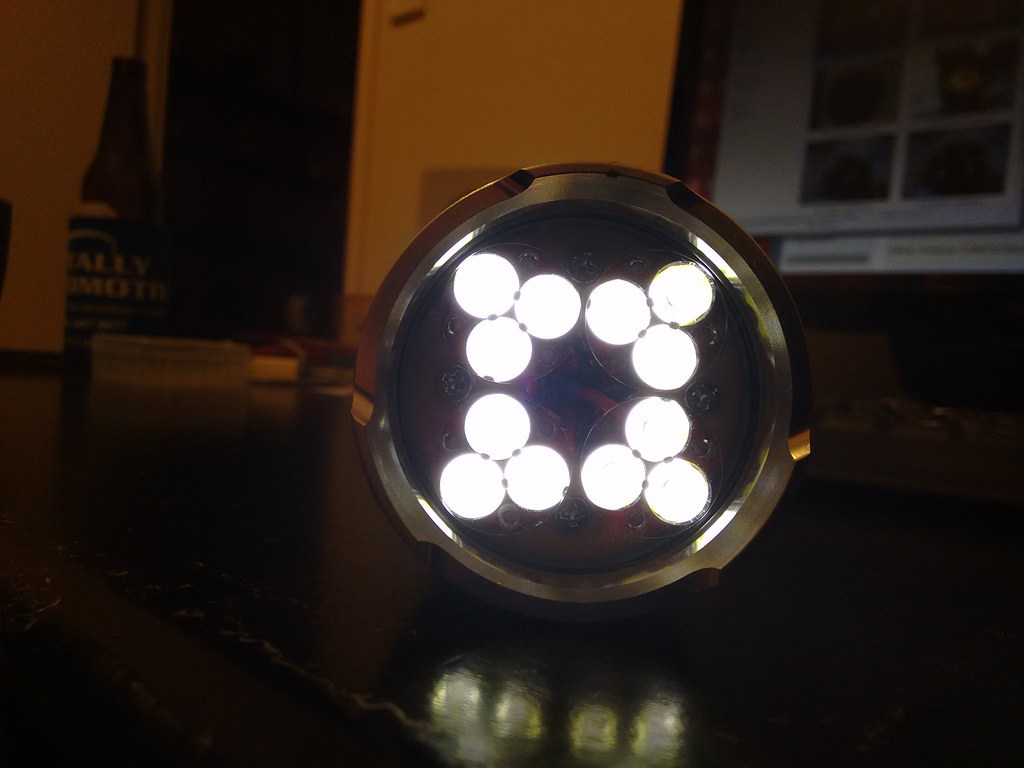
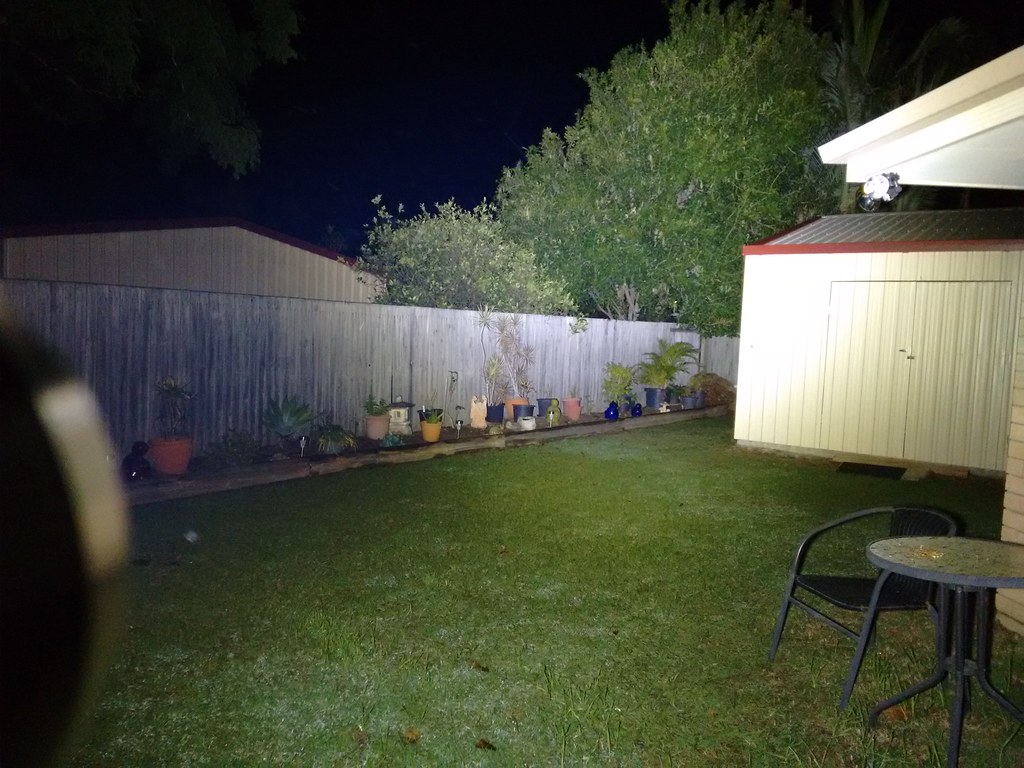
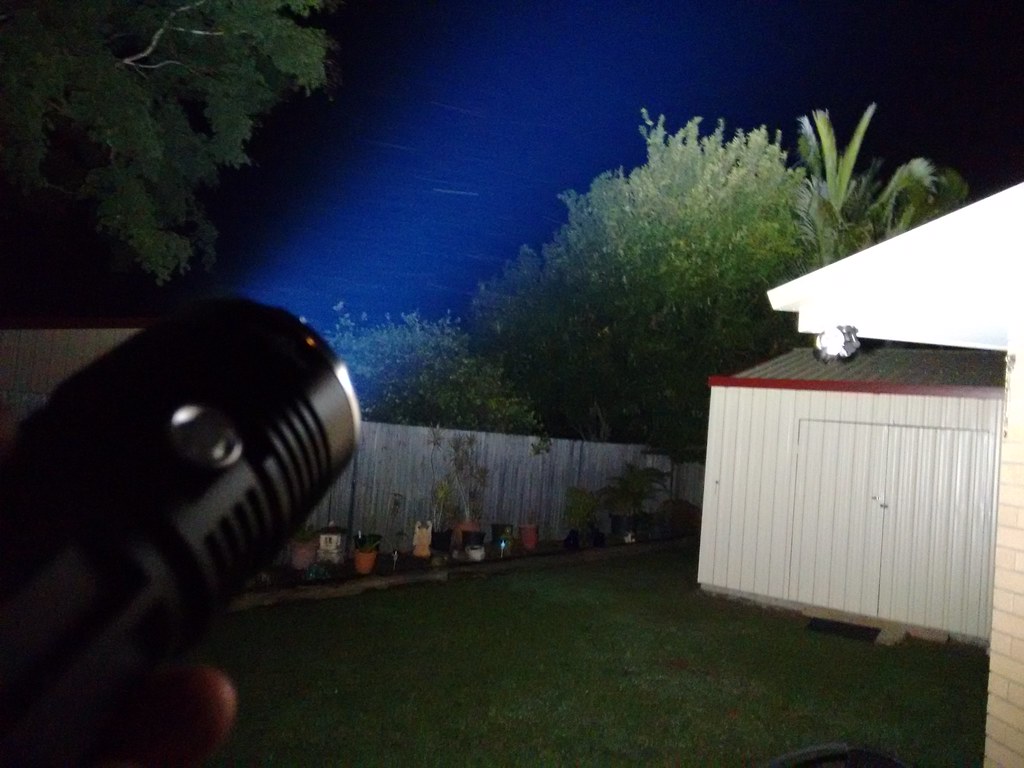
..and boy does it work... It puts out a ridiculous wall of light. How does over 11,000 lumens at startup sound?
At 30 seconds, the head is starting to get pretty hot, but still holding over 9000 lumens.
Time to put the beast to bed for the night....
Cheers! :beer:
