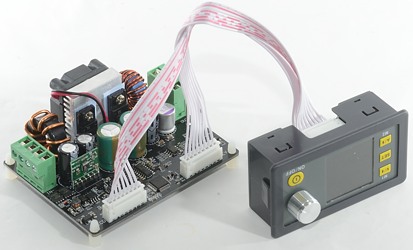
Power supply frontend DPH3205 32V/5A with buck/boost converter
This device is the front end for a power supply, it must be supplied with low voltage DC power (Up to 40V).
Official specifications:
-
Input voltage range: 6.00-40.00V
-
Output voltage range: 0V-32.00V
-
Output current: 0-5.00A
-
Output power range: 0-160W
-
Max allowable input current: 5A
-
Product Weight: about 227g
-
Display module size: 79*43*41(mm) (L*W*H)
-
Open size: 71mm*39mm
-
Power module size: 93*71*41(mm) (L*W*H)
-
Length of connecting line: 200mm
-
Fixed hole center distance: 86mm, 64mm
-
Output voltage resolution: 0.01V
-
Output current resolution: 0.001A
-
Output Voltage accuracy: ± (0.5% + 1 digit)
-
Output Current accuracy: ± (0.5% + 3 digits)
I got it from aliexpress store: RD official store on Aliexpress

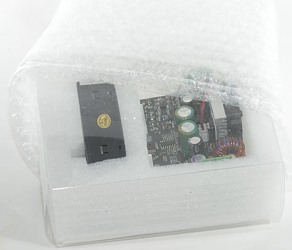
It arrived in a Styrofoam box, inside the box was the plastic box with the electronic.
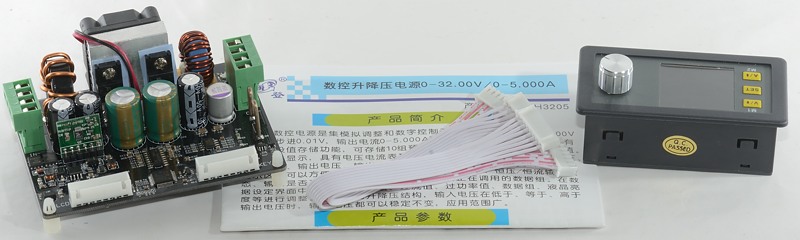
There is a control unit, a power unit, two cables and a manual in English and Chinese.
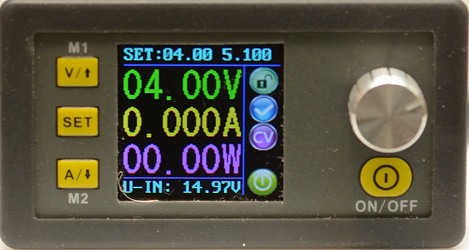
The control unit has a nice display, four buttons and a encoded that can be pressed.
The V and A buttons will enable adjustment of voltage and current with the encoded, press the encoder to select digit, when finished press SET.
Holding down V/A/SET will recall a preset, with V and A it is preset 1 and 2, with SET any of the 9 presets can be selected.
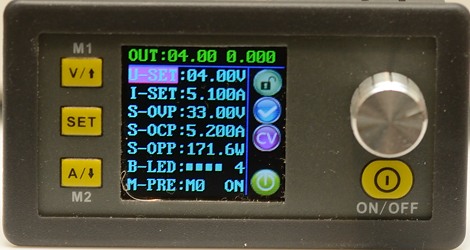
On the settings screen it is possible to define a couple of parameters: Voltage, current, over voltage, over current, over power, display brightness. The “over” settings will turn output off if they are reached.
The device has 9 preset memories. To save a preset adjust the parameters, move the marker to M0, adjust the encoded to desired preset number and hold down the SET button.

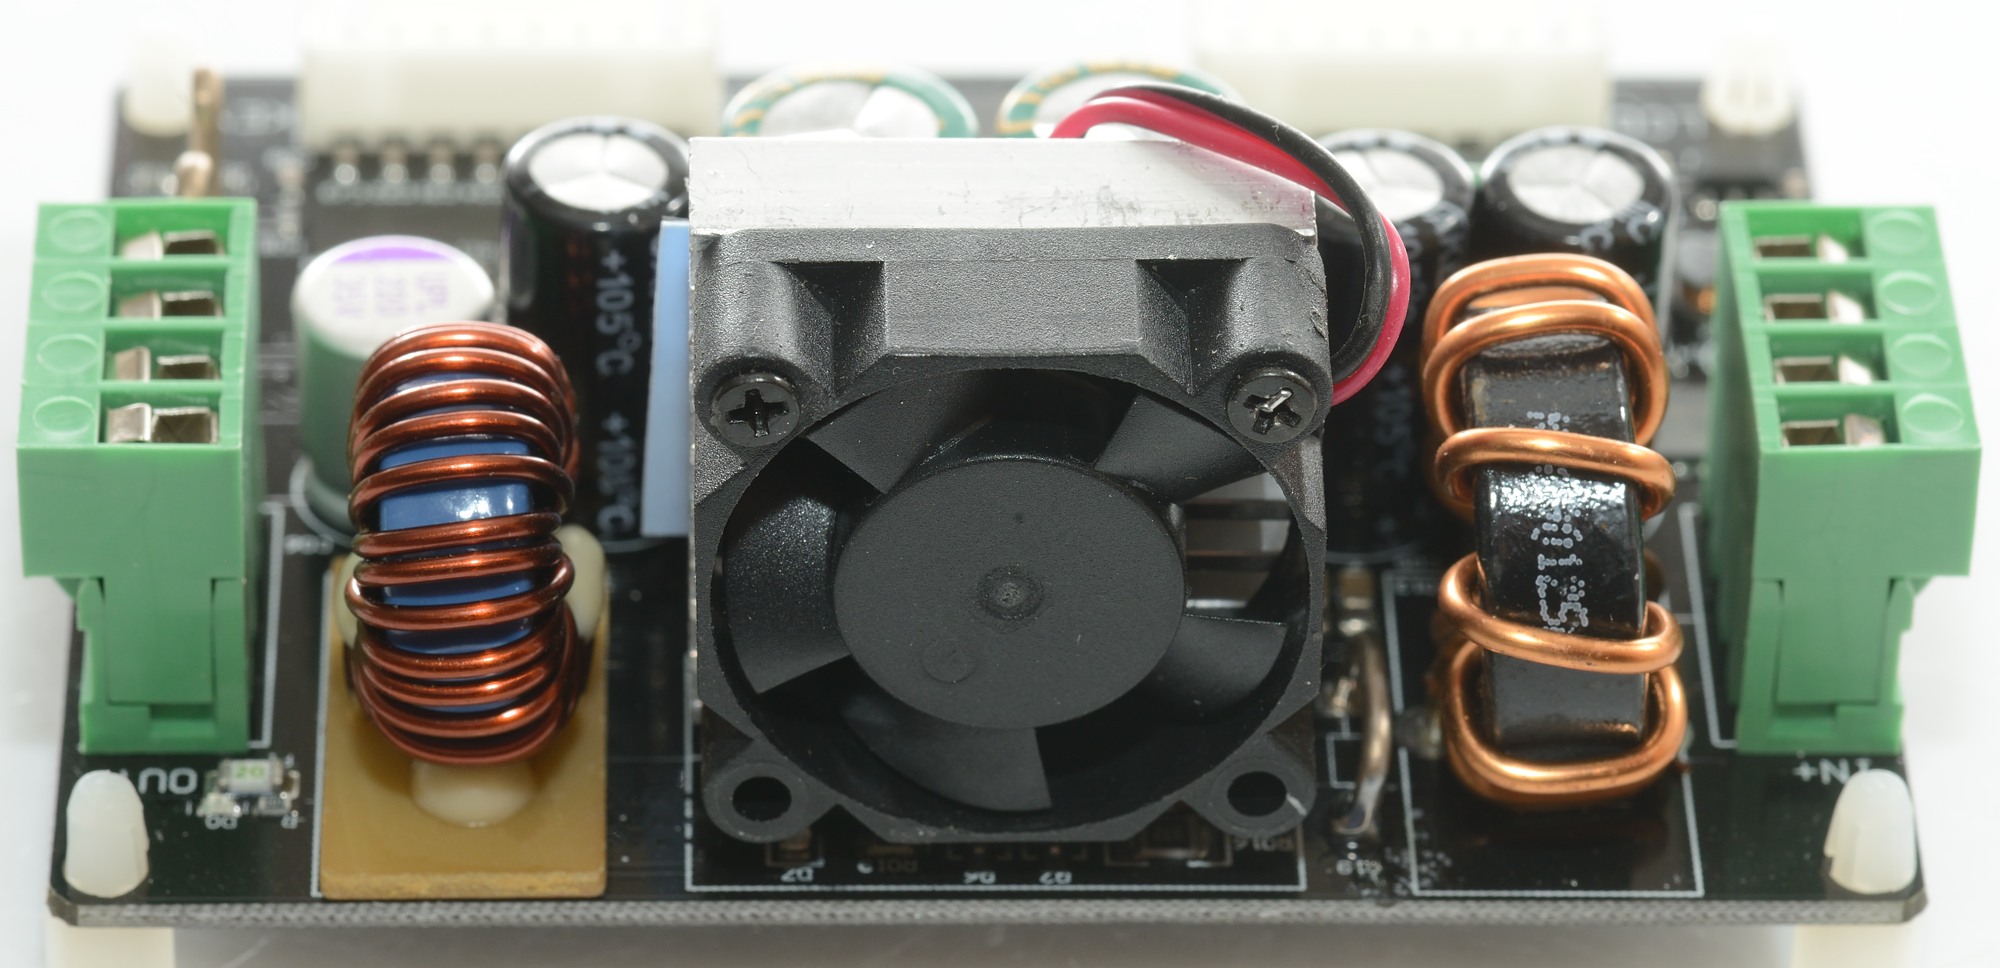
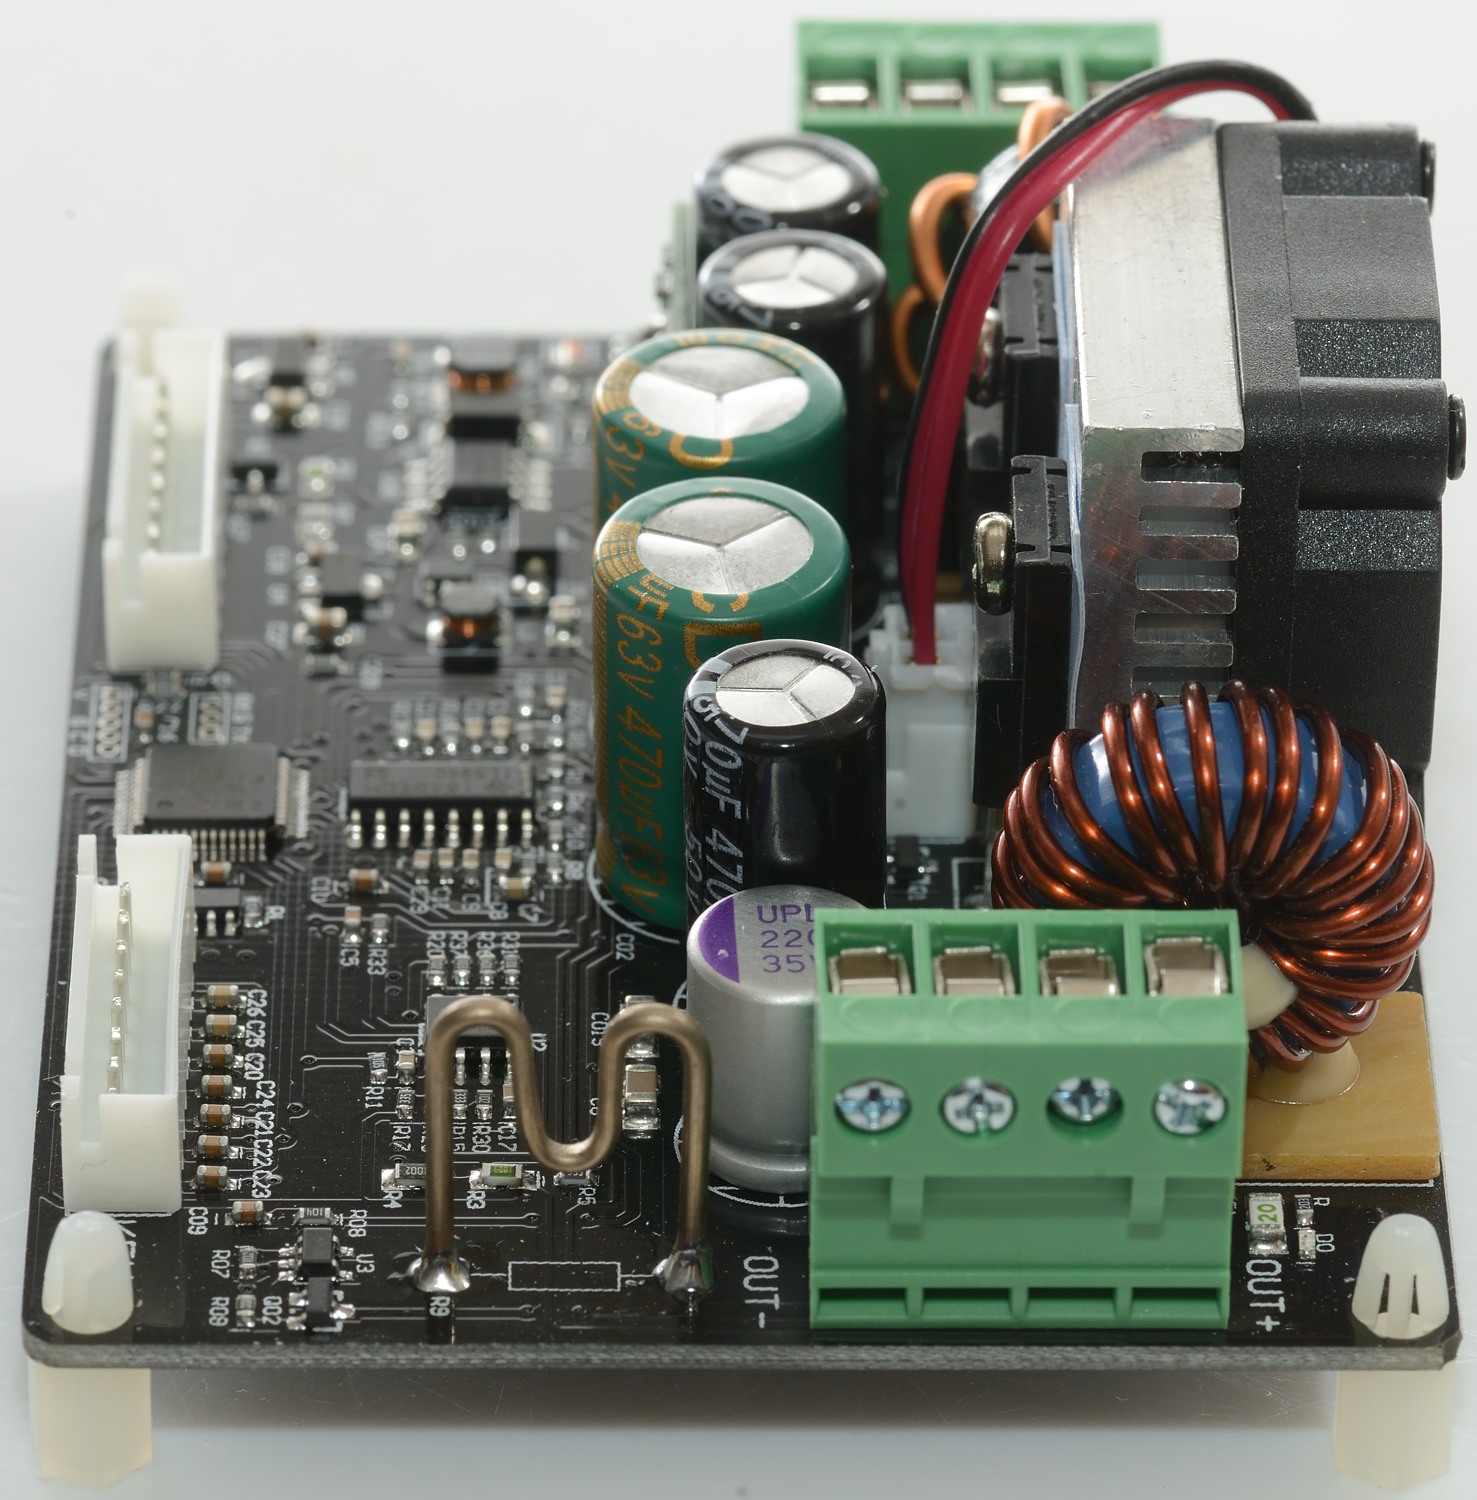
There are many parts on it: Capacitors on input and output. The input has two transistors to turn it off.
There are two internal switch mode supplies and a couple of linear regulators to power the electronic.
Two main switchers, the transistors are placed on and below the heatsink, the inductors for the boost regulator on the input side and the inductor for the buck regulator on the output of the heatsink.
Besides the output terminal is the shunt (resistor) that is used to measure the output current. There is also a current shunt between the boost inductor and the heatsink.
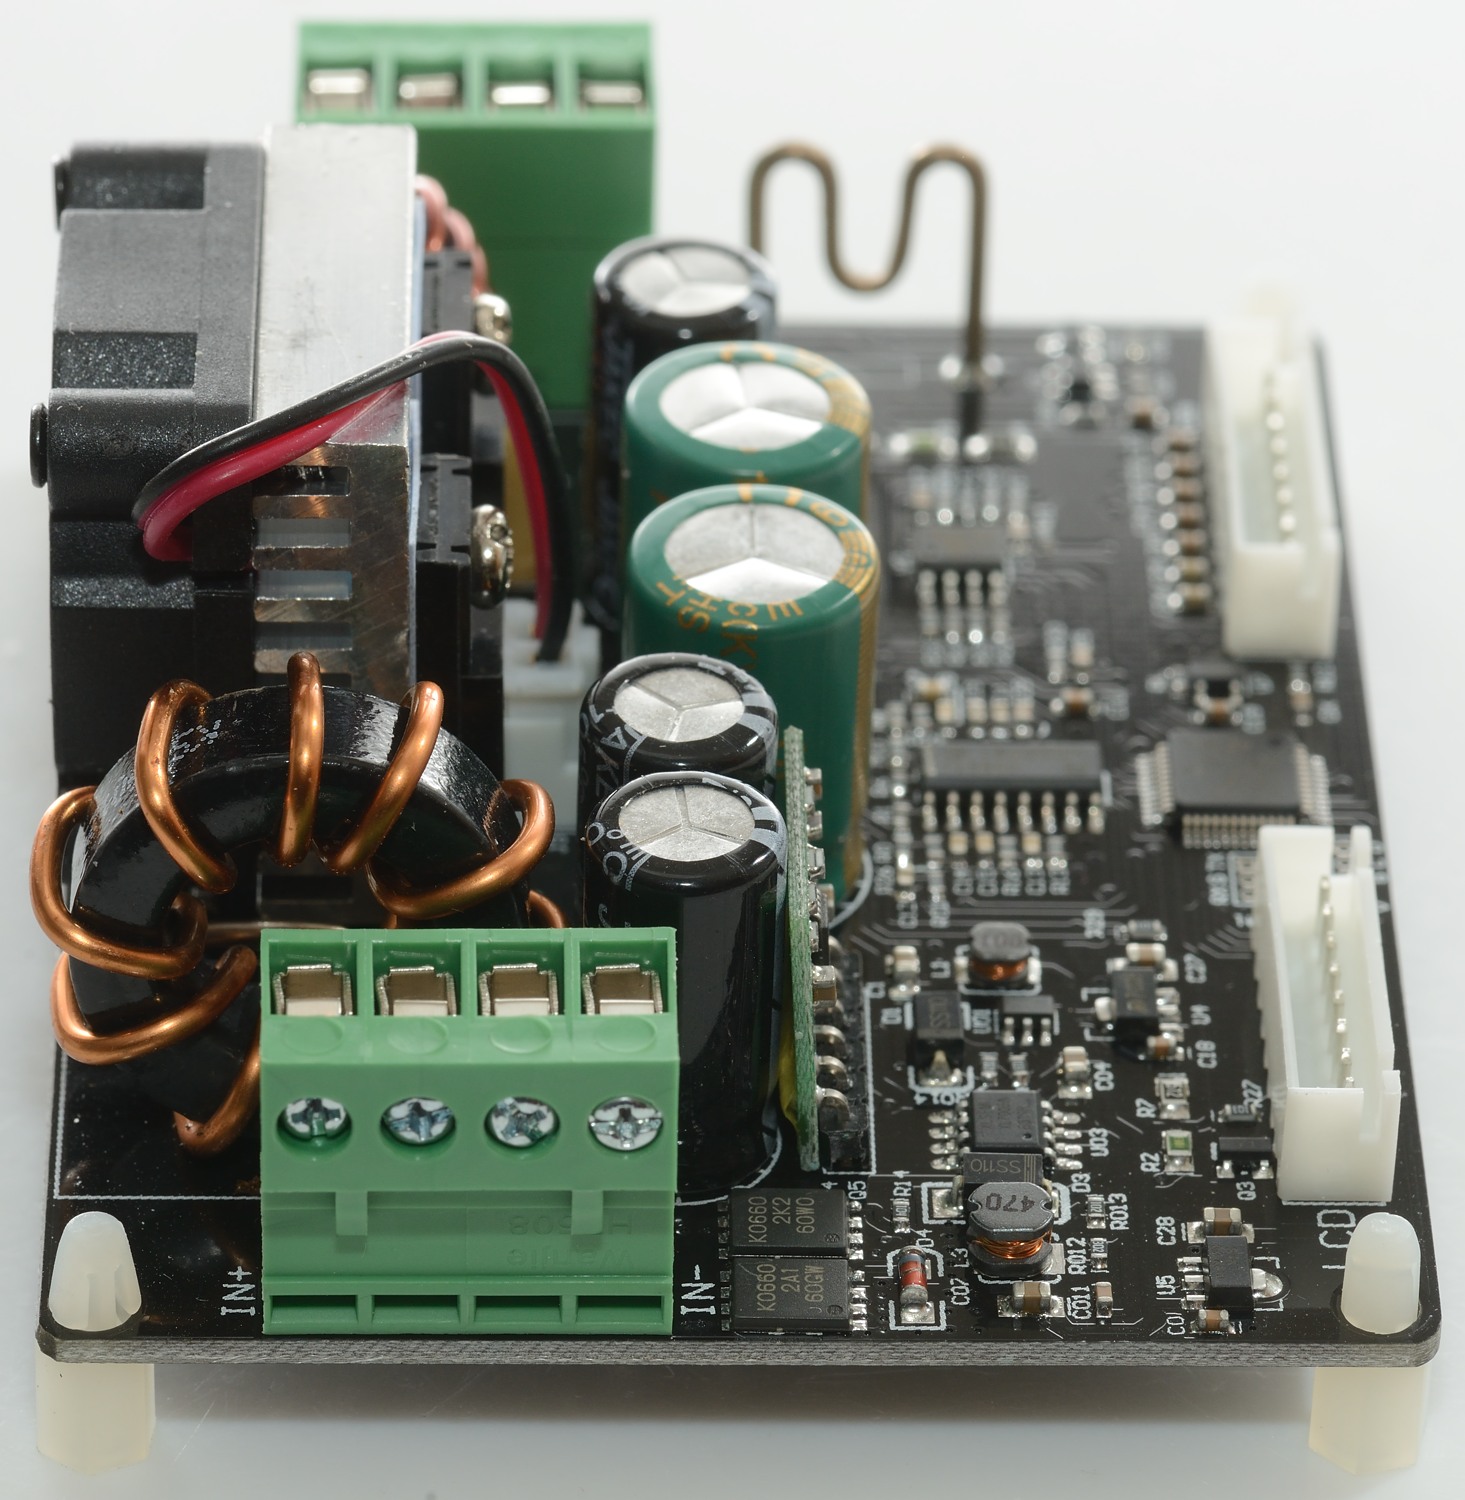


This raiser board is to control the boost converter (Chip is LTC1871-1).
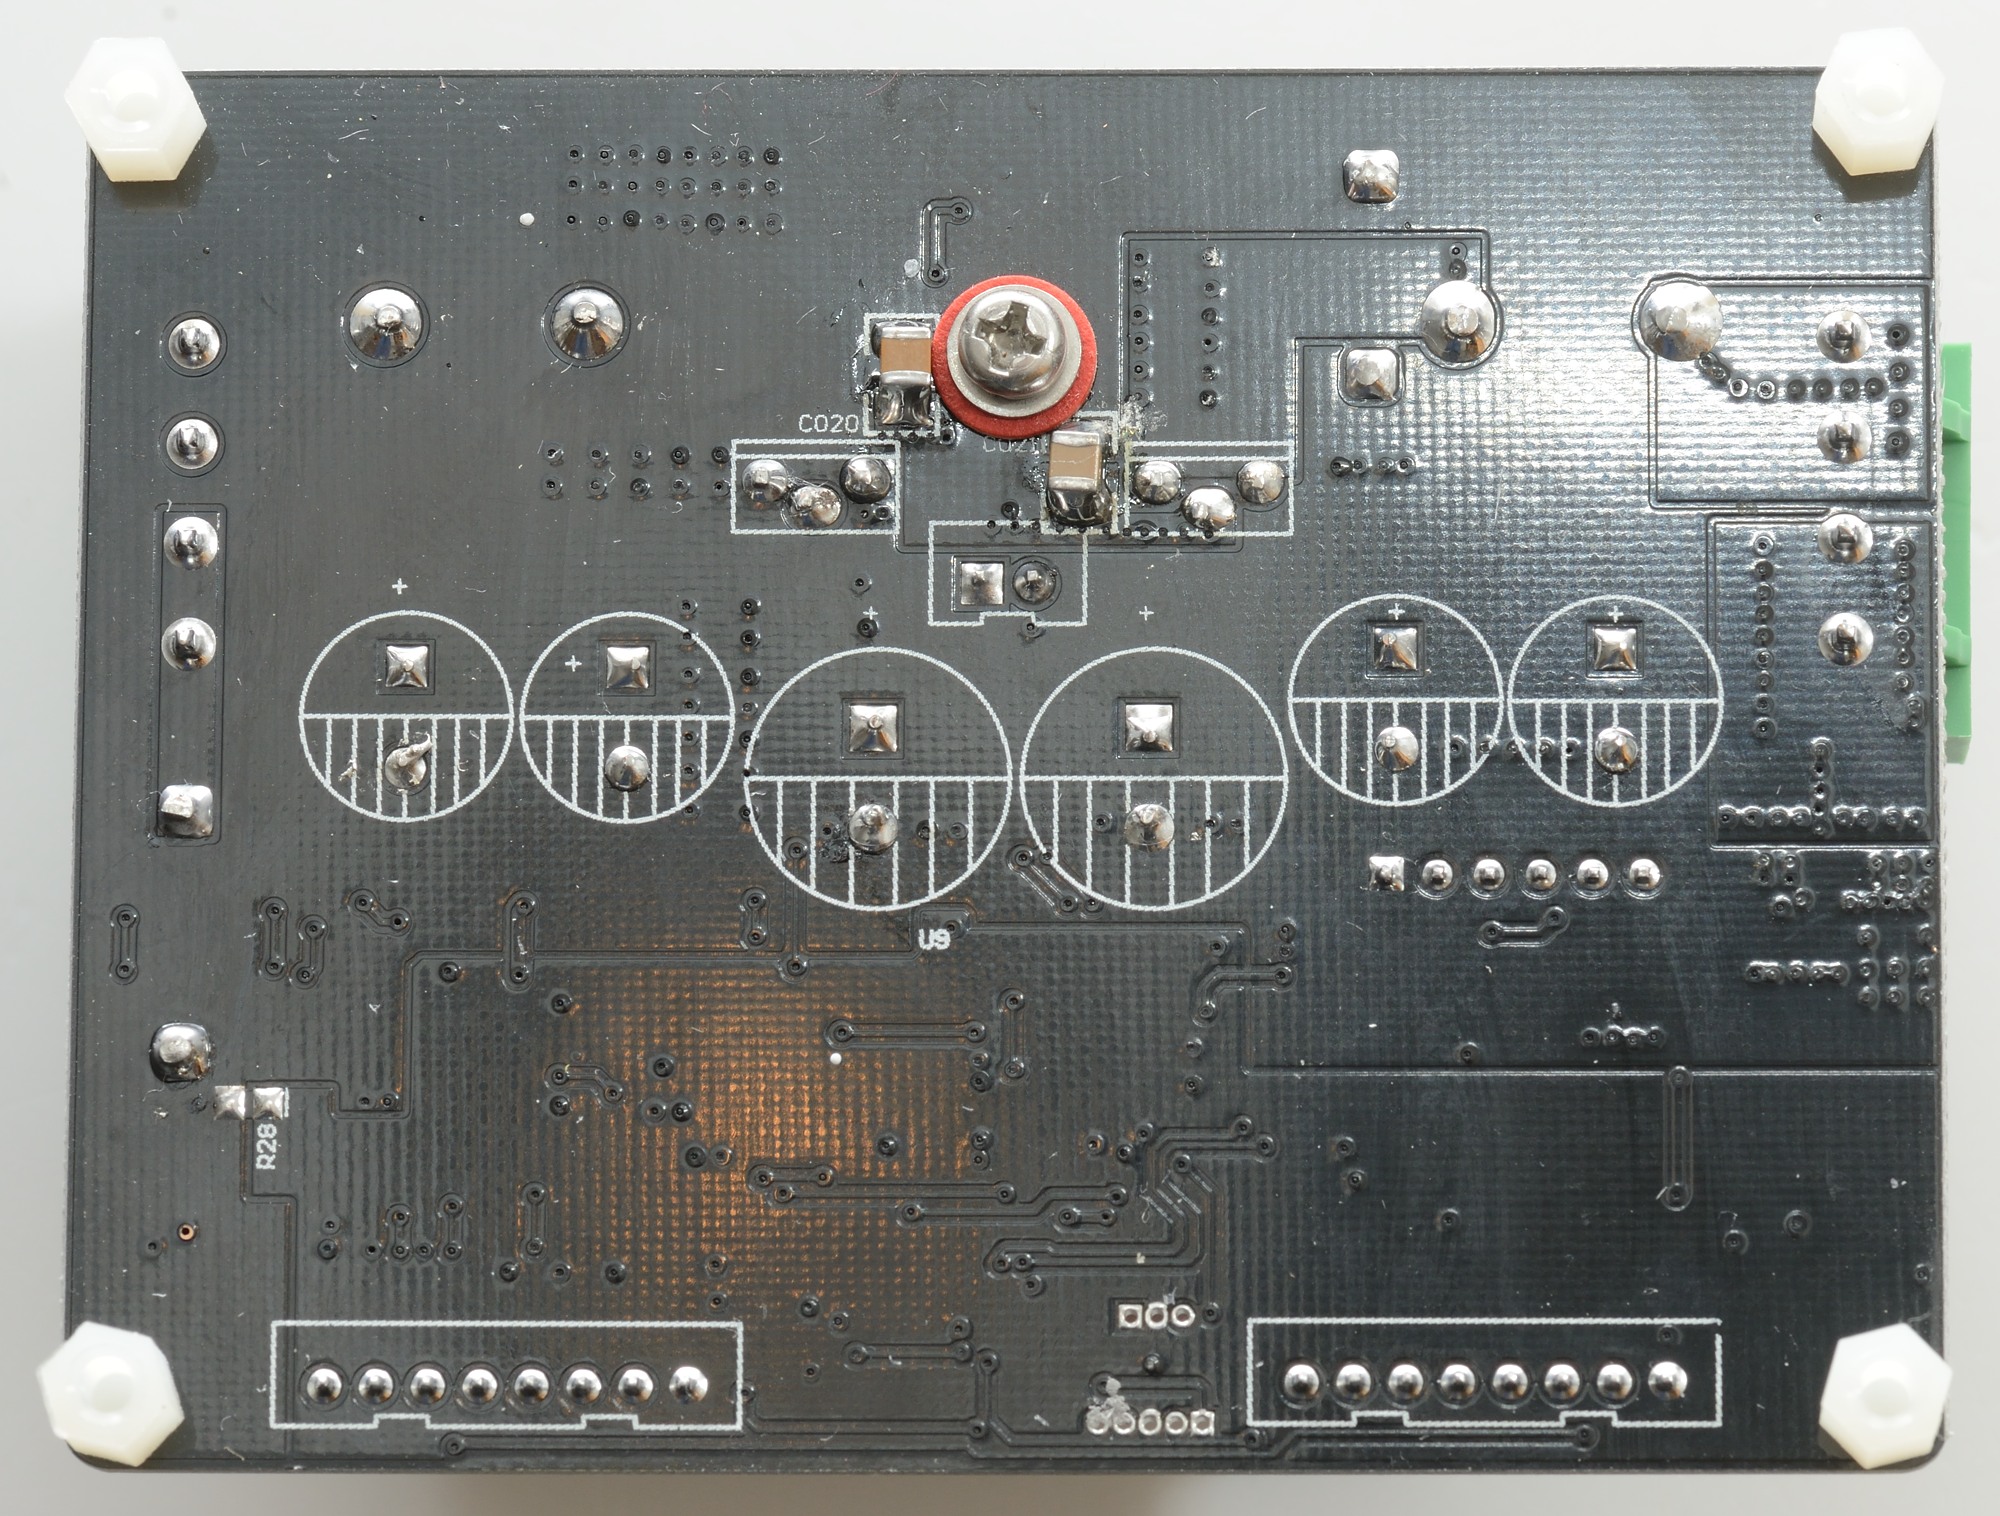
There is no parts on the other side of the circuit board.
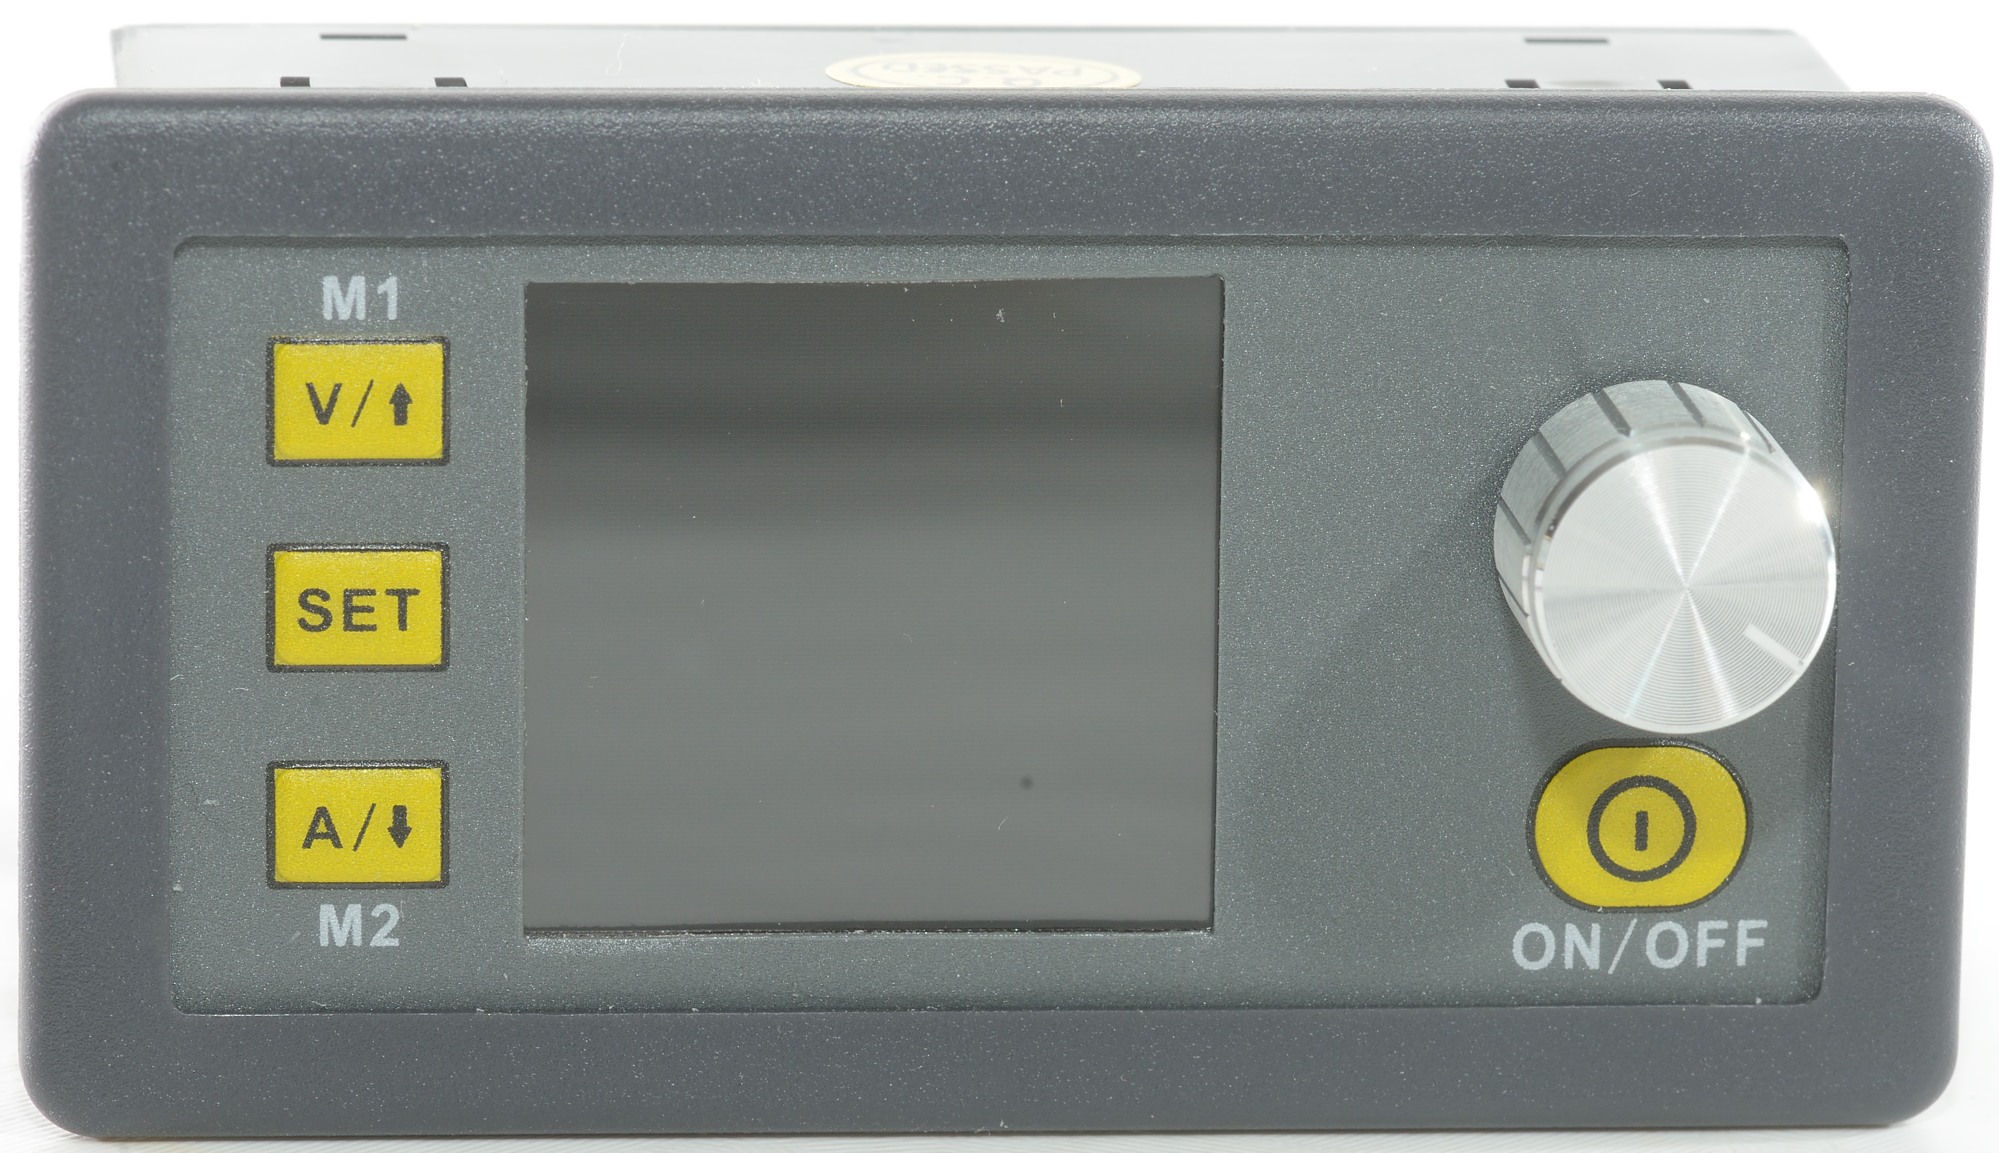
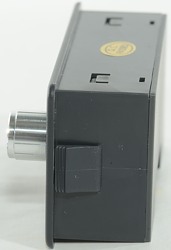
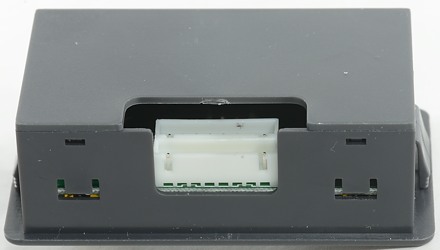
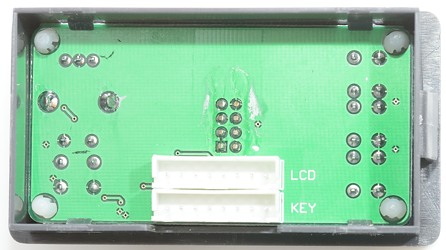
The control unit can be mounted in a rectangular hole, this makes it easy to build this circuit into a box.
Measurements
I did a huge amount of test on this unit and will only show a few of the charts here, I have posted more in another article.
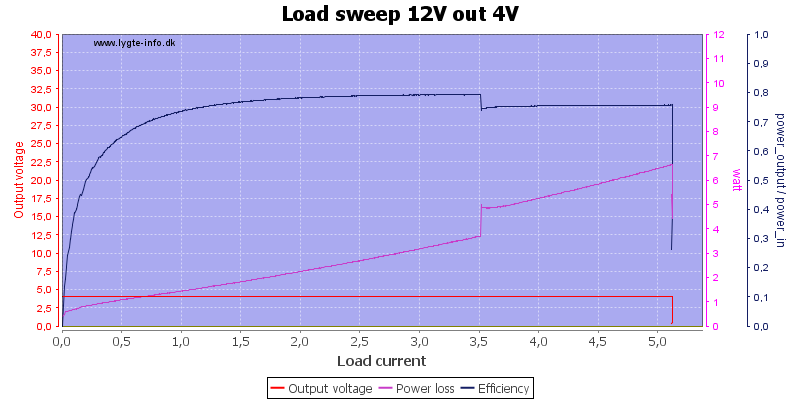
At 4V output efficiency is about 80% and the output voltage is fairly stable. The jump in efficiency/power consumption is because the fan starts.
Increasing the output power means better efficiency, because its own power consumption do not increase much.
When the boost converter has to help the efficiency goes slightly down.
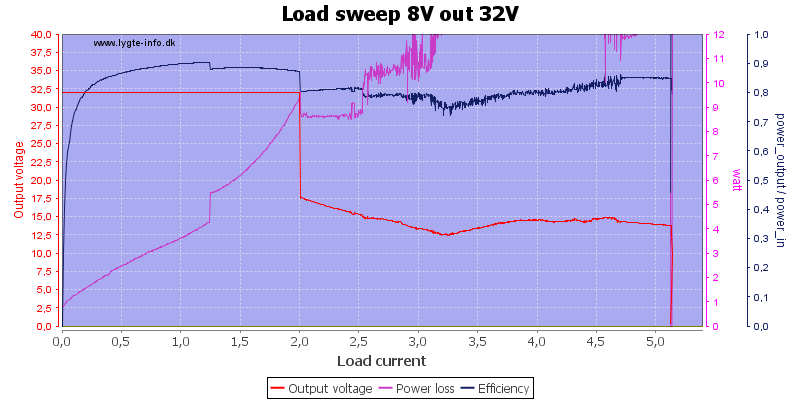
The boost converter has some limits, here it can deliver 2A before being overloaded. This overload happens slightly before the rated 10A input current.
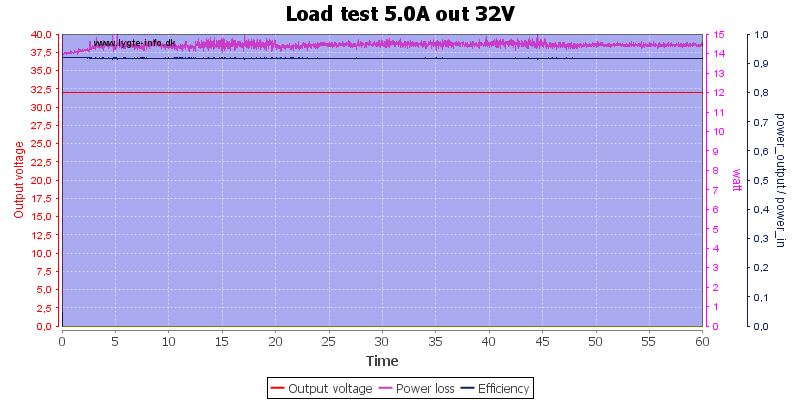
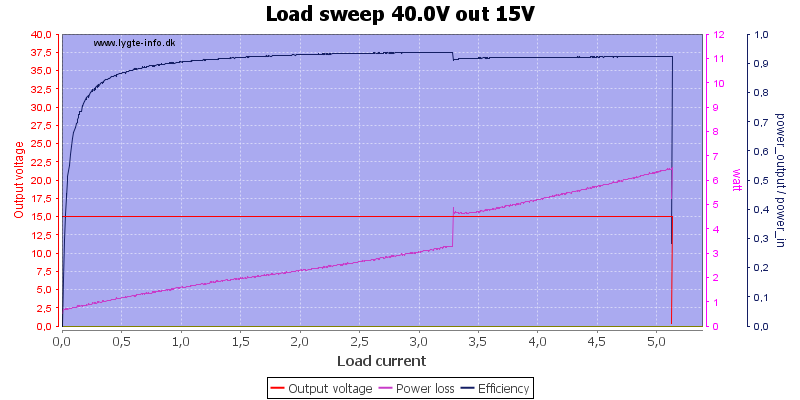
Running the output for full power for one hour was not really a problem, as long as the input voltage is high enough. Here I had 18V input, this means the boost converter was working very hard.
During the above test the output voltage varies less than 0.09 volt.
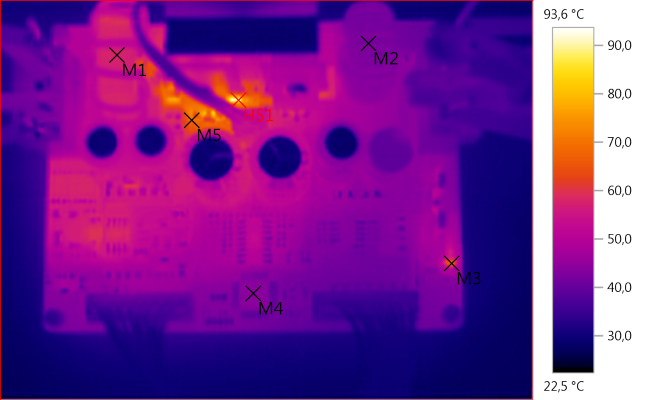
M1: 57,7°C, M2: 42,1°C, M3: 67,2°C, M4: 44,2°C, M5: 69,8°C, HS1: 93,6°C
Everything warms up at this power level and a chip below the heatsink get rather hot.
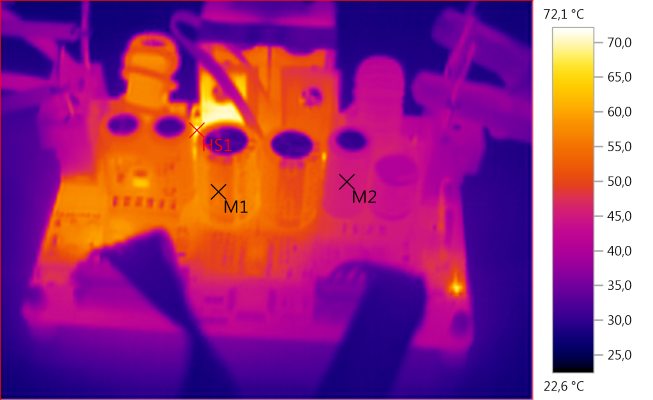
M1: 54,8°C, M2: 45,1°C, HS1: 72,1°C
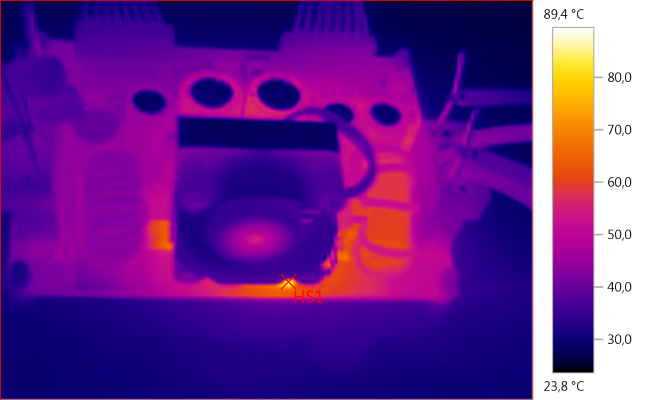
HS1: 89,4°C
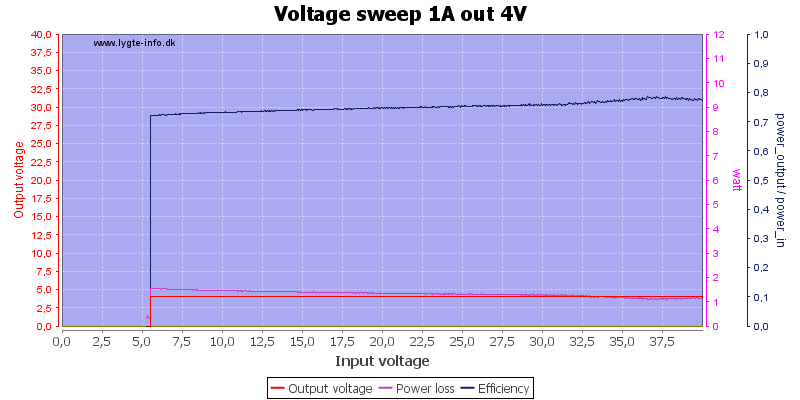
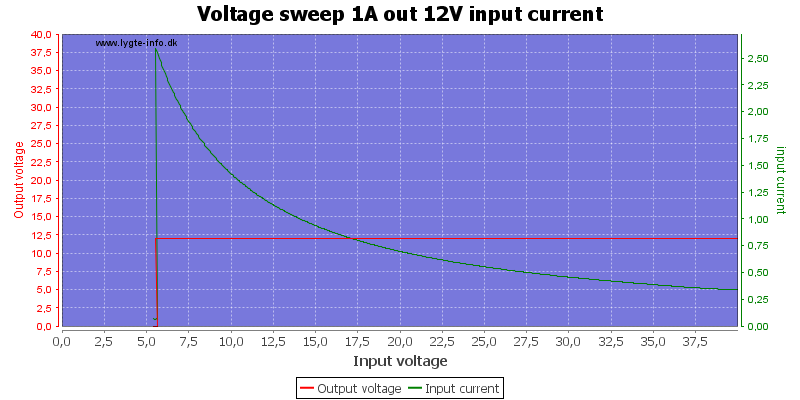
The specified minimum voltage is 6V and it turns off just below that. At 4 watt output (1A at 4V) the efficiency is fairly low, because the power for the regulation and display is a significant part of the input power.
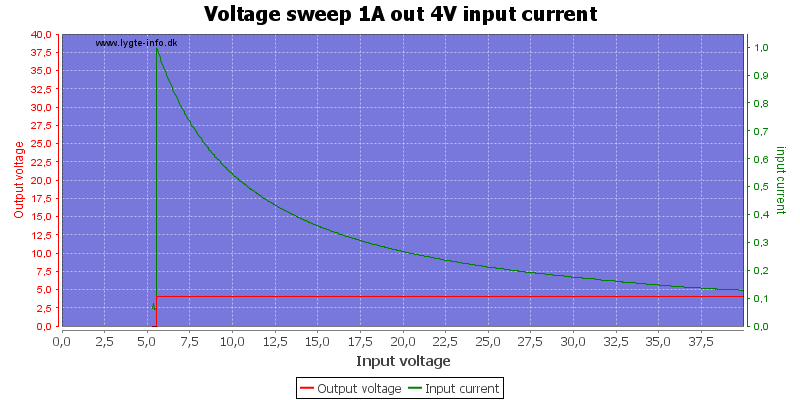
Input current varies with input voltage (As expected). With a full 40 volt input it only needs about 120mA to deliver 1A at 4V, when the input is down to 5V it needs 1A to deliver 1A.
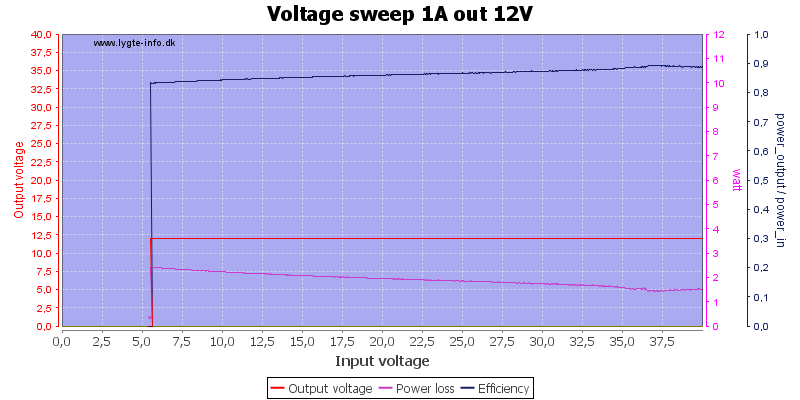
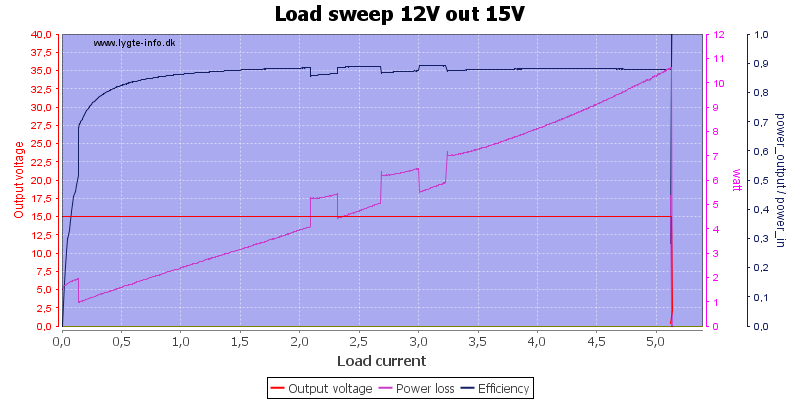
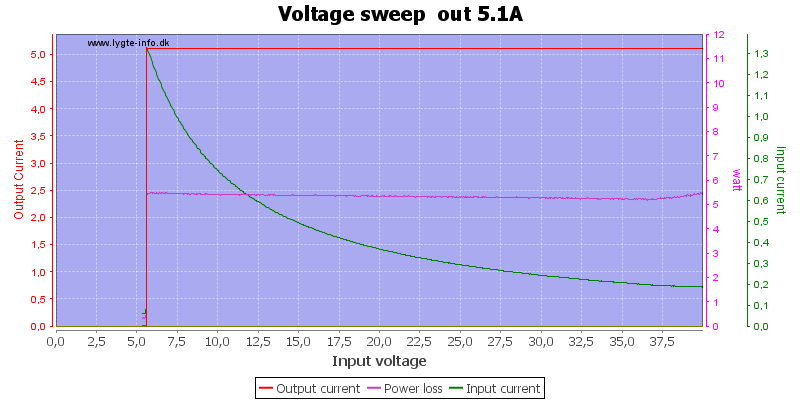
With 12V output the boost converter must be used to maintain the output voltage, this works very smoothly, it is not possible to see where it switches from buck to boost.
Depending on input voltage it can use from 20mA and up to 140mA for the internal electronic, some of it for the boost converter (The above chart was done with output at 32V).
With shorted output it will regulate the current.
When using it to drive led, remember to connect the led before turning power on or the capacitors will give a high current spike into the leds.
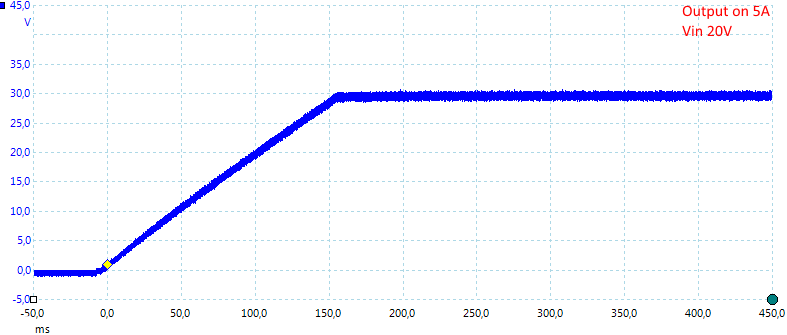
When output is turned on the voltage will raise “slowly” to the selected voltage.
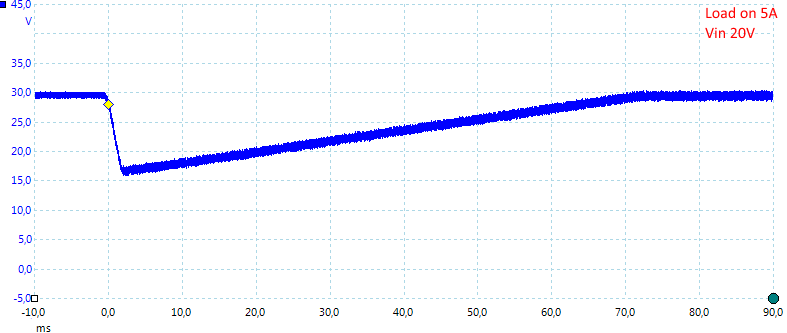
Switching a high load on will drop the output voltage significantly and it needs some time to recover.
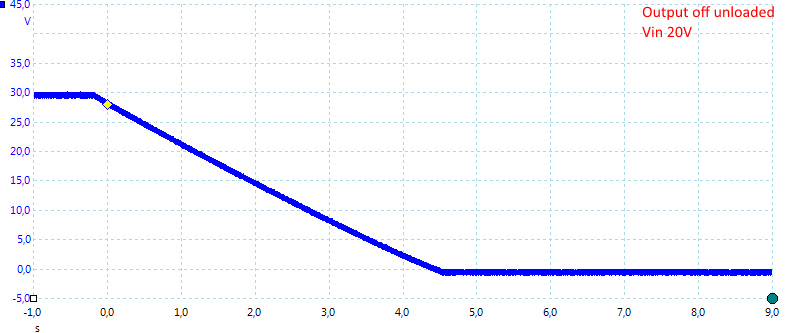
Turning output off without load means the output voltage will need a few seconds (About 5) to drop.
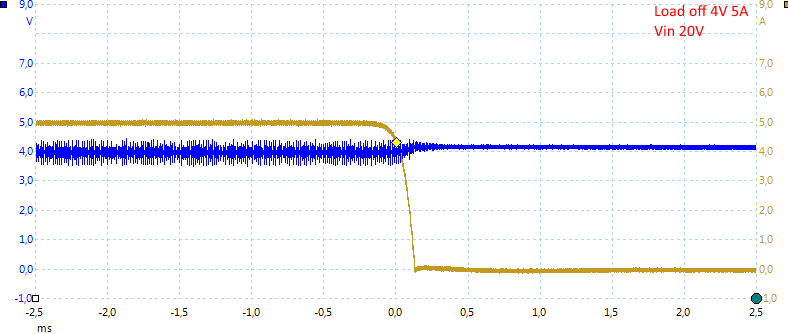
The output is fairly stable when a load is turned off.
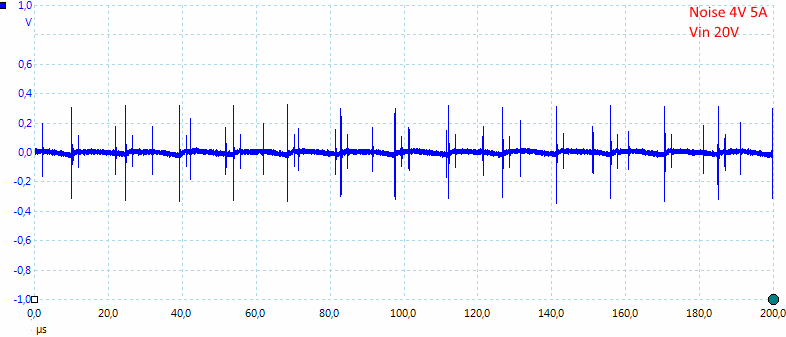
There is some noise in the output.
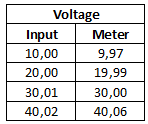
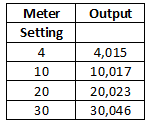

The display is fairly precise.
When not powered the output will only drain a little current: 0.25mA at 8.5V, when powered the current increases to about 5mA.
This means the unit can easily be used to charge a battery with.
Conclusion
This module is very useful to build a cheap high power bench power supply with. Add a cheap switching power supply, a box, some binding posts and some work.
The module works fine, but it is not very good for loads that pulses from very low current to very high current. This is a problem with all supplies, but the degree varies. This supply does not give over voltage, but drops significantly and is some time to recover.
If possible I would prefer to use the buck only units from RD tech, they have better efficiency and are better at maintaining voltage with pulsing loads. They do also pack much more power for their size.
Compared to professional units it is missing a lot: Lower noise, both numeric keypad and encoded, 4 terminal connections, computer control, larger display. But for the price it is good and works fine.
Notes
When using it for constant current remember never to turn it on before the led is connected