Making a Copper spring for a tailcap clicky switch

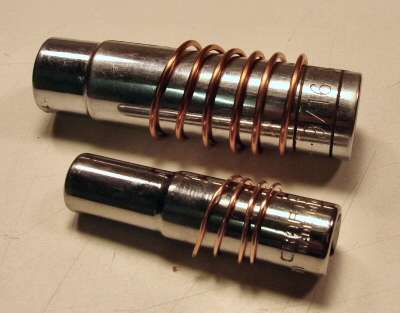
I decided to try out a mod that I was going to do for my up and coming build. Replacing the stock spring on a tailcap clicky with a copper one. Here's some photos of the attempt and a little info with it.

First I needed to remove the switch from the cap. I did that with a handy Snap Ring tool. A needle nose pliers will work if it's jaws are fine like a jewler uses.

12

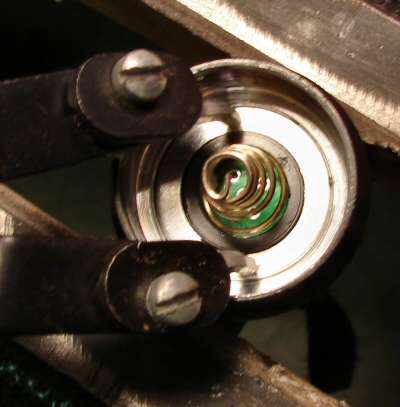
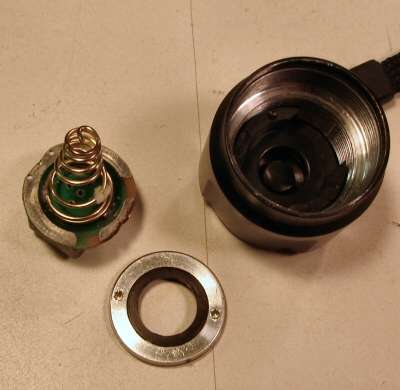
That was easy and here it is apart.The threaded ring that I took off holds the switch in place and it also grounds it to the tailcap.

3

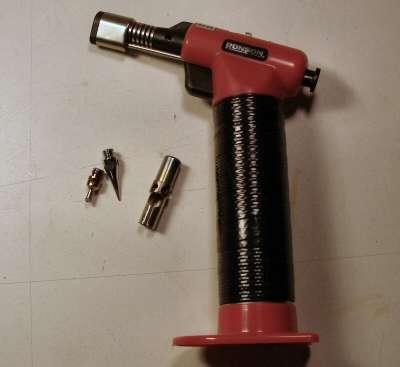
Now I need to remove the spring from the board. I have another little tool that I just love to use. It's a butane torch that has a soldering tip adapter with it. It's great for larger pieces and it gets hot enough to work with silver solder if needed. (Came from Lowes).

45

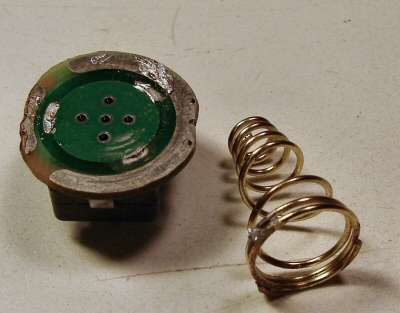
So the spring is off and now I can work on making a copper one.

6

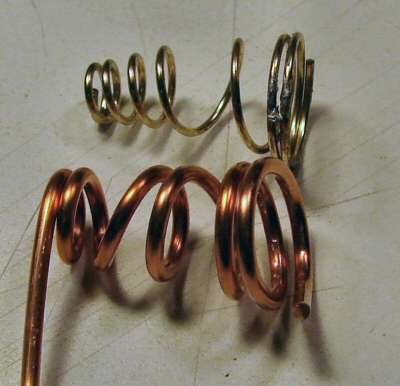
I have some solid copper wire that is bell wire and some copper wire from some Romex. The bell wire is about 16GA and the Romex wire is about 12GA.

7

I want to explain something about copper. It's very soft to work with, but if copper is "worked" it turns hard. The process of hammering, crunching, twisting or winding copper makes it harden. The more it is worked, the more it hardens.

I want this wire to be fairly stiff, so I just wind it around a socket.

8

So, to make the wire stiffer I wind it up, then I pull it off, then I wind it up and pull it off. I repeat this till I like how stiff the wire is. I only had to do this twice with the 12GA wire before it got stiff enough. Then I took a round punch and wound the wire around the tapered end of the punch. The diameter came out just about right.

9

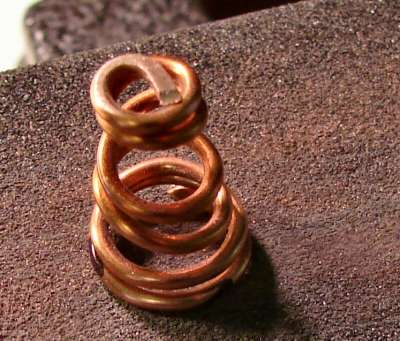
I trimmed it off and then I flatened the ends by rubbing it across some snadpaper.

91

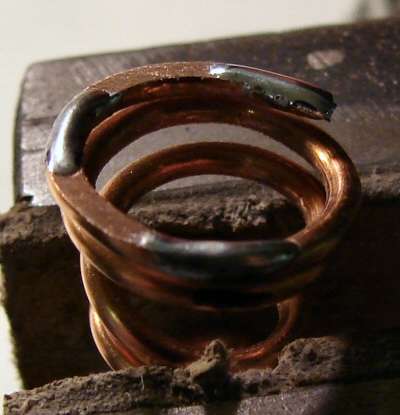
Now it's ready to tin

92

and solder onto the board where the other spring was.

93

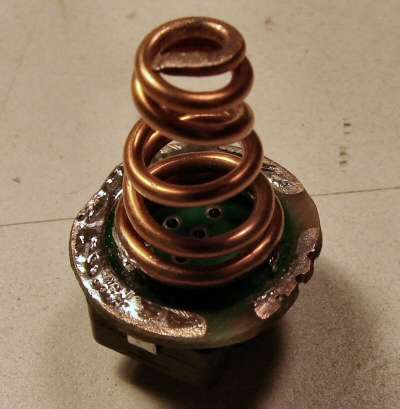
Here is the finished product ready to go back on the light.
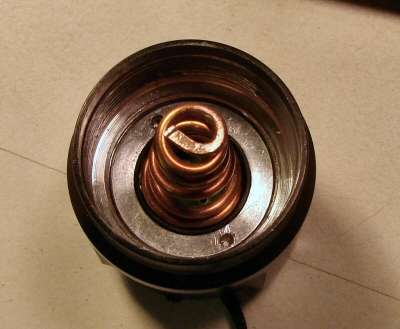
94

And it even worked!

Now, I am Not saying that anyone else should or needs to do this.

I just like doing stuff like this to pass the hours and to see if I can. I really think it is not necessary, but it is an alternative to the standard mod for a tailcap spring.

Nice job, but what about longevity? Sometimes, over time, the copper gets brittle. Some of the springs look like copper coated spring steel. The steel is probably better for longevity when pressed and depressed repeatedly.

The best “Copper” springs are made from beryllium copper (becu).

Thanks for sharing! Interesting idea!
Tonight I was busy with an AAA MDXL light, which had a strange yellow spot in a blue beam. After trying and filing, it became only worse ; )

I like trying things out.. But most times I dont have the right tools, or materials!

After I filed away too much, there came a black spot in the middle. When I moved the emitter in and out, I came to a position where the yellow center was gone, and everything was the same "blueish", but much better than the yellow center.

Here is the pic that I took when I received the light.

Because I took away too much plastic of the reflector, It tried to put some tape in between, and its better, but not perfect.

thanks for posting this, i was just about to ask you how you got the copper to work as a spring in your saik thread.

I've experimented w/ flat, braided copper wire soldered to each end of a battery spring to reduce resistance (it accordions easily).

it works, but looks kind of silly and you have to be careful the wire won't fold into something else and short...

Be careful with beryllium!

http://www.wired.com/thisdayintech/2009/07/dayintech_0715/

Lennart

I am by no means suggesting that one trust their health and welfare to information from wikipedia but...

"In solid form and as finished parts, beryllium copper presents no known health hazard."

I guess I am slipping. I never saw any replies, so I never checked on the thread.

Yes, copper springs are not "springy", that's why spring steel is used. It lasts a long time and it's cheaper than copper.

By no means am I saying that people should do this mod. I do it because I can, because I want to and because I enjoy playing with this stuff. For someone who changes batteries daily, the stock springs should be used and you shouldn't bother with the copper braid either, as heating the steel spring to solder the copper wire, makes it loose its properties and it will fail sooner. If you use the flashlight a lot, then leave it stock. (my thoughts only).

I don't use mine all that much and I know the properties of copper, so I know that I will have to pull up the spring every time I use new batteries. I know that I need to carefully slip the batteries in, because horsing them will make the springs compress and I know that the copper will get hard, so I know to use a little heat from my micro torch when the spring is feelig too stiff (annealing copper to soften it can be done repeatedly without damage to the copper). That's too much for most everyone to maintain. I do it because I know I am getting less resistance with copper. In 3AAA and 3AA lights I want the least resistance possible, due to the fact that the mah is so low to begin with and resistance robs power.

As I get it,this sentence means it is not harmful to look at.Next one starts with "however":

"However, breathing its dust or vapors, as formed when machining or welding, will eventually cause serious lung damage"

Lennart