Hi BLF,
Like many people here, I always wanted a small flashlight capable of producing some very high-CRI light, but while also being very bright! ... and yet sensible for everyday use. Sure one could get a basic Convoy S2 light and throw in a Nichia 219B emitter and have a nice light, but the main problem is that.. it's still too dim!
Well I guess that's not very true but it's been pretty difficult to break the ~1500 high-CRI lumen barrier on a single cell, single emitter package, so I thought I'll give the Nichia 144 LEDs a shot!
For those unfamiliar, the Nichia 144 is something like the Cree XHP50 equivalent, using 4 dies together on a same package, and can be driven with either 6V or 12V depending on the configuration. The upsides are generally better tints than Cree, but the downside is that they have a different thermal pad making it incompatible with Cree XHP50 MCPCs.
Clemence recently produced some 16mm MCPCBs specifically for the Nichia 144, so I thought I'd try them out. Big props to Clemence for his work with Nichia LEDs and the very fine MCPCBs he's developed for them! (Check out his thread here: https://budgetlightforum.com/t/-/42898).
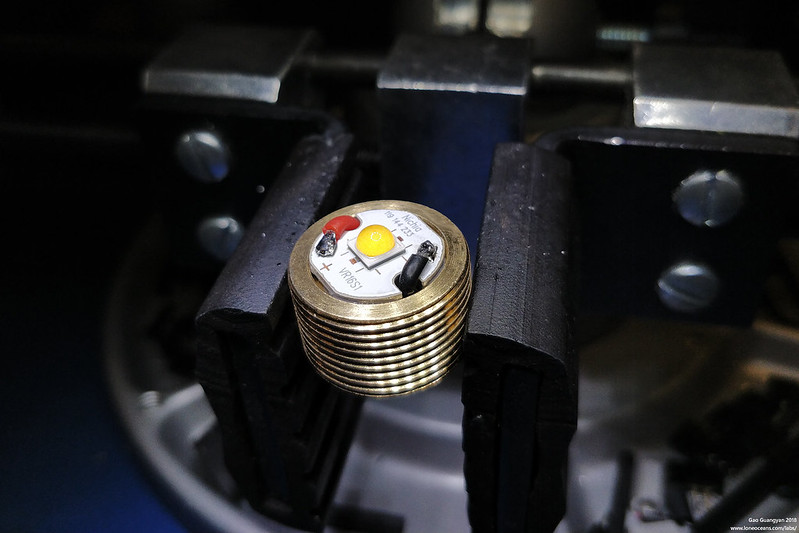
I haven't seen any actual small flashlight made around here before with a Nichia 144 LED, so I thought it'll be fun to try it out! Here's the LED reflowed onto the PCB.
Now Djozz managed to do some very fine tests (https://budgetlightforum.com/t/-/42057) with these LEDs. One problem with this LED (here I'm using a E1000 5700K CRI9050 version) is that it's very inefficient! For example, at 6A drive, it only manages about 2500 lumens, while a Cree J4 XHP50 LED (CRI 70 though) does some 4000 lumens (don't worry I'll tackle that soon!). But that's ok! The problem is that we need something like 6A at 6.5V to drive this LED if we want to achieve 2500 lumens!
How to achieve this while still keeping:
- A single, small lithium cell (no 2S cells, no 26650 cells etc)
- The same LED (which request a boost driver, but needs to be capable of high power output!)
Fortunately, it was a good way to give my GXB172 driver a first test run!
In fact, I thought this little build would be an ideal first candidate for me to knock out the kinks in the design and firmware for the GXB172 driver which I've recently put together. I won't go into the details here but it's a 17mm full-featured, constant current single-cell Boost driver capable of handling 50W of power! That's more than twice the Kaidomain H1-A boost driver can do.  Check this thread for more information (https://budgetlightforum.com/t/-/50015), but keep in mind that too is a work in progress.
So in a way, this build's main goal will be to test out the problems of the GXB172 driver, and to optimize it so hopefully I'll have a decent design I can release so everyone can build their own! 
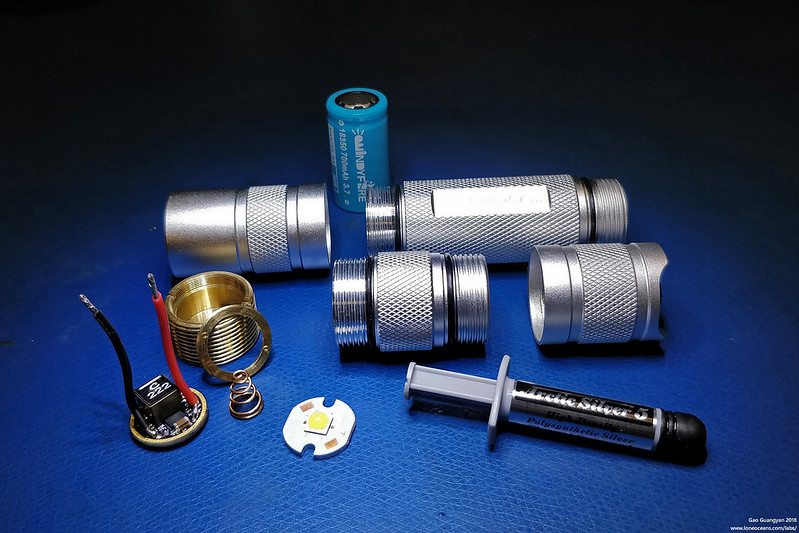
Row-call for the components!
I bought a clear-coated Convoy S2+ host, as well as a shorty-body-tube for this build. Note the 700mAh 18350 WindyFire battery (one of the best hi-drain 18350s around - let me know if there are better ones) which will be used in this light, as well as some Arctic Silver thermal paste, a Nichia 144 E1000 LED which I reflowed onto one of Clemence's 144 MCPCs, my GXB172 driver, and the internal brass pill.
Before assembly, I customized the firmware for this particular light.
I knew I wanted something that was reasonable, which I can also use everyday. So instead for an insane 6A LED drive (which would deplete my small battery in something like 3 to 4 minutes), I decided to go for a more reasonable 4.2A drive which should give me about 2250 lumens. At about 30W of power, this should should be a good test of the GXB172 and provide some decent runtimes and heat management.
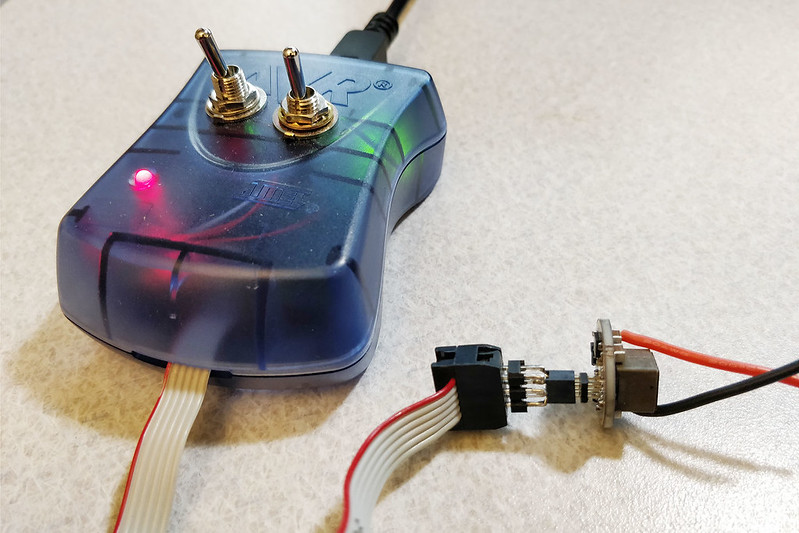
The GXB172 was programmed and verified on the bench, and it's ready to be installed!
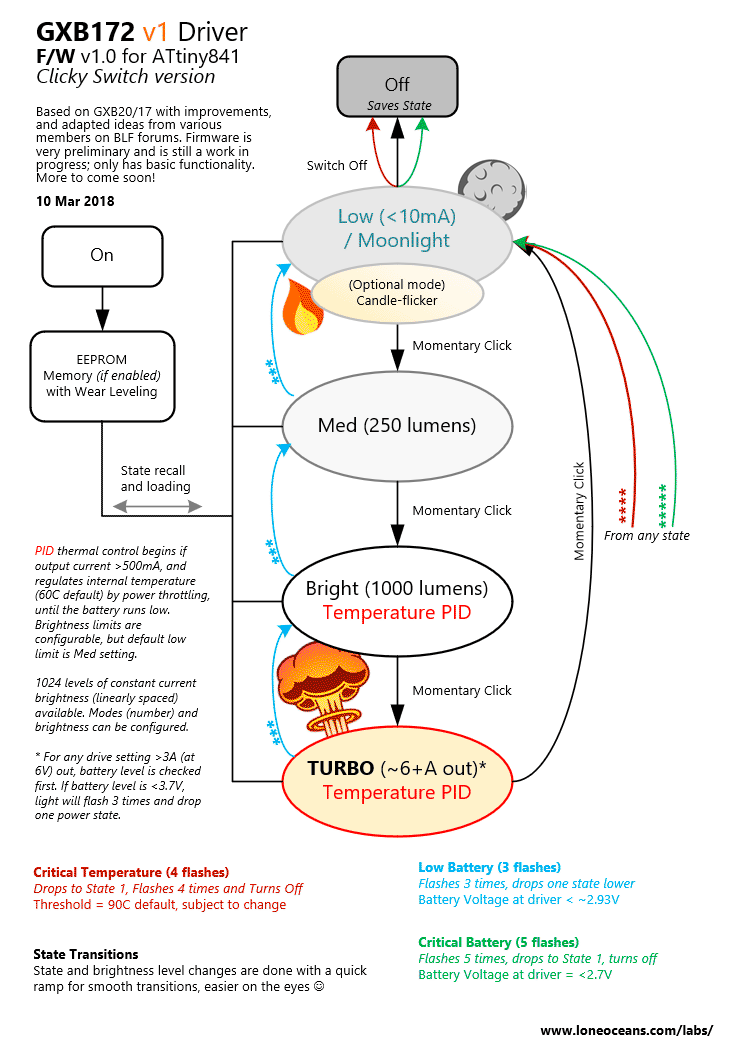
Above's a general outline of the firmware, just that I configured the Turbo to 4.2A, Bright to 800 lumens, Med to 200 lumens, and enabled memory and candlelight mode just for fun!
Again I won't go into the discussion on the firmware, and yes it will work with Bistro / Narsil etc with modifications and porting changes, but check my GXB172 thread for more discussion on that.
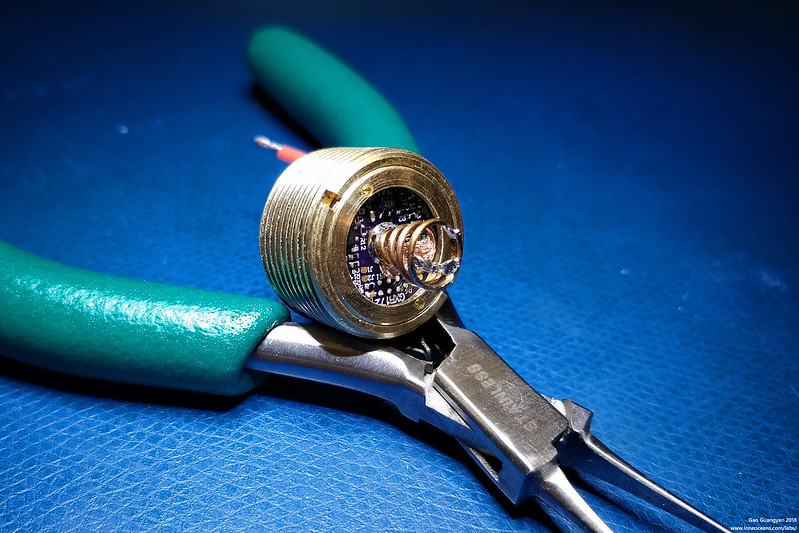
In order to maximize performance, a phosphor bronze spring was used with a spring bypass for good measure. I also soldered the spring on upside down - yes verified that it fits my flat-top batteries just fine! We'll need all the current we can get from our battery (expected ~8 to 9A or so!). This spring was specifically chosen so it would fit on the small spring pad on the GXB172, and yet have as large a contact area as possible to the battery terminal.

Everything fits together pretty well!

The stock Convoy S2+ comes with a clear reflector, so I swapped it out with an orange-peel one! The Nichia 144 is one pretty LED! Care was taken to insulate the wires and reflector to make sure nothing was shorting the output, which would be a bad thing!
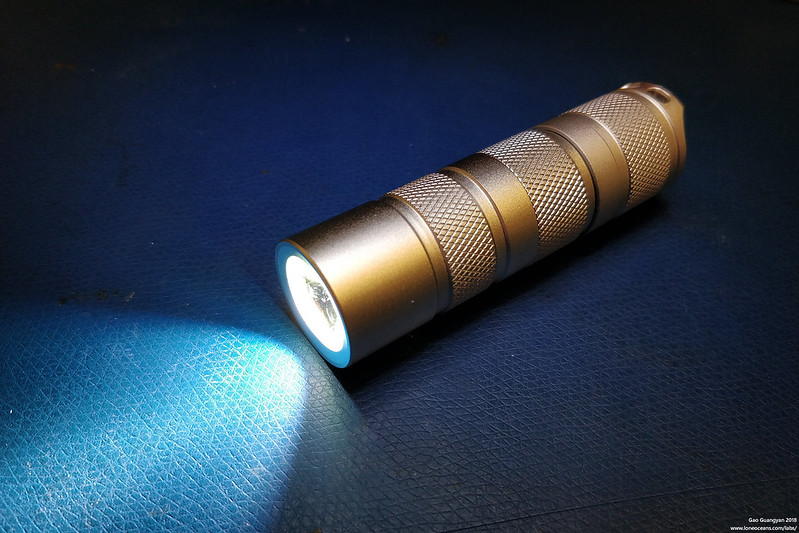
Finally it all comes together!
www.youtube.com/embed/M-_C1XHUgQw
Above is a very quick video showing the basic functionality of the flashlight, and to show you that I'm not making this up! The light is extremely bright! But my camera stops down pretty quickly so I'll make another one properly when I have the time in the future.
After putting it together, everything worked great the first time around! There are some additional fun things I haven't covered yet  , but feel free to check this page and I'll be updating it with more information soon!
Next up, more detailed and everyday use testing and tweaks to come. I'm sure there are a lot of tiny little problems and bugs to be found and ironed out, so I'll be working on them! This is only the beginning of the project!
Thanks for reading ^_^
