I recently received a cheap AAA light which was bad on arrival. I'm curious to see whether I can fix the light. After checking the contacts elsewhere nad still having problems, removing the pill I found a piece on the PCB was loose, and with a little wiggling came right off. I'd like help identifying it: it looks like copper wire coiled around a bit of plastic. More importantly, if I were to try to re-solder it to the PCB, do I need to look for each end of the copper wire? Could I try shorting the contacts where it came off the PCB (this is where it would help to know what the part is).
This is an inductor and your description is acurate enough : a piece of copper wire coiled around a core but the core is usually ferrite not plastic (maybe the ferrite is hiden into the plastic)
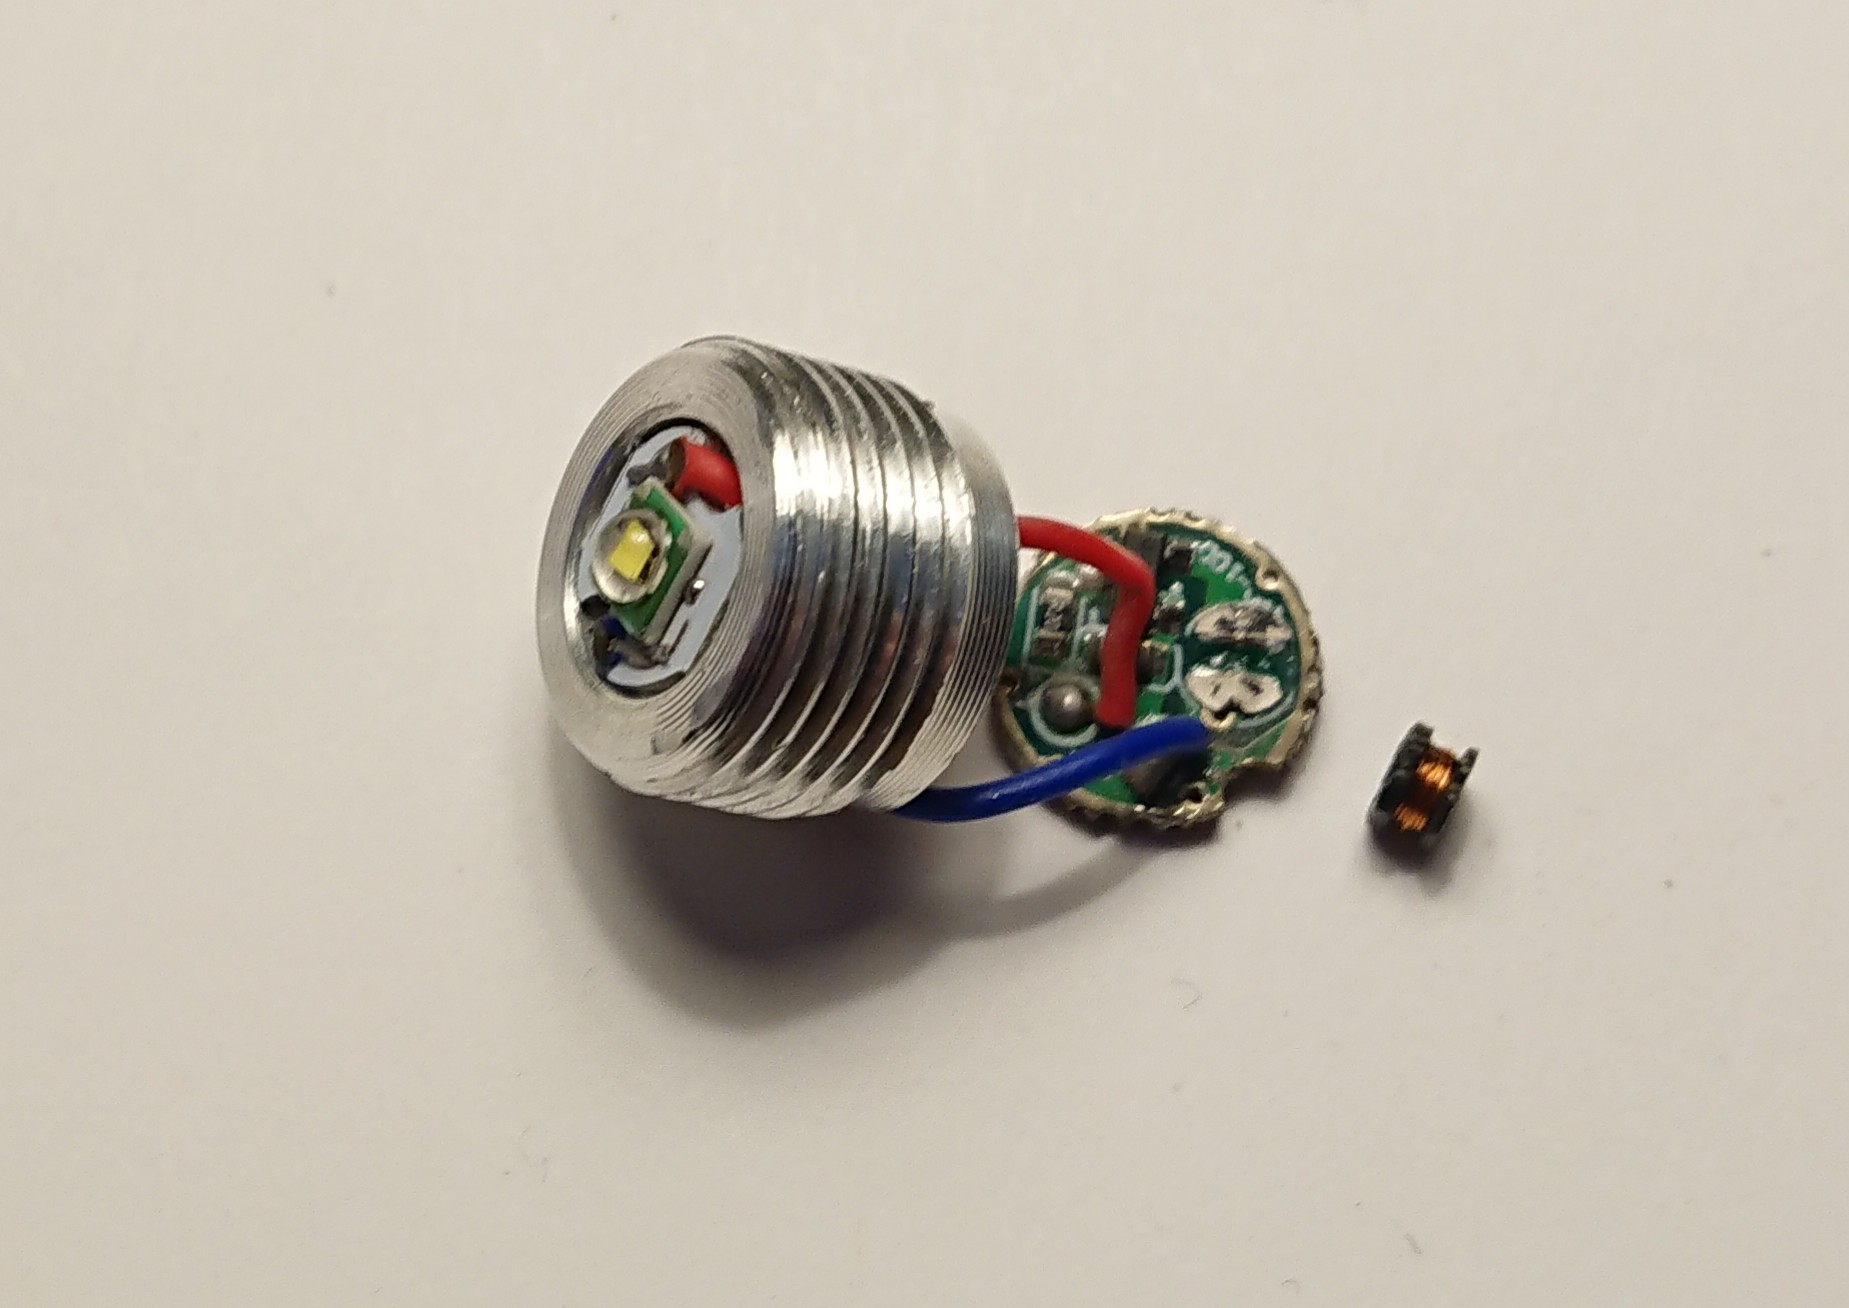
Each end of the coil should be connected to one of the two mounting pads that can be seen on the right of the pcb on your picture
Thanks. One problem is that I can only find one end of the copper wire. Would I need to solder each end of the copper wire (probably require uncoiling and re-coiling the wire)? Or would simply making the connection to the coil on each pad suffice?
are the pads intact?
if so measure resistance between them.
less than 1 ohm typically.
if so solder it on.
if it works add a dab of glue of some kind to prevent it from shearing off next time its dropped.
and it looks like the latticeblight is not centered on the pads.
welcome to blf!
Its hard to tell from the pic but if the pads are still there just soldering it back on should fix it. Do you see solder on the pads on the driver or is that the pcb substrate? Are there still solder on the pads of the inductor? If one end of the wire is not connected to the inductor bottom pad, you can unspool one loop and solder it back to the correct pad. The wire has a enamel coating that can be lightly scraped off to expose the copper. Use a dmm to find out which pad if you can’t see it visually.
The pads looked like they had something white covering them - maybe something that tore off the surface of the inductor. The inductor being so small I wasn't able to unwrap any wire from it with a precision tweezers. I tried running solder between the two pads in hope of connecting the circuit, but if that was successful, the LED isn't lighting up. It's not worth putting more time into it since I can get another light for less than $2... though I may see if I can find a bare 10mm LED driver on AliExpress (no luck so far).