BLF style 18650 1s thrower( poor mans Olight M2X)

LI, I just purchased one of these lights with the intention of modding it similar to your 16mm one. In short, you

  1. enlarged the hole of the reflector to fit an entire 16mm mcpcb
  2. stripped a 16mm mcpcb and adhered it to the pill to act as a spacer
  3. adhered the LED on a 16mm mcpcb on top of the spacer

Any other mods? And tips on cleaning the reflector after drilling - compressed air, rinse, etc?

Now just to decide between a new XP-G2 (I don’t have any old ones), a DD XM-L2 U4, or DD XP-L V6. Hmm… decisions, decisions.

Reflector cleaning? You know about those special fluids for cleaning LCD TV? They usually come in set with fine microfiber rag.

So after drilling use compressed air (i have air compressor), after that spray it(5-8 times) with LCD fluid and after that blow with compressed air again. Now it will be dry but now use spray (1 time) with lcd fluid and then use microfiber rag to clean reflector out (put rag and press it firmly into reflector and just do cw or ccw spinning of reflector to that rag). It will be shiner and better than stock. Use same method for main top glass cleaning.

I added thin o ring under upper reflector edge and pill is copper tapped.

I found desired focus with fine pill ccw screwing and with mentioned very thin oring(probably not needed) under reflector upper edge + eye centering method which can be tricky…
I hold light firmly with benchvise (but you could firmly hold it with right hand) while i fiddle with reflector with left hand and when I center the hotspot that it looks perfect to my eyes on high ceiling(low mode of course) than I just hold it on that position and super glue it very thinly on several points of reflector. Fine tipped super glue helps here.
So once when it is locked with supper glue additional press of glass and bezel will tight it up even more. Reflector spinning can’t happen with this method cause reflector is locked with super glue.
You may use your own methods but if you did this way and if you messed something with glue just use hot air gun (short time around each edge) and glue will crack; clean and you can start again.

New XP-G2 should give you around 240 kcd(depends on light meter you have :slight_smile: ) and only 3,6A current draw(new xpg2s42b I have at home) which should be good for FET driver combination.
Longer runtimes in turbo mode are desirable in single 18650 lights right guys?

Edit “stripped a 16mm mcpcb and adhered it to the pill to act as a spacer”
No. I added it for better heat transfer. You don’t actually need that. So it is not a spacer. It is probably even easier to set focus without that. Use thermal glue(artic alumina so no room for mistakes here) with hard press and you should be fine with heat transfer even without additional chunk of copper.

I wonder why you pll make your life harder :slight_smile: Just order those lovely Manker( thanks m8 for the bangood link) MCPCBs and be happy.

luminarium iaculator

We have new breeds of those XPG2s now m8, they are better than the first wave ones, yet they cant compare wiith the good old ones

It all depends Mitko… For someone without lathe or without possibility to hand file or rasp the pill to fitt 26mm mcpcb that method could be harder…

BTW does newer breeds also draw 3,6A of current like first batch of new ones? I know that first batch of new xpg2s42b draws only 3,6A of current on fet driver.

And of course it can’t be better than old one. New one won’t reach 321 kcd… No chance for that… But it will give longer runtimes on turbo. This is single 18650 light after all?

But how do you install the manker mcpcb? Wouldnt it leave a hole under it where normalu the 16mm mcpcb sits?

Hi, New XHP50.2 dedomed, could it be an option? Bin is not equal to xm-l2? Greetings.

Do you mean those with the bigger die but the lower Vf (draws 4.3 - 4.7 amps) ?

Btw , my first supwilfire was great , had the nice black centering ring Mitko mentioned and reflector was super clean , my second one is really disappointing ! Glass has some marks that can’t be cleaned , reflector is full of dirt and centering ring is the unusable one .

I had good results with this centering ring

Friend you did not read a single thing from this thread? :smiley: That’s OK…

You must add thin copper plate into that hole (up to 19mm wide and up to 1,5-3mm thickness) than you must use lathe to take pill top and to make it flat to that copper plate and sand and polish everything up.

Or if you don’t have lathe or mill you can file or rasp it to that plate by hand but you must be very skillful for this (gunsmith skills)

So Junior librarian job (click and you’ll see)

I have another Supwildfire waiting, and a 26mm Maxtoch board. I will clamp the pill into a vice and use a hacksaw to saw the rin off the pill, and then file and sand it flat. No lathe needed. Will make a few pictures when I do that.

In mine used only a big file and sandpaper , didn’t take much time . My current one will be done with the hole in the reflector , since i don’t have any 26/28mm boards for now …

Lathe is most accurate method. Hacksaw? That is brave… Very thin hacksaw blade could do it I guess…

I see you got one with dirty reflector and lens. Use my above mentioned method for cleaning that out. It should work.

I did read it :nerd_face: i think i got things mixed up because not everyone is using the same method… and i dont have a lathe but maybe with a file and a whetstone :partying_face:

Tried cleaning glass but it won’t clean .

Not touching reflector with something , lesson learned :disappointed: Even microfiber cloth leaves micro scratches

[quote=giorgoskok]

I disagree. Some guys are cleaning camera sensors and lenses with same stuff(you can use very fine microfiber cloth if you are concerned) and I don’t even have to tell how sensitive stuff is that.

But I respect your opinion. I guess even dirty reflector will throw. Reflector from Supfire factory really comes fingerprinted and dirty from factory. They use slap and play assembling method.

I could not resist anymore so i ordered one to test this thing out, my plan is fet driven xml-2 on maxtooch board, i have no use for that led-board combo so i thought i give a chance to this light, it should be fun modding it :smiley:

I just need to find cheap cooper board so i can make spacer from it, those noctigon boards that i have all around me are too good to chop them.

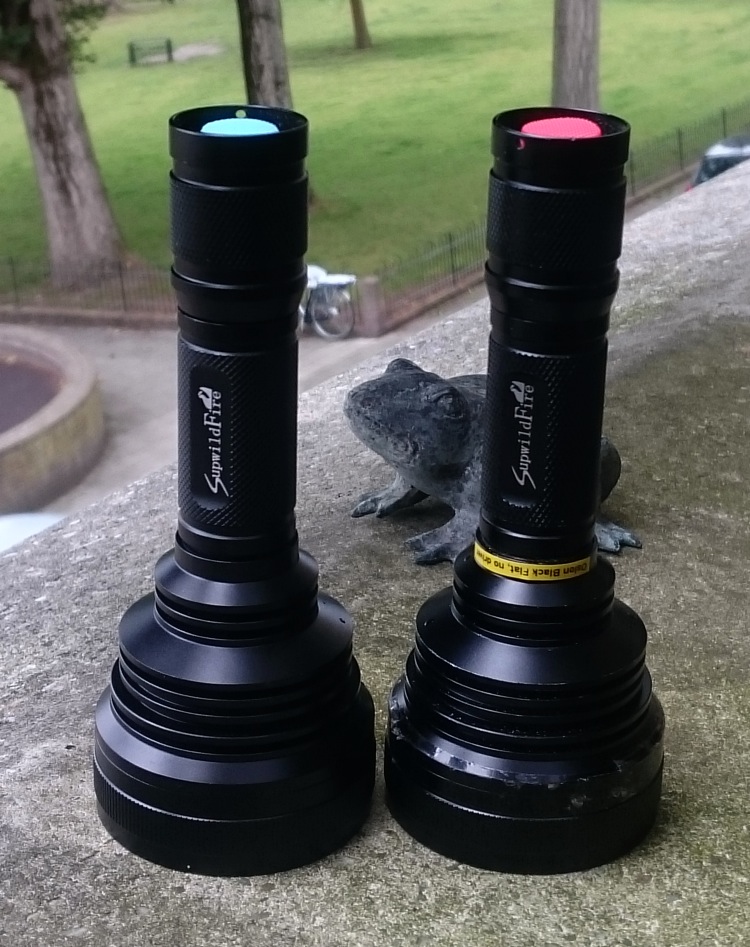
Jay, I had time for a mod today!

My second Supwildfire. It had the fake XM-L2 and a cheap aluminium pill. But also a fat Omten switch at the back which is nice, I only had to solder a wire from the brass cap to the bottom of the spring, add a colourful silicon tailcap and the tail was done.

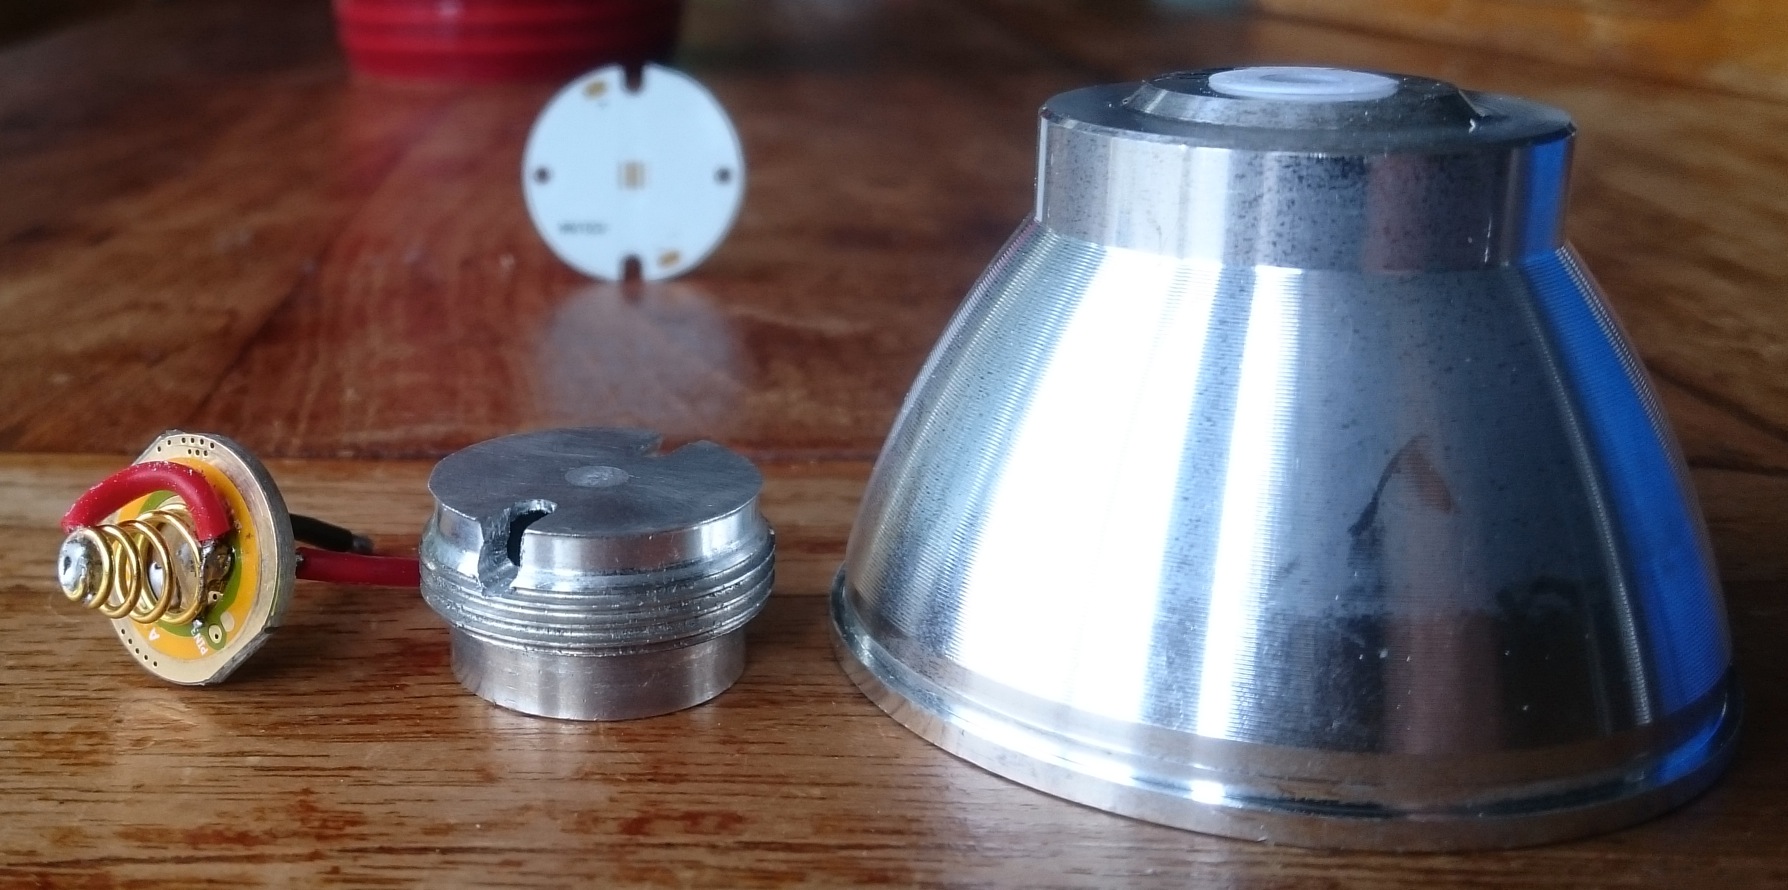
So I had bought one of those expensive 26mm Maxtoch boards (before I knew about the cheaper Manker version ) and all was fine they said. Well, I do not know how other people did it but for me it required quite some fancy pill modifications to get it working.
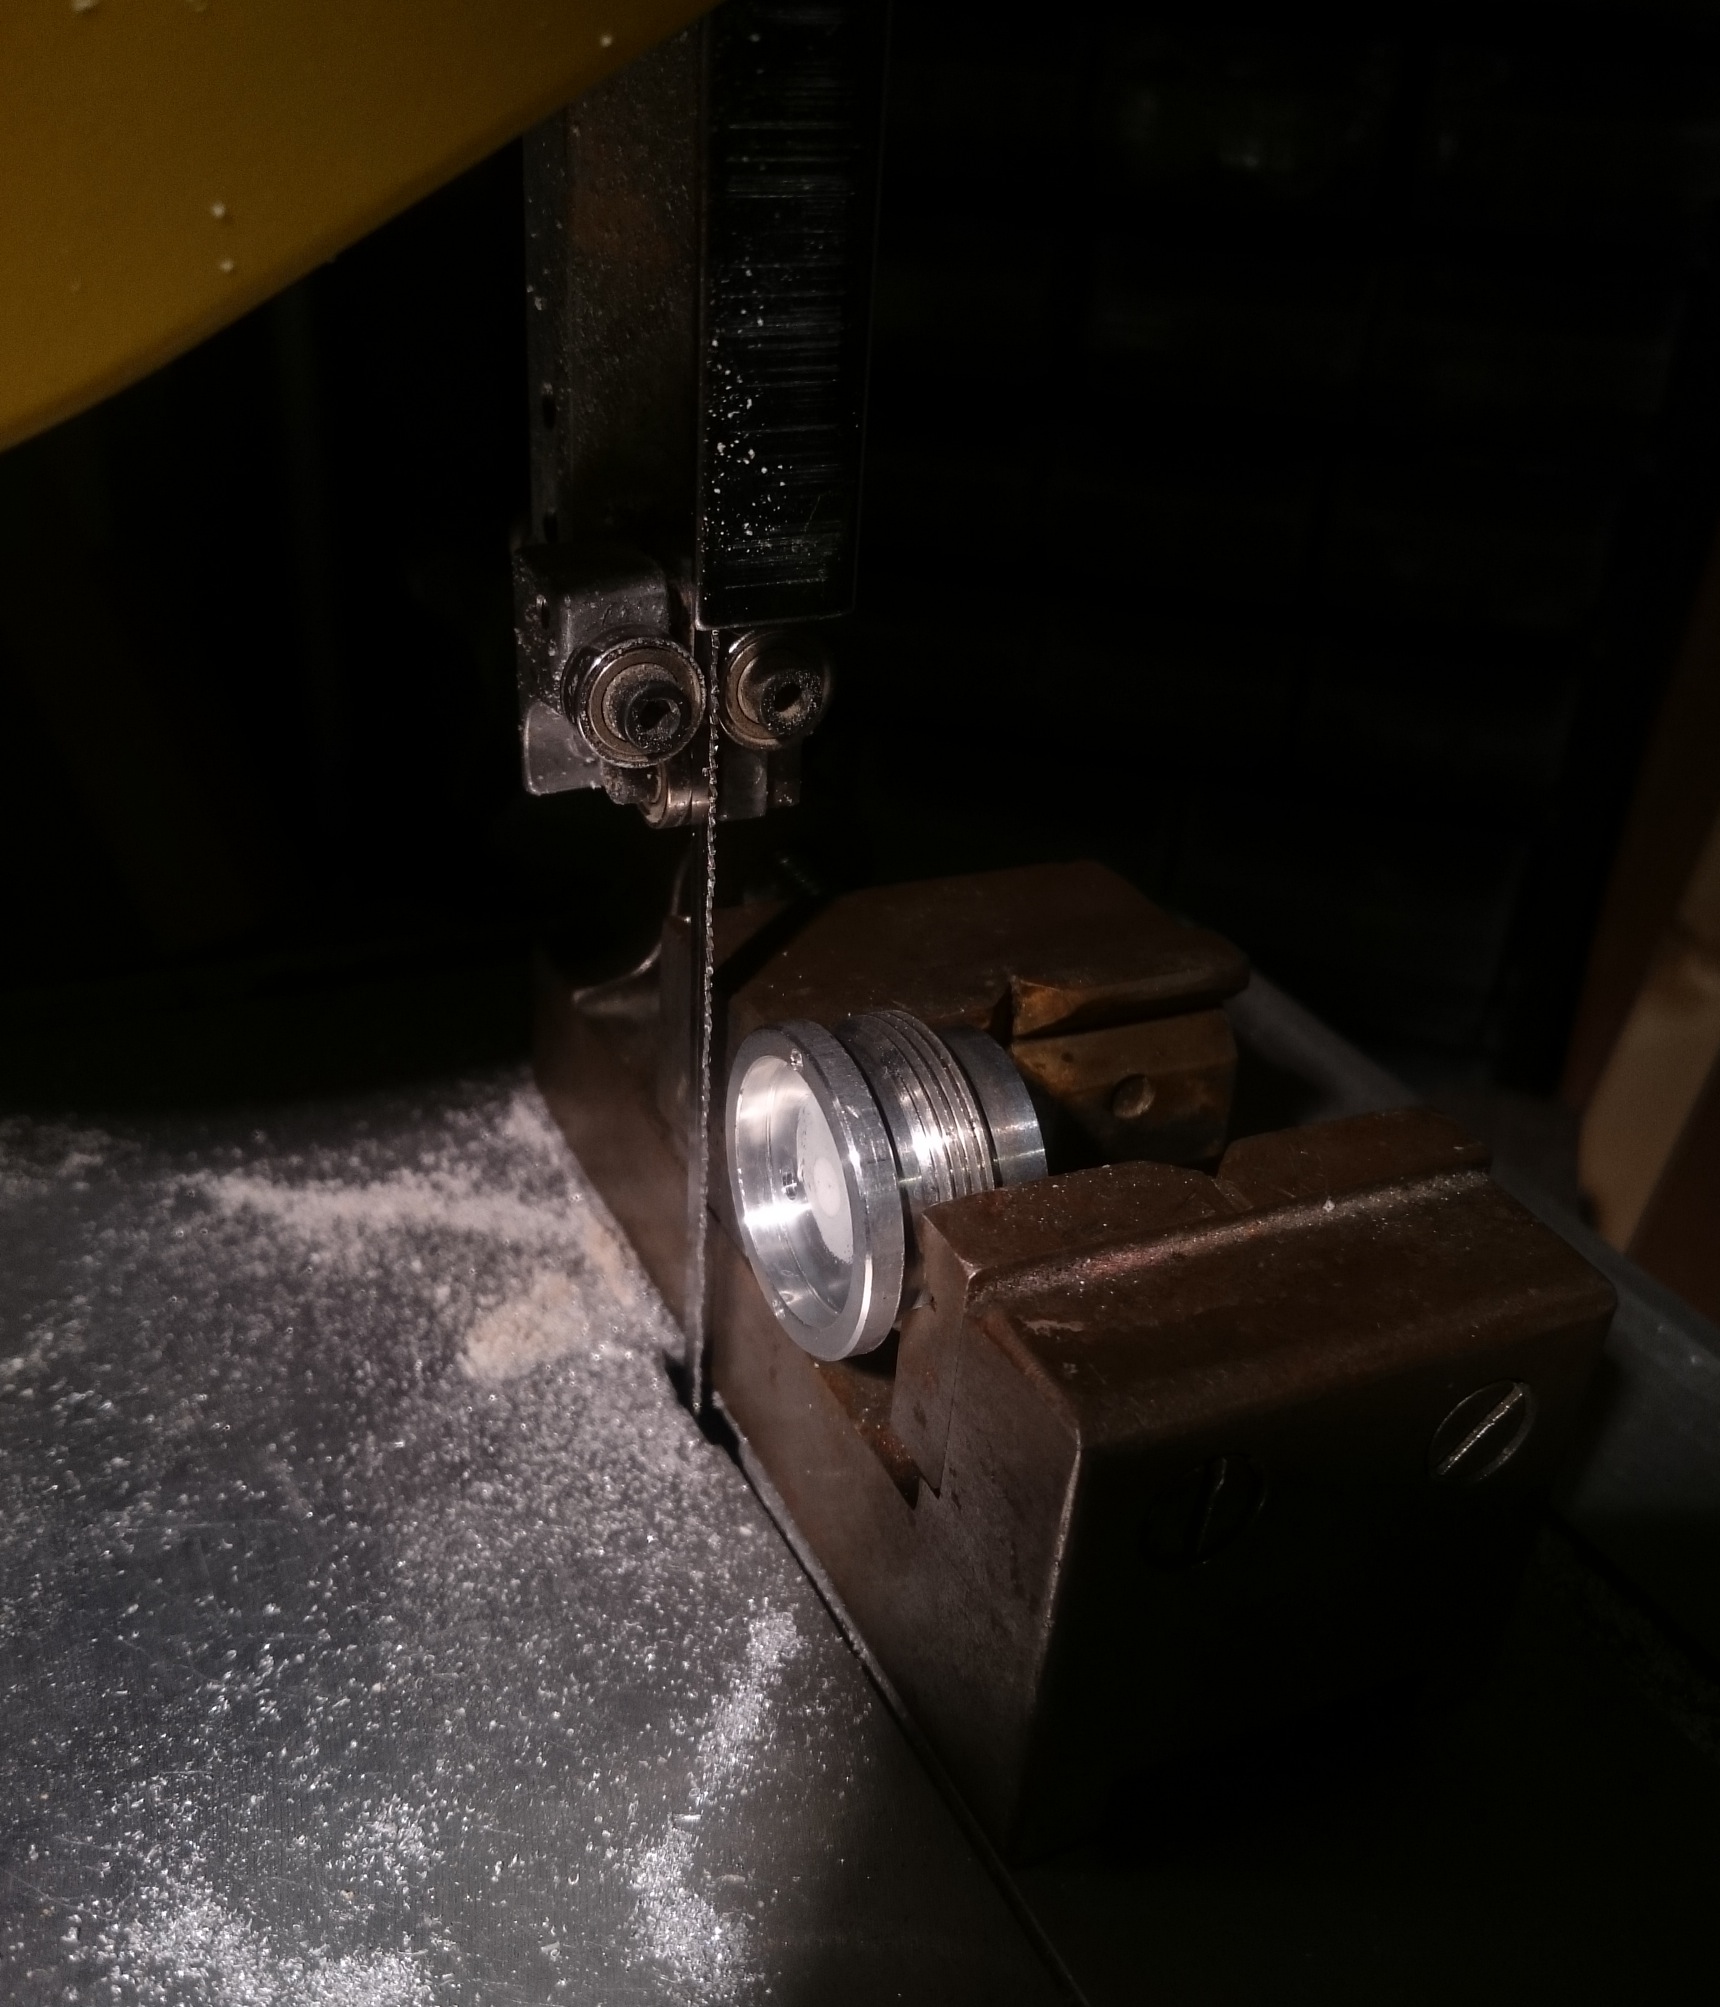
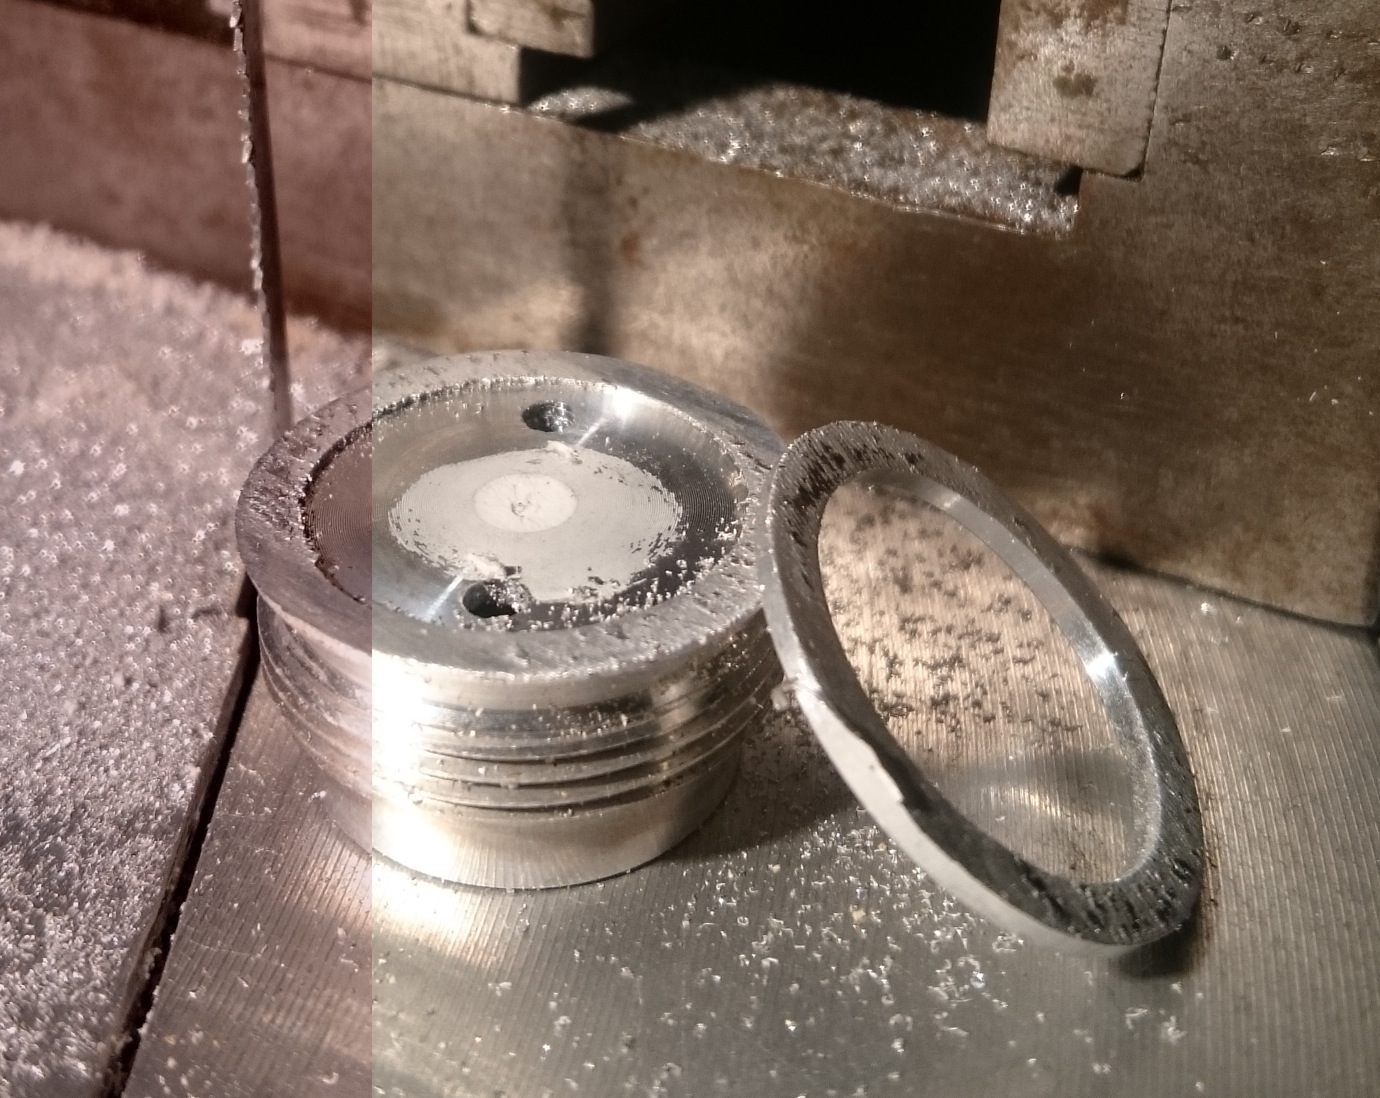
Sawing off the rim

Sanding the top flat (a very thin edge was leftover, later I removed it)

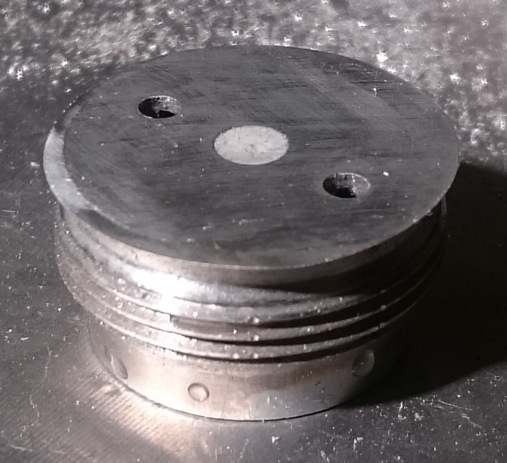
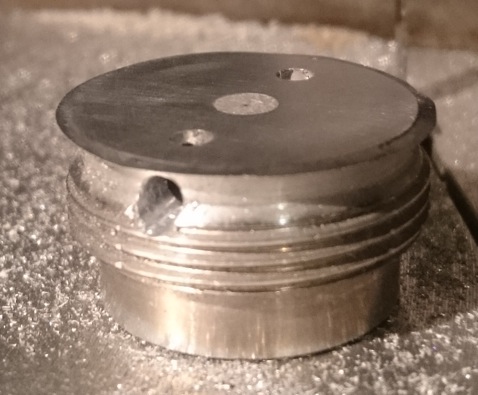
Holes drilled in the side

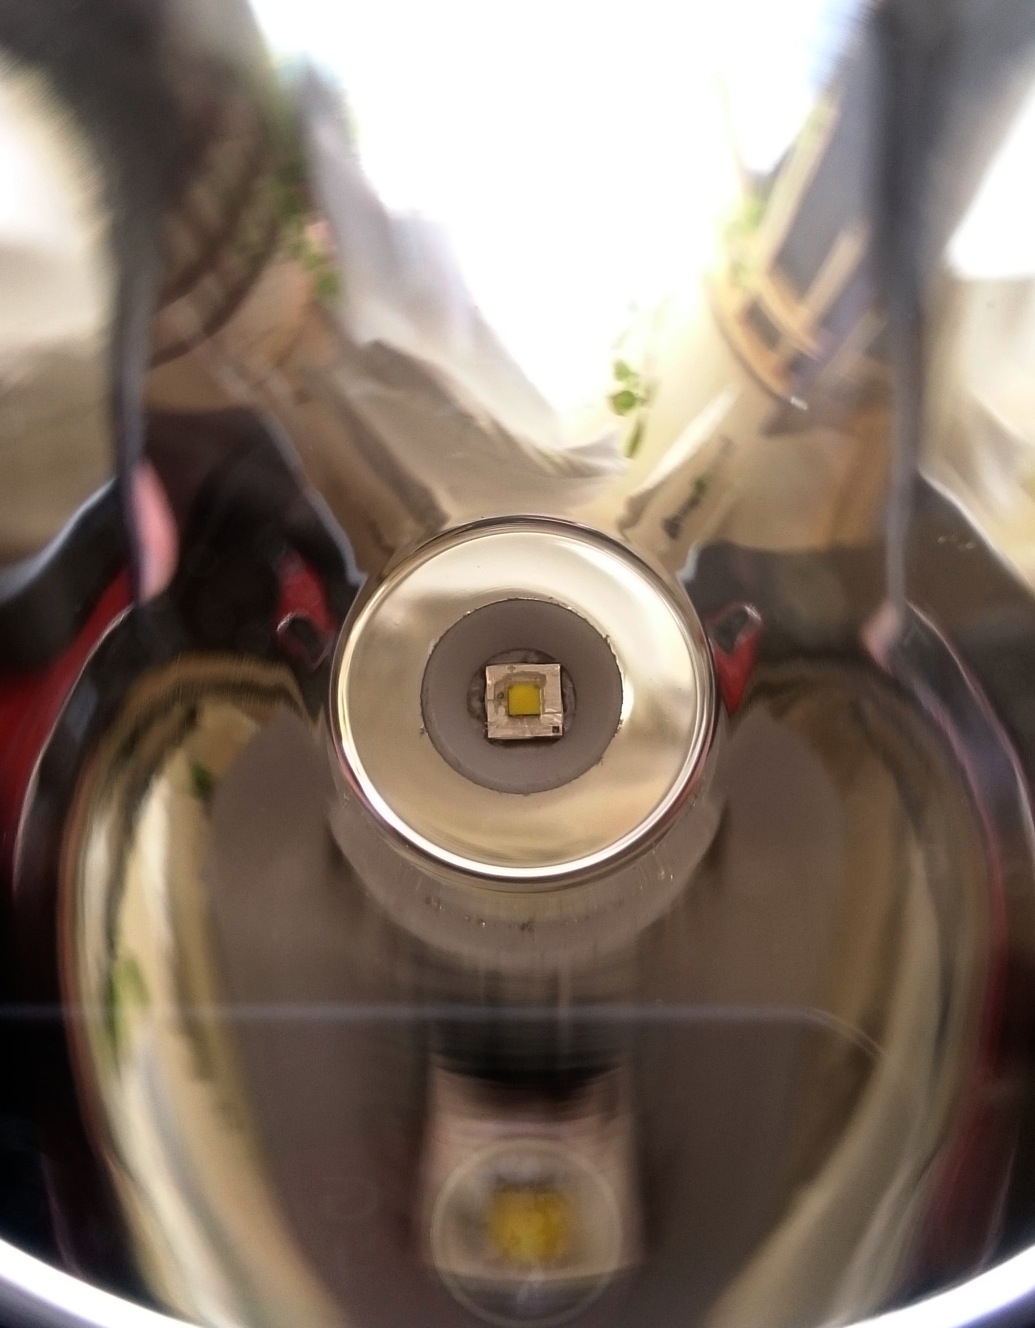
Dremeled the opening out. Also added 20AWG wires to a bistro-driver and made a spring-bypass. Also carefully reamed the reflector opening so that one of my better centerpieces would exactly fit. The centerpiece was also sanded down on the underside so that it only sticks out of the reflector by just a fraction of a mm (=correct focus for a dedomed led!)

Then flattened the Maxtoch board on the underside as well as possible (800 grit) reflowed an old type XP-G2 S3 3D on it and hot-dedomed the led (went well :-) )

Then the driver was fixed into the pill (it has a well working retaining ring for it :-) ), applied a very thin layer of Arctic silver 5 on the pill, screwed the pill into the head into position (top level of the pill just above the shelf in the head surrounding it) and fixed the position by screwing in the battery tube against it (very tight). The ledboard was pressed on the pill and the ledwires soldered. I did not fix the board to the pill, just hoped that when screwing down the bezel, the reflector would not shear something off.

It worked well, the reflector nicely pressed down the board when closing the bezel, without damaging the ledwires (at least the light works fine )

Now I have two of these modded!

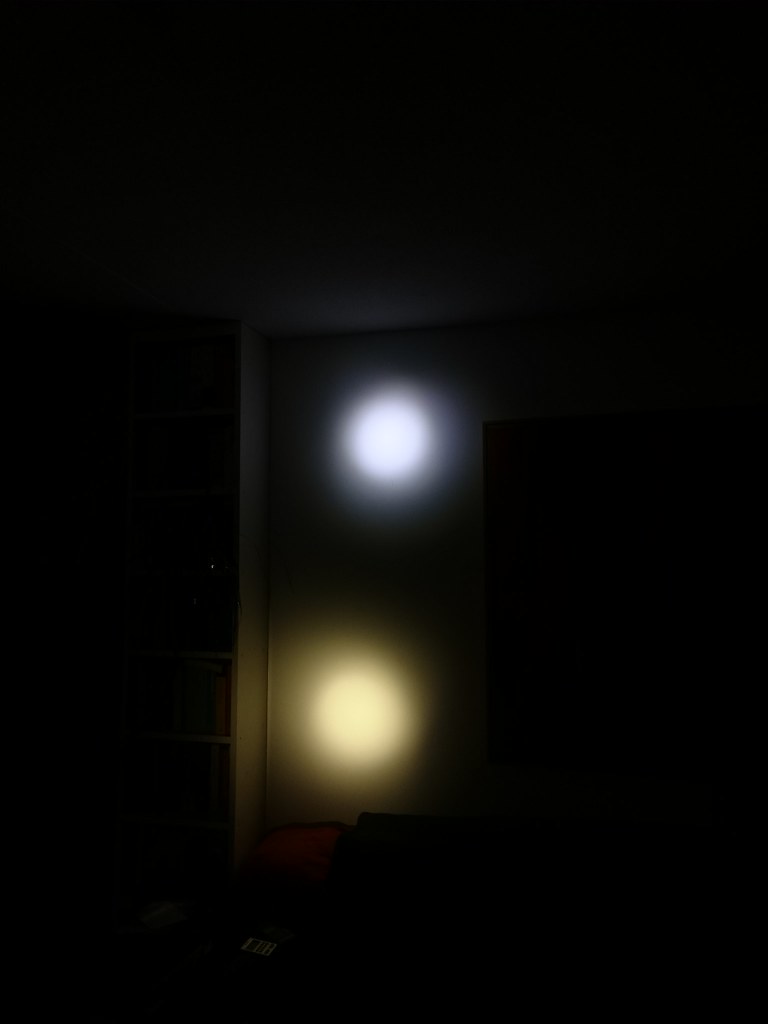
The current on a VTC6, measured with a clamp meter with the tail section of the flashlight off, is about 3.9 A. The output at 30 seconds: I measured 965 djozz-lumen. I carefully measured the throw (VTC6, 30 seconds, 7 meter distance) and measured a rewarding 322 kcd. And very steady as well, hardly dropping output, perhaps thanks to that huge Maxtoch board.

Good job !!!, what centering used for xpg2? regards!!

I used these from Banggood: 5 Stück Konvoi XPL Isolationsblatt für 9-mm-Reflektorloch Sale - Banggood Deutschland sold out-arrival notice-arrival notice , they are too large so I reamed the hole in the reflector to exactly fit the center piece.