Just sent a message to Thorfire asking what sort of stuff is in the threads and/or how to best unstick the thing without damage. I was to straight mod the torch and this is like a bad joke.
Heat the bezel with a gas burner flame Lexel? Are you serious? That would leave anodizing scars and the lens would more than probably end up ruined.
you have to get the heat in the material fast or the whole light will heat up too much
and you need about 200°C to get the glue soft, so lilkely the bezel hitting 250°C
of course you have to put the flame so, that onlxy the bezel and tip of the head get hit, not the lens
if you do it right the section with the driver wont get over 70-80°C hot
100°C from boiling water does not do anything to the glue
I'll see. I've yet to try anything. I think white spirit will no doubt soften/remove the stuff, so there's a good chance that it can do wonders, namely if you boil it a bit as it contains hidrocarbon chains with melting points near that temperature.
As you can understand, I am to avoid damage to the lens, as getting new equivalent lenses can be a trouble.
The white spirit bath did what it had to do and I was able to unscrew the bezel with ease.
Installed new emitter and driver, didn't raised the stock driver current, and I believe I'll leave it this way (1A/1.5A turbo). Measured ≈125°C peak emitter temperature in front of it with my infrared thermometer. The tint and colour appreciation are really great. Versus his good old UltraFire SK98, my friend Enrique kept complaining how Kermity his dedomed cool white XM-L2 looked.
Bits off the o-ring behind the lens appeared here and there, that may have something to do with the spirit bath, don't you think?
Self-update from #99 in Jensen567'sBuck and Boost Drivers, Testing, Modding, and Discussion (Pic Heavy).-
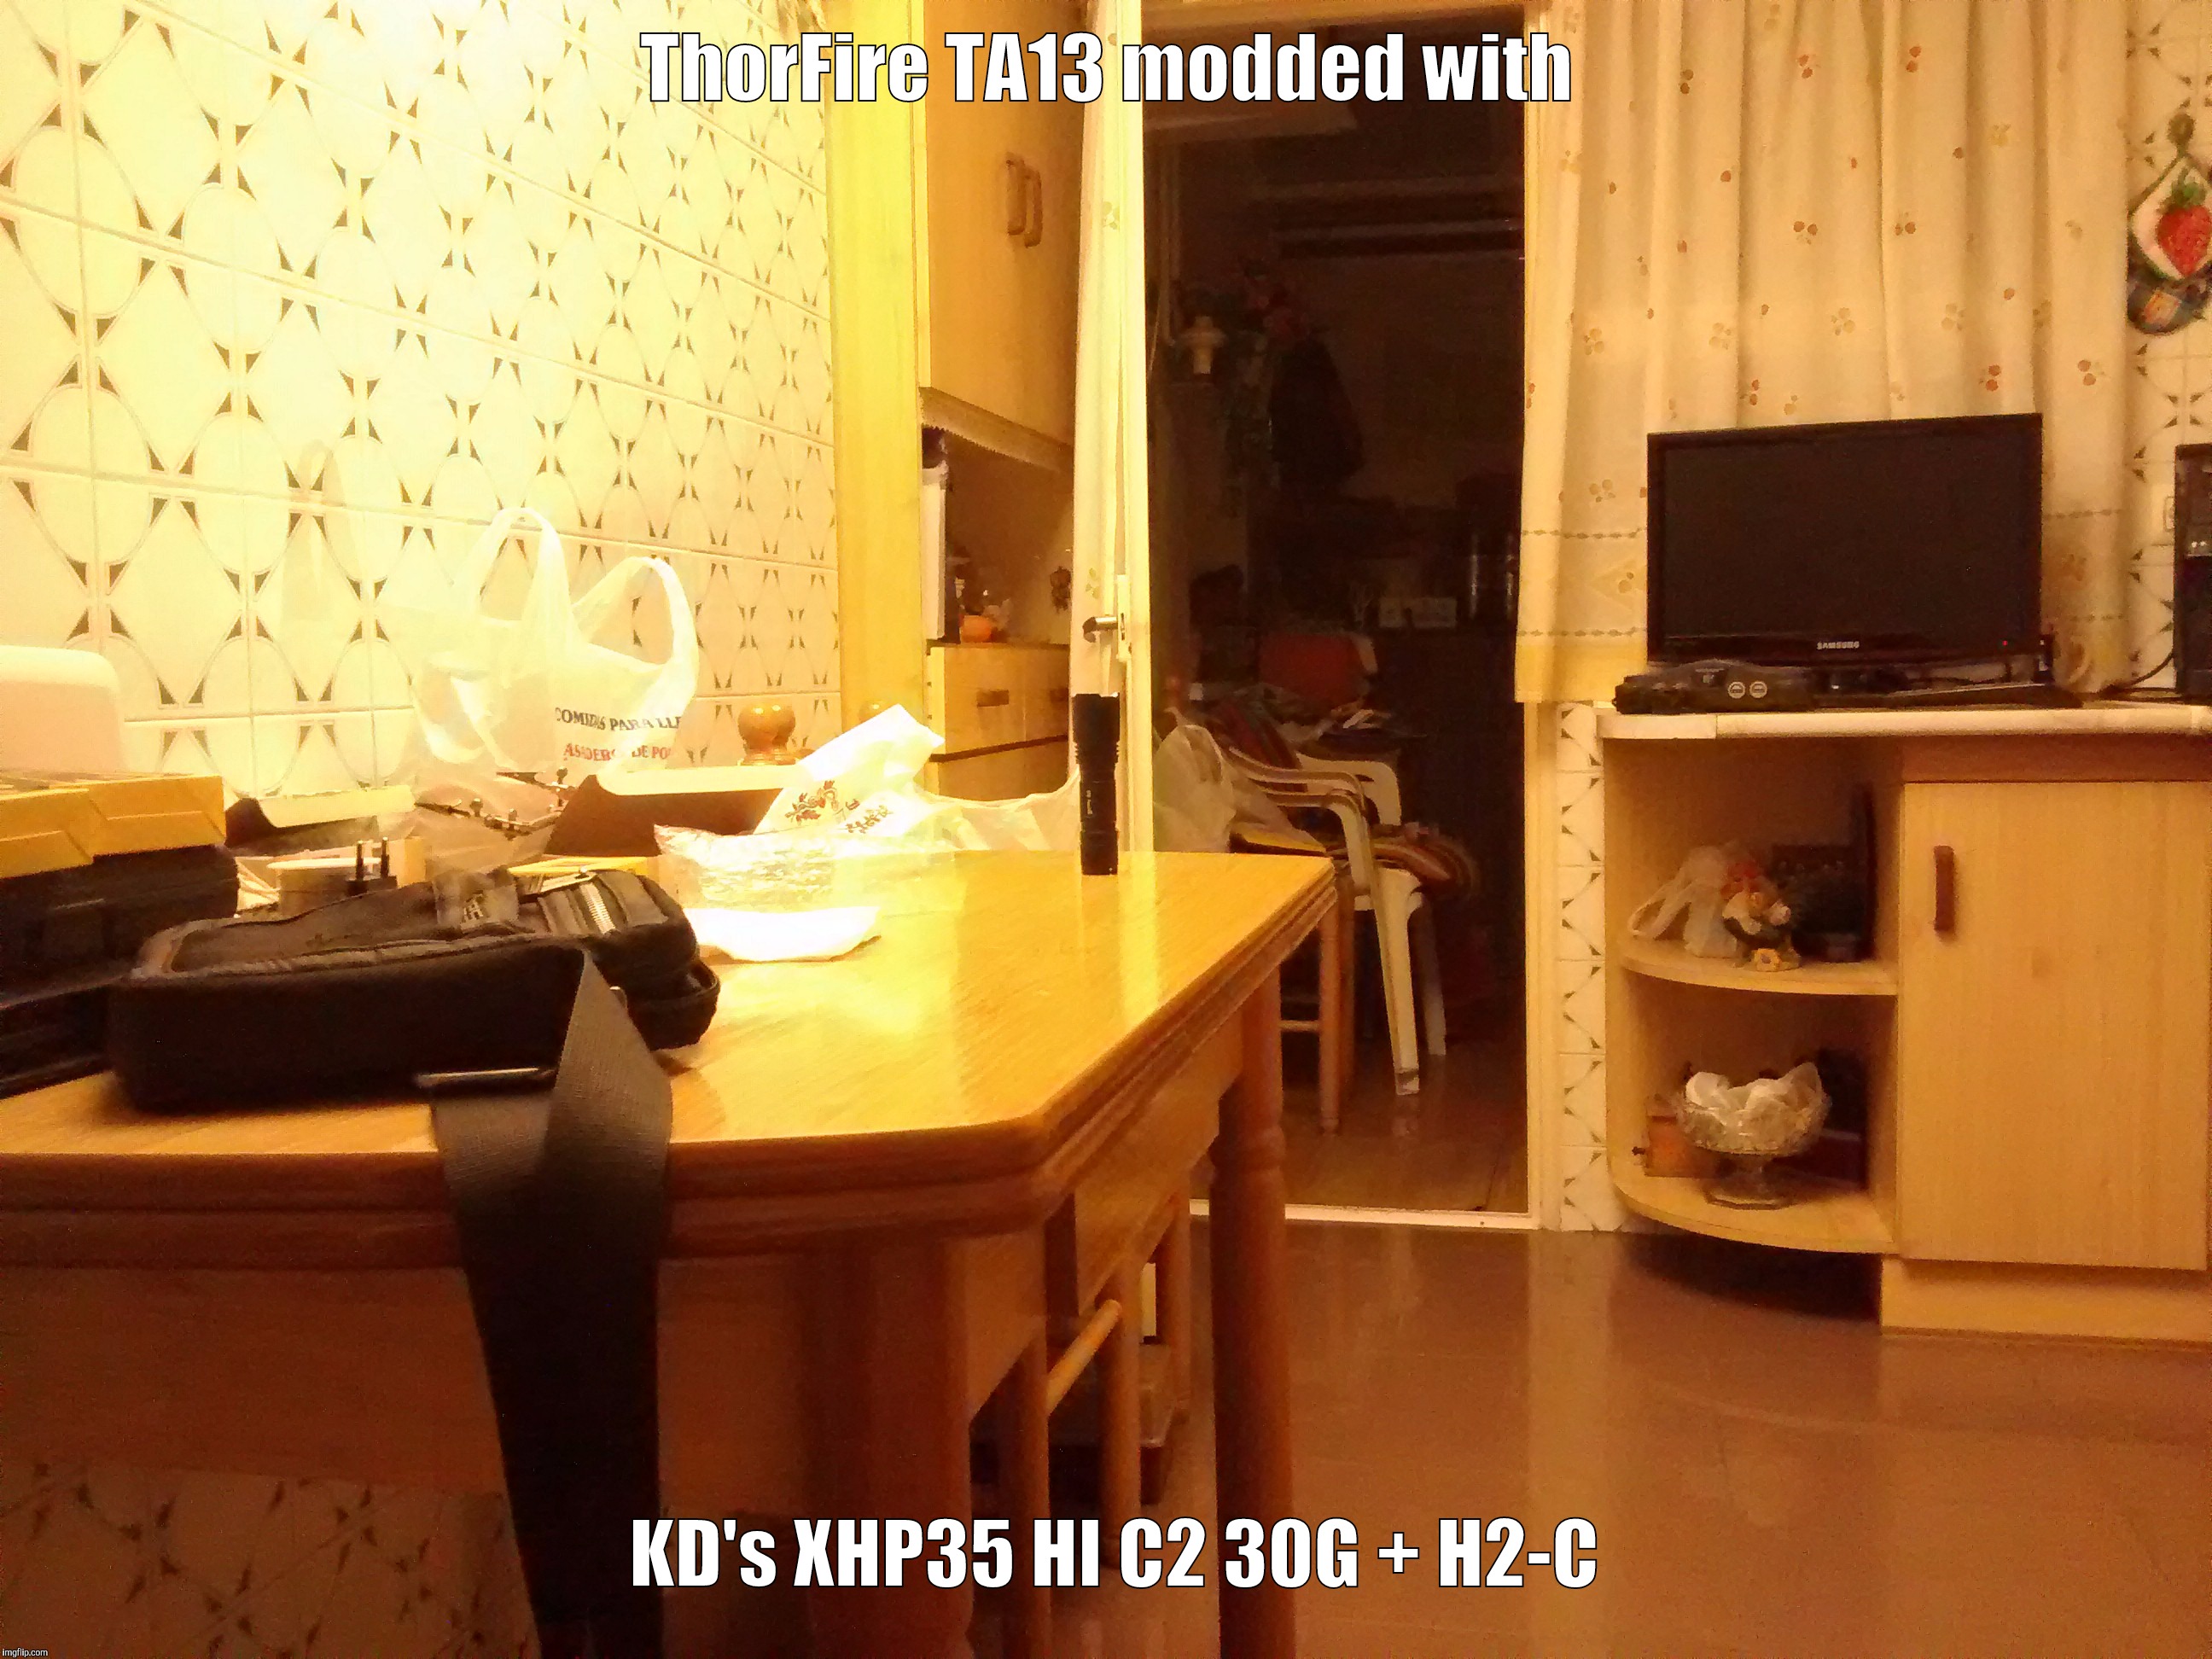
Peeked more in-depth in the TLF SF30A review & modding thread khas posted. My modded TA13s should be achieving ≈50Klux fully focused, considering ≈20W reach their XHP35 HI C2 30Gs.
Interesting the inner cylinder extension (≈5mm) mod proposal, I wonder who would be willing to craft such a piece for a reasonable cost (preferably in copper). It is a bit @#$% to see how the torch designers didn't realized this beforehand.
Hello? My jeans are crotchless and here I am, willing to spend money on custom flashlight parts…
I wonder how much actual output am I getting off this torch on turbo (1.5A), prolly just ≈950 lumens. :facepalm:
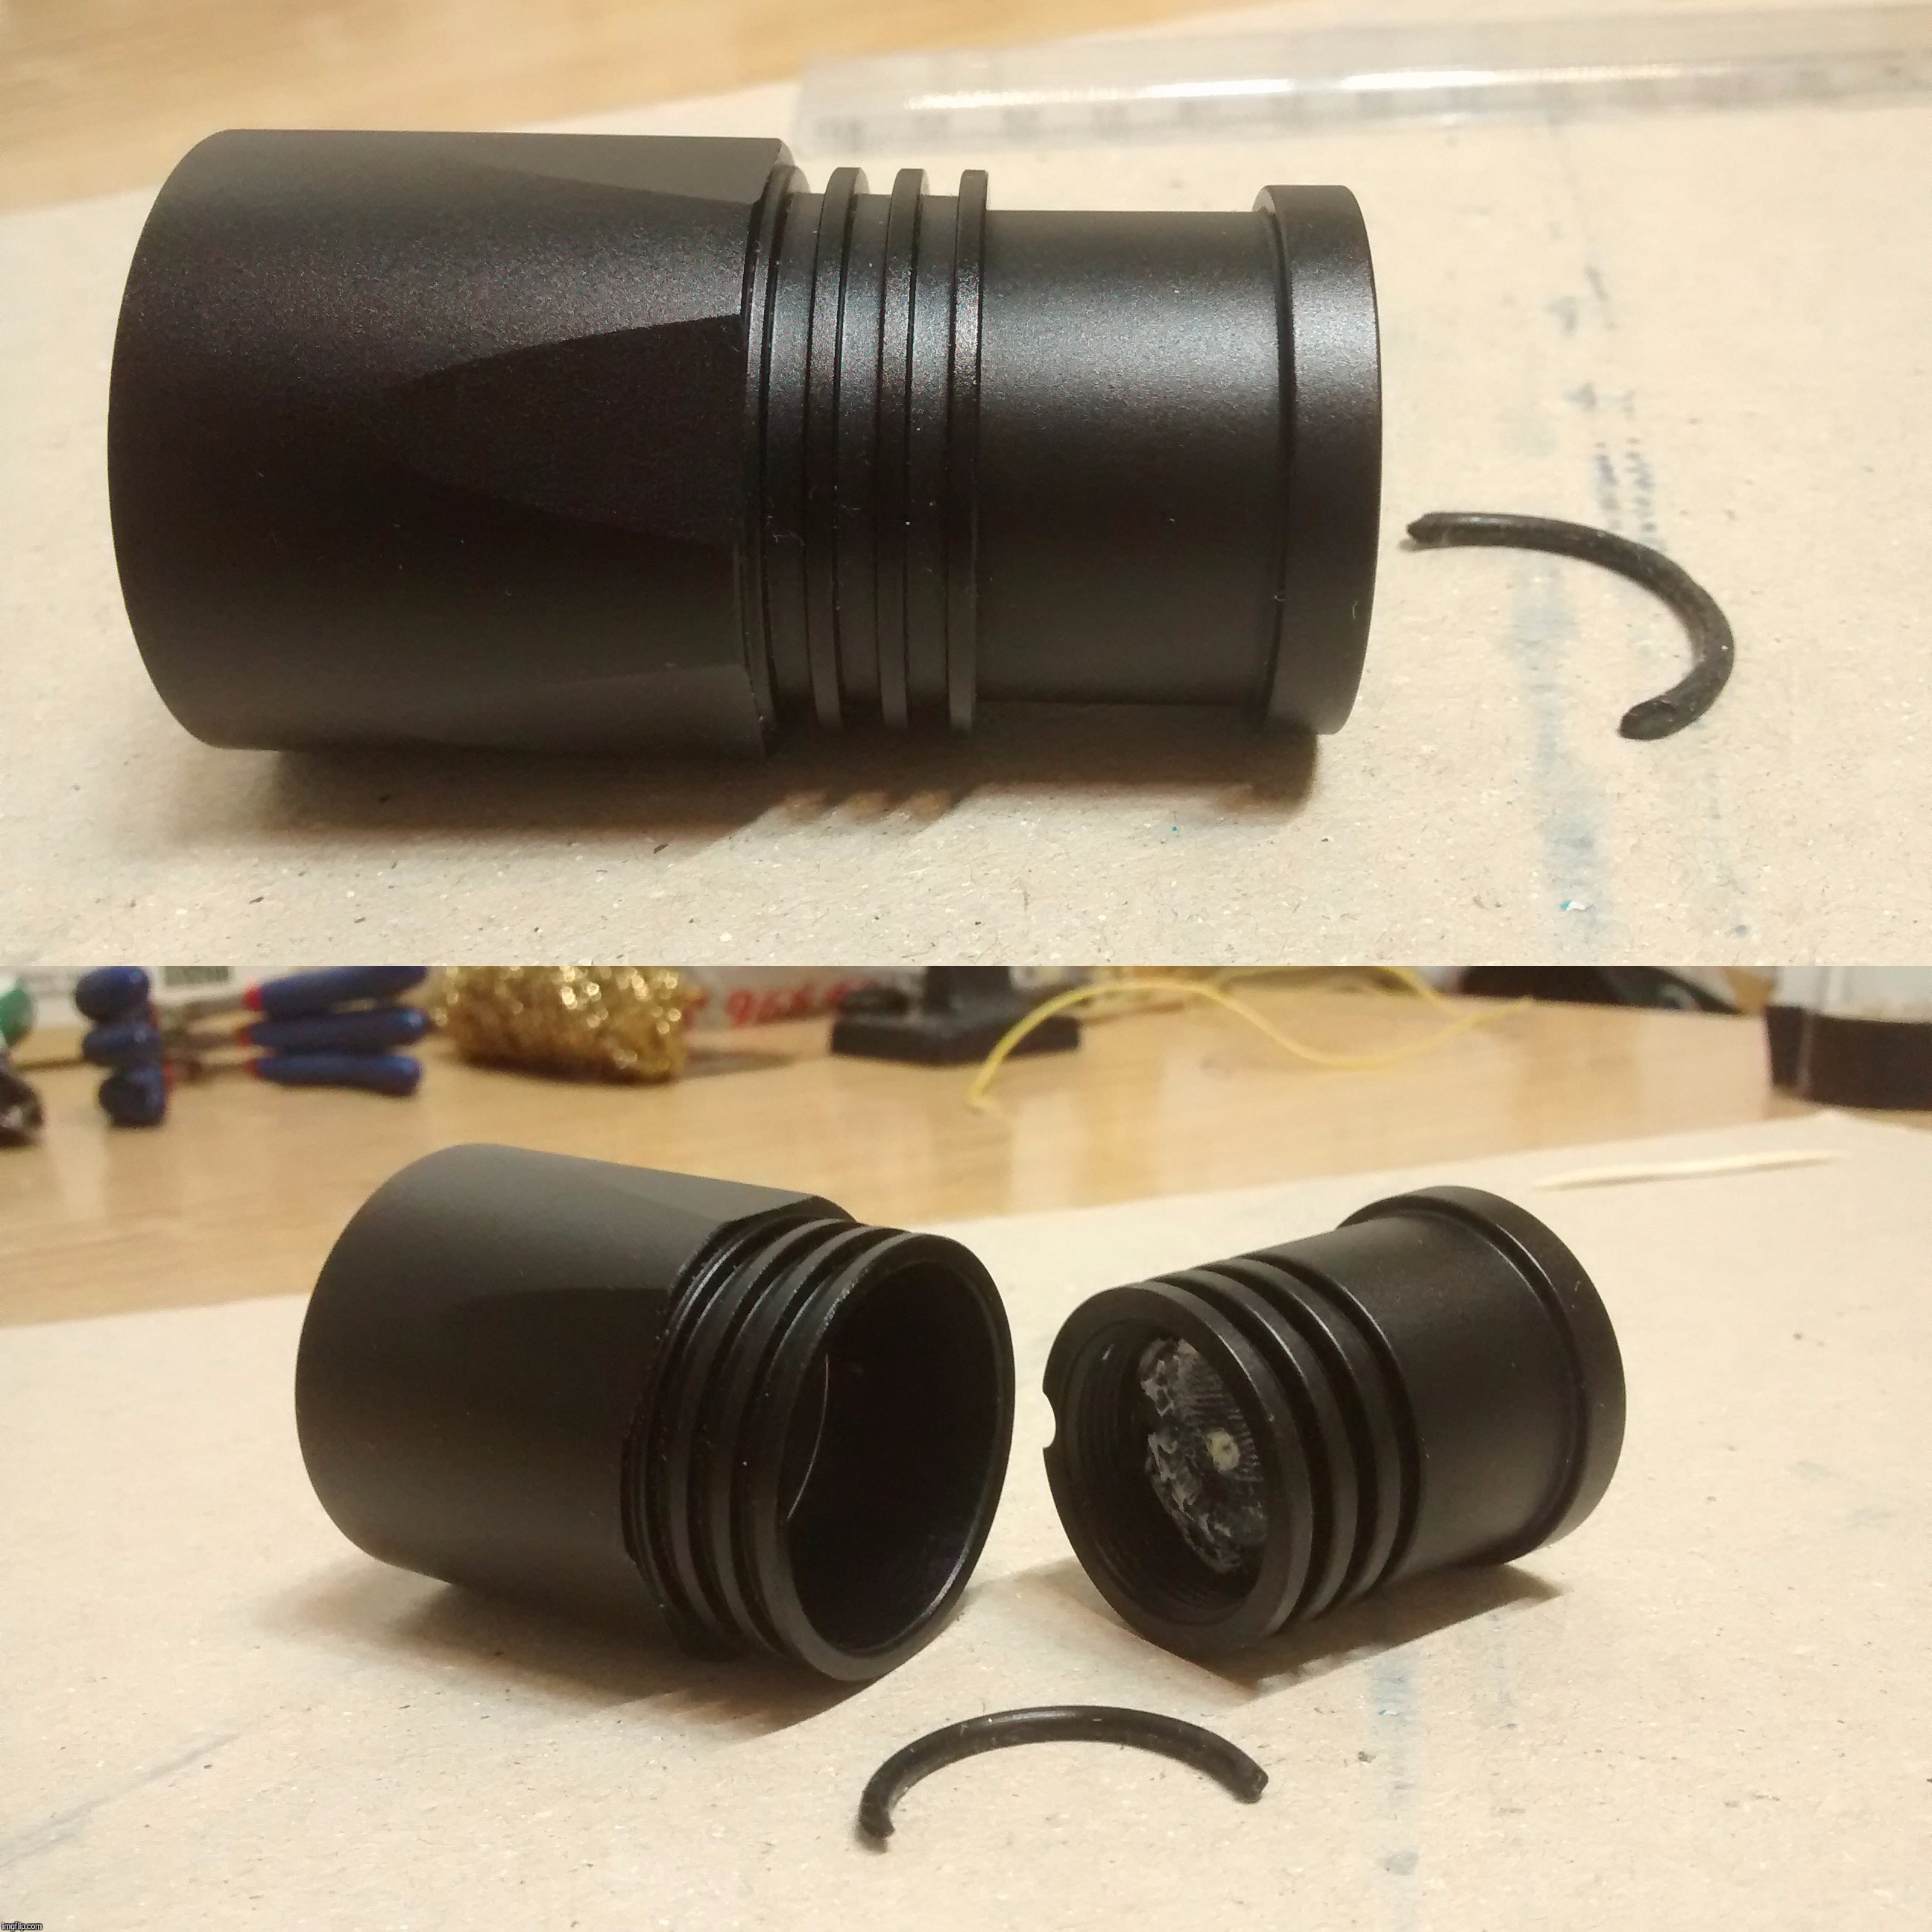
I have news my comrades, more than likely due to my initial white spirit head treatment the inner head cylinder o-rings became ruined.
I've disassembled the head and taken a couple pictures, as you can see. The o-rings were installed in the upper slots, and were being torn up bit by bit because of excessive friction (no oil or grease at all).
If some of you can provide me some accurate measurements of their size I should be grateful, I believe they're ∅27mm outer by 2mm thick (cross section), though this is not an actual measurement of them as you may guess. Slot diameter seems to be 23mm.
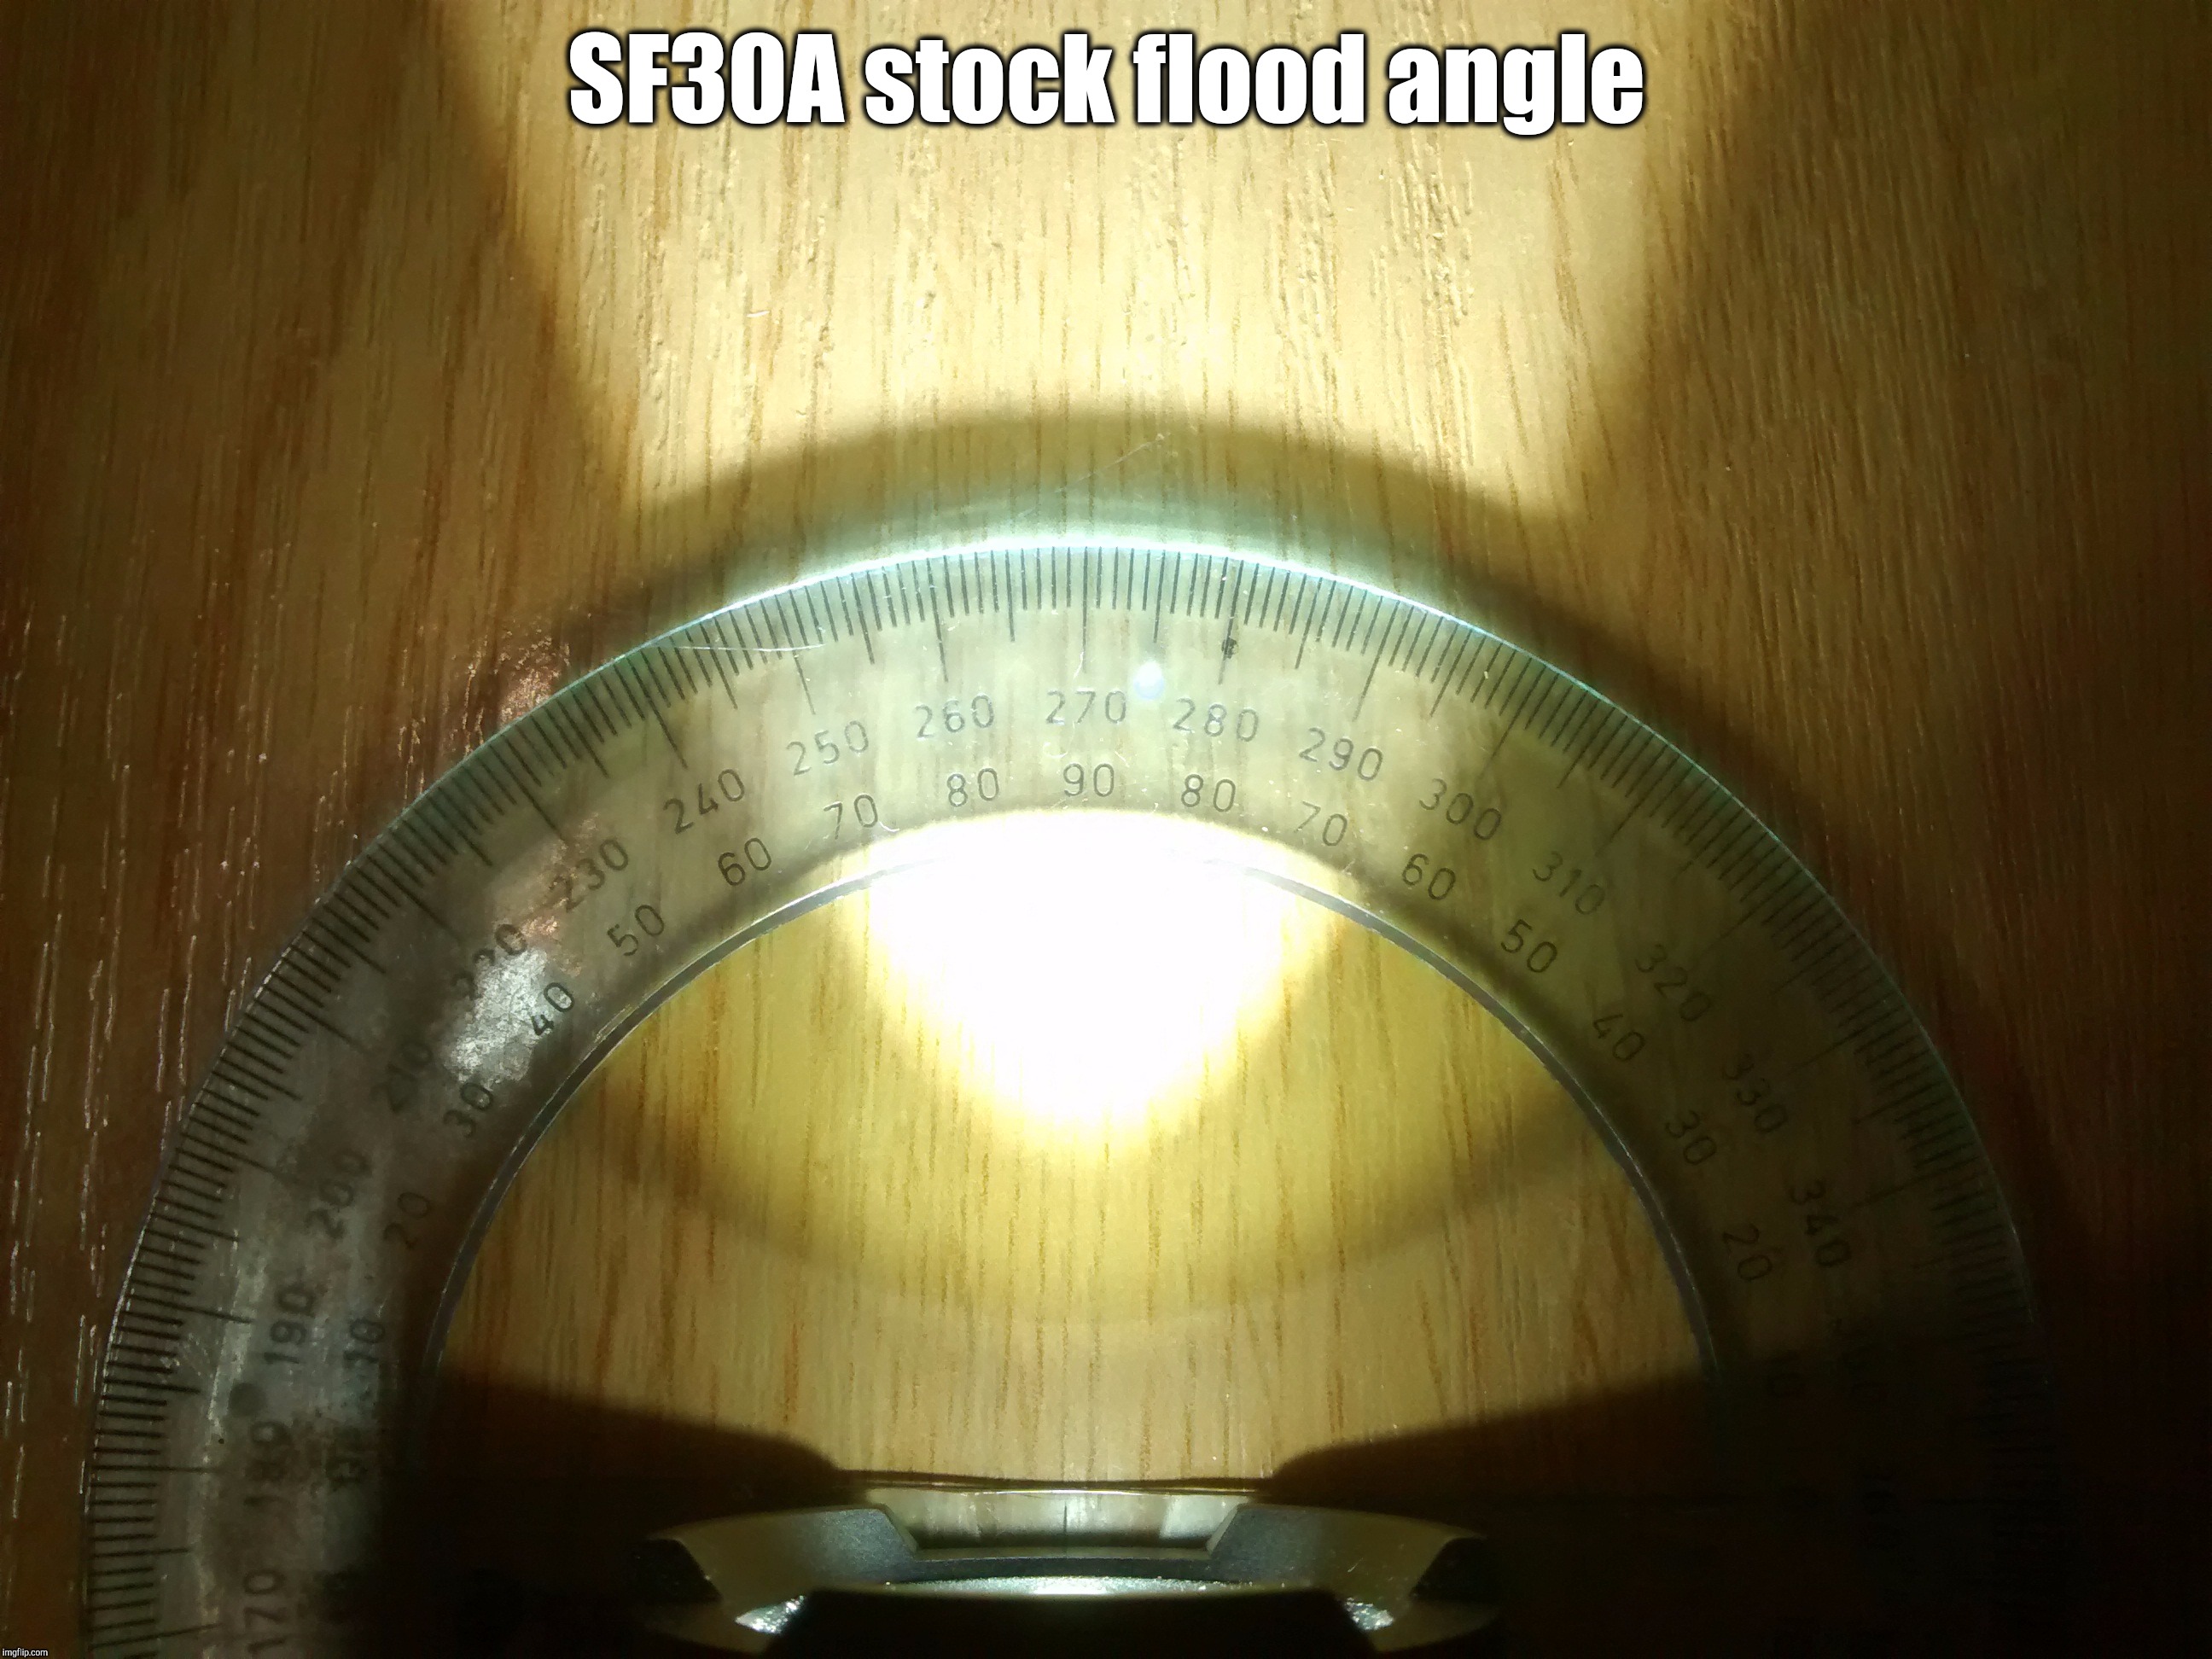
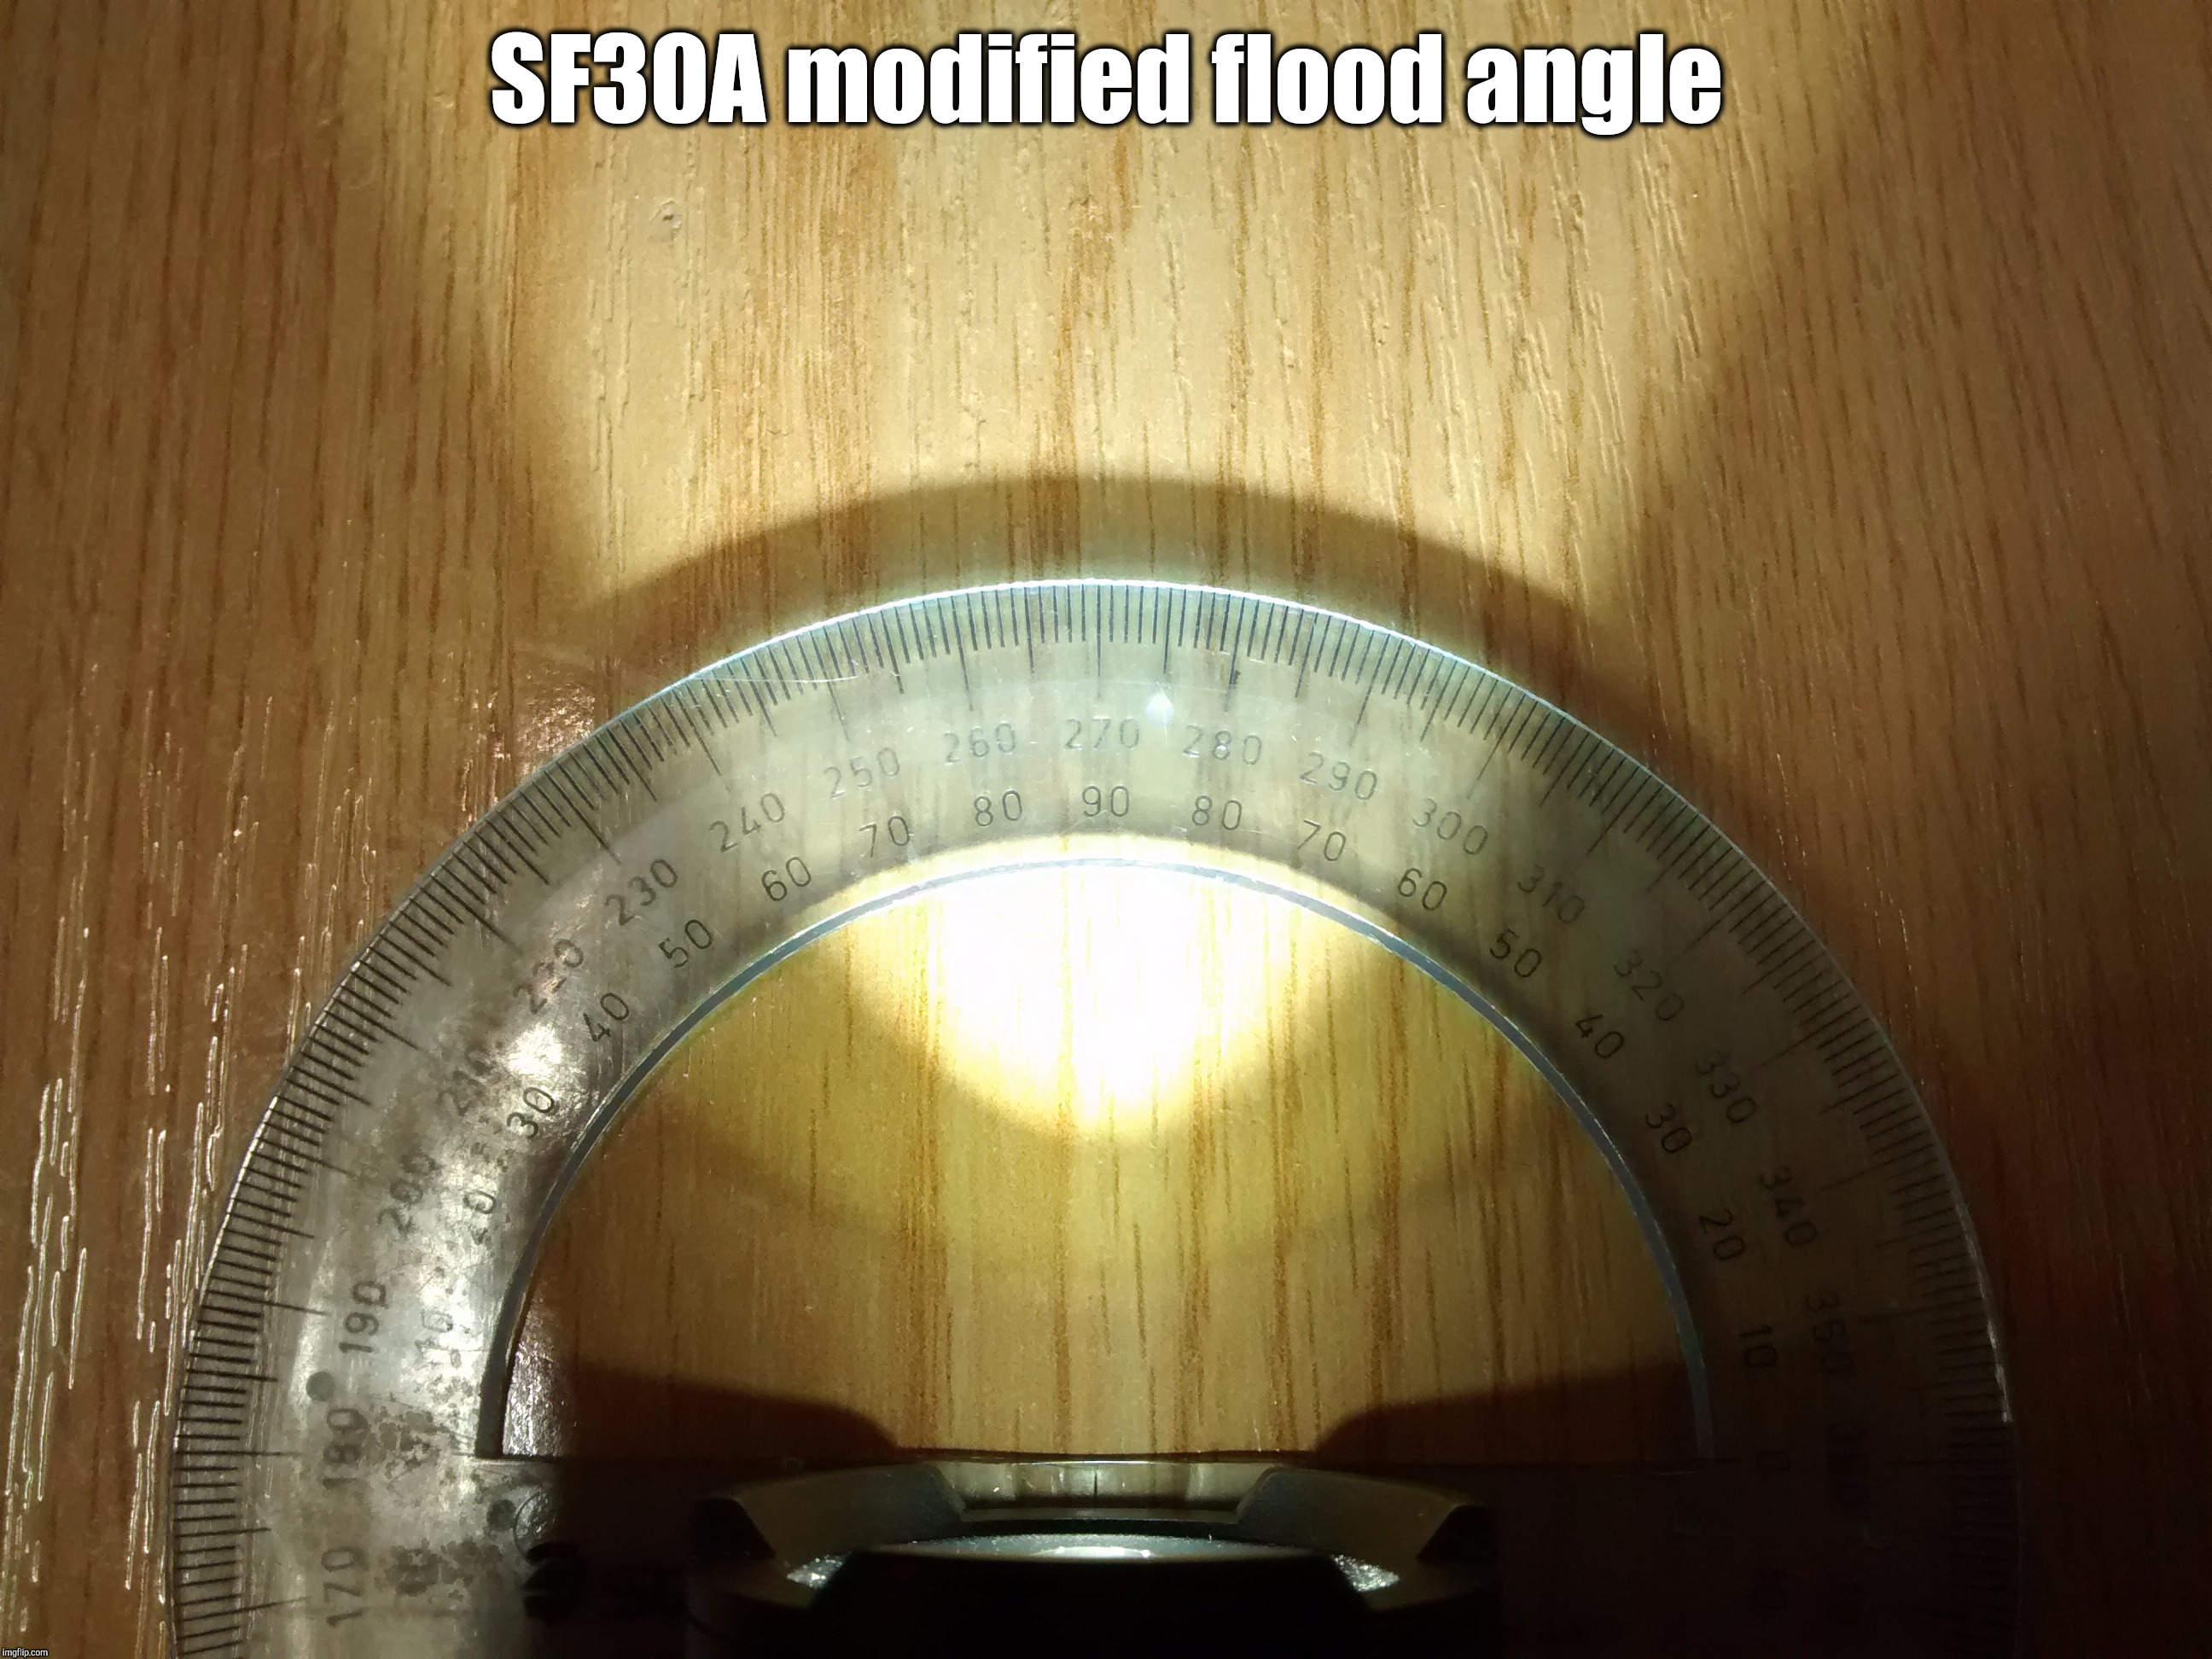
Another comment. In the Sofirn SF30A Modding, Review, Zoomtaschenlampe thread Raff comments something about a longer inner cylinder part to achieve a closer to the lens emitter in flood. Well, after toying with the parts I've come to the conclusion we can more or less address this by filing the main headpiece a bit. The above up shot is taken with the inner cylinder inside the headpiece but all the way back without showing up the inner slots, resulting in 15mm of neck lenght. Can someone tell me what is the lenght of the neck in your torches fully zoomed in? If it is a maximum of 10mm, perfect. If not, the last slot will be seen if we file the main headpiece 5mm from below.
Are you serious, khas? That's very nice but first make sure there's no one around you who could be grateful and handle it properly…
I stand by what I said about filing the sliding headpiece. It will remove the anodization but that's 0K for me, it may even give it personality. khas, could you please zoom in your SF30A and measure its neck? It is only to determine if the lower groove would be seen atop the neck in full zoom once the headpiece is filed.
If you look at my lower picture above you can see the zooming headpiece to the left. Filing 5mm from it would remove the base “grommet”, that is, the first two rings plus the groove in between. The question is how much handwork would this require as I would be doing it with wet sandpaper. I should start with a very coarse grit, doesn't it?
Cheers fellows
P.S.: may be, Lightbringer. Dipped a switch into the stuff recently and I had to oil it afterwards. :-D
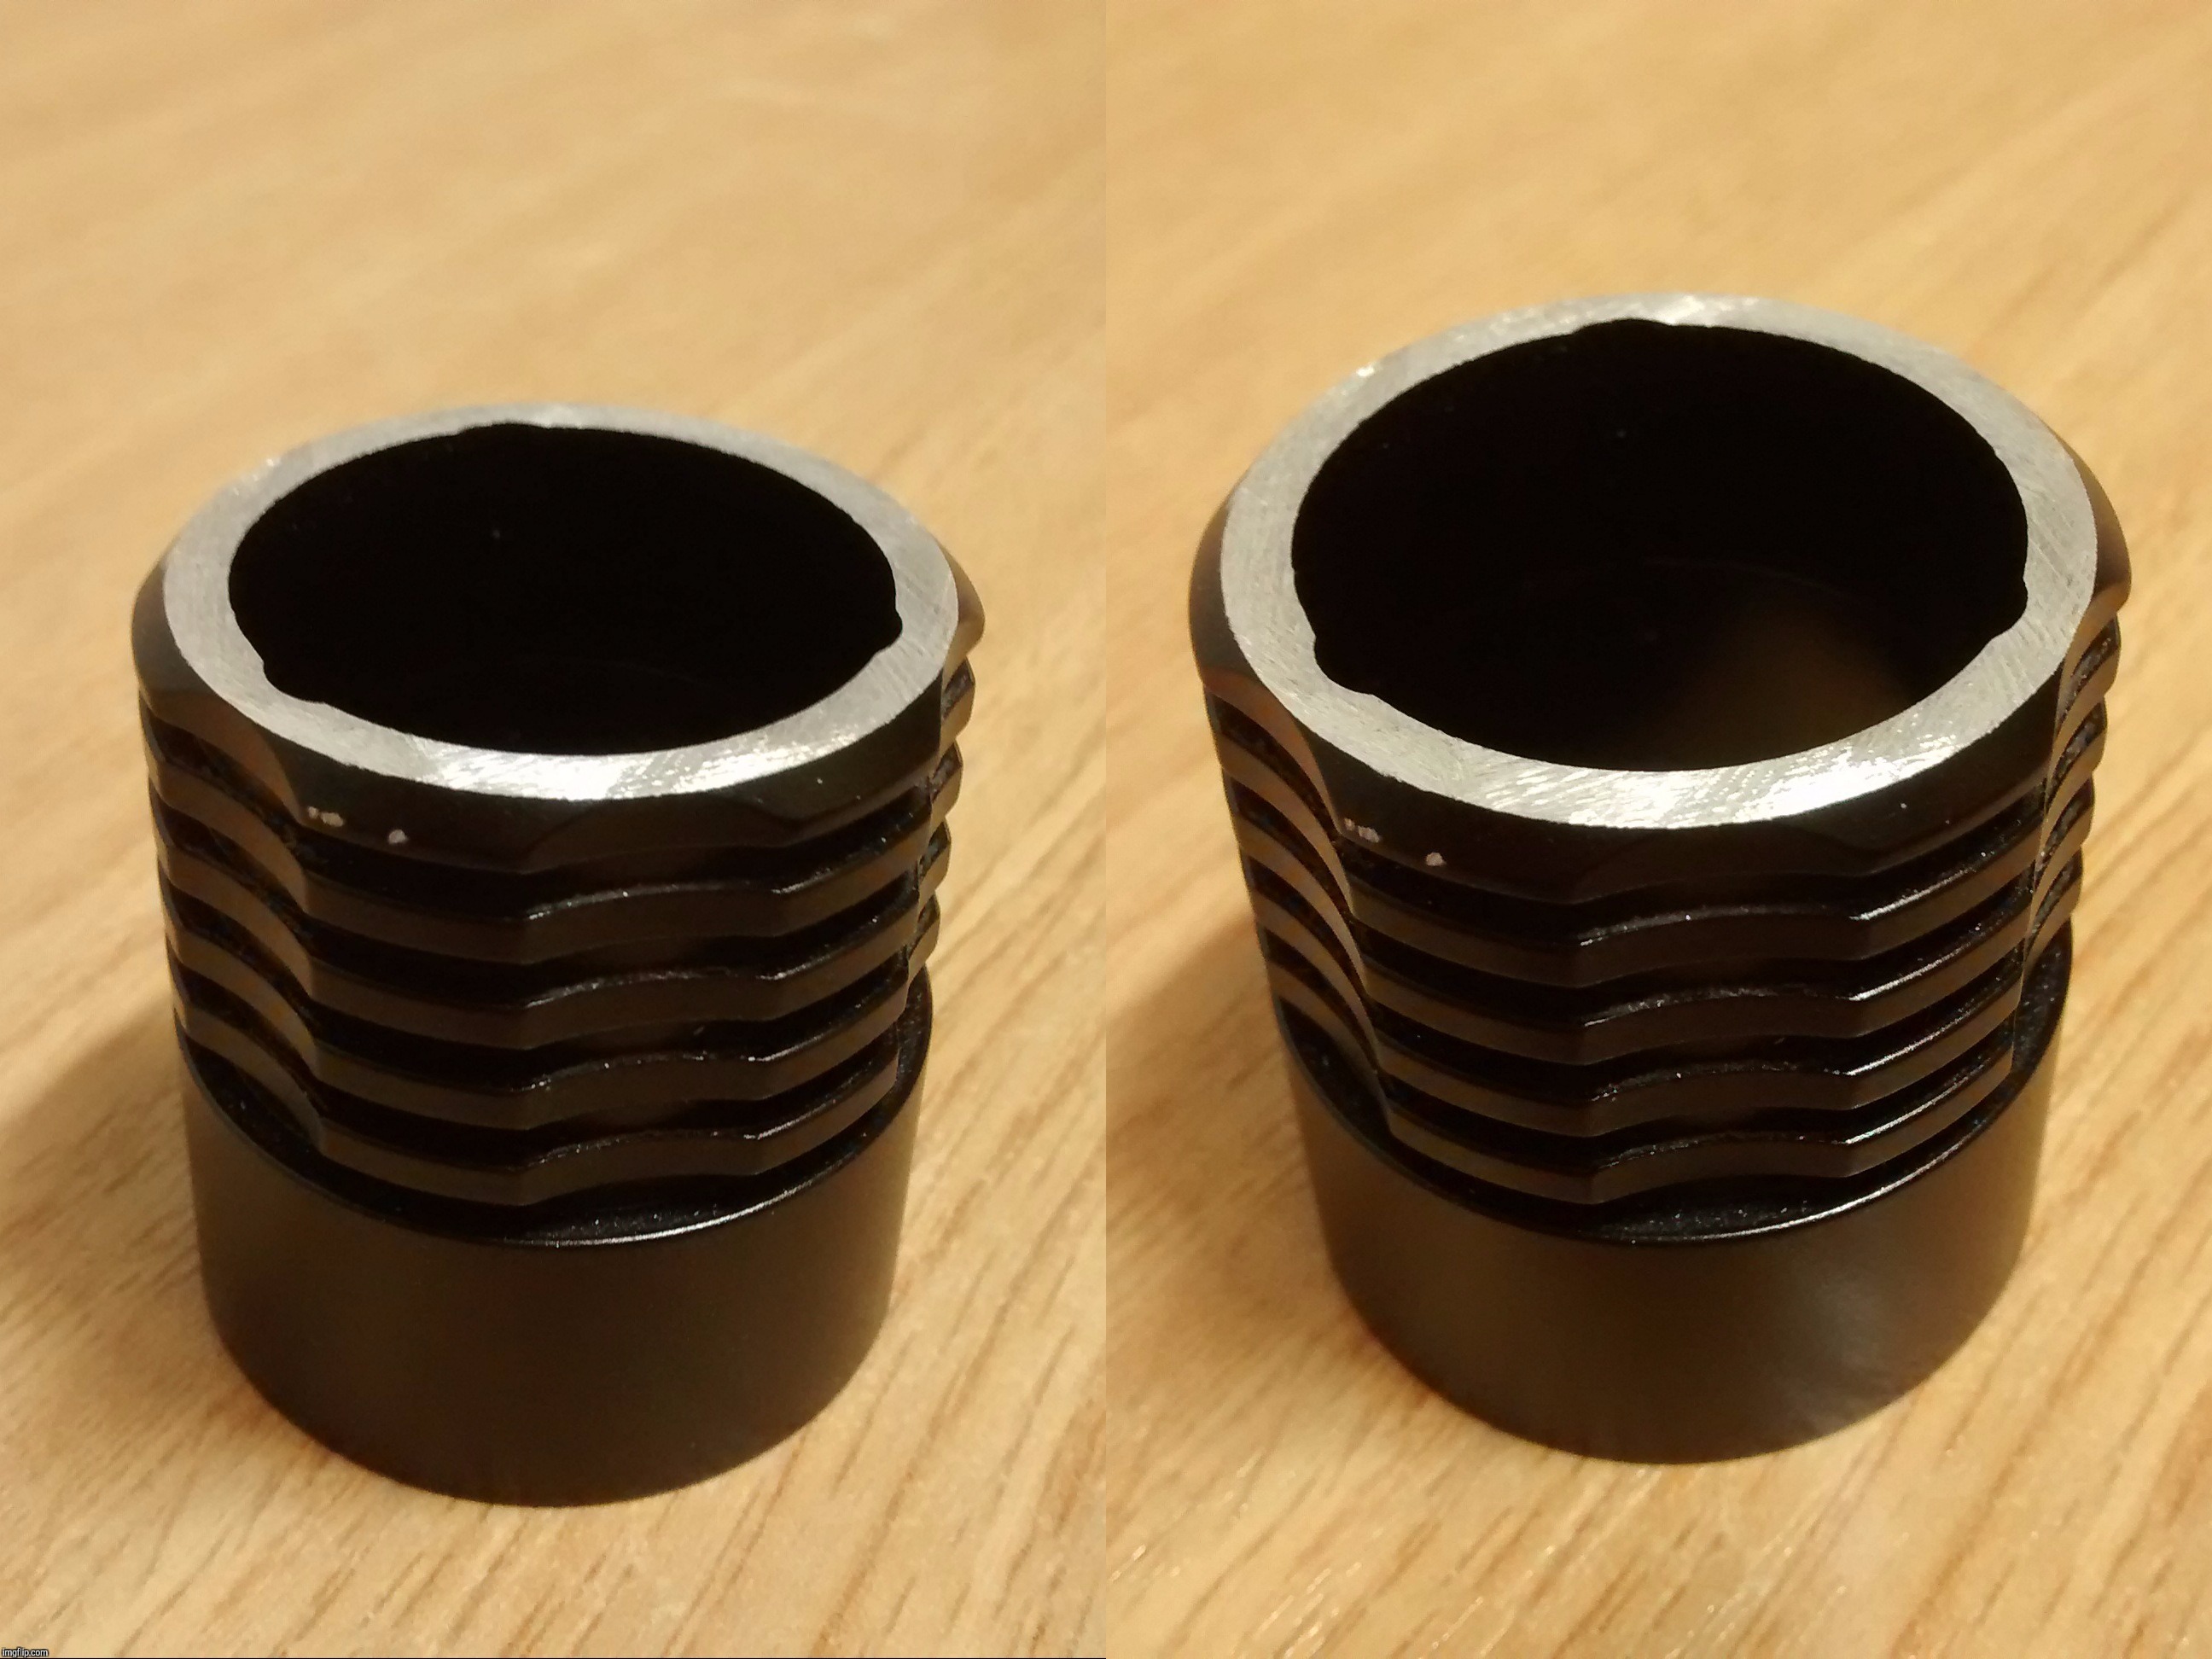
First wild guess set of o-rings (∅27×∅23×2mm OD×ID×CS) completely out of league.
Khas donated me his SF30A and once I dissected it I ordered a set of equivalent o-rings for my TA13, (∅24×∅20×2mm OD×ID×CS).
The second set of o-rings has failed also. Problem? The TA13's head inner cylinder is different! In the SF30A slots 2 & 3 are slightly shallower than the one closer to the emitter, and are the ones used to seat the o-rings. In the TA13 inner cylinder slot 2 is deep, not shallow, and o-rings seat in slots 1 & 2. This is because the main headpiece, where the inner cylinder pistons, is also different inside. In both headpieces inner diameter is slightly less at the bottom, however in the SF30A there are three logitudinal grooves spaced at 120° which serve for its o-ring cylinder setup to move smoothly. The SF30A o-rings fit well over the TA13's cylinder last slot, but its headpiece doesn't have grooves. It is clear that it is designed to be used populating the deeper 1 & 2 slots with an unknown to me o-ring size. @#$%! :facepalm:
Luckily I have a friend for who I tuned another TA13. Hope I can convice him to come home and take a look at those damned o-rings.
Finally modified the SF30A's head, trimmed it off ≈3.5mm with my rotary tool:
Finished head work. Not bad I'd say…
The head now feels like it's missing something, and it wobbles a bit.
Mmm…
The pre-mod shot was taken 3+ months ago. The modded one has been shot with the torch in medium mode, I guess this means the stock one was shot on high.
TA13's head trimmed, went a bit further with this one and the o-ring leans out a little bit with the head fully extended. The TA13's head doesn't wobbles, but the uncovered last travel path is loose.
I just received my last Sofirn order, including a SF30A flashlight, as you recommended I don’t know for sure, if it is glued at the bezel, but I could not open it by my hand. Do you received your recent ones glued by default? (How do you open them?)
adam7027, the bezel thing solution can be found here (#16). Auto-quoting myself:
A finger of white spirit/gasoline in a glass/jar is all you need. First extend the flashlight head (zoom in), then insert the flashlight upside down in the glass so that the bezel is bathed in spirit. How much time it needs to dissolve whatever glue I do not know, so leave it there for a nice deal of hours or check it often.
The reason for extending the flashlight head is to avoid the gasoline/white spirit bathing and damaging the head's inner tube o-rings.