Thanks DB and Geuzz.
Just a heads up there is a silver plating under the Black (PVD?) I literayy had to hand file it off the entire light where the Copper is exposed. Sanded with 220 on up to get it to polish as seen. Was a lot of work but looks neat.
Cool ![]()
Very handsome, vwpieces! So the black in the grooves is still PVD-coating, this finish will last very well, should still look nice with a patina. ![]()
Nice spring bypass.
One thing I like to do with spring bypasses:
Cut a small piece of copper sheet into a disk and put that on the end of the spring facing the battery. Having a bit of copper there helps protect the solder from friction. The spring bypass tends to last longer.
CRX Approved, Thanks!
The Bezel and E-sw ring were the Blue. I tried the warm sodium hydroxide solution and no joy. They are Brass. To my suprise, it wasn’t till polishing it that the blue came off. The Lye may have actually helped a bit. The original emitter MCPCB is copper but super thin. To get the thicker Sinkpad in there I filed the bottom of the optic shorter and reamed out the bottom hole with a 60* reamer to fit over the XM and sit on the pad. Bad thing is that changed focus and the Smini now has a Square Spot. Like a zoomie but big. Mostly only seen on turbo.
This thing will be coming apart again. Change some things and mostly larger guage wires.
Thanks djozz.
Yes the black is the original coating, pretty hard stuff. The flats polished again after getting sanding scuffs.
Waiting for Patina….
Here’s my first LED project in a long time. It’s a 50W automotive light bar I purchased from Amazon that I’m modding into a UV inspection lamp.
Luckily when I opened the light up it used what I think are Cree emitters with the 3535 footprint. This made it easy since I was able to remove all of the LED’s and the 5 buck converters and reuse the MCPCB with the Lite-On 365nm emitters. Some jumper wires had to be soldered down to run the LED’s in series, but it wasn’t a big deal.
Here I was testing out the LED’s. My power supply maxes out at ~31V, so only 8 of them could be tested at a time.
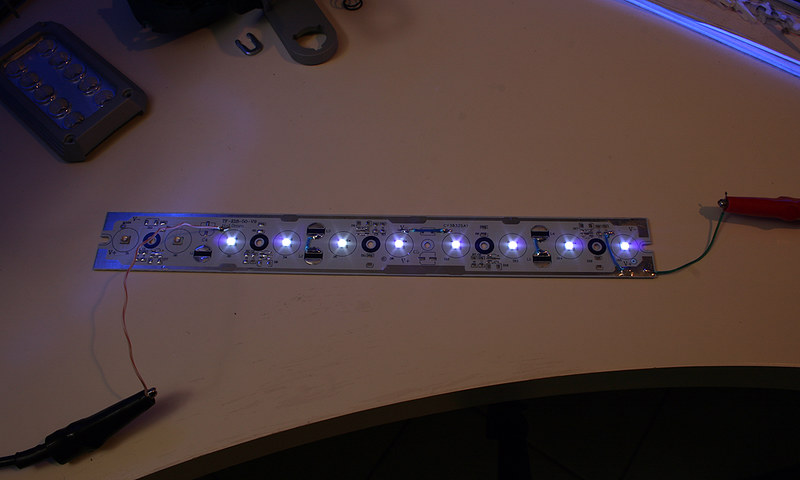
The datasheet shows a Vf of 4.0 @ 500mA, but here it shows it to be closer to 3.45V.

9 of the LED’s have a consistent color, with one of them being noticeably “whiter”. This whiter LED still appears to fluoresce objects as much as the others, so I won’t bother to swap it out.
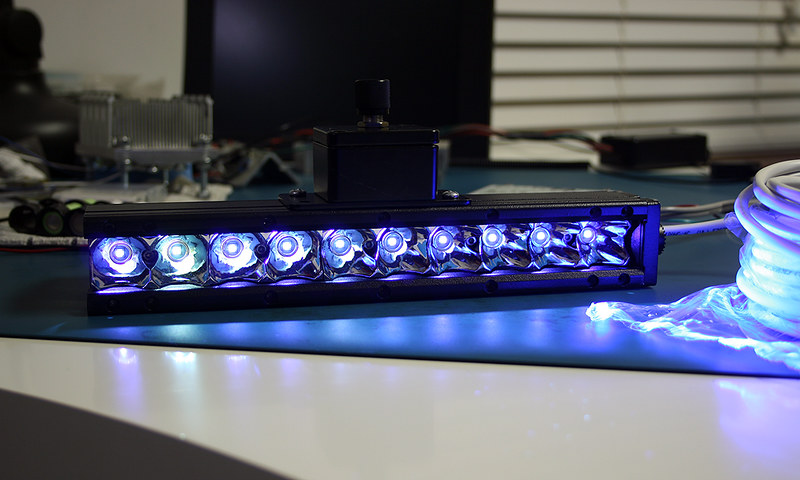
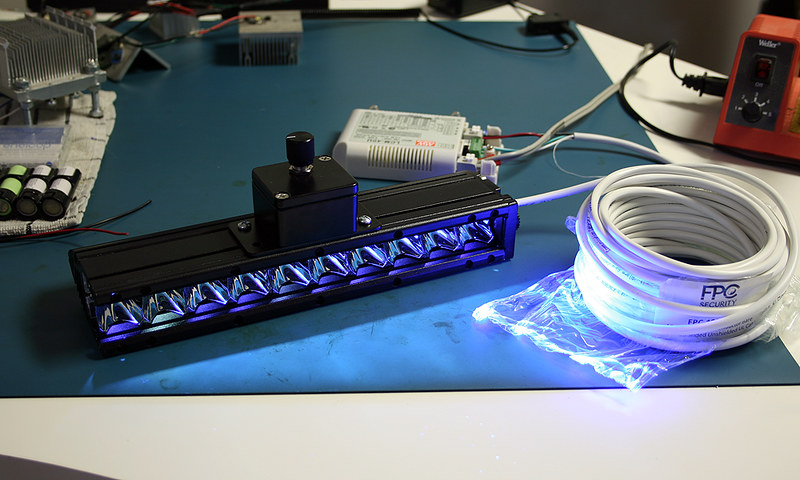
I mounted an aluminum project box to the top of the lamp for the dimming pot. It looks a bit ugly, but it’s good enough for this project.
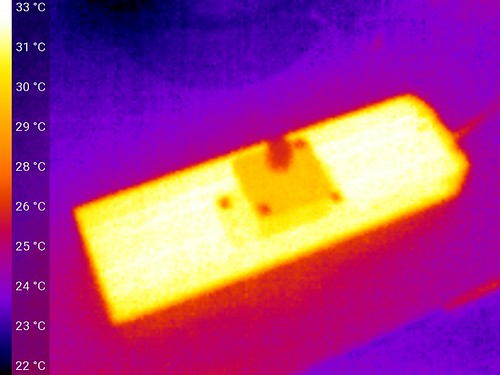
The heatsink is more than adequate. At roughly 17W for an hour the temperature only reaches 33° C.
The only thing holding it back now is the window. The one that came with the light bar was made of polycarbonate and blocked nearly all of the UV. I have a piece of Starphire glass at a shop right now being cut to the appropriate size. I should have it back this week and the lamp will be complete.
Nice UV-bar! What kind of inspection would you use it for?
(One of those LiteOn’s that I tested was 3.6V at 500mA, but there was a clear design change at some point, that may have affected the voltage too)
Nice UV bar can you link the LED bars seller?
Just thought if you go for sapphire glass why not a ZWB2 filter glass installed?
The SST 10 UV may be also promising with XPL footprint and low thermal resistance
just the important thing would be to see what kind of Wastelight the SST has, like the Lite-On or no like the Nichia
that’s a nice aluminium case! i like it
Good mod by the way
Thanks! This one will be fixed to a printing press. Often clear coatings must be applied to the labels which is difficult for the press operators to see and register to the images. A small amount of optical brightener is added to the coatings formulation (usually less than 0.5%) allowing it to glow when viewed under UV. This lamp will be an upgrade over the fluorescent blacklight lamps that we’ve used in past. Those tube lamps don’t produce enough UV to make some colors of optical brighteners to fluoresce.
Thanks, sure… Here’s the Amazon link.
The bandpass filter would be a nice addition. I looked at filters briefly a few weeks ago, but wasn’t able to find one with the correct dimensions or one that wasn’t outrageously expensive. Maybe there’s a ZWB2 film that can be applied to the glass window? I haven’t looked into that yet.
If this lamp does works well, I’ll have to assemble several more. Next time I can mix it up with the SST-10 LED’s and do a comparison. I’ve been wanting to play with the Luminus UV emitters since they starting releasing these less expensive variants.
Can you link the Luminos Emitter?
ZWB2 filters should be cheap availiable in rectangular sheets
Im home alone tonight so I decided to mod my H03 side LED because dont like red colour as it’s not efficient.
Blue colour

Green colour

white colour without rubber boot

![]()
i also made AA vampire light from plumbing parts fits perfectly (just plug and play) ![]()
The light can run on dead AA bateries people throw in the bin and it will run about 2 weeks continuously

Forward clickie fit in perfectly.

no machining is needed ![]()
Plug and play. Your either a genius or an idiot. ![]() Hows the water leak?
Hows the water leak? ![]()
Hey MDsDNF
It’s not water proof and I don’t intend to put in water rather use it as night lamp to drain dead AA batteries.
Although I can silicon seal the gap and put O rings but too much hassle ![]()
Sorry, I meant the water leak where there is now a hole in the wall where the tap was. ![]() . Just me being silly.
. Just me being silly.
Here is the head MRsDNF

Had a spare XP-L 3D from the Astrolux S1 and decided to swap it to the Lumintop Tool AA.

Here’s the ceiling shot of Eagletac D25a Ti CW and Tool AA with XP-L 3D. Sorry about the cell phone photo as it does not capture the true color.

Good tip Firelight2. I’ve noticed with some of my bypasses that the solder has worn and has flat spots, but not too much to be concerned. If anything, the flat spots seem to help with conductivity. But I suppose at some point, the solder will eventually wear away too much, and then it will start to wear against the bypass wire or the spring.
Made my first attempt at “De-Anodizing” a light.
I turned my black anodized A6 , into a shiny , black “highlighted” A6.

