some mention CW give you eye strain when using CW at night, so even if these are HCRI at 9080 could this still be the case, or would it be easier on the eyes with the colour rendition, or something else?.
thanks.
No, no matter how high the CRI, cool white CCT will always strain most normal eyes more than warm white CCT. Many researches proved human eyes are more sensitive to blue and green spectrum. This will make your pupils smaller and less sensitive to the dark surroundings (tunnel effect). Warm lighting with less blue green spectrum perceived as being less intense by the eyes, so the pupils will open wider. This is why candle lit dinner is so romantic. Your partner face will looks more inviting with reddish tone and larger pupils and redder lips. Aroused, human will show slightly swollen red lips. This also why (the origin) women wear lipstick.
Now imagine how a tactical combat flashlight with high CRI and warm white CCT perceived by the enemies. :laughing:
- Clemence
I only have two cool-white high-CRI emitters, and they’re 5700K (a 219B and a 144A). I do notice less eye strain with these than with other cool white emitters, but 5700K is a little less cool than than most, so that might help too.
I wonder how the enemy would perceive this CCT? Think his lips would get redder? I bet his eyes would get Bigger and his back door would slam shut! ![]()

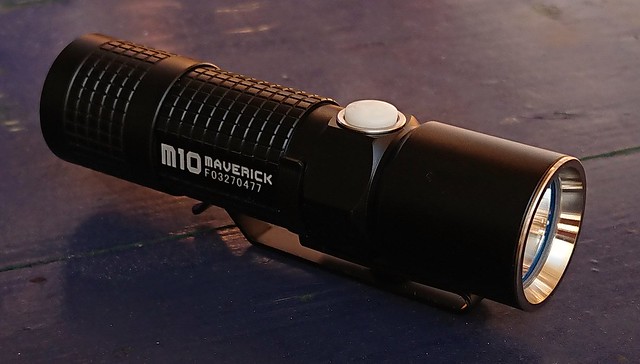
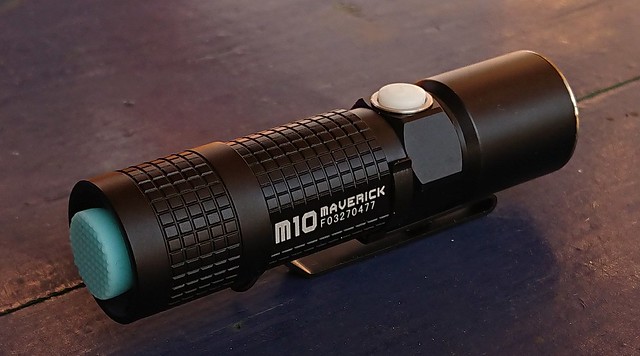
Djozz , it is the first time when I saw a " downgraded " light , made by you !!! From 350 Lm to 265 Lm , almost 30%...There is a new trend I don't know about ?
I was joking , I'm sure that you had your reason , maybe the tint or the CRI..! . On my Maverick M10 , I'd just dedomed the XM-L2 , in order to make it a little more throwy , thinking that the SMO reflector will help , added a bit of quality thermal paste , a small but strong magnet on the clip ( with shrinking tube ) . May I call that an " upgrade" ..? Hardly.., but , except the tint shift ( just a little bit on the yellow side) it seems that worked ! The beam is narrower and more brighter , overall it looks like is better than before ( my wife has an M10 also , and now she is trying to make a trade with mine...  ) Should I go for it ?...
It is not the first light that I downgraded in favor of CRI but it always hurts to loose lumens! The throw has increased quite some btw.
I downgraded the M10 a bit further today :innocent: , made it a lot less ‘tactical’ : foybezeledtm the front end and swapped the long forward switch for a small Omten 1288 reverse clicky, and a flatter switch cover.
The blue boot is looking very " manly" ..., may I have one in pink ... (for my wife... )...?
Subtle minor changes , but great effect..! !
!
Wow, nice Foybezel™ Jos!
I will try to make my first foybezel as soon as the SS C8 bezel arrives
Nothing fancy, but today I completed my first mods.
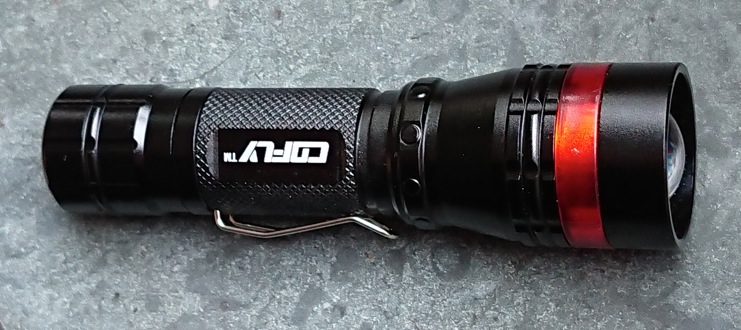
I put Texas Avenger Bistro OTSM drivers into a Convoy L2 (XM-L2 T6 4C) and a silver Convoy C8 (XP-L HI U6 4B), plus Convoy lighted tail switches with spring bypasses.
I used 18 AWG wire for everything and it was a pain to work with. I’m wondering whether it’s overkill.
It wasn’t all good. I put a BLF X5/X6 driver in my Convoy M2 and I think I fried the emitter, and I overheated the switch in my BLF A6 when I fixed its broken leg so its a bit sensitive.
Replacement parts have been ordered and I’m looking forward to my next mod!
You are well underway modding skinny_tie, leaving a tailing of fried parts ![]()
Changed batteries in an 9 Year old Batterypack. Its an Ferm Premium Power 18V Batterie with 2P5S 18650.
I used Samsung 30q. It doubled the Capacity. Old Cells had former 1500mAh, I measured around 1000mAh with a High Resistance between 200 and 300 Ohms.
Edit: Thats my Post #500! :partying_face:
Nice work Wieselflink, happen to have any pictures?
Yes!
Old Batteries with 1500mAh each:


New with Samsung 30Q:

Not jet changed, another old battery-back with Sony 18650VT and 1100mAh each:

More Pictures: http://www.taschenlampen-forum.de/media/albums/akkupack-ferm-premium-power-18v-cda1051-fpb-1800l.2157/
Thank Wieselflink! Very nice to see, might have to do the same sometime for my cordless drill!
I got the battery-connections off with only little damage. Than pre-tinned the batteries and after cooling the batteries I soldered the connections to the new batteries.
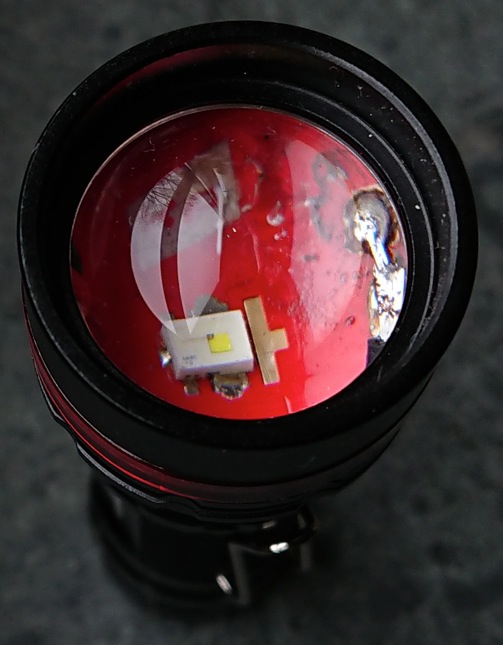
Did my first Syniosbuild today. I build one in a small 14500 zoomie and unfortunately it underperformed. In this same zoomie I got a dedomed XP-G2 S3 3D perform up to 54kcd, so I hoped for at least 80kcd with the Synios led. Instead it was just 48kcd, and an uglier hotspot. Of course I can think of a few reasons for the underperformance, of which the heat barrier from ledboard to pill is the main one, keeping the ledboard temperature too high (the board was glued onto the edge of the hollow pill with Arctic Alumina Adhesive, making it electrically insulated from the pill). But I had to re-heat the board an extra time for creating a solder connection between ledboard-core and minus-pad (could have thought of that while reflowing the led ![]() ), that extra cycle at 210 degC on the heatblock could have affected the led performance as well.
), that extra cycle at 210 degC on the heatblock could have affected the led performance as well.
Oh well, I made pictures so I may as well report the mod:
-flattended a 16mm Noctigon well on the underside and slightly sanded the side as well to avoid anything sticking out that could short the board to the pill when later glued in.
-reflowed the Synios led on the Noctigon
-scratched an opening to the core of the board next to the minuspad and reheated the board once more to create a connection from core to minuspad with a tiny bit of wire.
-build up a simple 6x7135 MCU-less driver by stacking chips.
-soldered two pieces of copper wires around the edge of the driver board to create a press-fit connection between driver and pill.
-soldered two tiny ledwires to the ledboard and glued the ledboard into the hollow pill while my led-tester (at 10mA) was connected to led+ and pill. This way an unwanted short from ledboard to pill makes the led light up, so I could re-position the board while the glue was not hardened still.
-made a spring bypass at the driver side.
-assembled the light and tested the current. It was a nice 2A precise (should be 2.1A but those 7135 chips are not that precise).
-tested throw at 7 meter with the Mobilux luxmeter: 48kcd ![]()
 (for fun: stereo!)
Very nice, I especially like the last picture comparing the two LEDs.
The problem might actually be the precision of the aspheric lens. The led could be too small for it. A pre-collimator could help.
A good thing to mention might be that you are using the 0.5mm^2 Synios, there is also a smaller one.
Synios looks brighter so I really don’t get that 63 kcd readings. Yes of course I believe you Djozz :+1:
Lenses have ultra clear projection. I don’t like size of it but it looks very nice and unusual. Well done Djozz ![]()
Good experimentation :+1:
gchart, little late reaction but I was thinking about that too, since I don’t have a 3D printer I didn’t do anything with the idea till yesterday.
I needed a 3D print for my soldering microscope and I had to make a 3D drawing for it and found a shop in my area who could print for me, meanwhile I also make 3D model for the button, shop didn’t have clear filament so asked him to print in any color to test.
I don’t know if this is category mods, but here it goes.
EDIT added the file to: Convoy S2+ metal button replacement for lighted tail cap. by Sp4wN - Thingiverse
I picked up today and print was not really successful the thin part where the gasket comes was a mess, it is a small object after all.

I did trim the print and it works in my S2+

The guy who printed for me asked if I could add some pillars to it so it makes the print sturdy while printing, thus I added some side supports for inner side, if it is printed I will cut those supports.
Since it is only 12 minutes print, he will wait till he has something else to print and print this afterwards.
Here is the new model:

If it goes like this, I might buy a 3D printer….