Banggood graciously agreed to send me this bike light battery pack free in exchange for a review. As always, I give my honest opinions and state the facts from my tests.
First of all let’s get this straight, this is actually a “5,200mAh” battery pack. The Chinese manufacturers often don’t seem to understand how to add up capacity for these packs. When cells are in series the voltage increases, but capacity does not change; when cells are in parallel the voltage remains the same, but capacity increases. This pack is a typical 2 series and 2 parallel arranged pack (2S2P).
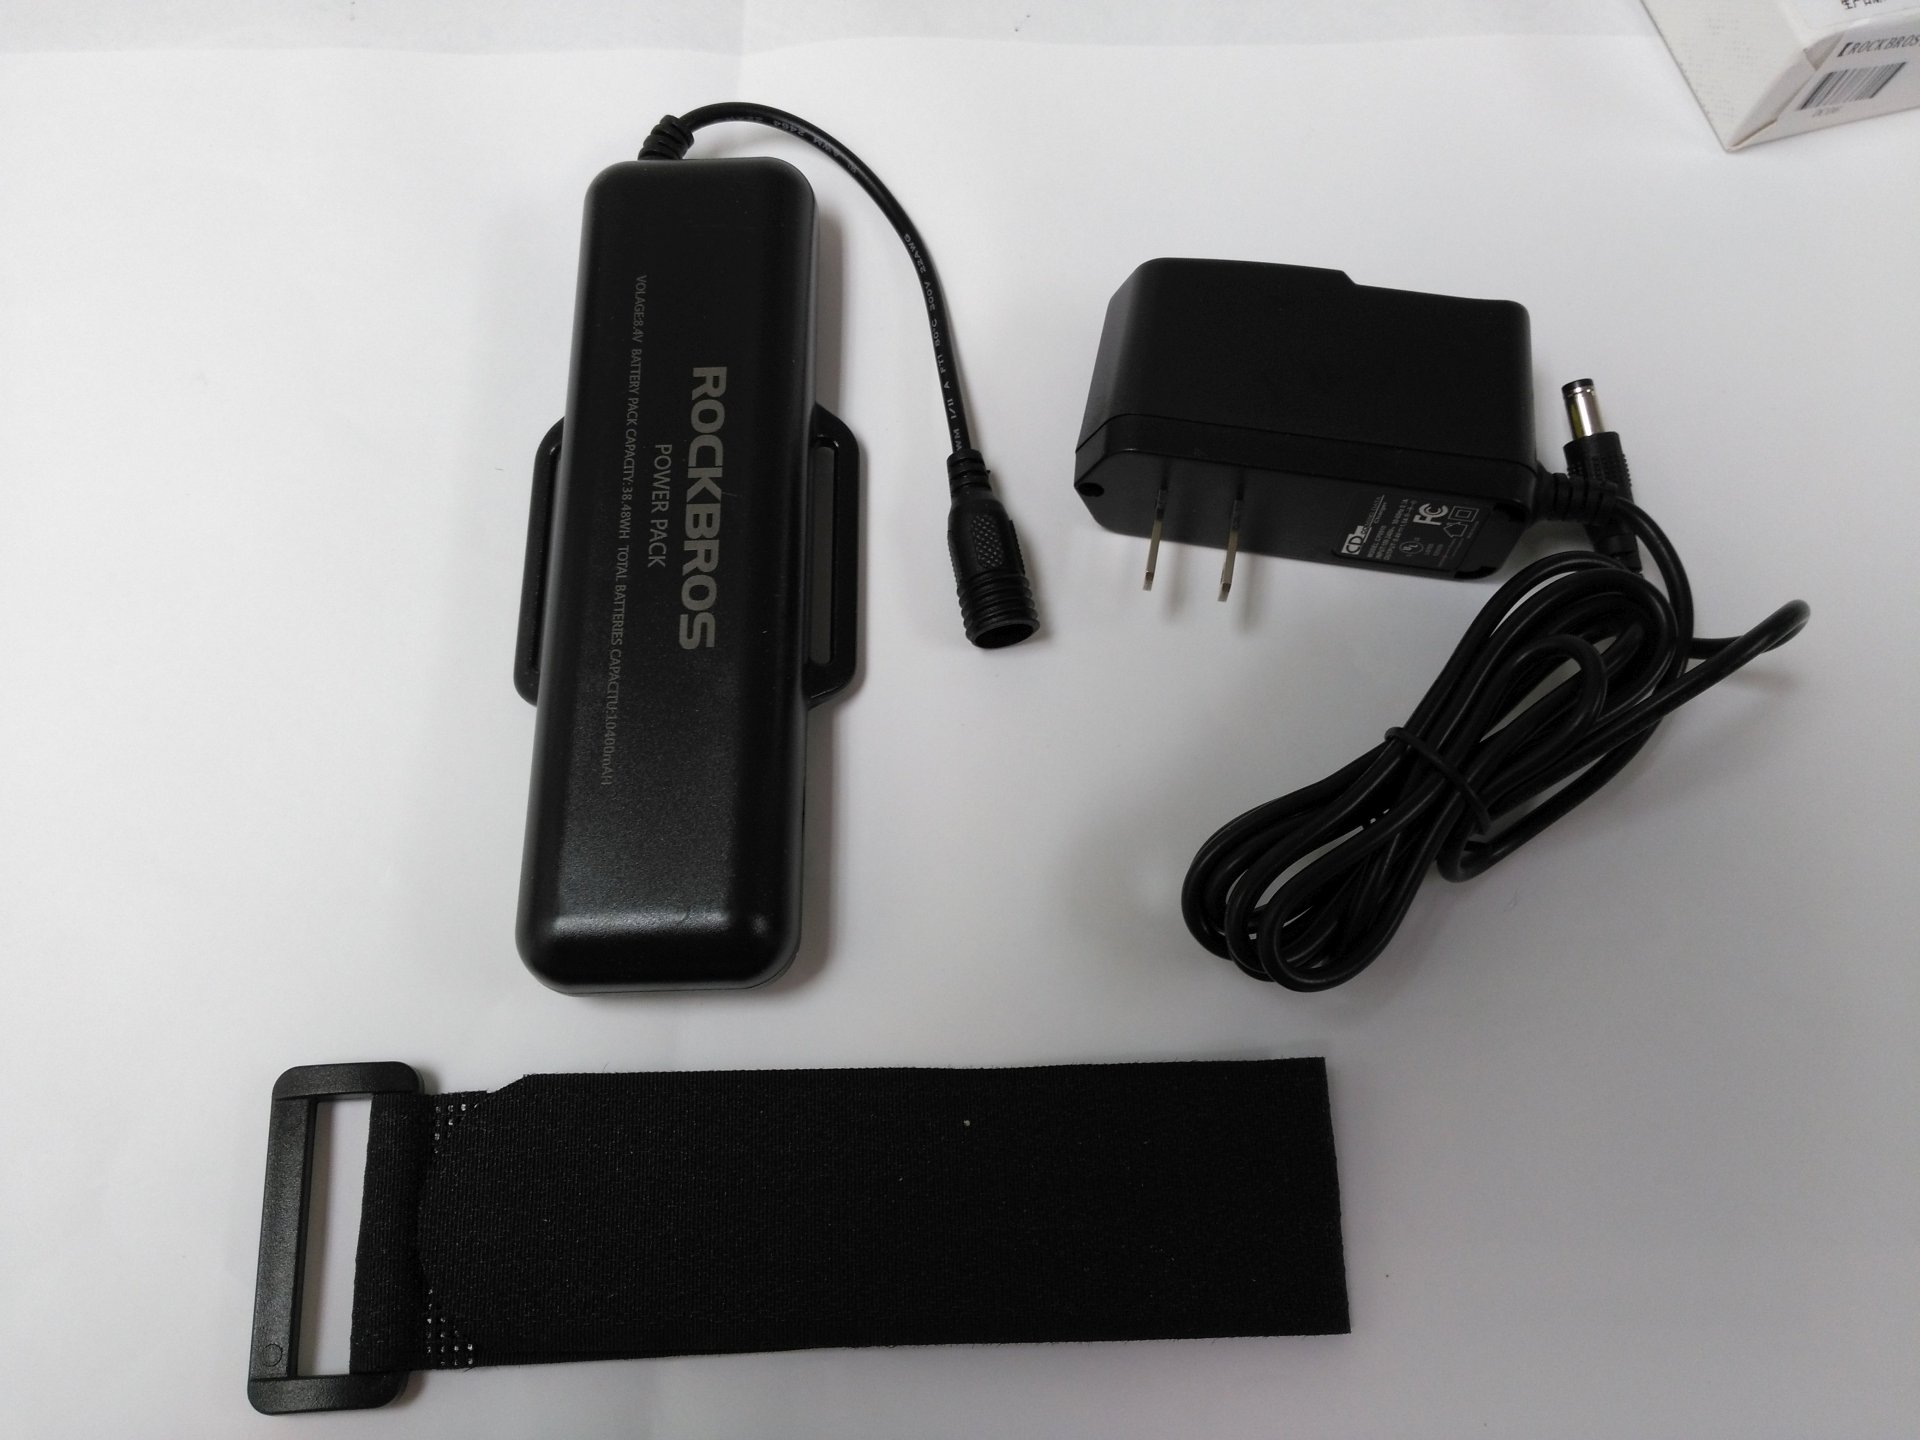
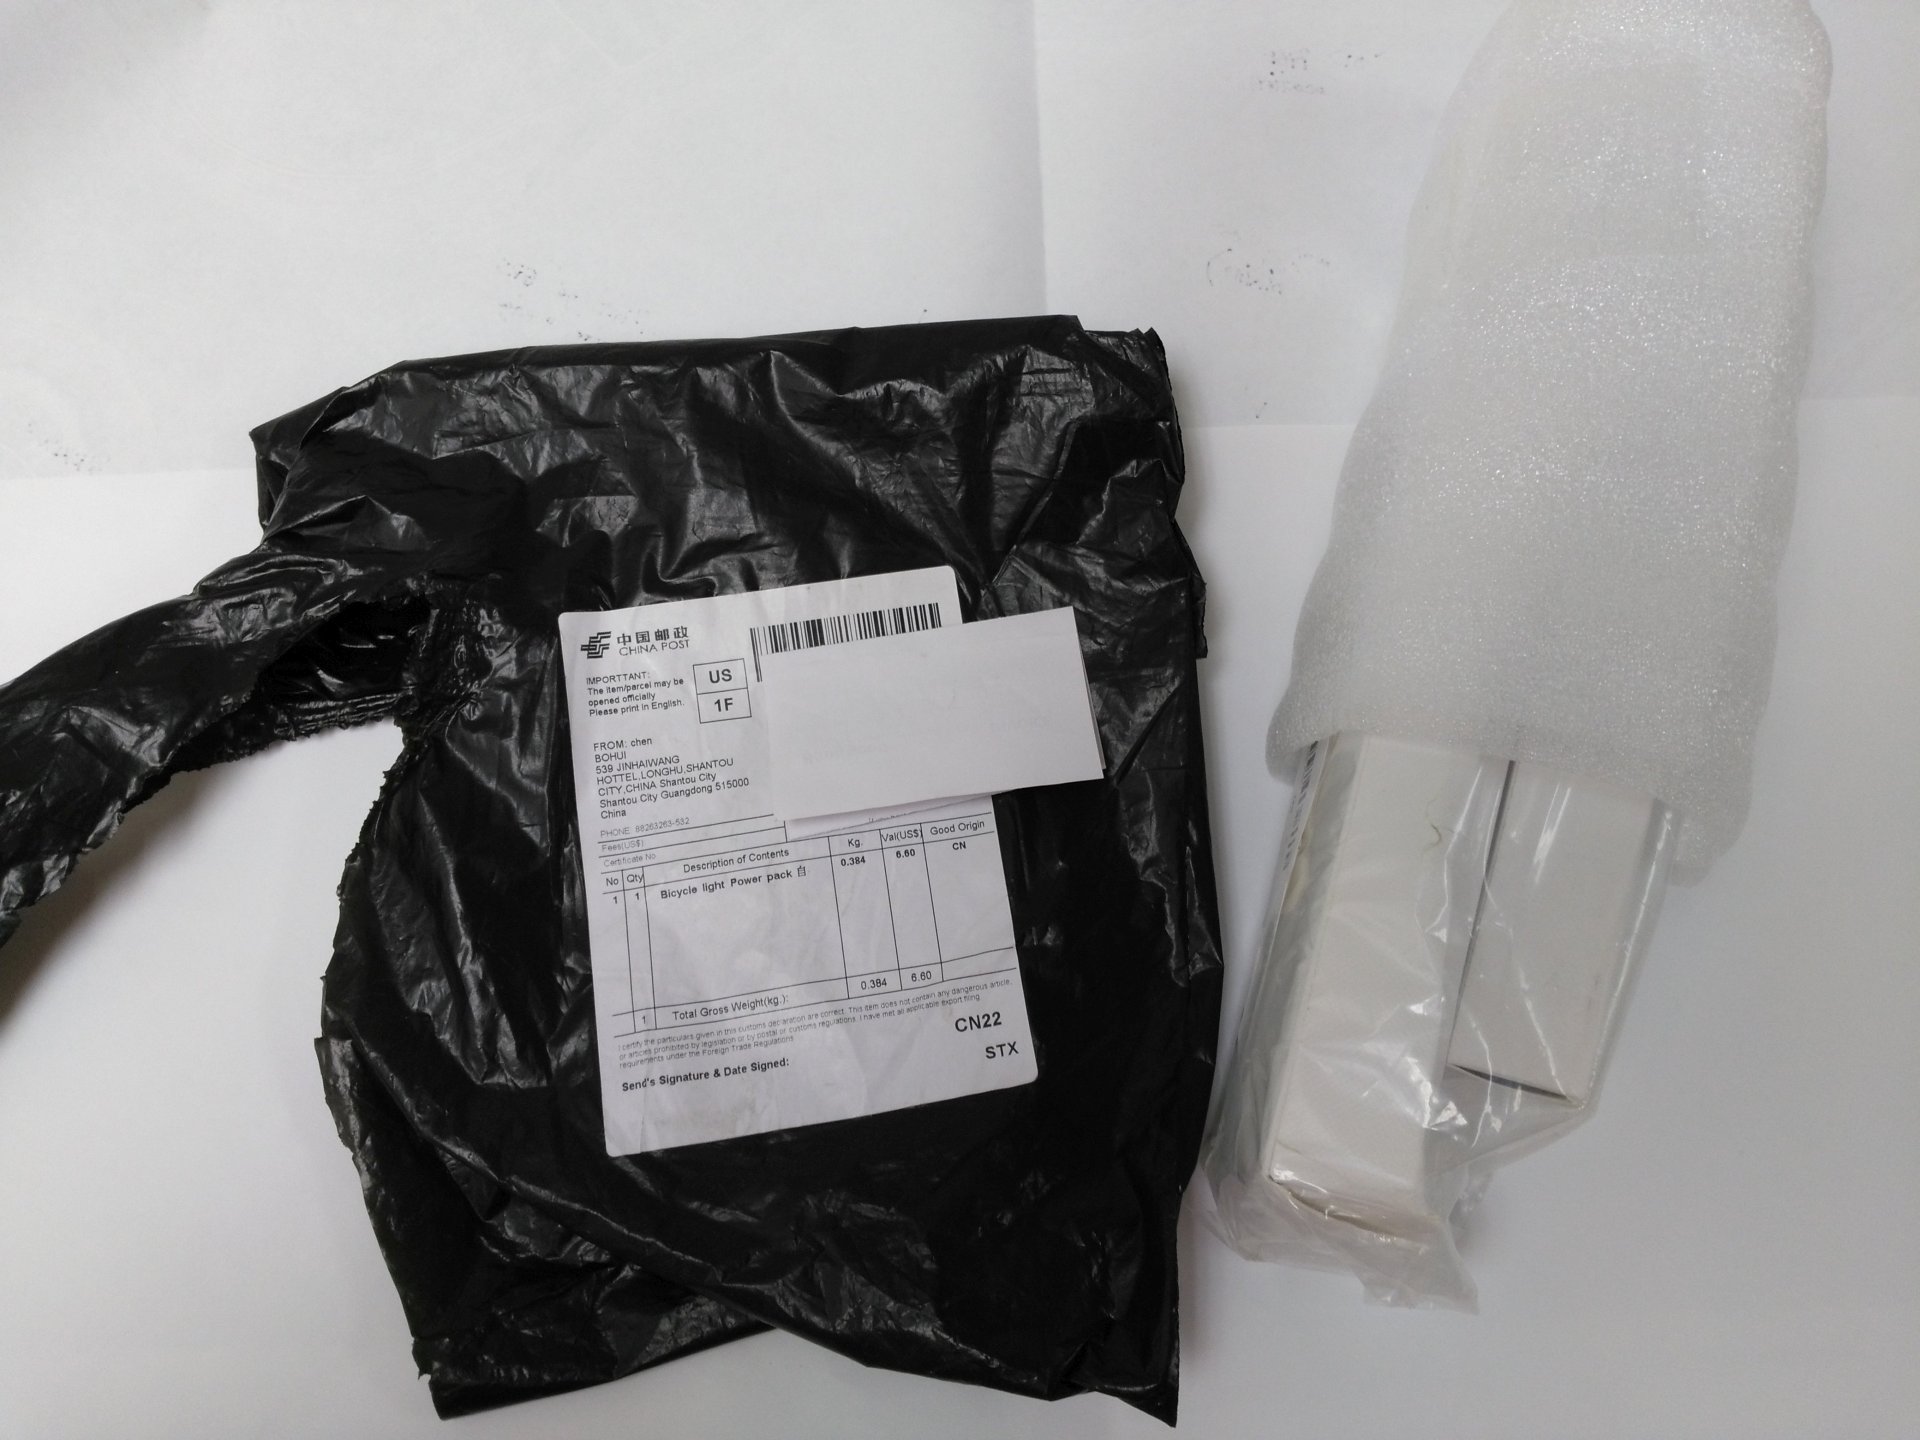
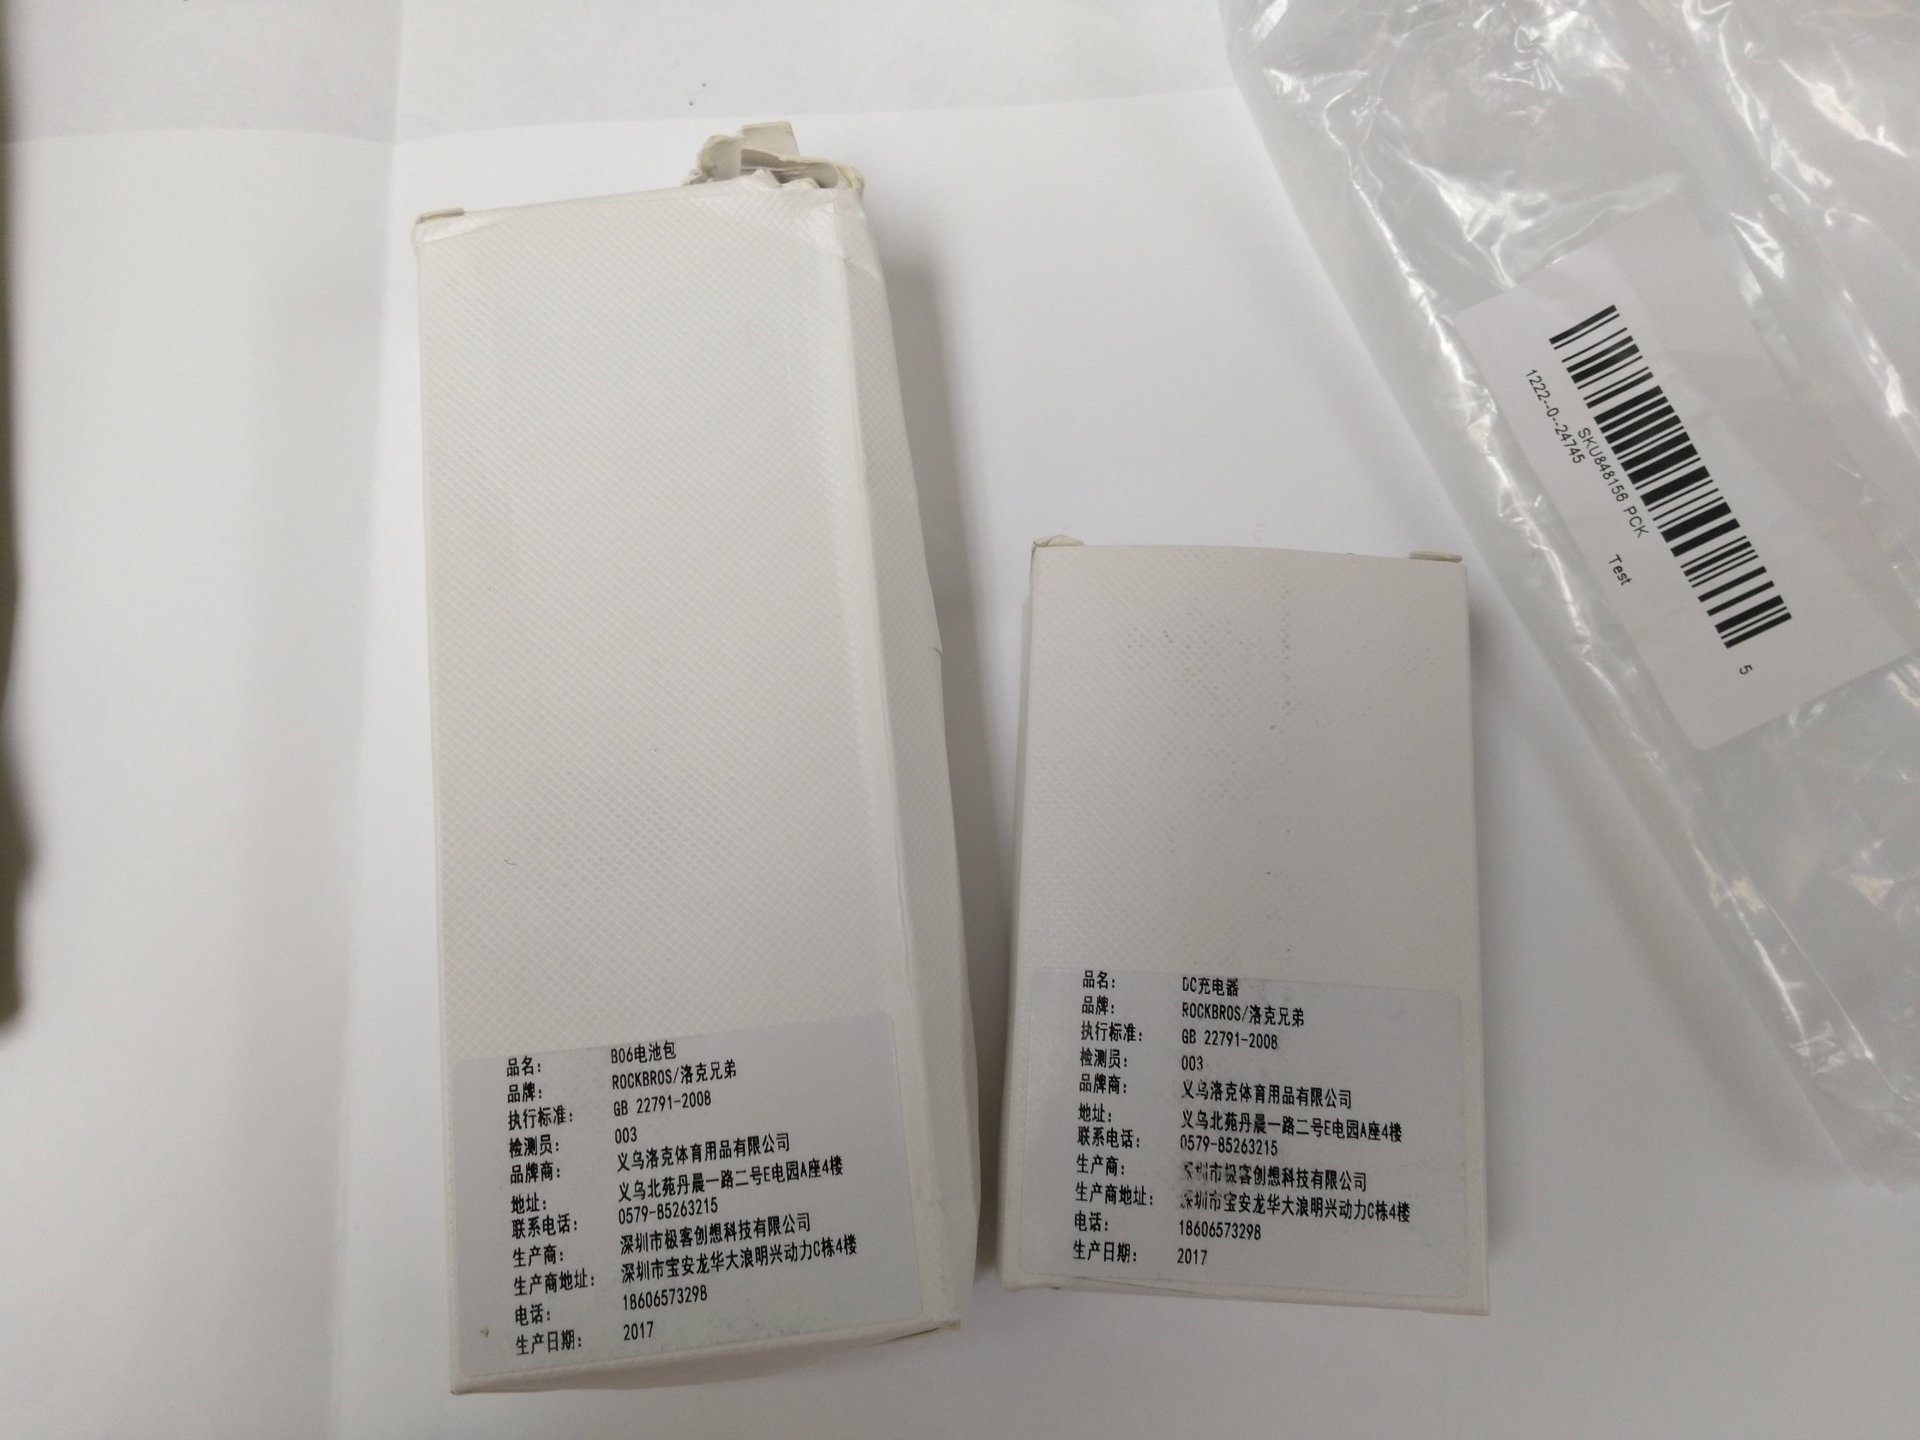
Banggood shipped this pack out China Post “Priority Air Mail” (one of the basic low cost options for shipping, not an expedited option) on January 25th and it was delivered to me on February 7th. The fact that the package had lithium ion cells in it did not seem to cause any shipping issues. (As an aside, a few months prior I personally ordered 4 Samsung 30Q 18650 cells with a plastic storage case by regular shipping and had no shipping delays with those either.) The battery pack with velcro strap and charger arrived in their stock two boxes wrapped in foam and then inserted into a plastic shipping bag. I feel the packaging was sufficient. The battery pack itself weighed in at 8.2oz.
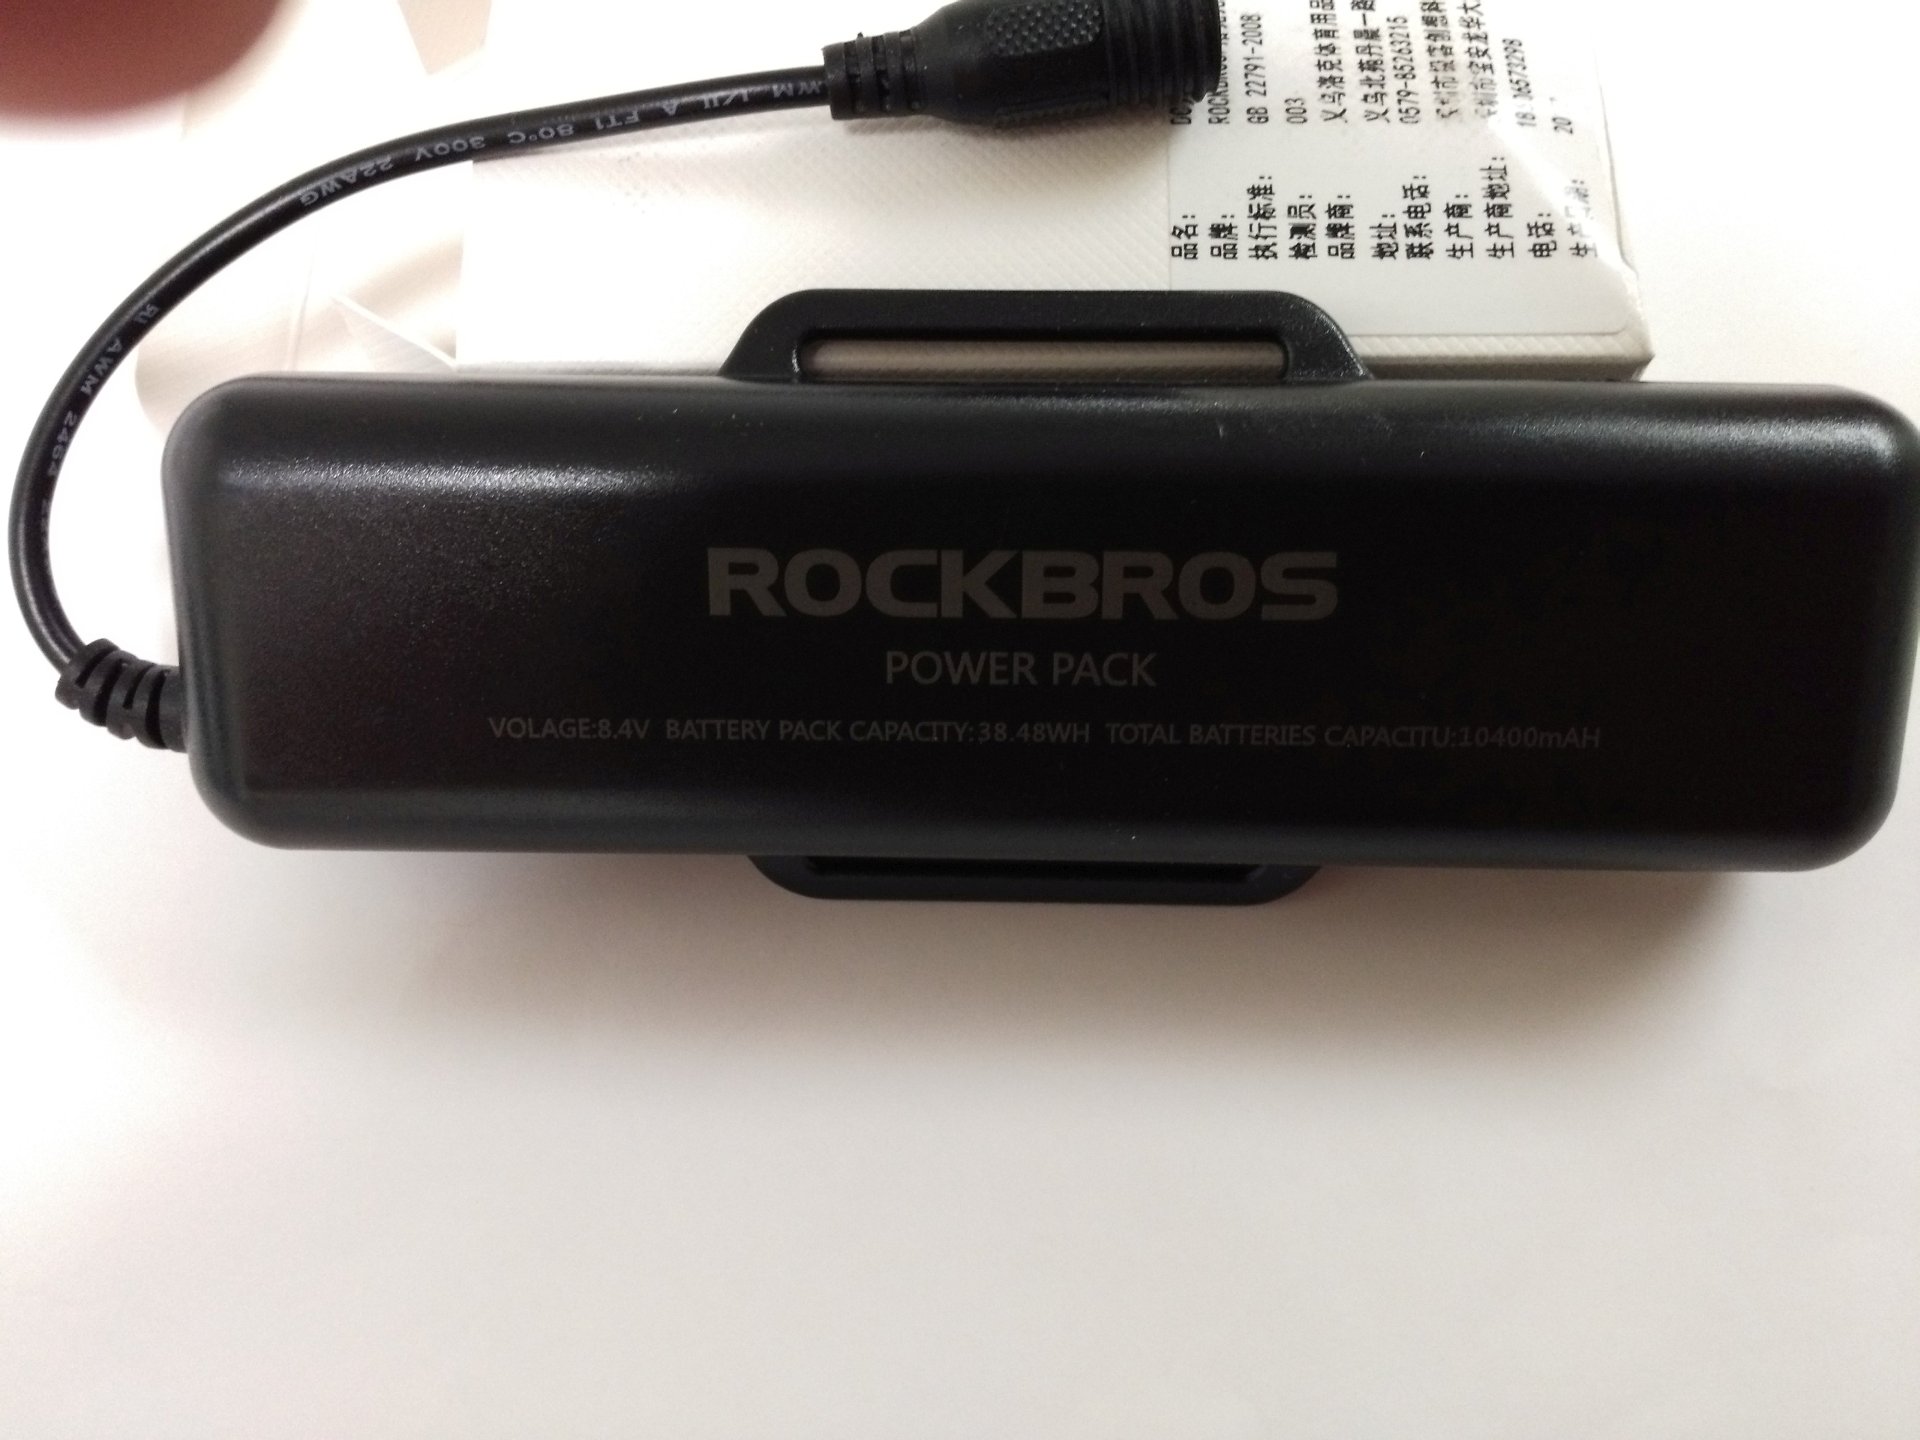
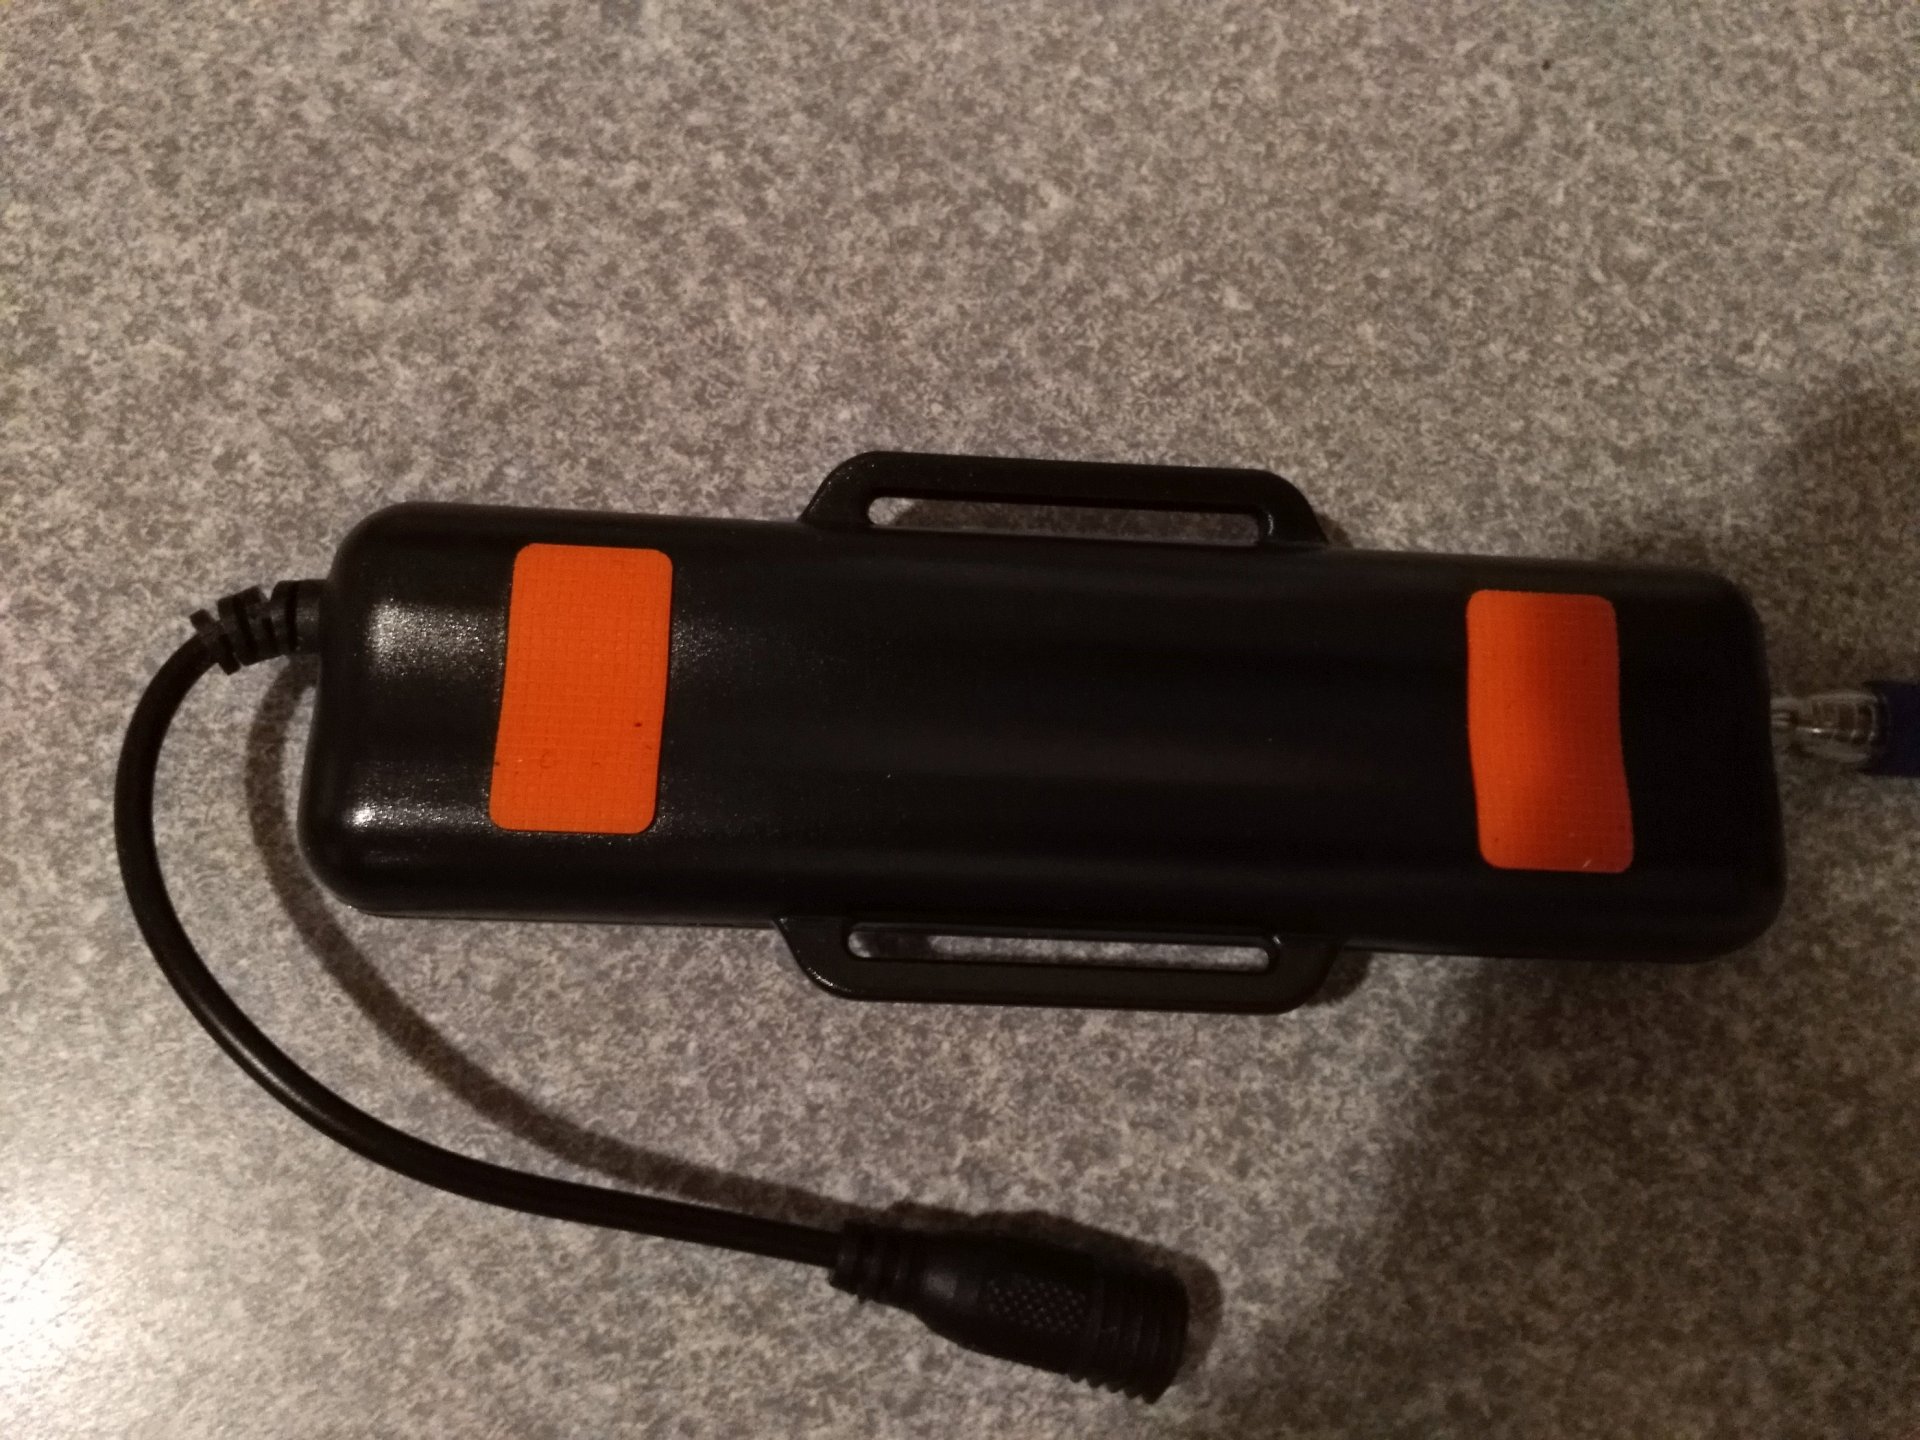
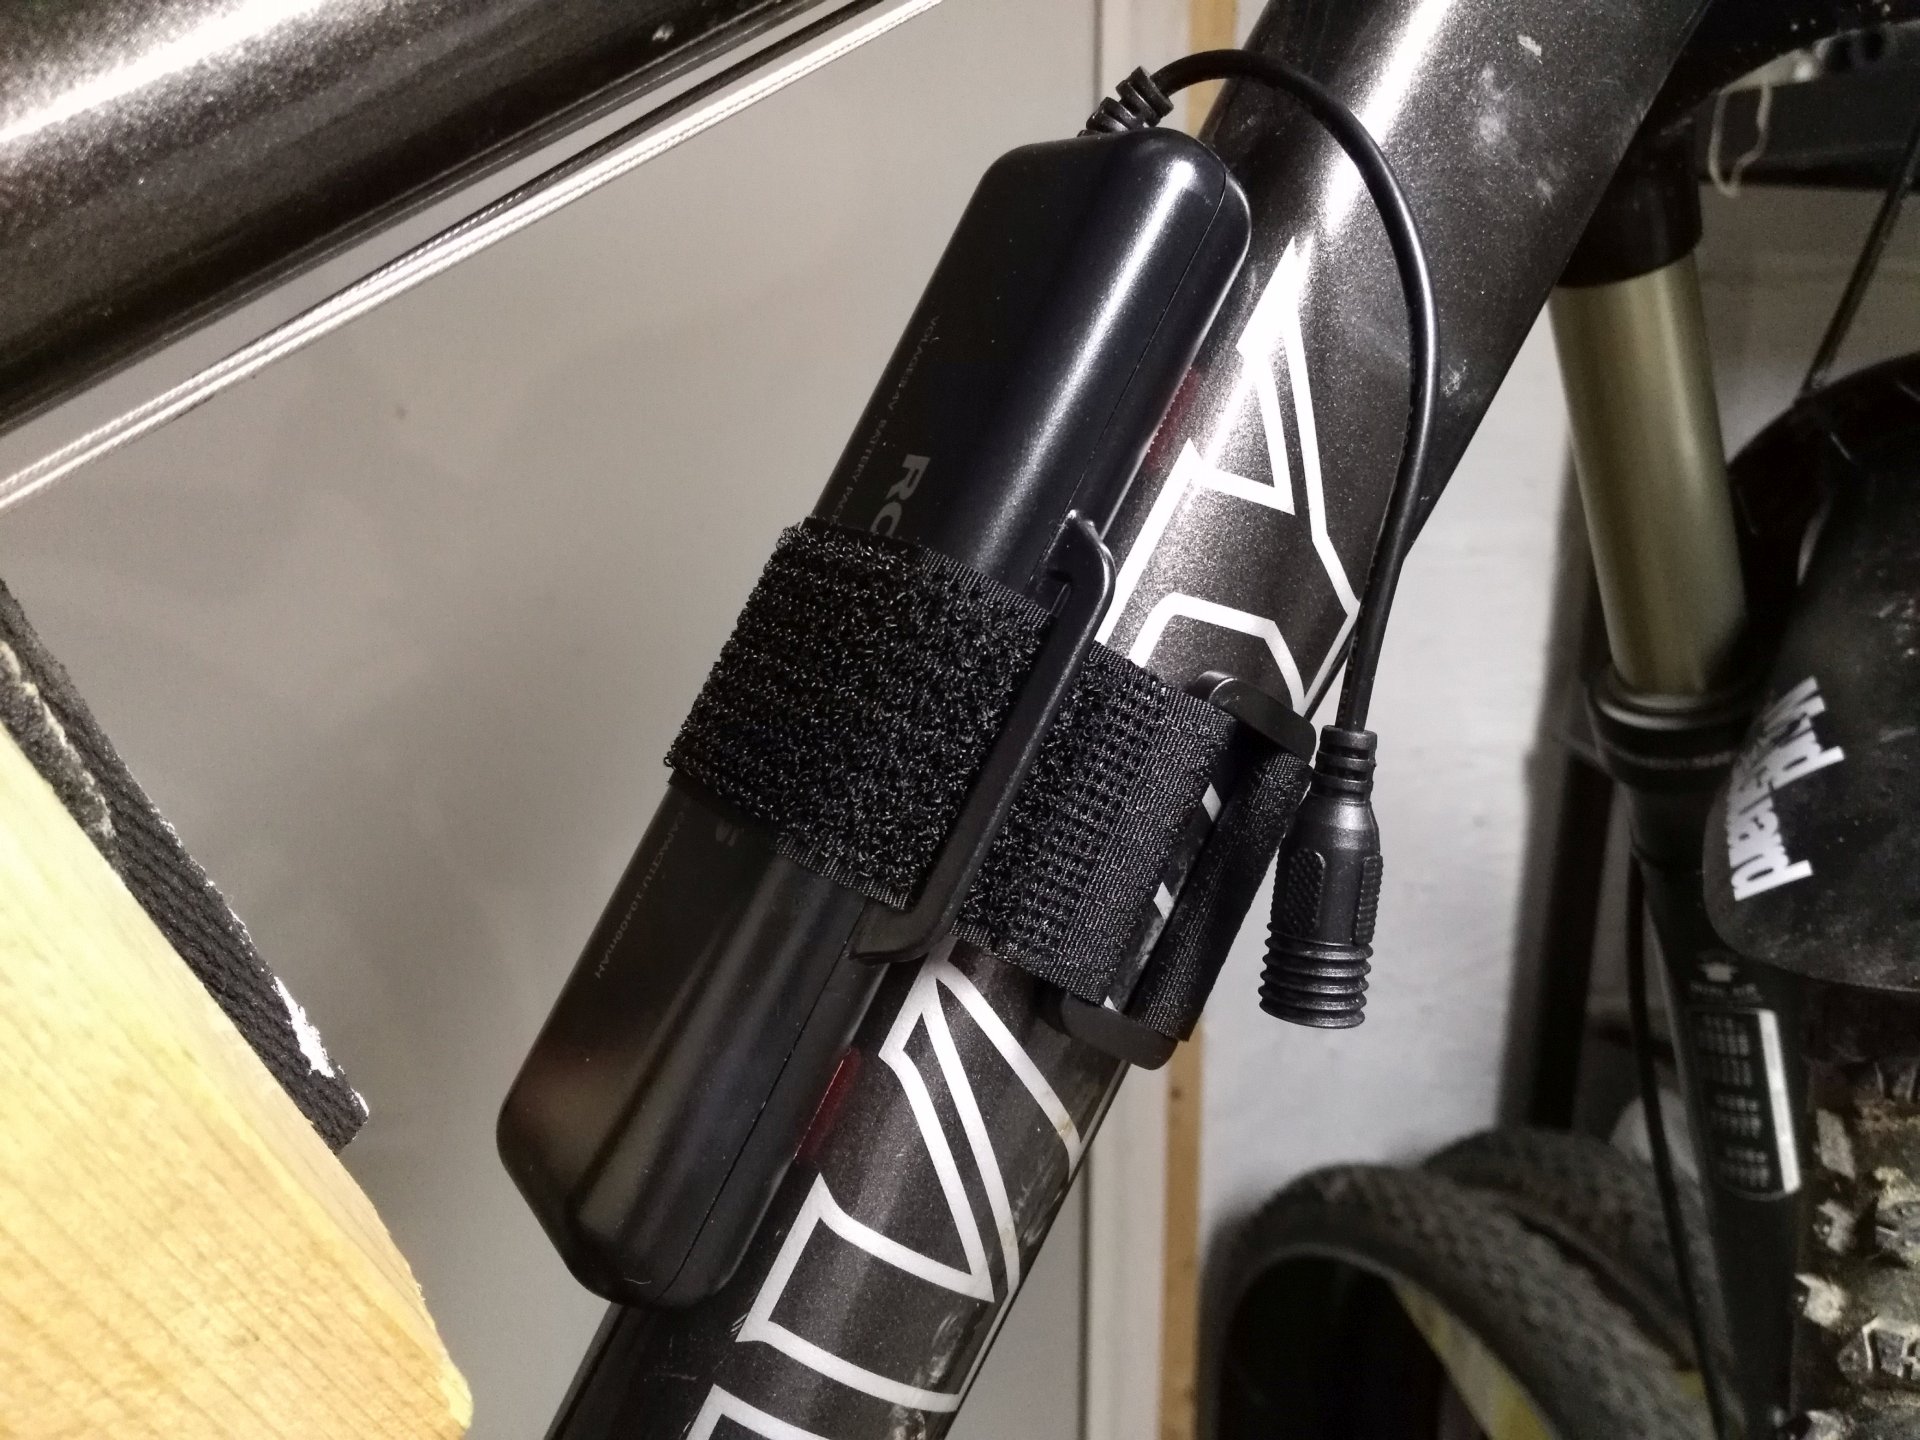
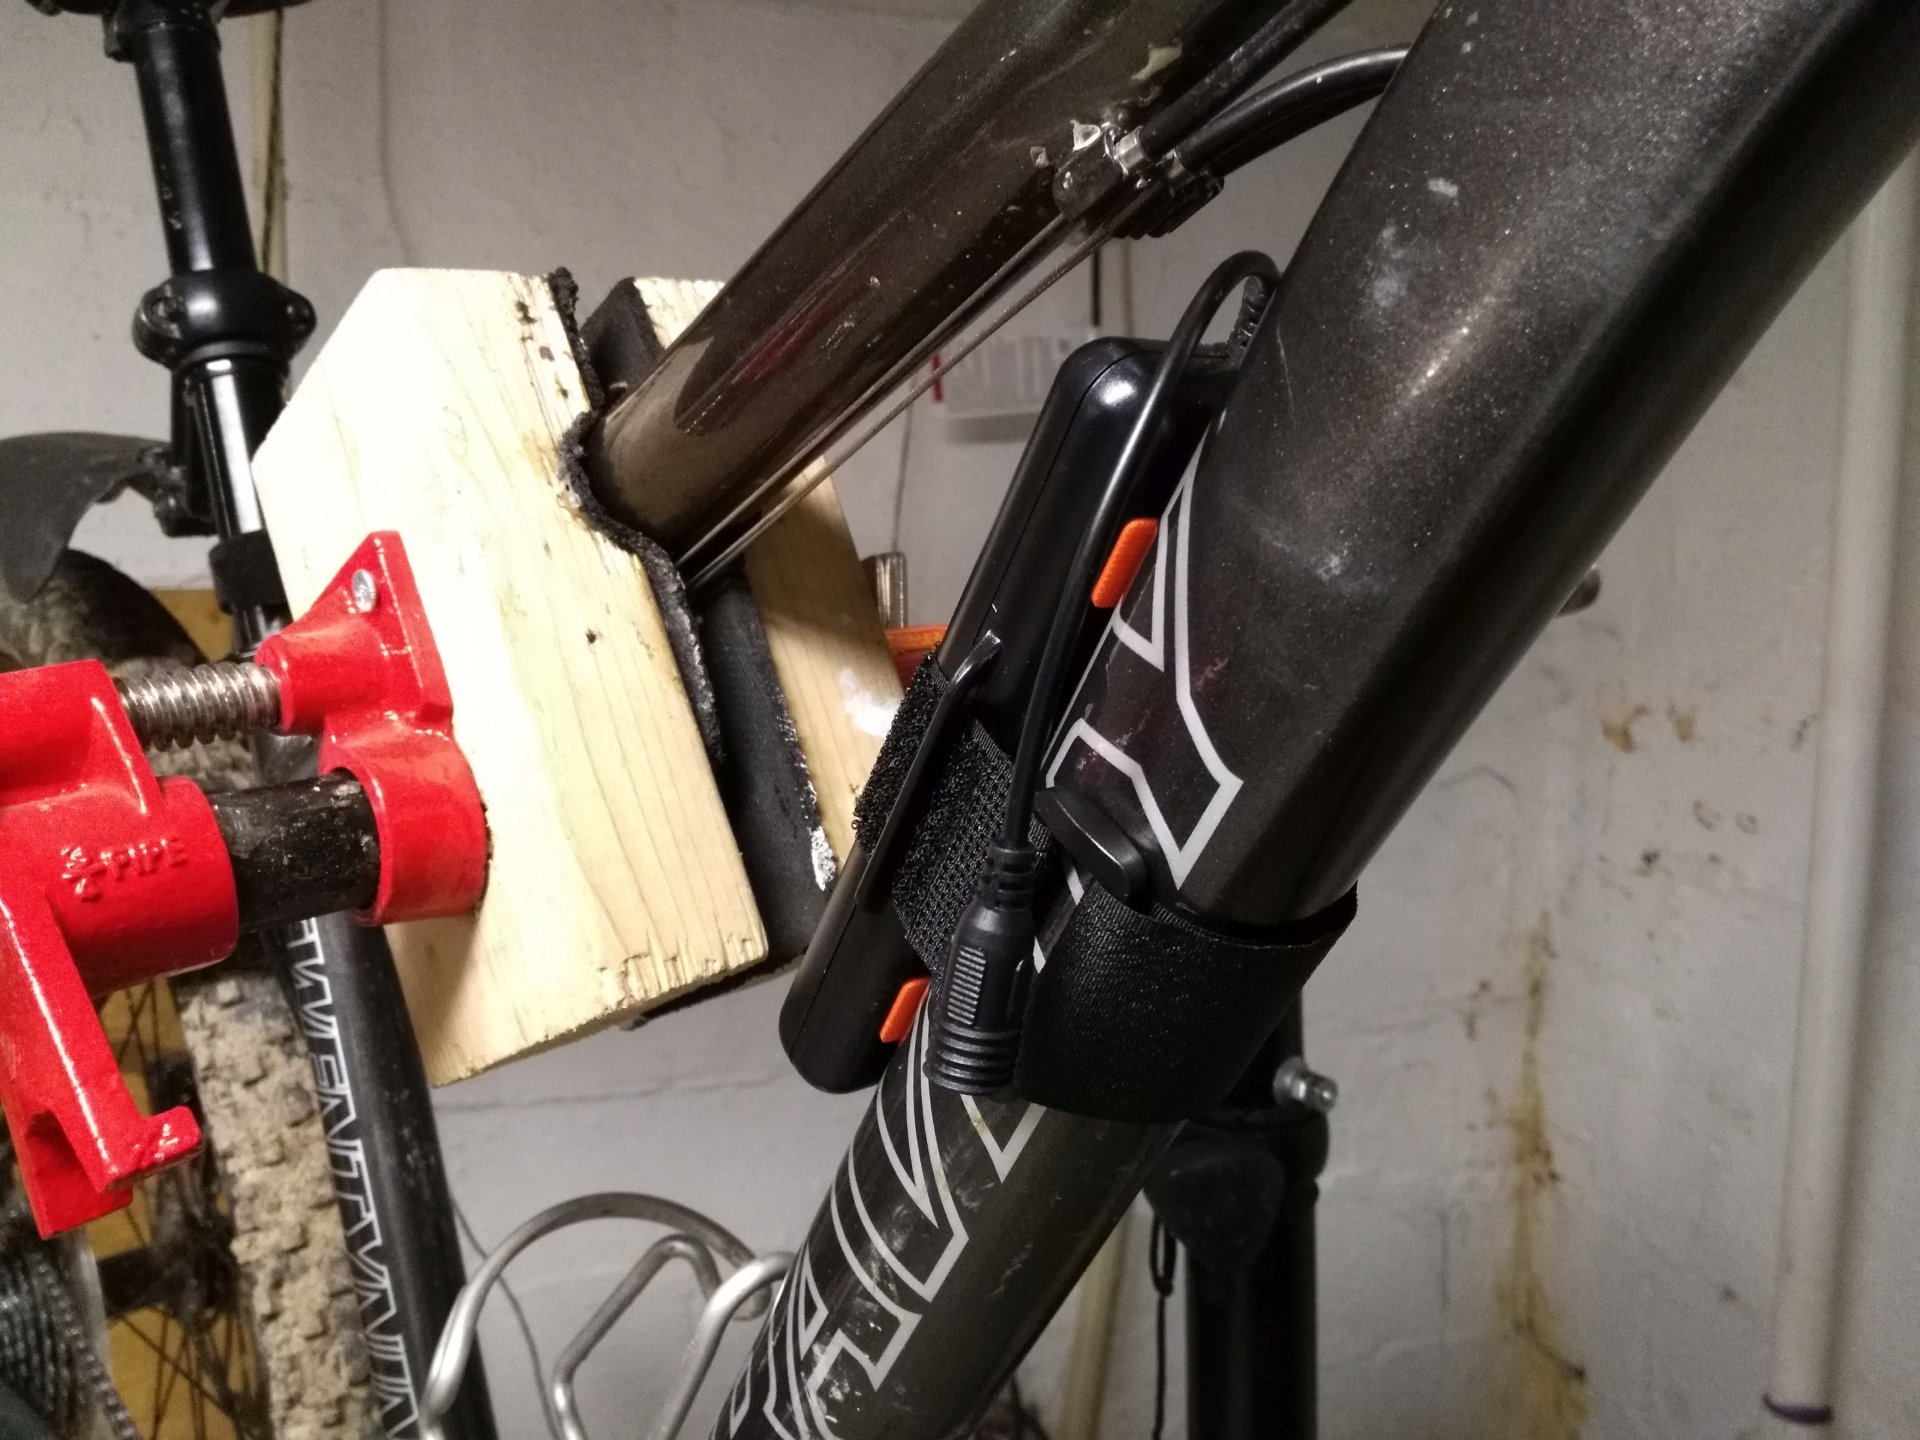
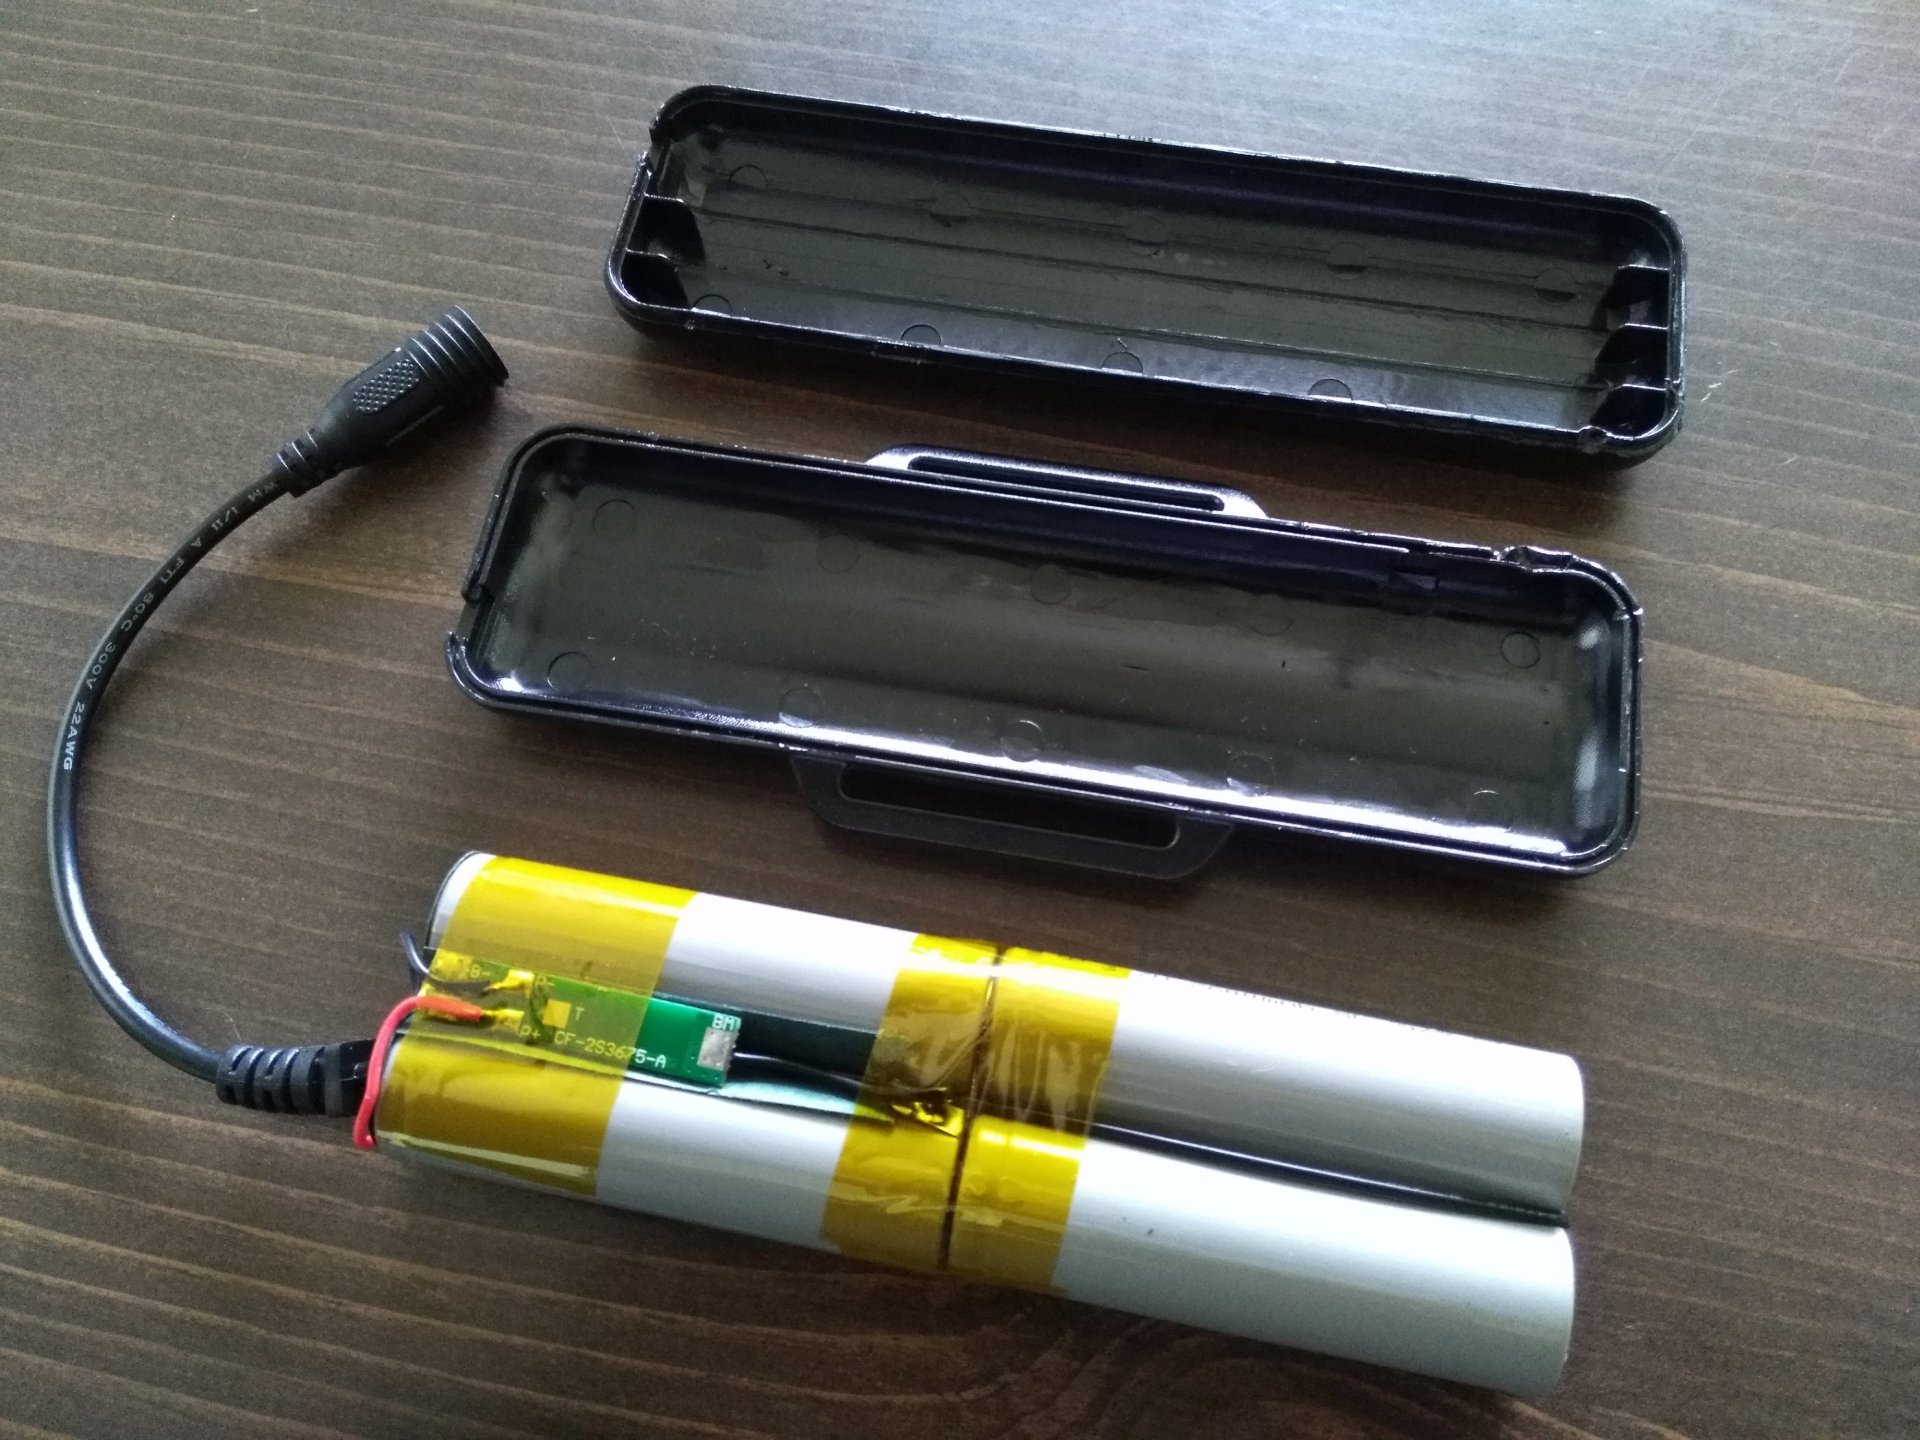
As you can see, there are some spelling errors on the battery pack itself. Everything has an appearance/feel of being decent quality. The rubber pads on the back of the battery case work well for their intended “anti-slip” purpose. The velcro strap is a much wider version than the one shown on Banggood’s product page and works well. I like this flatter more rectangular shape of the pack too.
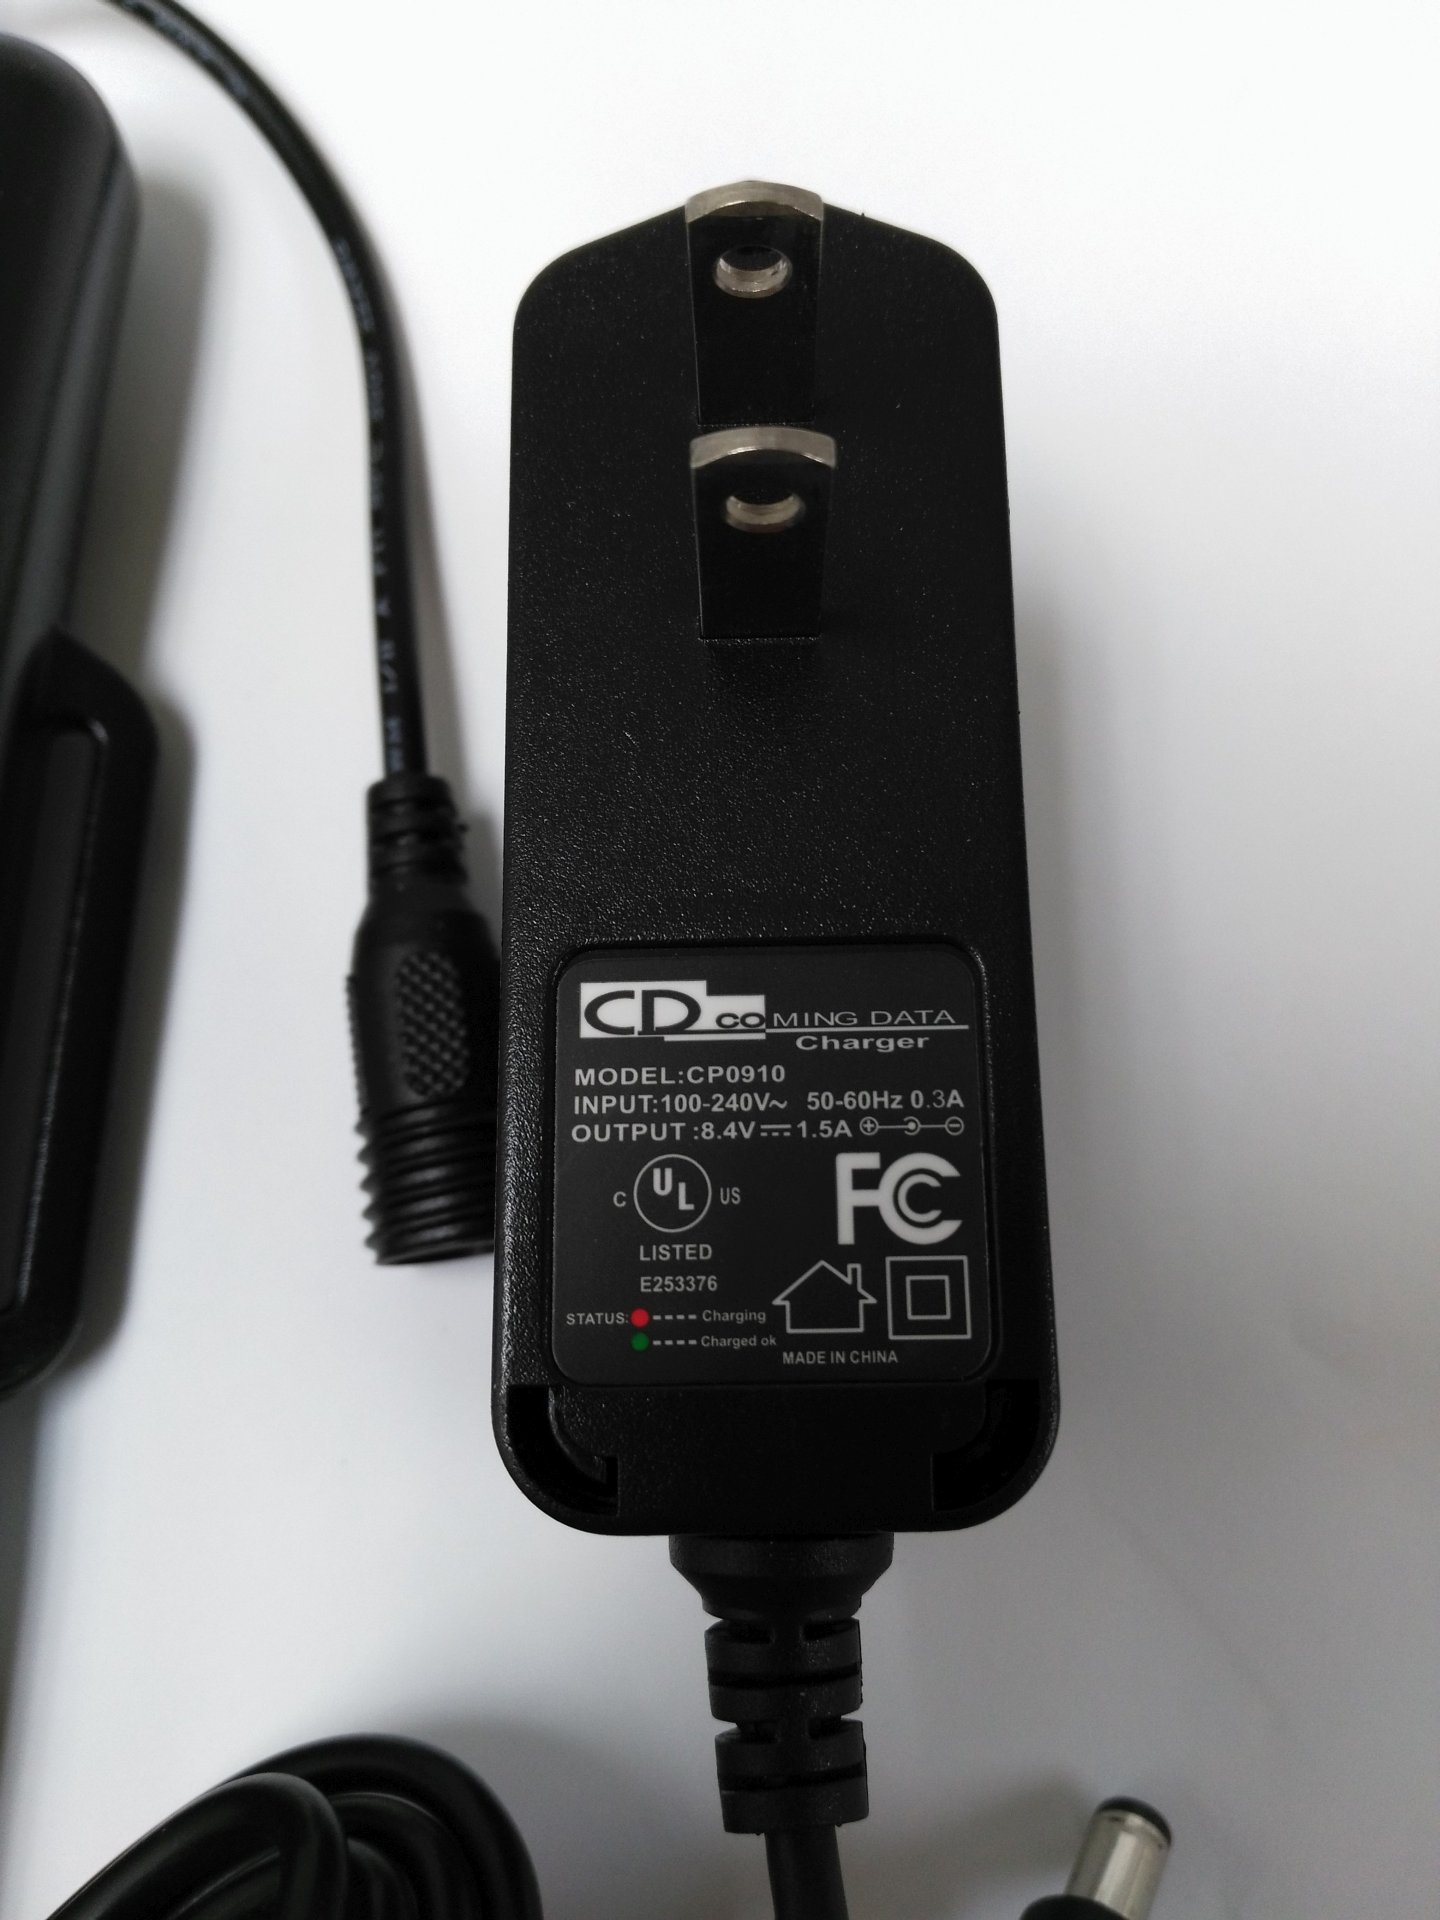
The pack arrived measuring 7.71v. The no load voltage of the charger is 8.40v, though it seems to change as my notes show it measured as high as 8.44v. Either way this voltage is acceptable. The charger is spec’d at 1.5A charge rate, but in my testing it only reached a maximum charge rate of 1.03A. However, it does seem to follow some sort of CC/CV charge algorithm as it does lower the charge rate after the pack reaches about 8.10v. The charger’s indicator turns green at about 8.34v, though the charger keeps charging albeit at a declining rate. The charge rate was down to about 0.07A at 8.40v and was reaching 0.00A by 8.43v. Many times I left the pack on the charger overnight without any issues. The charger does NOT rely on the pack’s protection circuitry for cutoff like some cheap “bad” chargers do. I’ll rate this charger as very good for a budget Chinese charger. (Note that I made no attempt to open the charger and verify it’s inner construction / circuitry as I don’t feel I’m qualified to do so.) The following are two short timelapse videos showing the charging process (in the first video I forgot to have the wall plug in view in order to see the indicator LED, and in the 2nd video it is charging a different battery pack):
www.youtube.com/embed/C3GH85VfxoI
www.youtube.com/embed/vM4Mthm_RWs
I wanted to complete a full discharge and recharge cycle before beginning discharge capacity tests so I connected my highly modded Revtronic (aka. Nitefighter) BT40S to the pack and monitored current pulled from the pack on Turbo. This light is modded to draw a calculated 4.0A and I have few battery packs/cases that can provide the full 4 amps. On this RockBros pack this light pulled 4.4A at start and over the course of 60 seconds it maintained over 4.20A! At that moment I knew I wasn’t reviewing a junk pack with recycled cells. Here is that 60 second test (sorry for what I believe is PWM affect in the video for the first 12 seconds until I reoriented the lighthead):
www.youtube.com/embed/-fULXeNZlpM
I then placed a small fan blowing across the BT40S and continued discharging the pack with the BT40S mostly on high mode. As an aside, the voltage indicator on the BT40S was red for much of the discharge and starting flashing red at 6.60v (goes to show that you should put much weight in the accuracy of those voltage indicators). The battery pack kicked in its over-discharge protection at 6.10v and wouldn’t reset until you plugged it into a charger. (I later discovered that this over-discharge protection kicked in a little early because the cell pairs were out of balance by 0.05v, more on that later.)
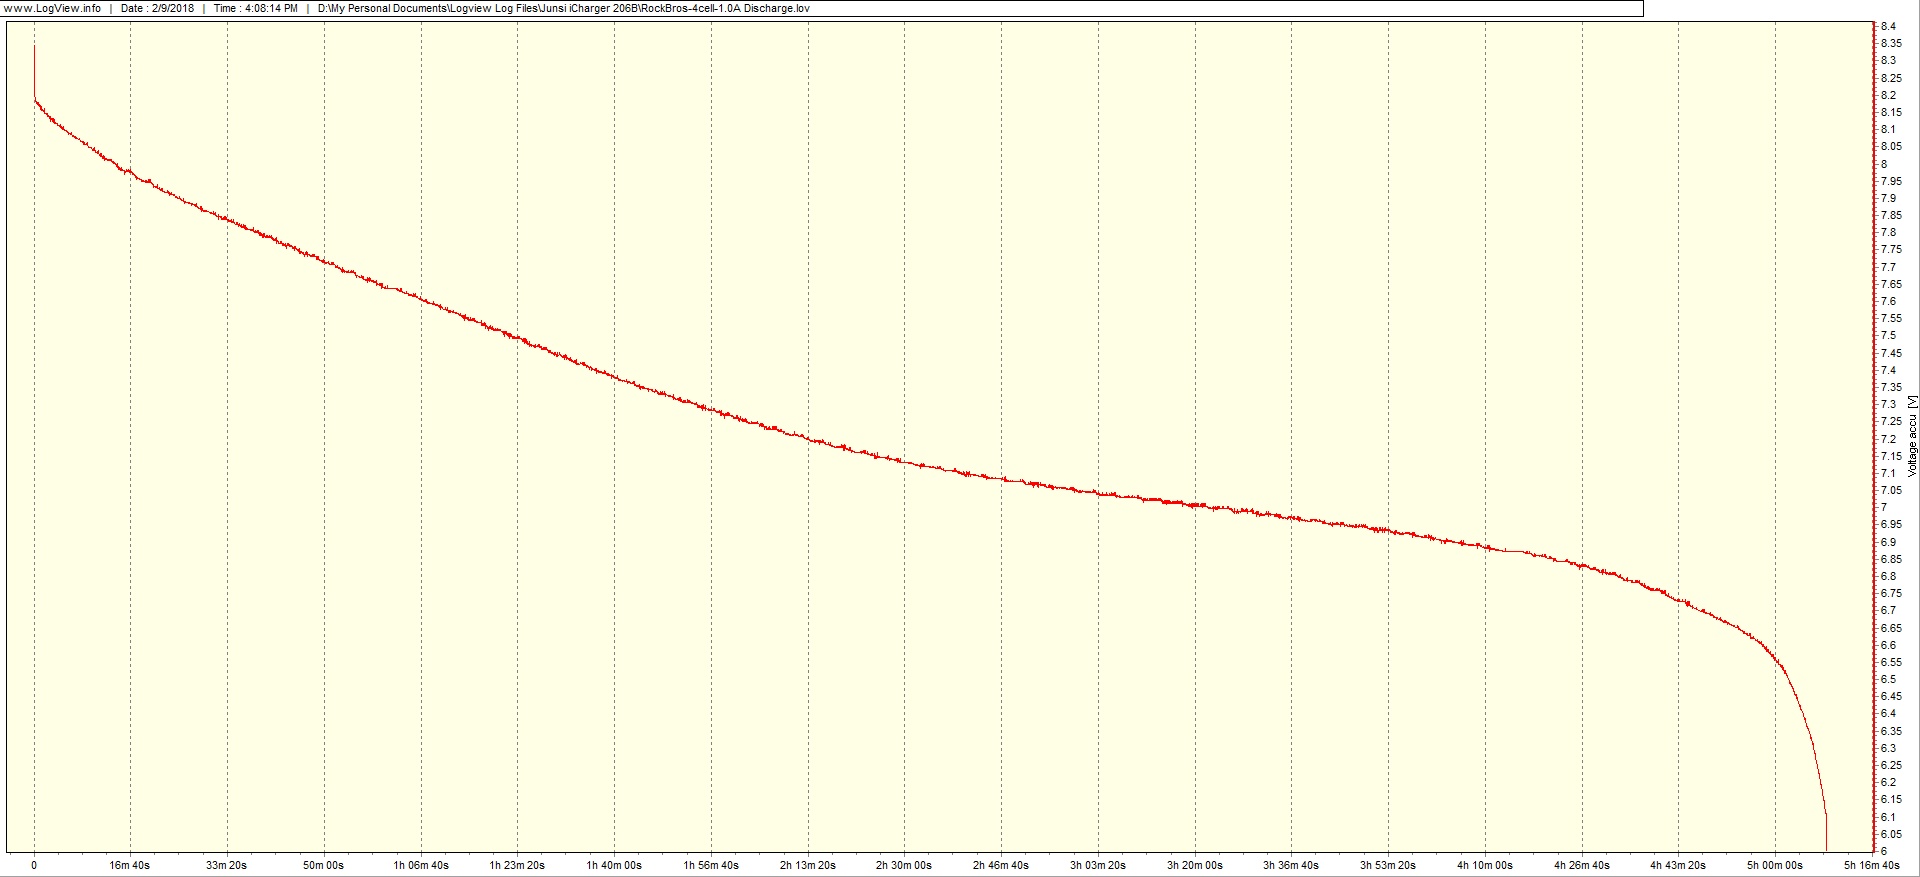
Next began discharge cycles on my rebranded iCharger 206bB (as received, no cell balancing or any modding). Each test was started from a fully charged pack as it comes off the included wall charger (thereby simulating exactly what a user would experience). I started with a 1.0A discharge down to 6.0v (pack protection kicks in before that anyway, so no sense trying to go lower). The test ran 5 hours 8 minutes, yielded 5,182mAh, and what appears to be a very good voltage curve.
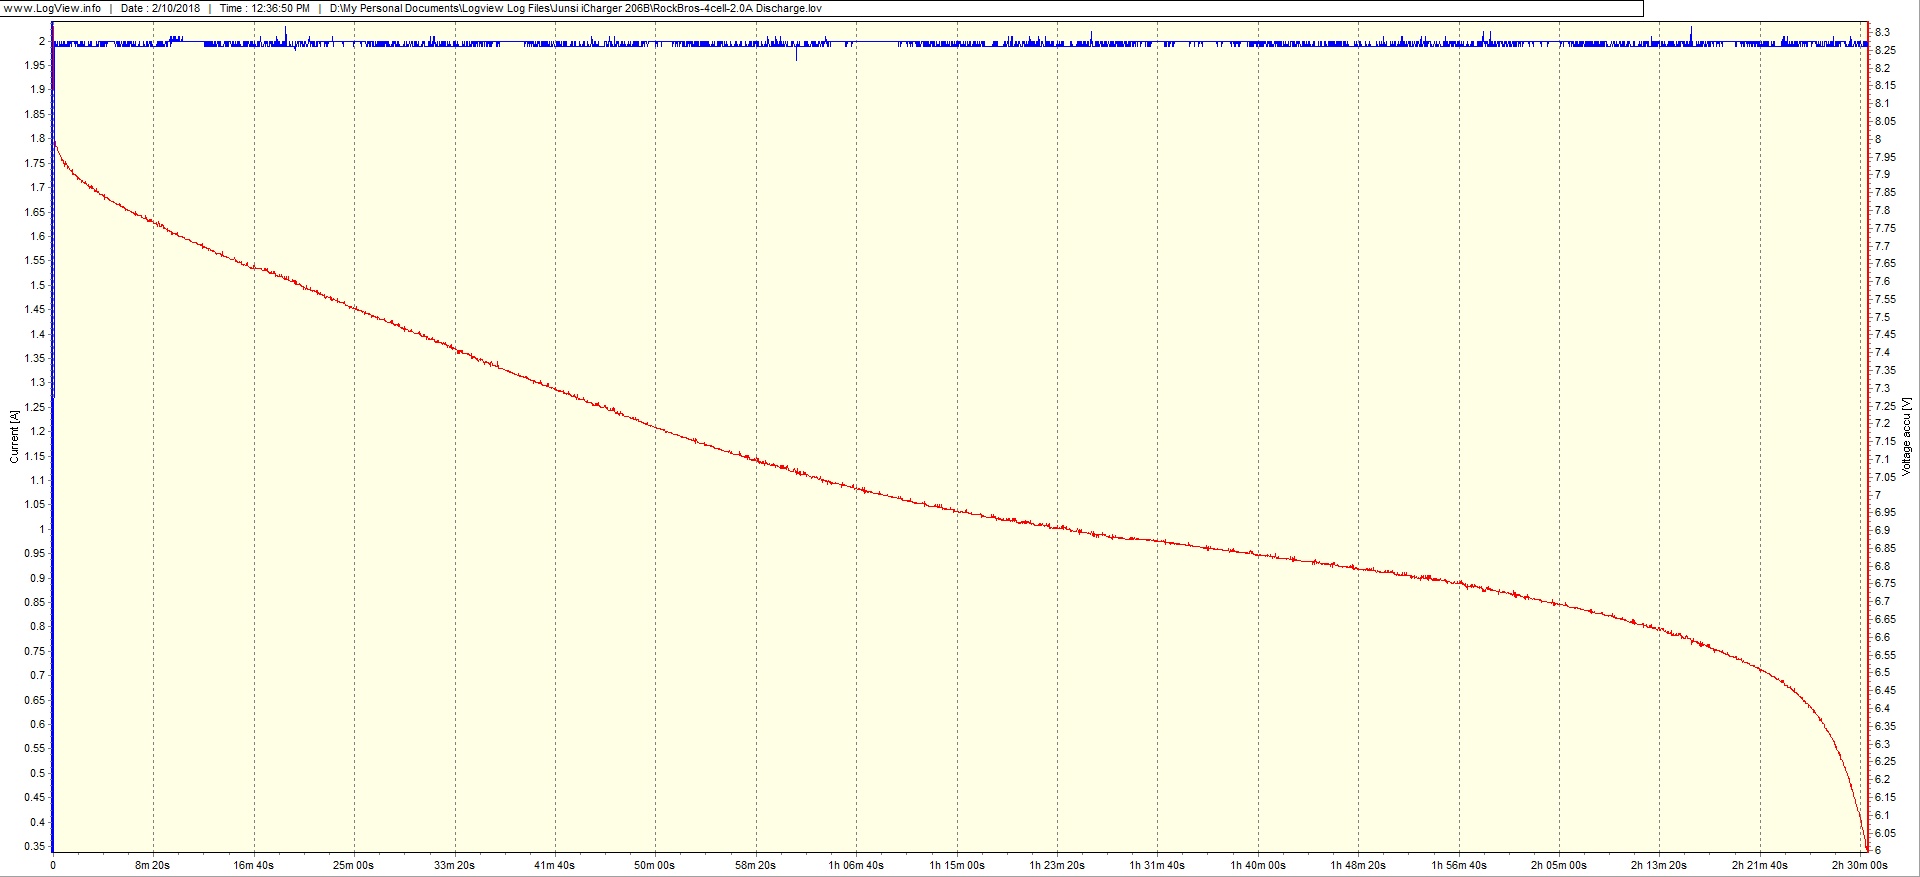
Next, I ran a 2.0A discharge test. This test ran 2 hours 30 minutes and yielded 5,045mAh. With a typical cheap Chinese pack I would have expected the capacity on the 2A test to drop drastically from the 1A test, but in this case it did not further indicating that I’m not testing low quality cells.
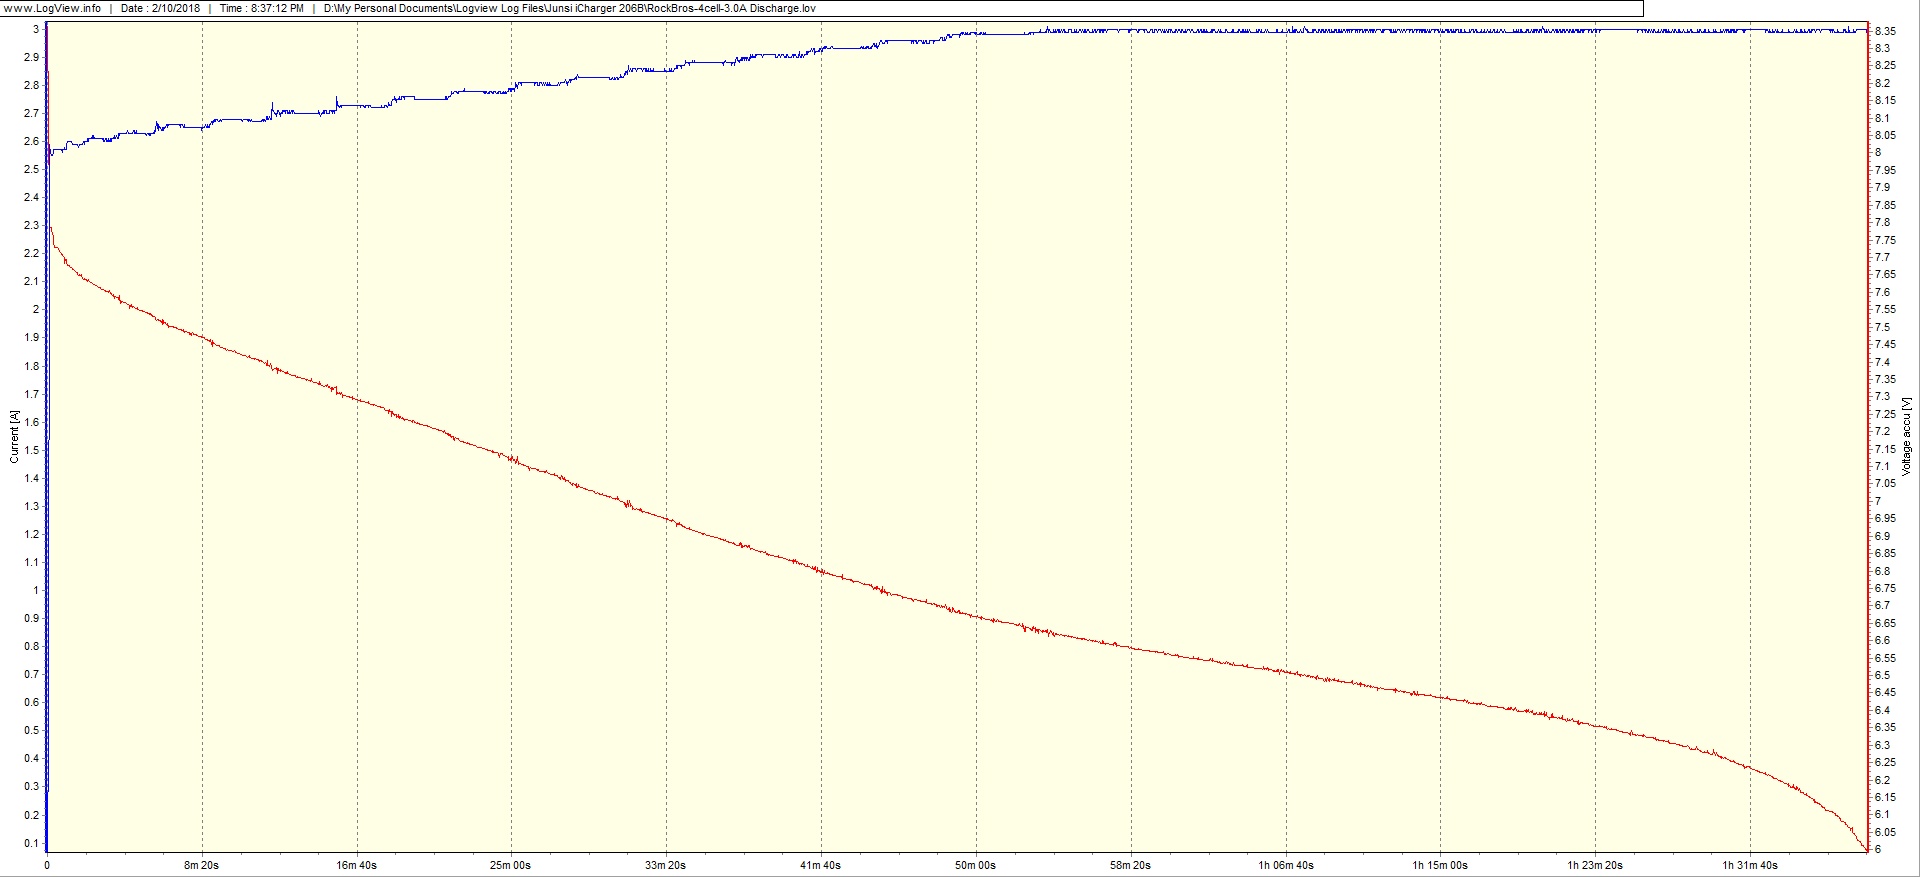
Next, I ran what I will call a 20 watt discharge (the limit of my hobby charger without discharging through an external load). This test started 2.5A current draw and increased over the course of 50 minutes to a max of 3.0A. (I actually set the hobby charger to 3.0A, so technically it drops below 20 watt at some point during discharge.) This test ran 1 hour 37 minutes yielding 4,745mAh, still very respectable.
Next, I disassembled the pack and checked out the internals. This pack was quite difficult to get apart. You have to be very careful while poking tools into the seams and prying that you don’t cause a short and let out the “magic smoke”! I’ve disassembled laptop batteries that were easier than this pack!
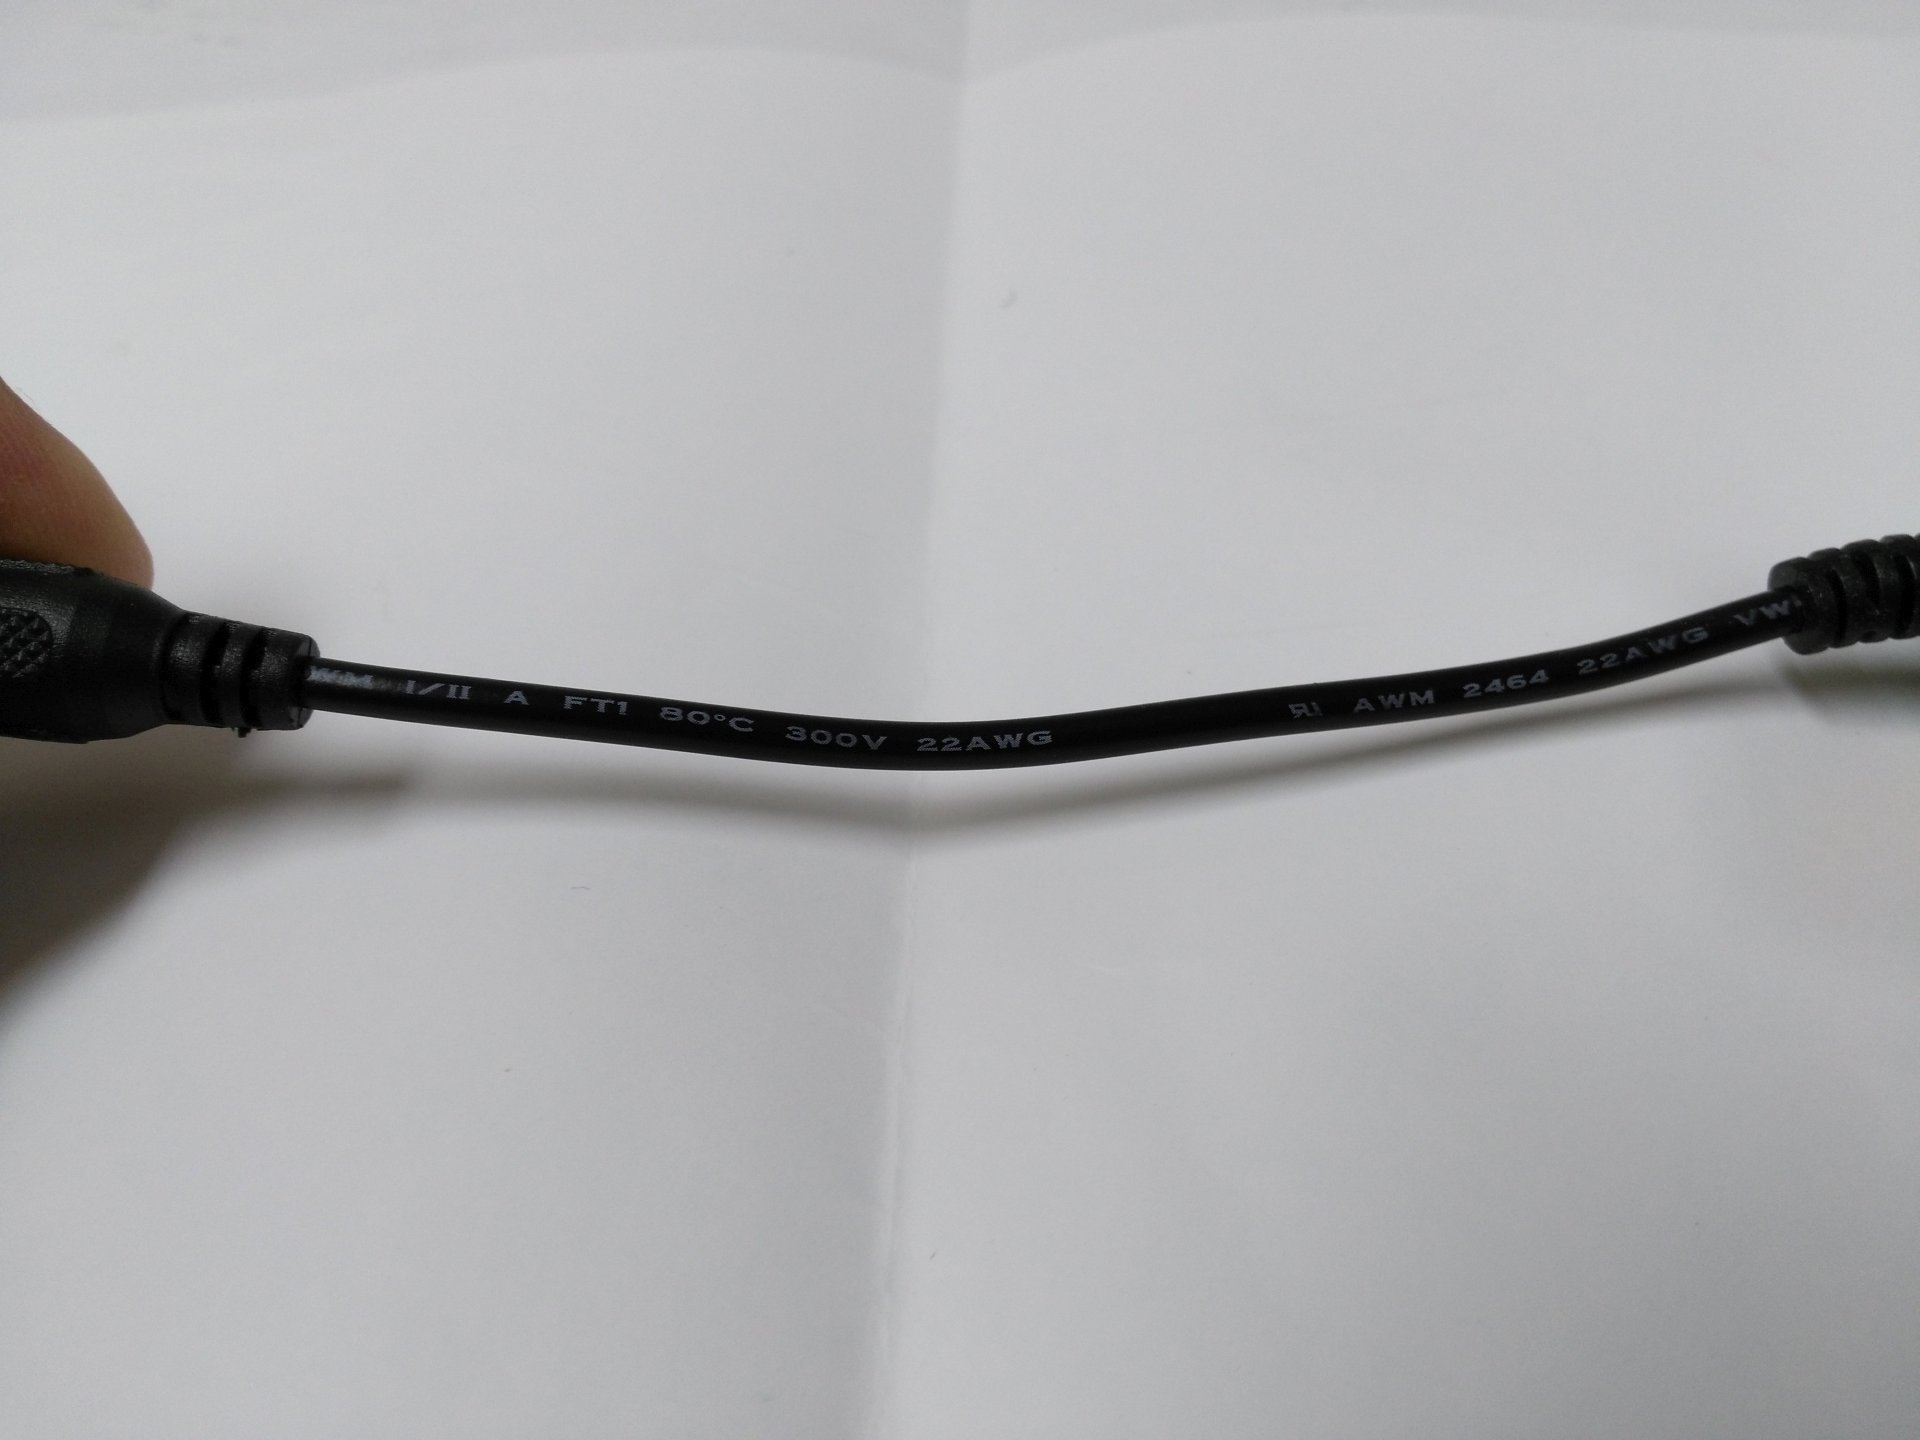
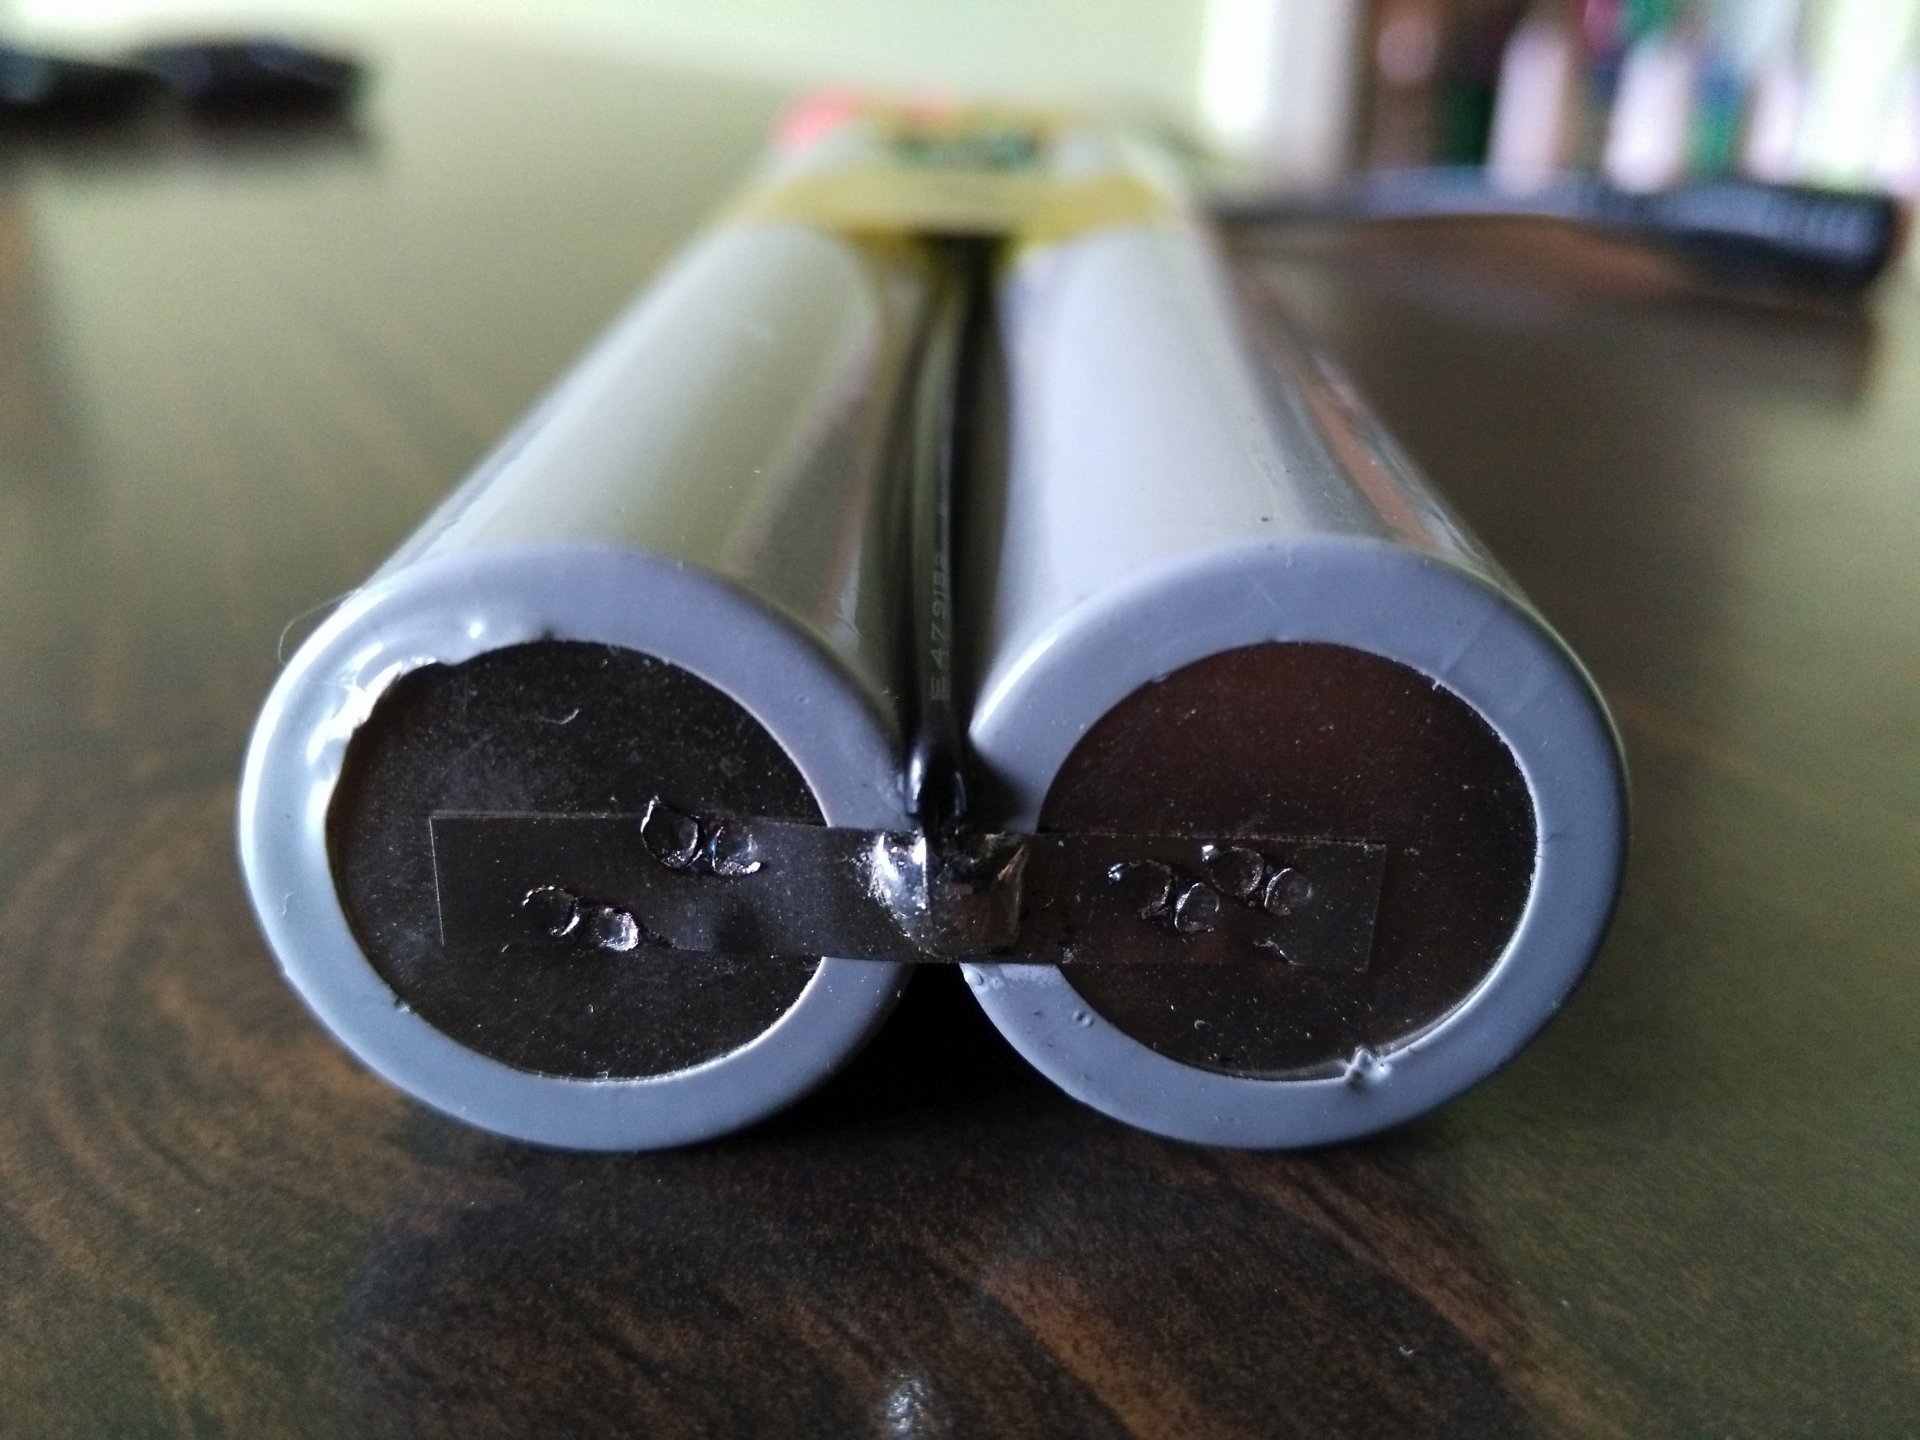
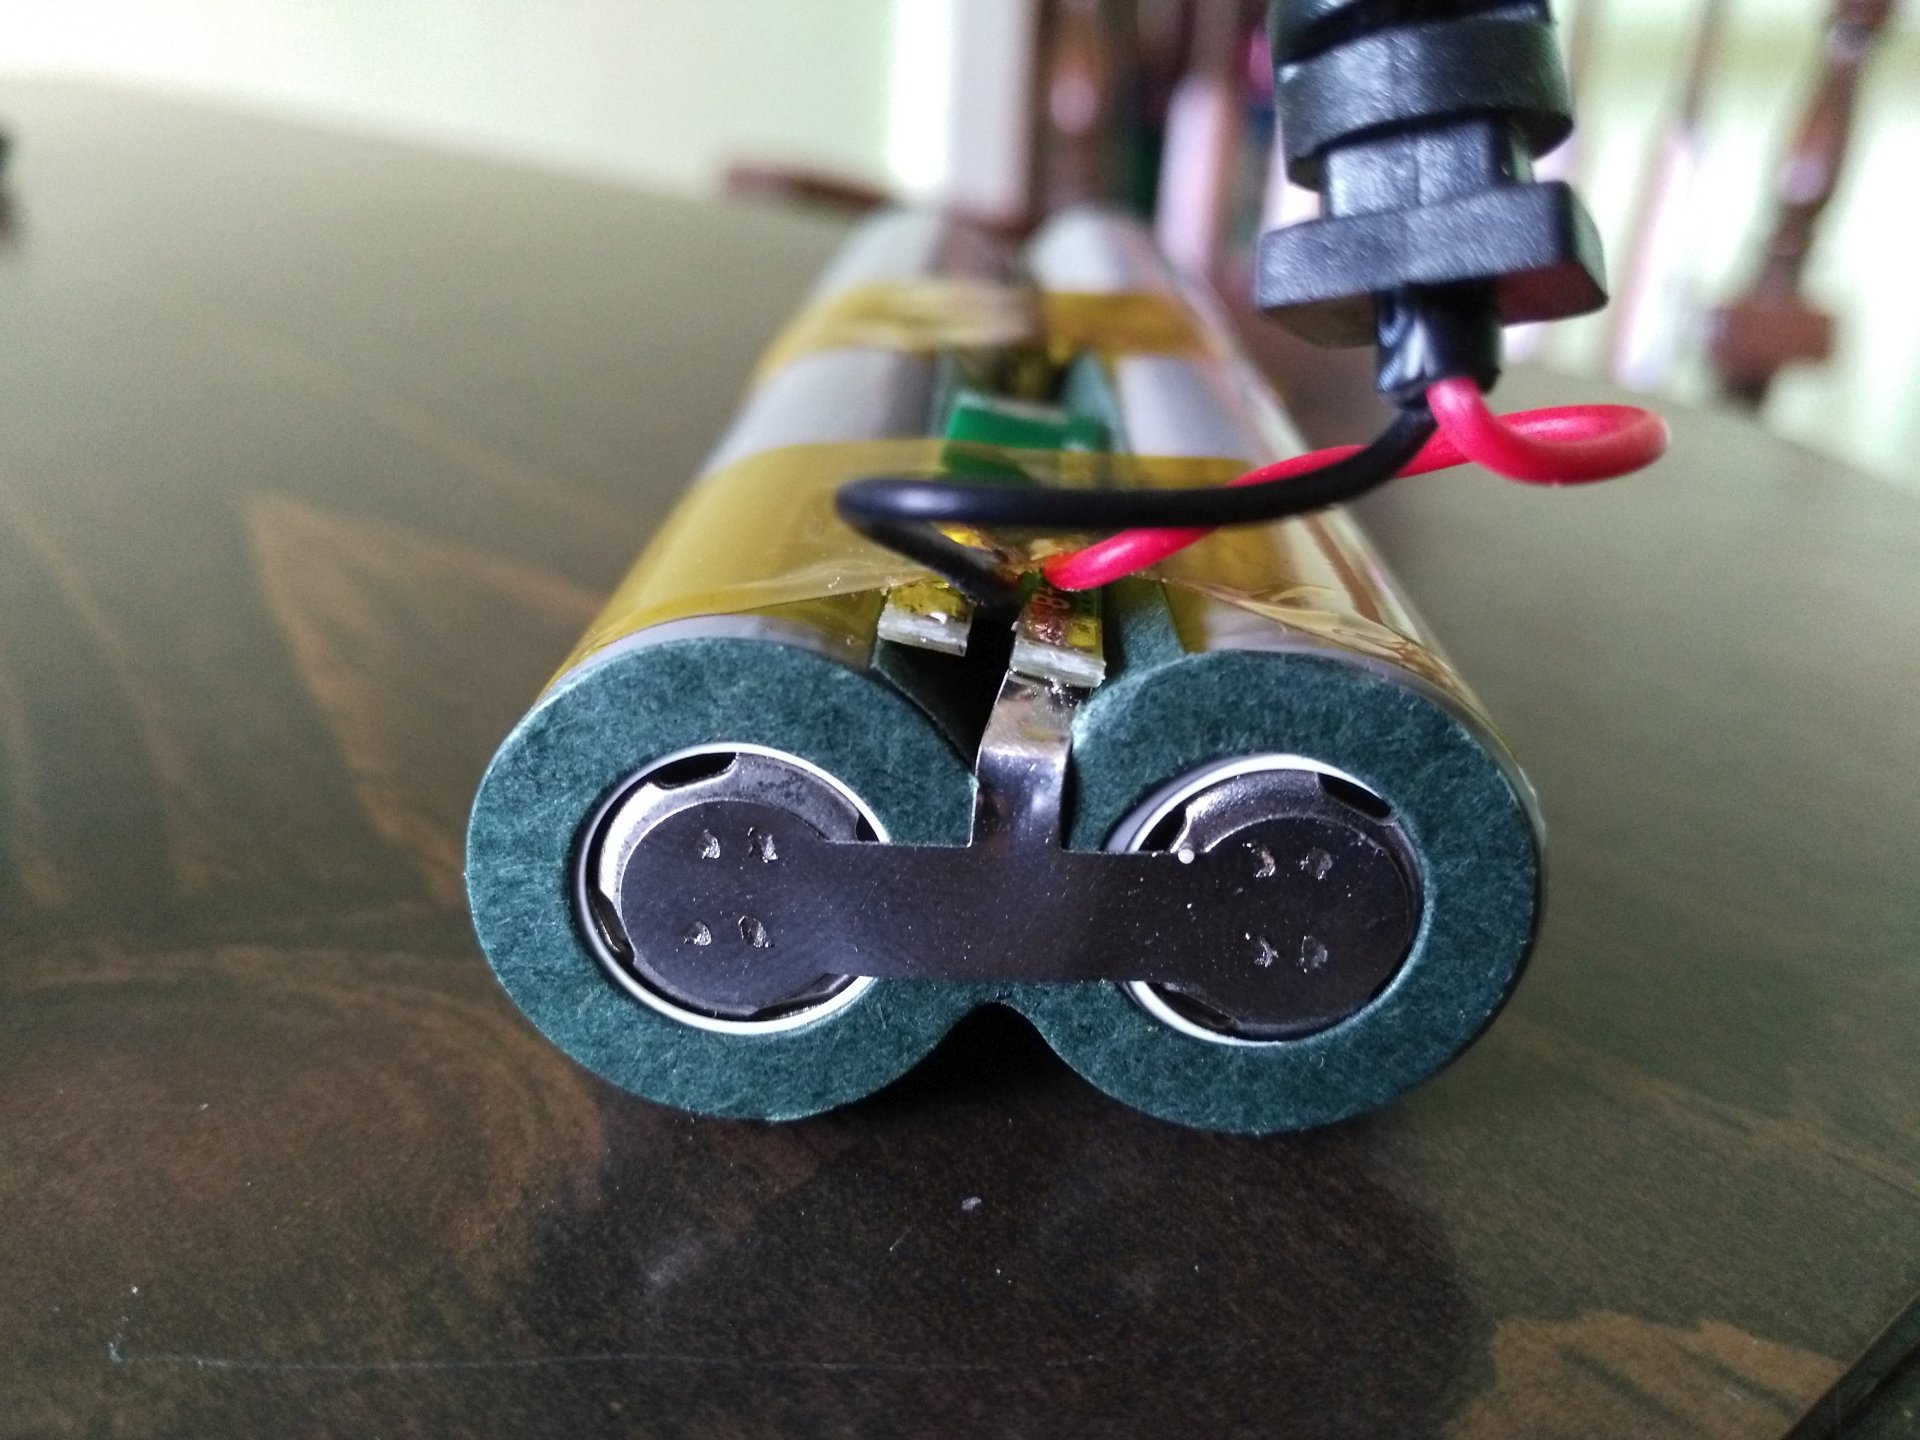
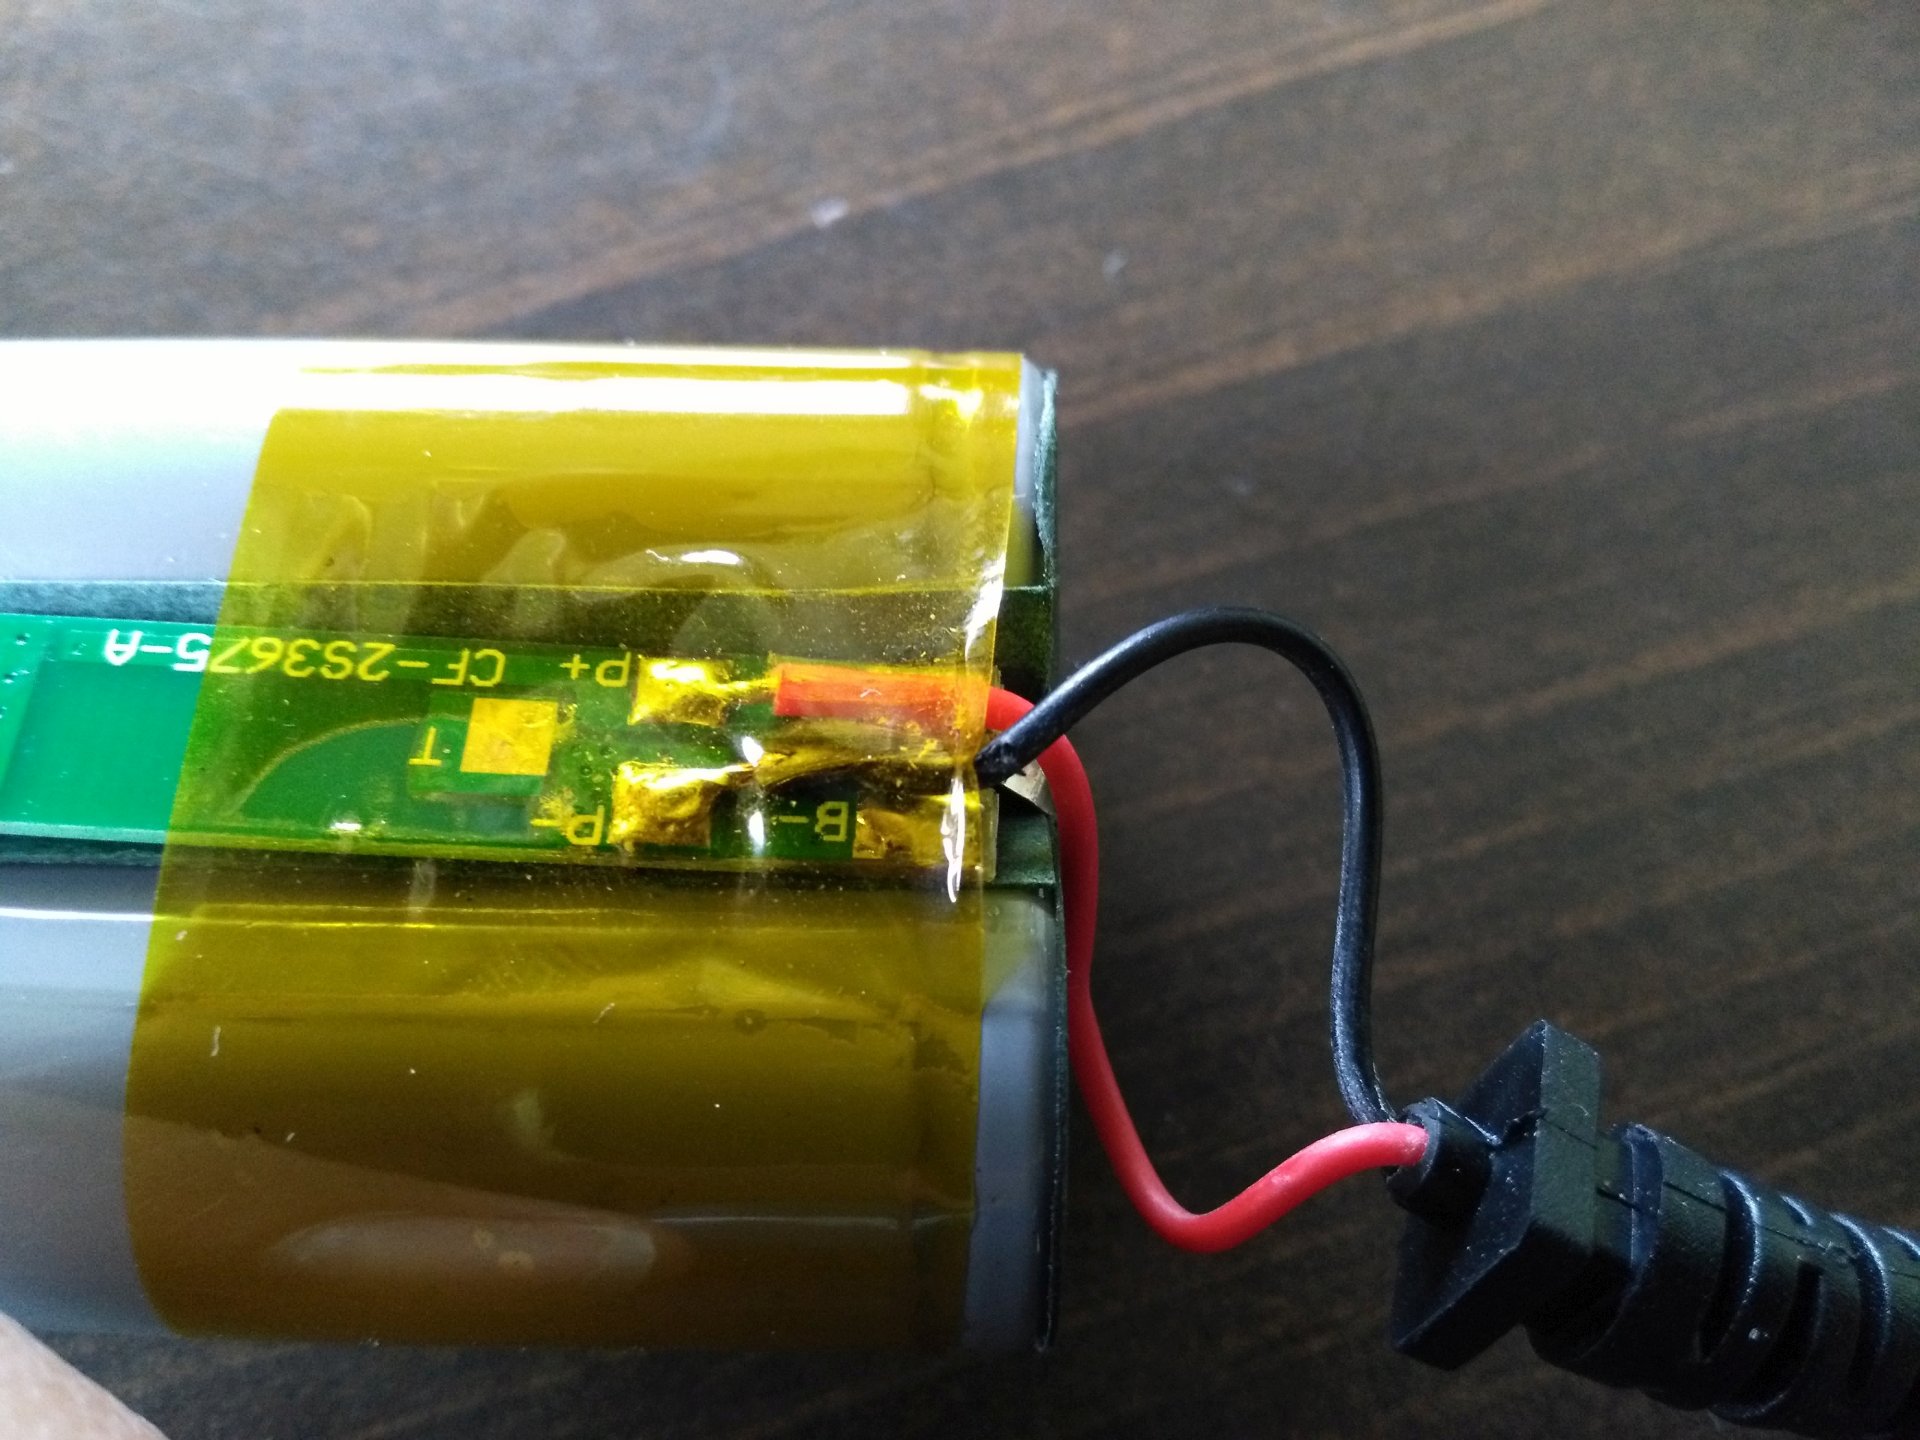
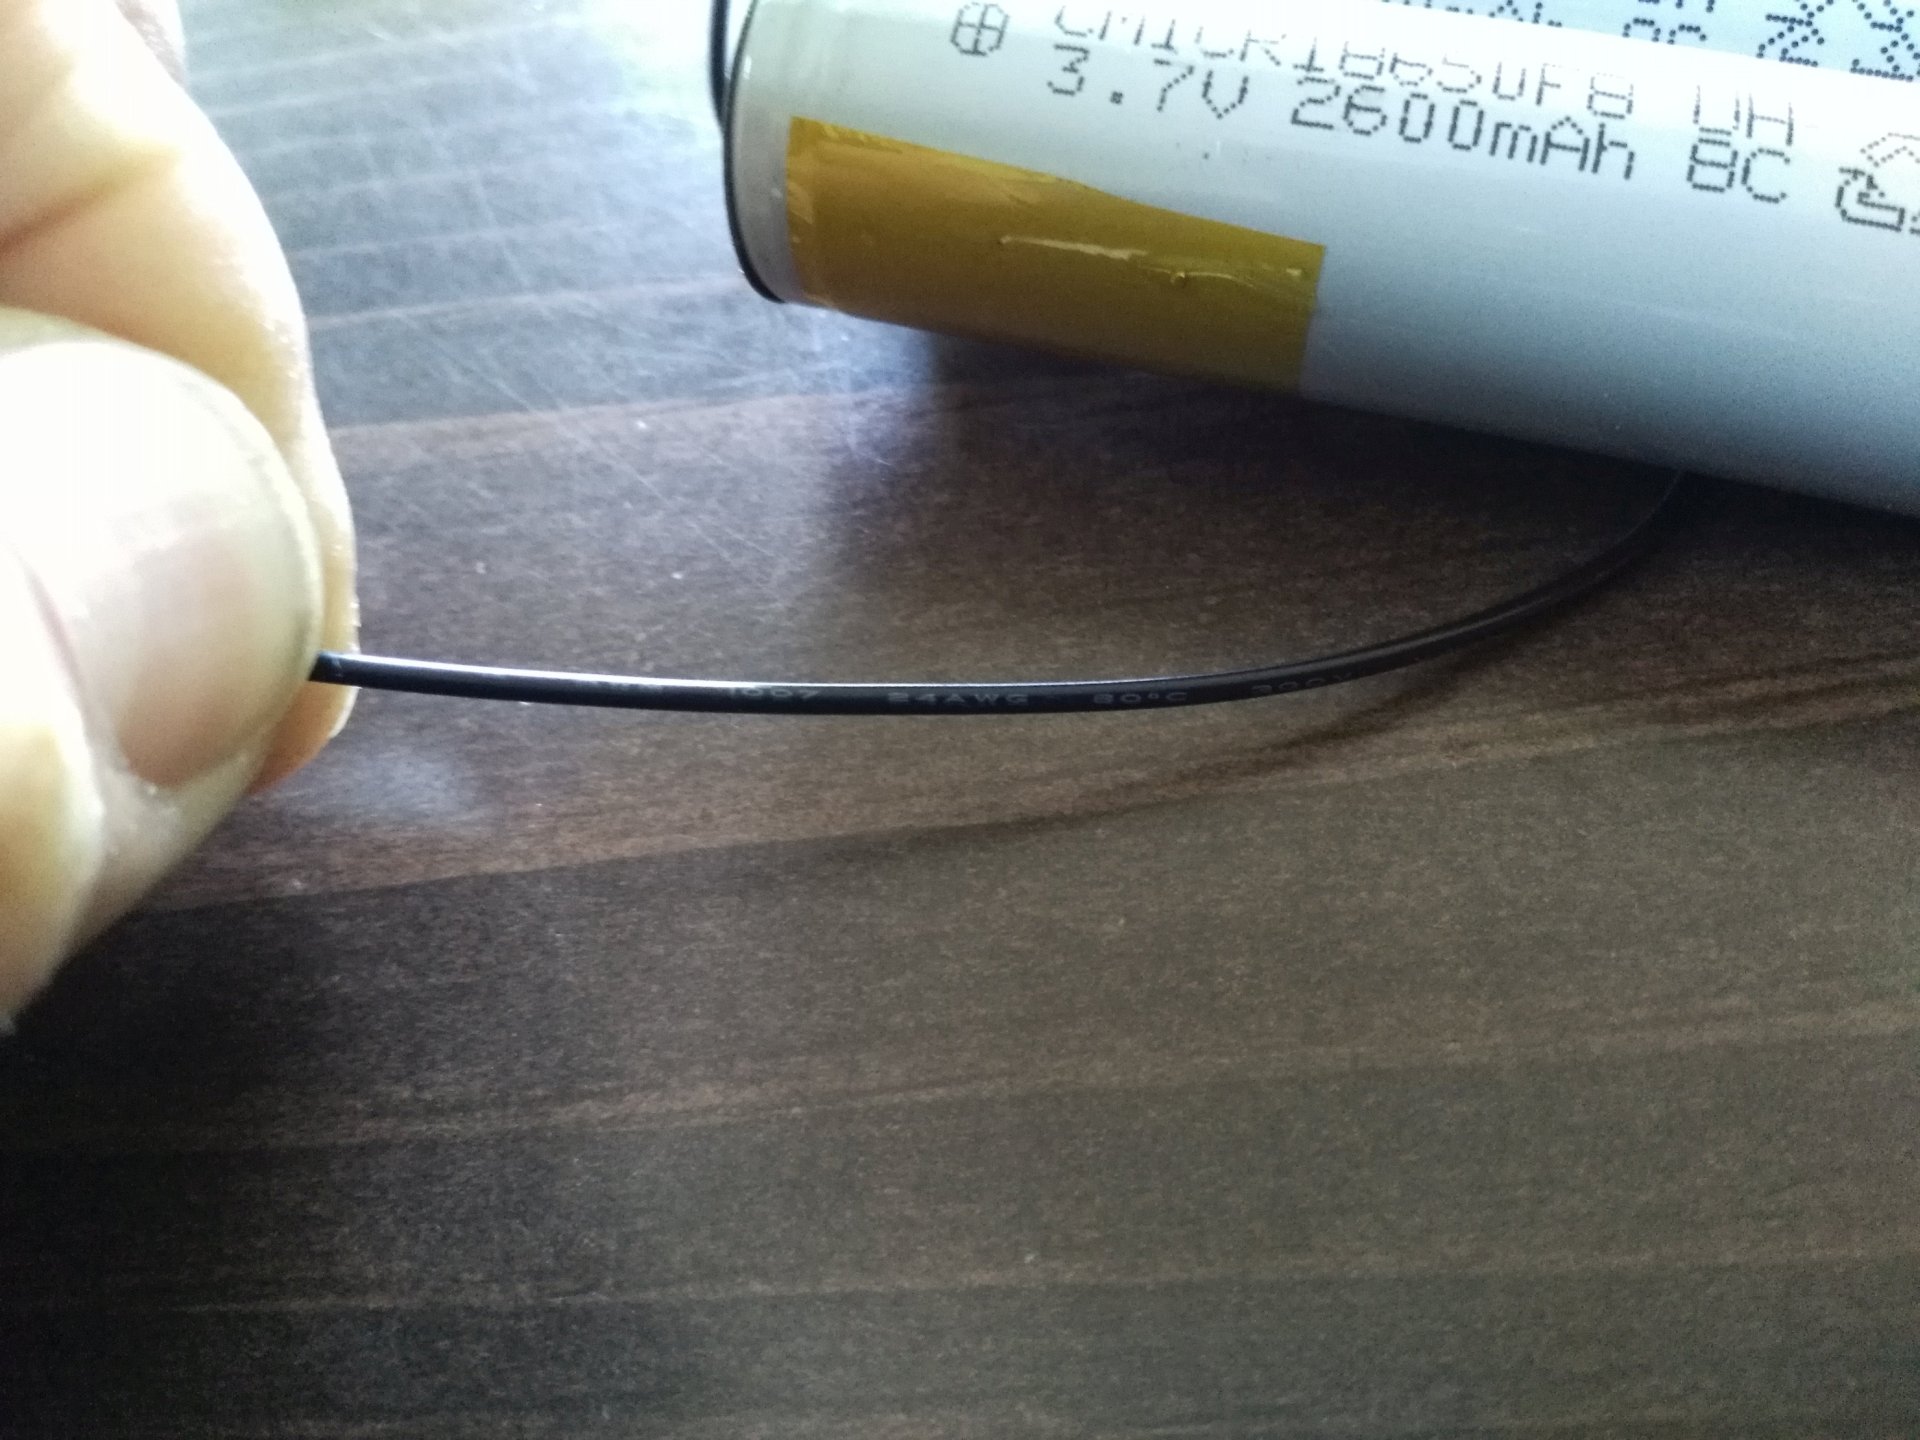
Inside I found four nice new looking 18650’s with a small protection circuit. The welds on the cells all looked very good and solid and so did solder joints. There was also good use of kapton tape. Wires between the cell pair contacts and the protection pcb were only 24AWG, but this seems to be acceptable. Measuring voltage of the cell pairs showed they were out of balance: first pair at 4.20v and the second pair at 4.15v. This explained the cutoff voltage being a tad high at 6.10v (3.05v per cell) instead of 6.00v (3.00v per cell).
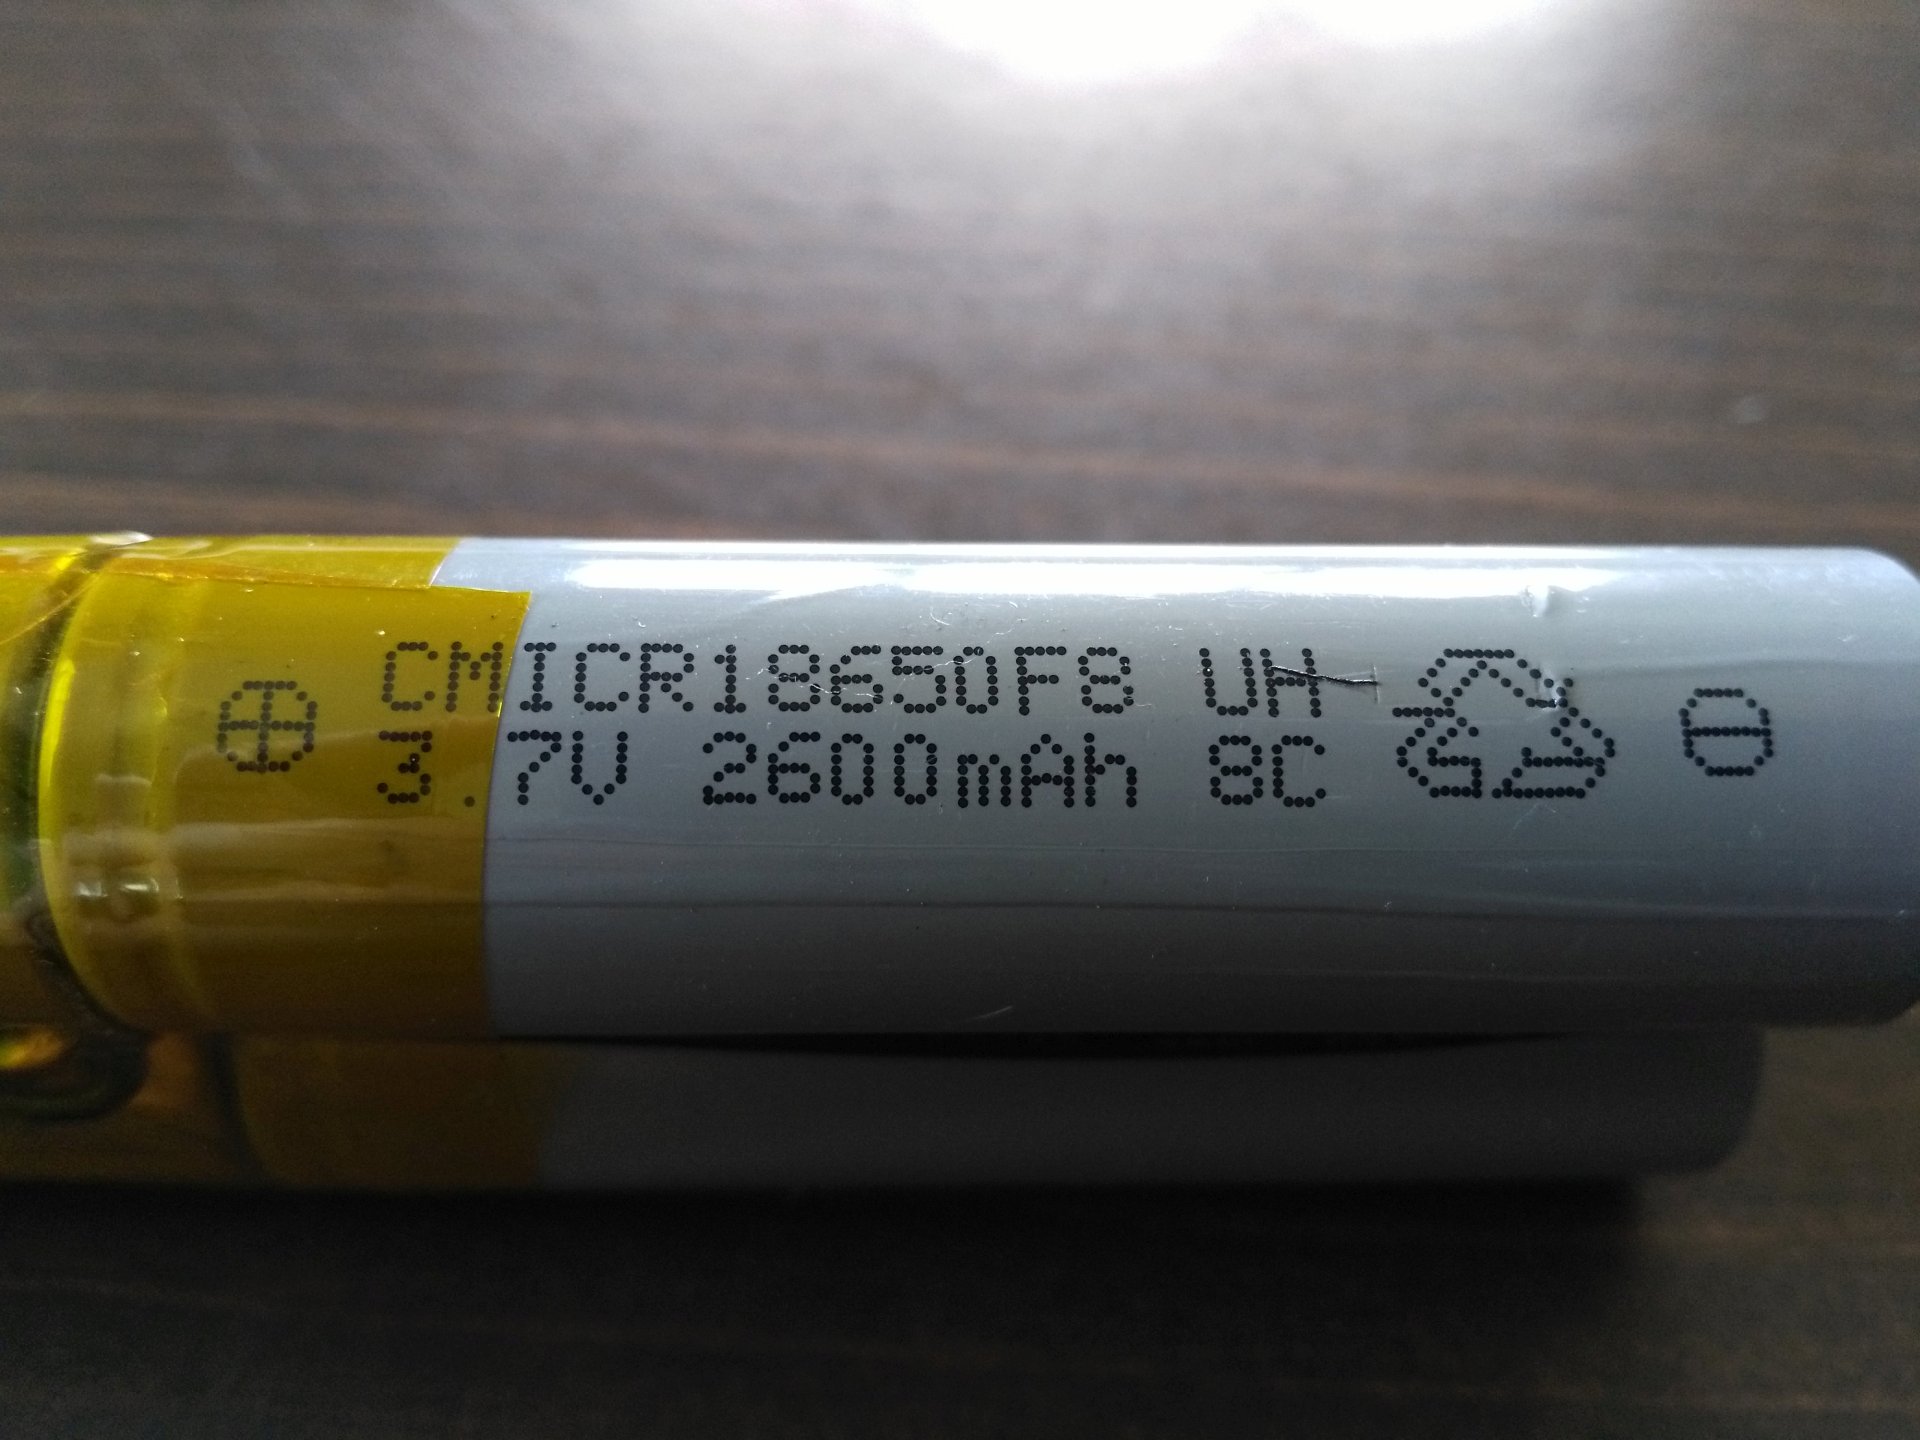

The cells are labeled “CMICR18650 F8 UH 3.7v 2600mAh 8C”. A Google search seems to indicate these are manufactured by “Shenzhen Eastar Battery Co., LTD and it’s listed as a “High Energy Cylindrical Cell”. The datasheet can be found here: http://p.globalsources.com/IMAGES/PDT/SPEC/677/K1151862677.pdf
According to the datasheet, these are a 4.20v cell rated for a discharge cut-off of 3.00v, standard charge rate of 0.2CA (520mA per cell, or 1040mA for this pack), rapid charge rate of 0.5CA (1.3A per cell, or 2.6A for this pack), and rated for a max discharge rate of 2.0CA (5.2A per cell, or 10.4 for this pack). These cells are rated for at least 300 cycles of use. If you have the time, be sure to review the “Safety Performances” and “Environmental Tests” section of the datasheet. These tests remind me of the extreme testing performed by Samsung on their cells. I have no experience with this brand of cells, but they appear to be at least a decent quality cell, if not a very good quality cell.
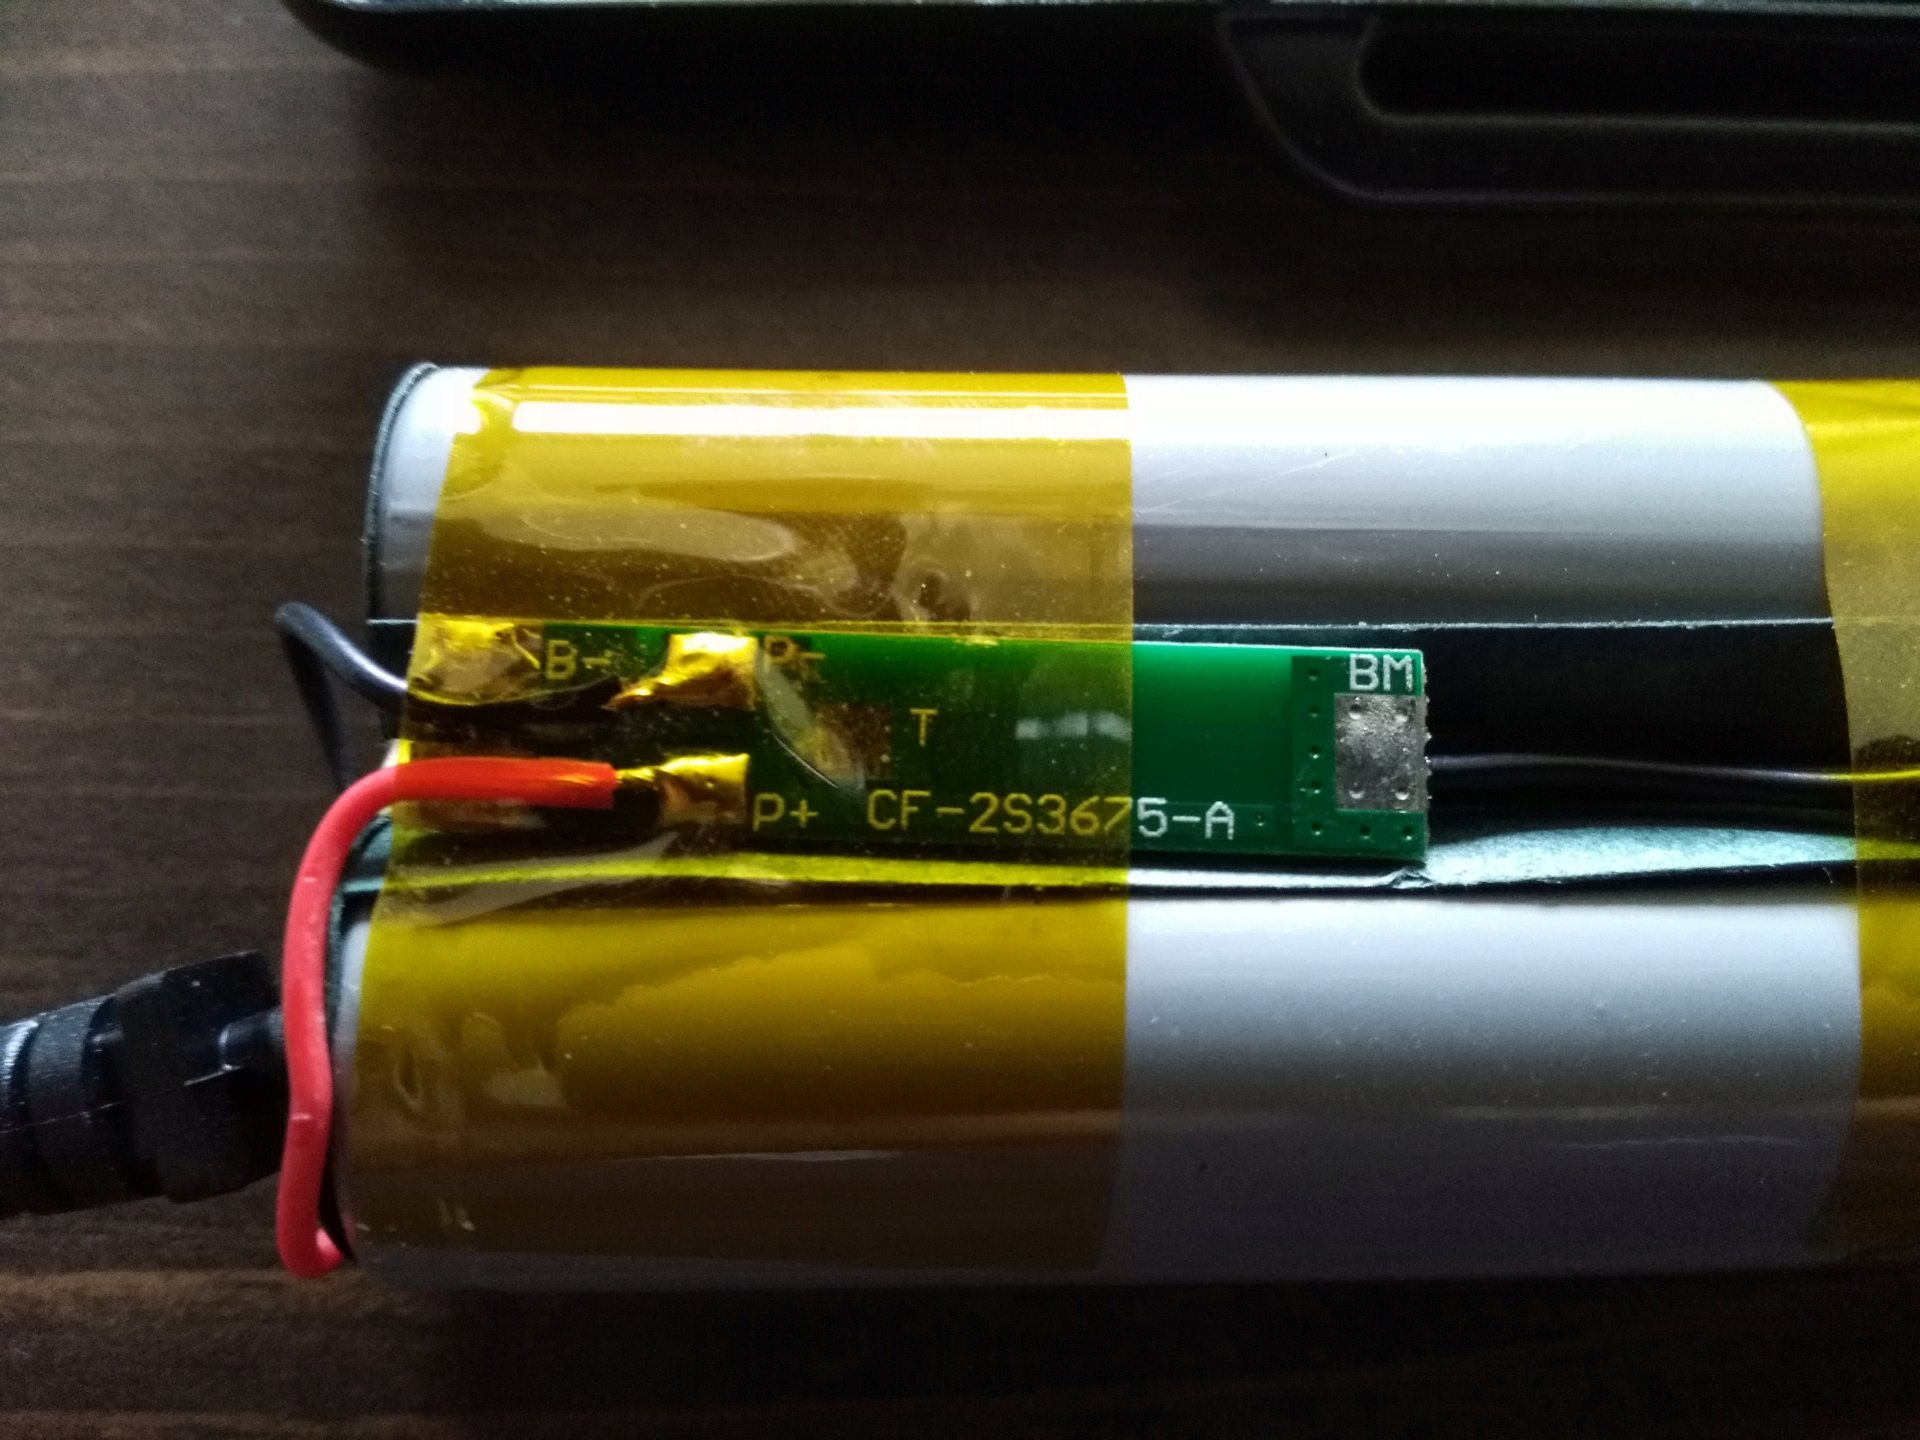
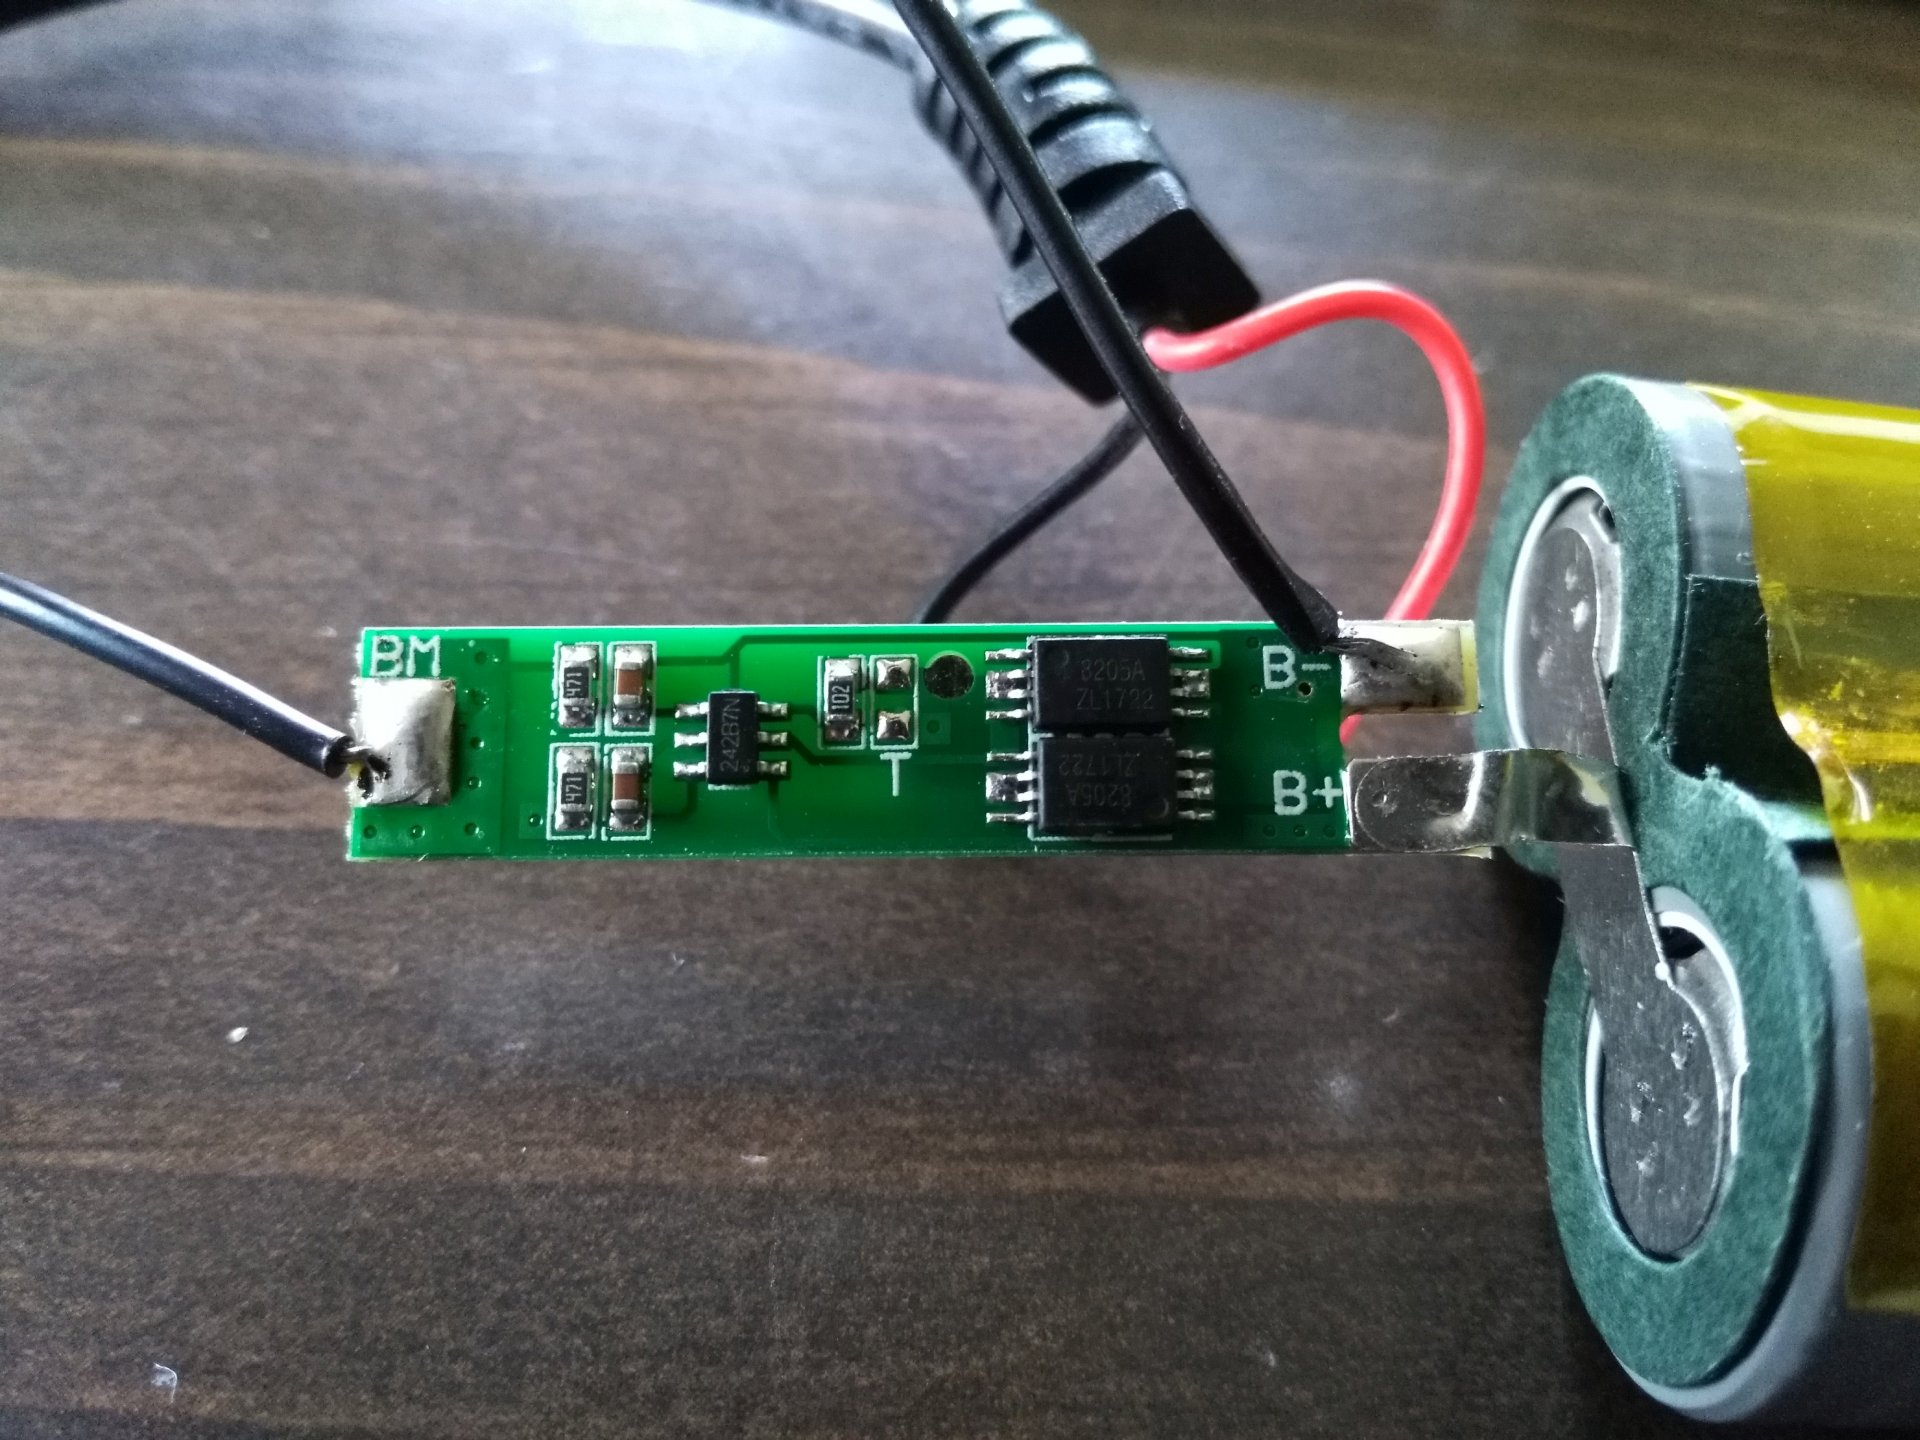
Next, I investigated the protection circuit. The pcb is stamped “CF-2S3675-A”. I found a Russian webpage that shows specs linked here through Google Translate: https://translate.google.com/translate?hl=en&sl=ru&u=https://tagelkit.ru/goods/Kontroller-zaryada-razryada-2-h-Li-Ion-18650-7-4V-3A-CF-2S3675-A&prev=search
Apparently, there is a 3A and 5A version of this circuit. Please note that this webpage is showing specs on the 3A version. I’m assuming this pack uses the 5A version since I was able to pull over 4A from it. I think I am correct in this assumption because that Russian webpage only shows 1 MOSFET on the 3A pcb and the pcb in this pack has 2 MOSFETS. The MOSFETS by the way are the ubiquitous 8205A variety. According to the listed specs, this pcb provides short-circuit protection, over-discharge protection set at 2.9v, and over-charge protection at 4.28v. This 3A version lists over-current protection at 4.5A. Note that I did not test the over-charge protection level as I don’t have a charger that over-charges cells and the included charger should never reach that voltage level.
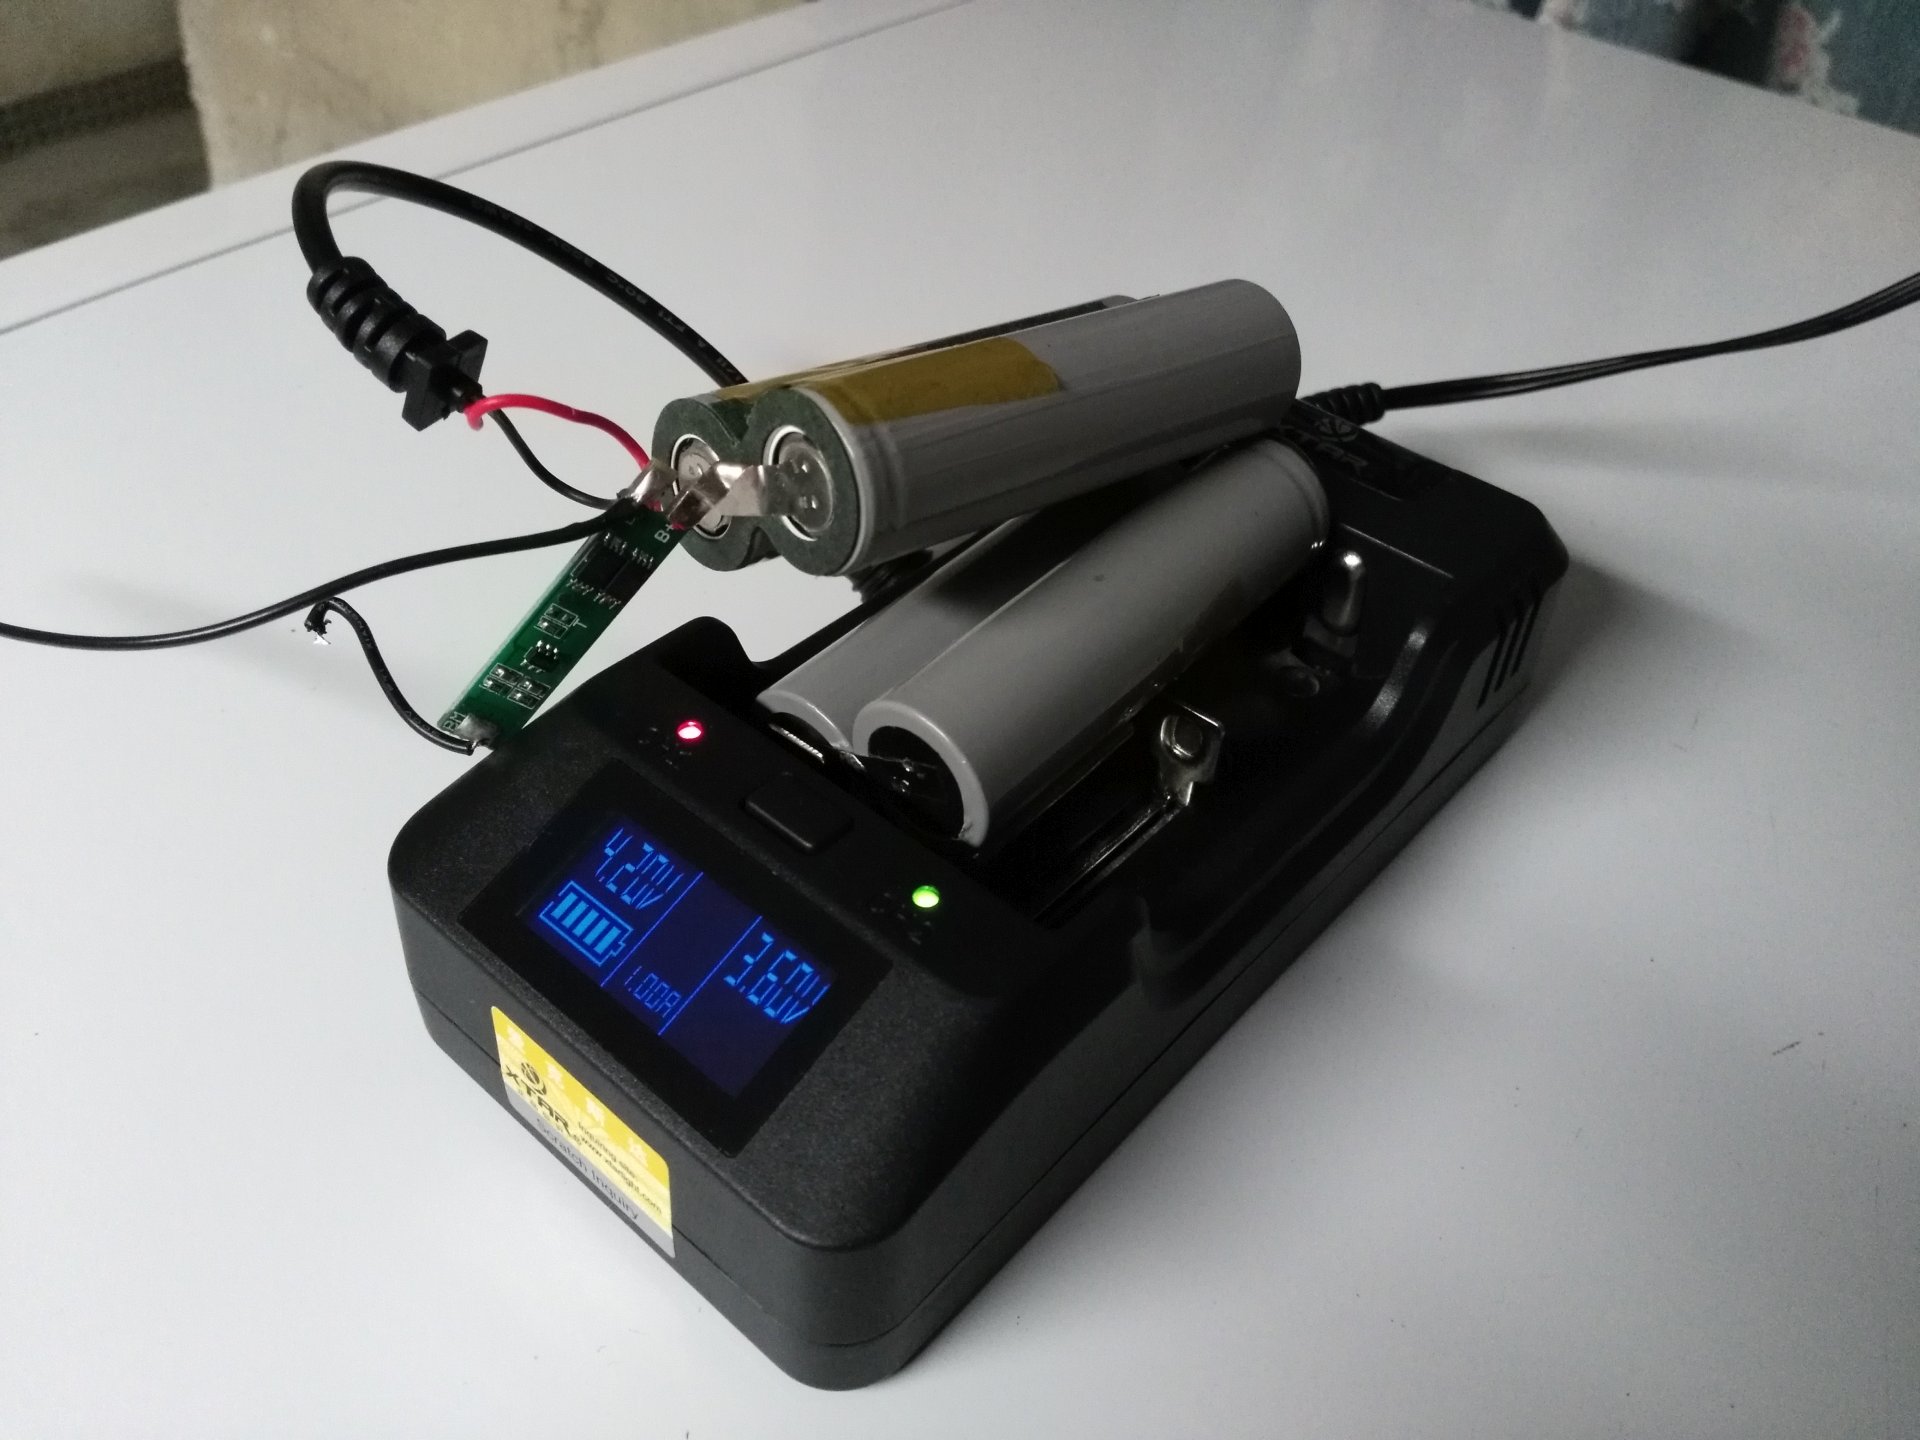
I then balance charged the cell pairs and soldered a balance lead in place in order to monitor the cell pairs on additional tests with the hobby charger. To initially balance charge the cell pairs I simply used my XTAR VP2 charger:
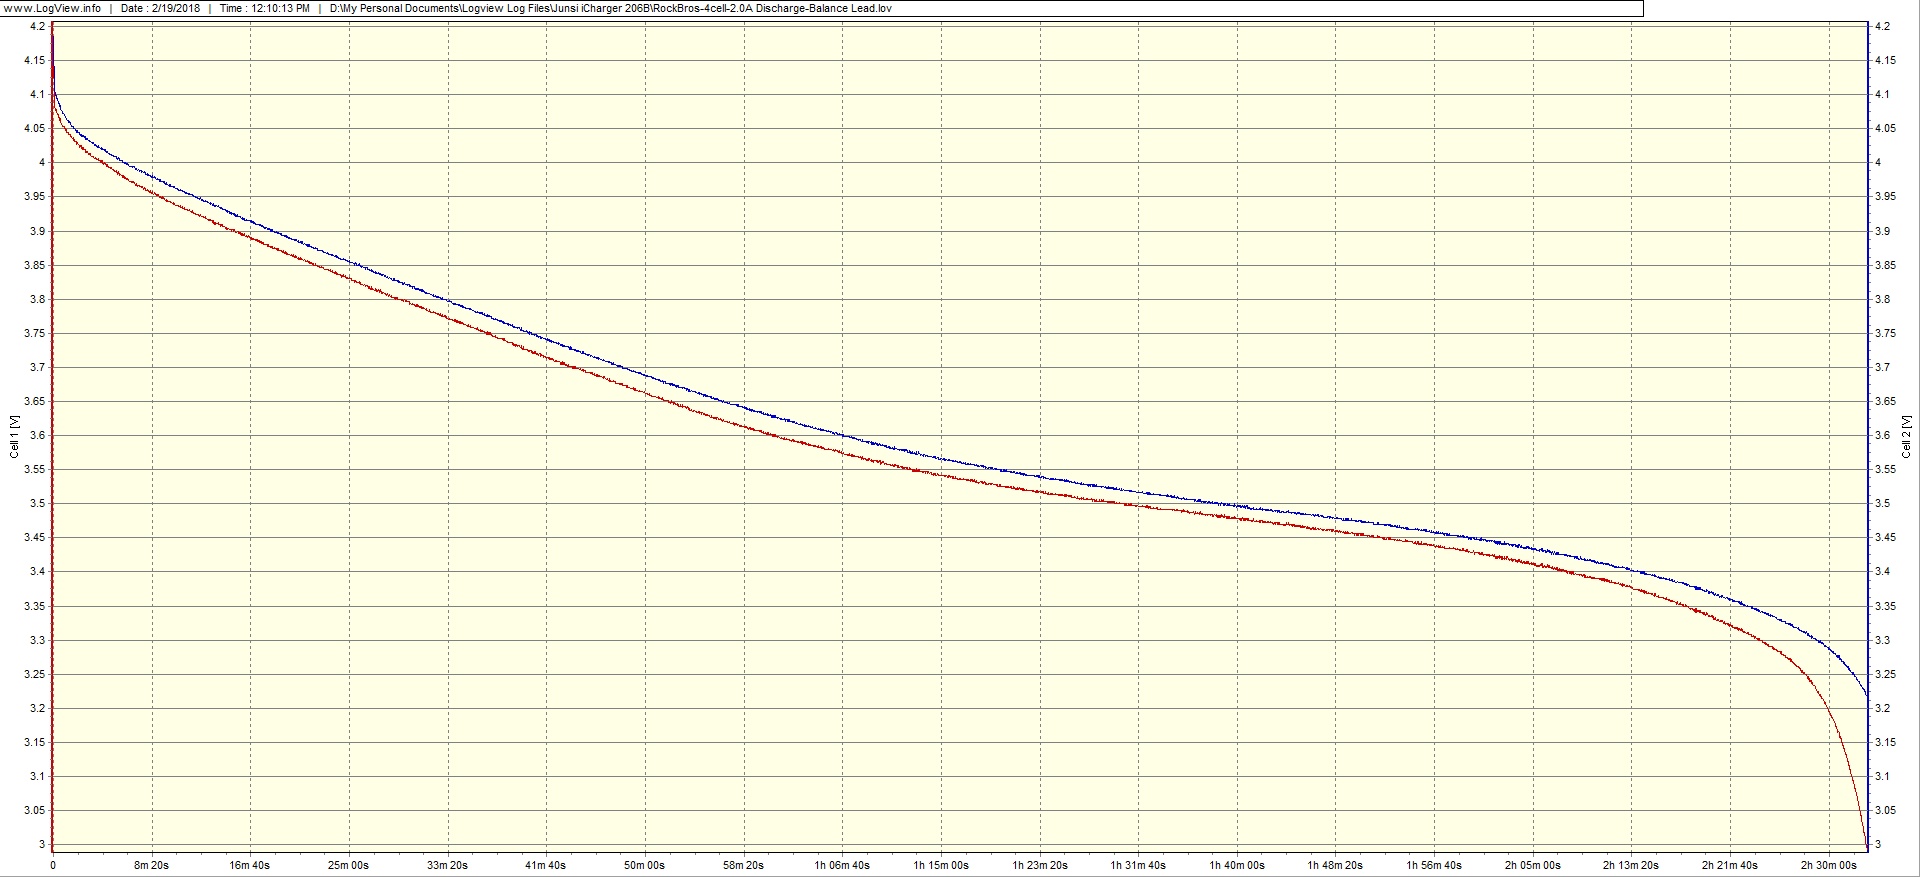
I then performed two 2.0A discharge tests, the first without the balance lead and then the second with the balance lead to monitor the individual cell pairs (I actually soldered the balance lead in place between those two tests). The first test ran 2 hours 32 minutes and yielded 5,097mAh (up from 5,045mAh on the initial unbalanced pack) and the second test ran 2 hours 33 minutes yielding 5,133mAh. Since the second test was monitoring cell pair voltages, I noticed that even though the cells started at nearly identical voltage levels, they started to spread apart near the end of the discharge cycle and were 0.23v out of balance by the end. Immediately at the end of the discharge test the cell pairs were at 2.99v and 3.22v, after 30 minutes of rest were at 3.40v and 3.43v, and then after 45 minutes were at 3.41v and 3.43v. Here is the graph showing both cell pairs:
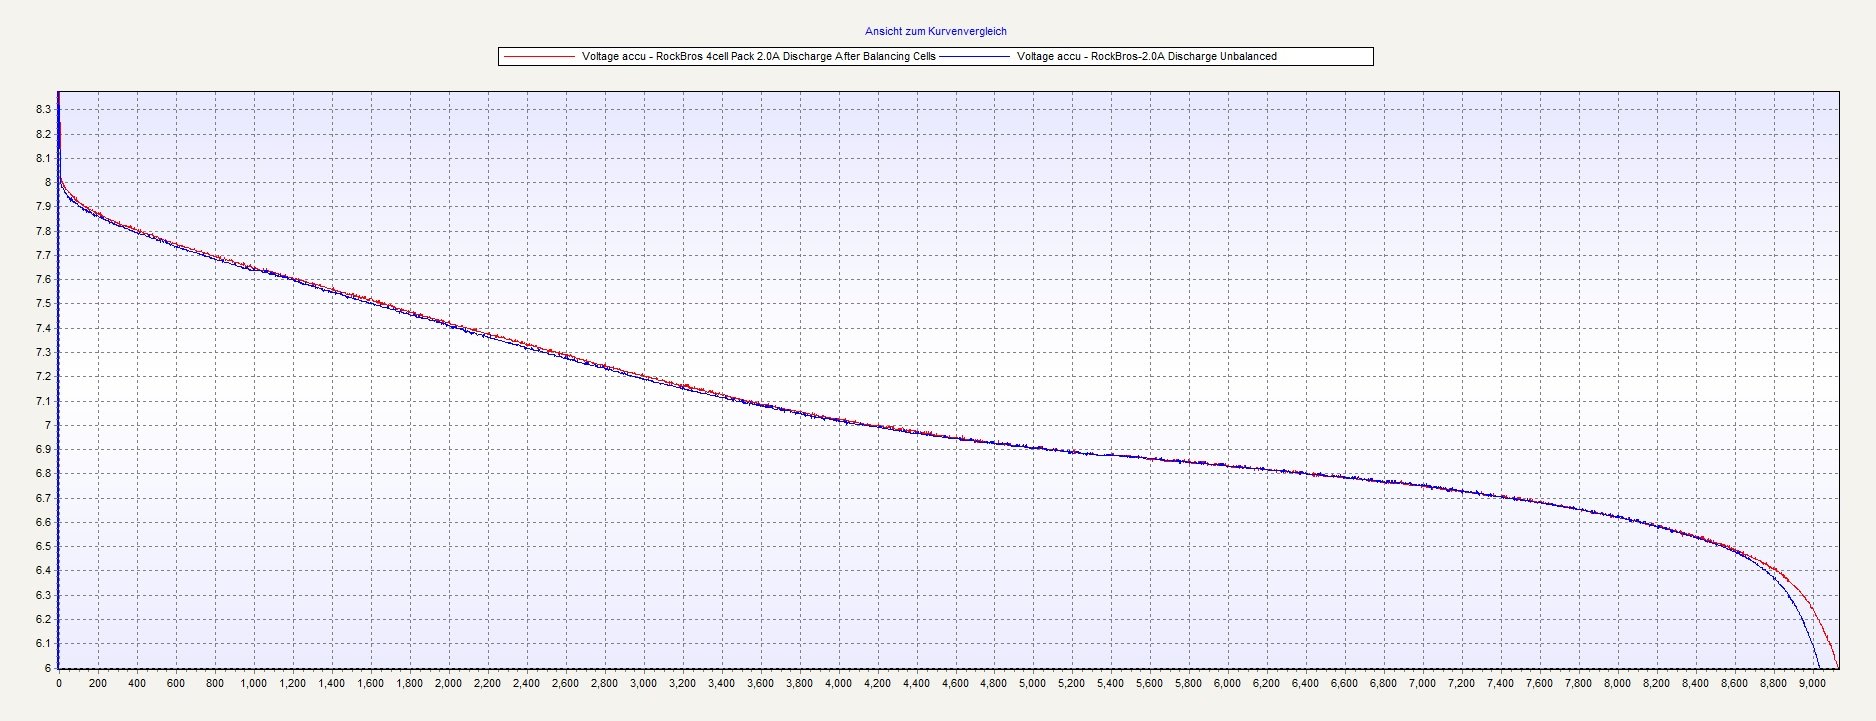
Here is a graph comparing "unbalanced" (red line) vs. "balanced" (blue line):
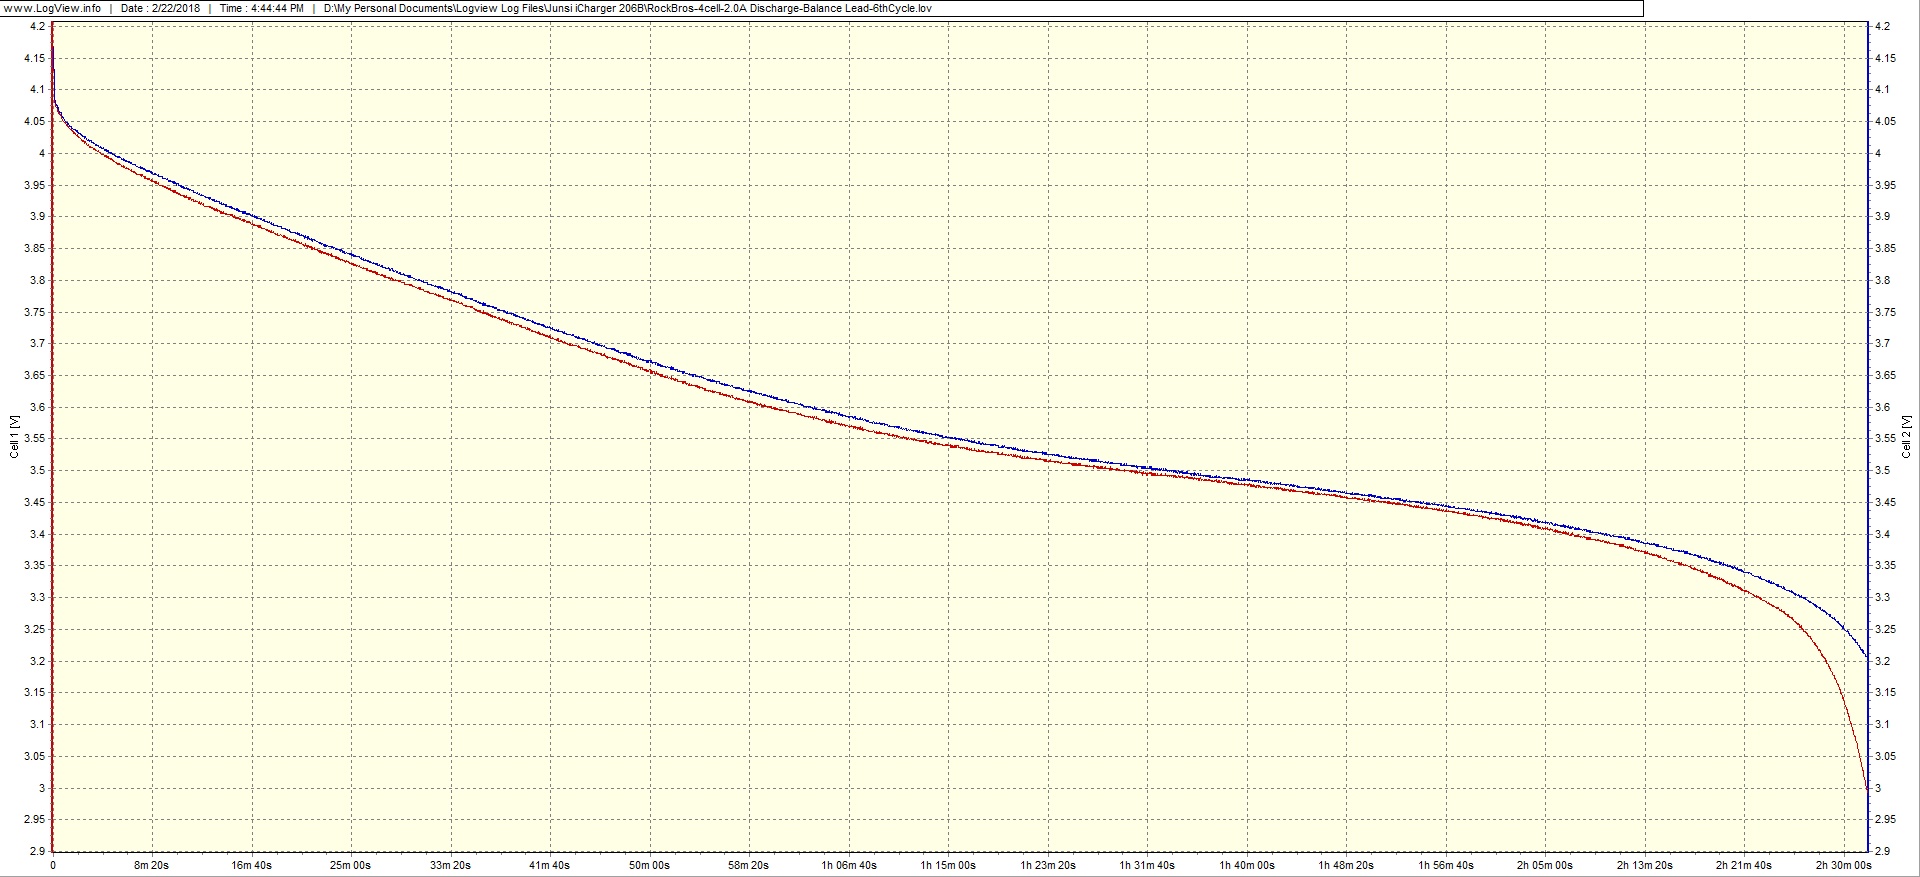
So then, under Ledoman’s advice, I ran the pack through 5 discharge – recharge cycles at either 1A or 2A rates depending on the time I had in order to see how far out of balance the cell pairs would become after 5 cycles. These were regular charges and not balance charging. I did not log these tests, nor keep detailed notes, but I remember generally seeing the cells at 0.02v difference at full charge and after resting from the discharge. On the 6th discharge I connected the balance lead and performed yet another 2.0A test. Starting voltages were 4.19v and 4.18v. At the end of the test the voltages were 2.99v and 3.20v and after 5 minutes of rest they were showing 3.40v and 3.42v. One hour later they remained at 3.40v and 3.42v. It is hard to gauge a packs long-term performance on just 6 cycles, but I’m going to say that these cell pairs will remain close enough in balance to not have a significant decrease in performance for quite a few cycles (i.e. a few years use by an average user).
Graph showing cell pairs being discharged at 2.0A during my "6th cycle":
Ledoman was gracious enough to share his log file for the Kaidomain 2S2P Panasonic NCR18650B pack tested at 2.0A. Comparing this RockBros pack to that KD pack you can see that the RockBros pack actually holds voltage significantly higher during discharge.
RockBros in Blue and KD Panasonic in Red:

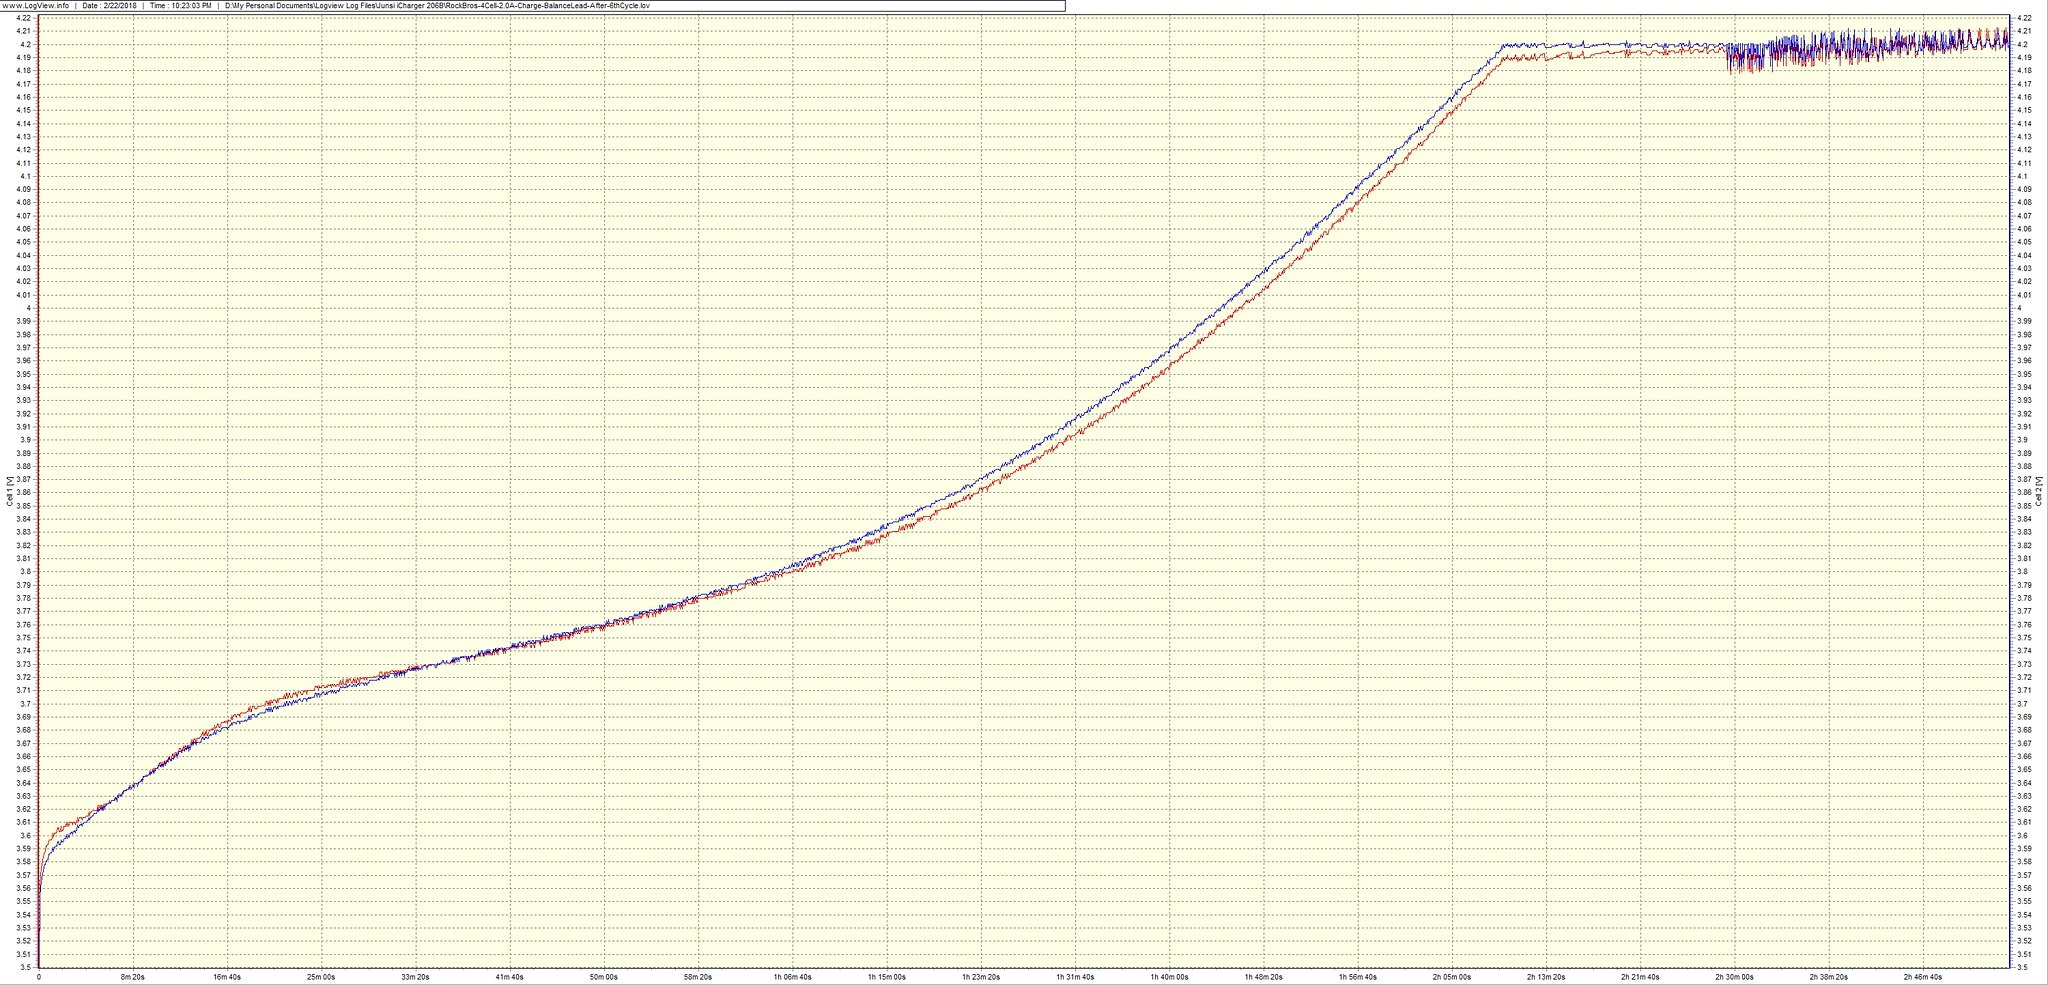
For what it's worth, I also logged the cell pairs during a 2.0A charge cycle after the above discharge. This was a regular charge cycle and not a balance charge. The noise at the end occurred when I turned on a fan blowing across the charger and cells (I had forgot to turn the fan on at the start). Not sure why it interfered with the logging.
All in all I’ll give this pack a very acceptable 3.5 out of 5 stars (I’m tempted to bump that to 4 out of 5). The only real negative I found is that the pairs were assembled out of balance and most users will not open it up to balance them. I don’t believe this is a big issue since capacity testing showed little increase after balancing and the protection circuit is there to protect the pack from any serious interactions of out of balance cells. The use of 2,600mAh cells is very average, so I wouldn't knock them any points off for that, but yes they could have used higher capacity cells. I wouldn’t hesitate to use this pack myself or recommend it to others.
I again thank Banggood for providing this pack for review and hope you enjoyed it! Be on the lookout for a similar review on the 2 cell version of this pack in the near future. Please use the following link to support my review (note: I do not receive anything from you clicking this link): https://goo.gl/WAzSx1.
The entire photo gallery can be viewed here: https://www.flickr.com/gp/garrybunk/dd0F92 .
-Garry