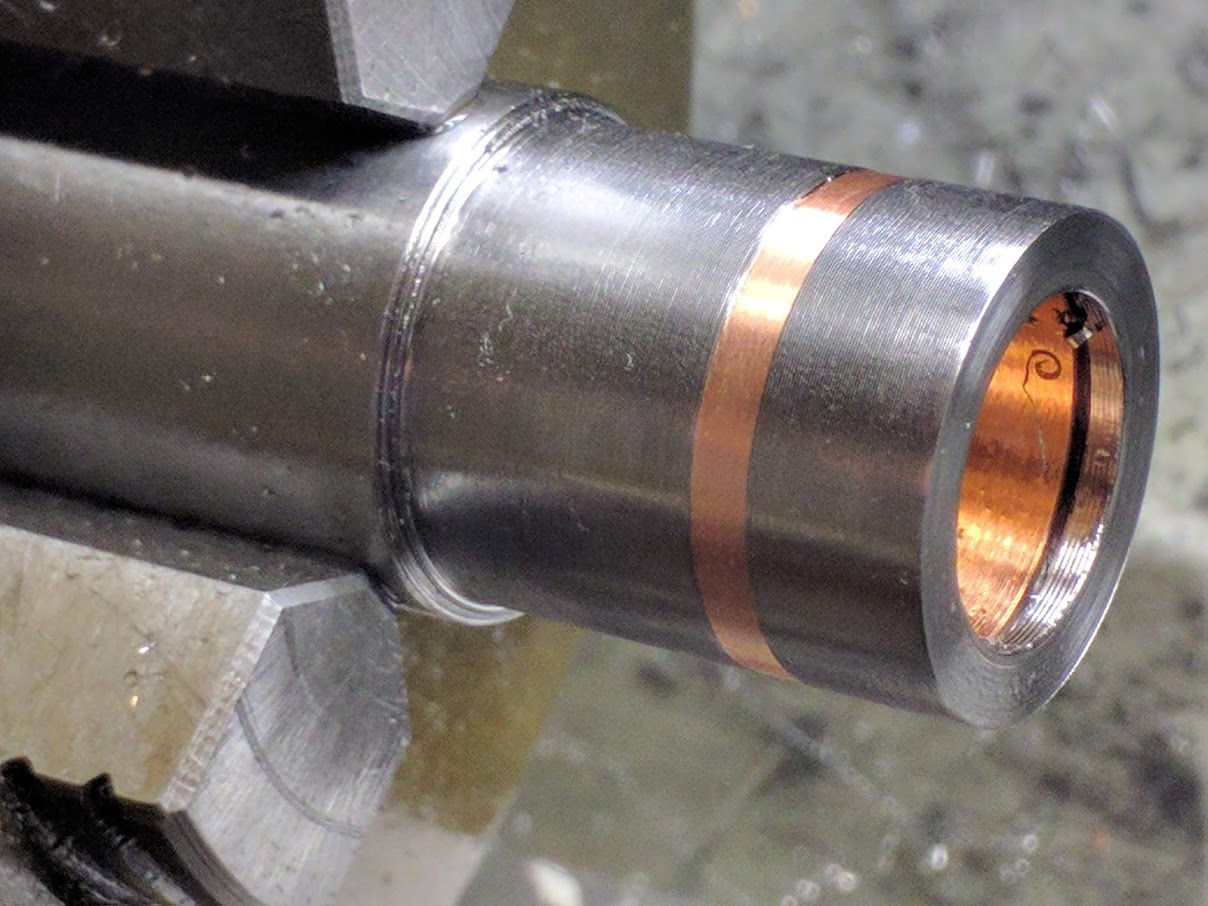
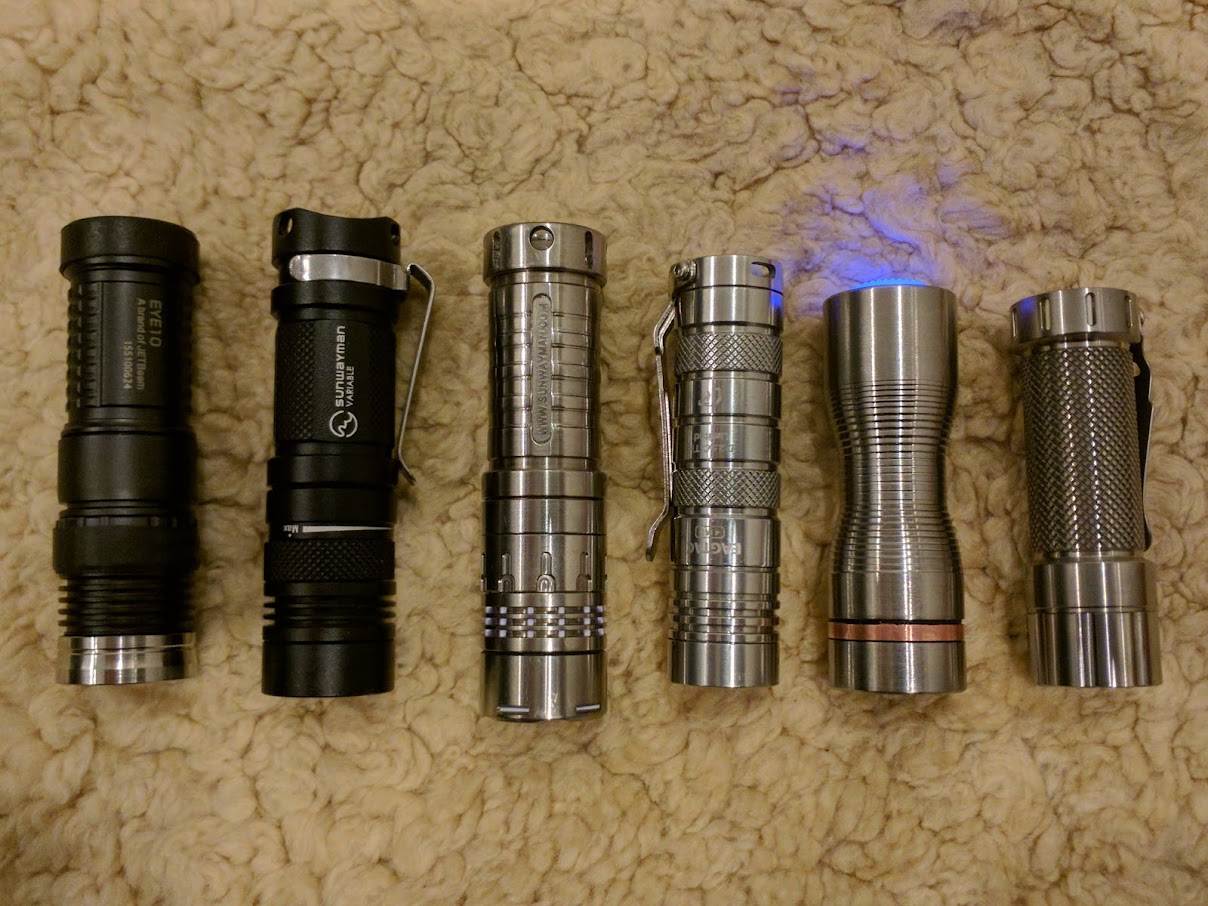
My first attempt at cutting up some titanium
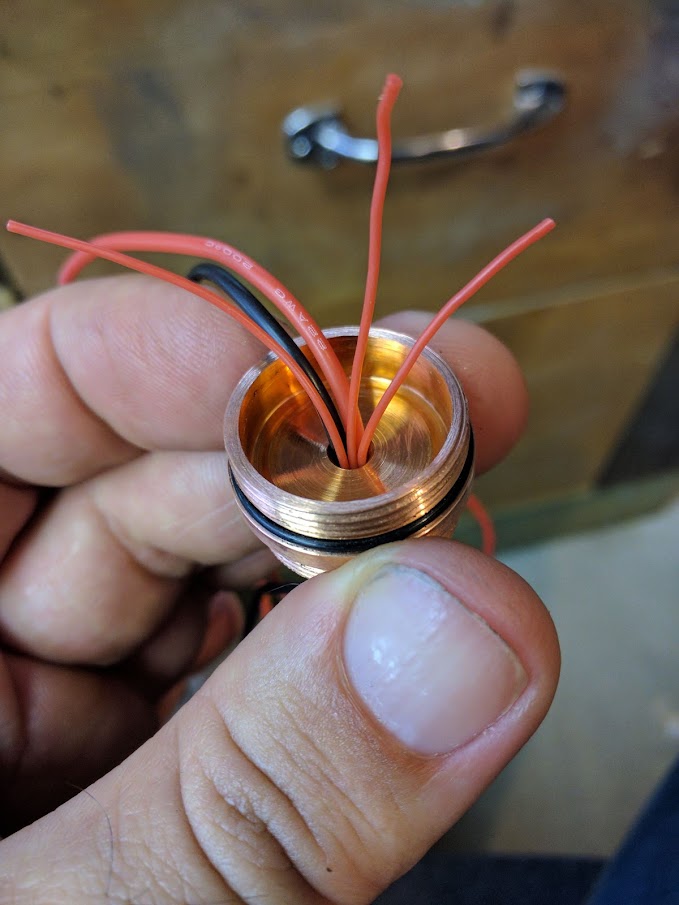
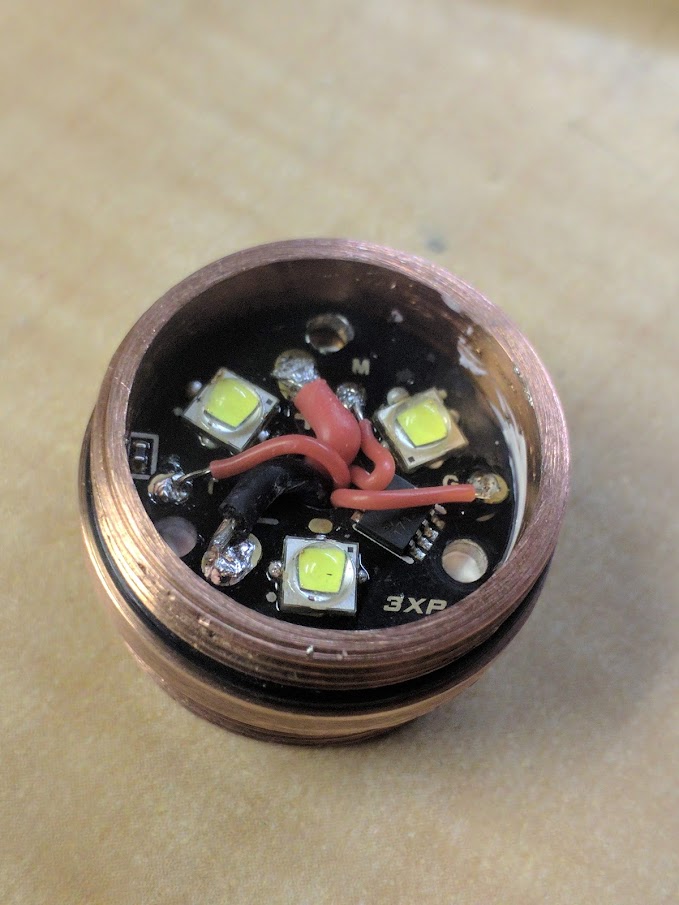
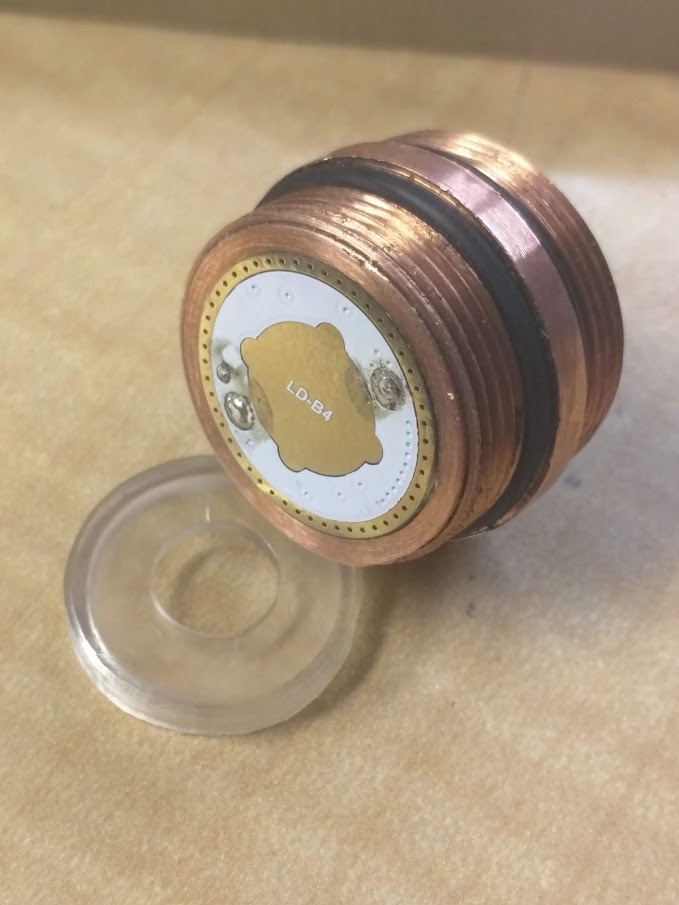
Led4power driver and mosled mcpcb
xpg2 leds guessing around 5000k
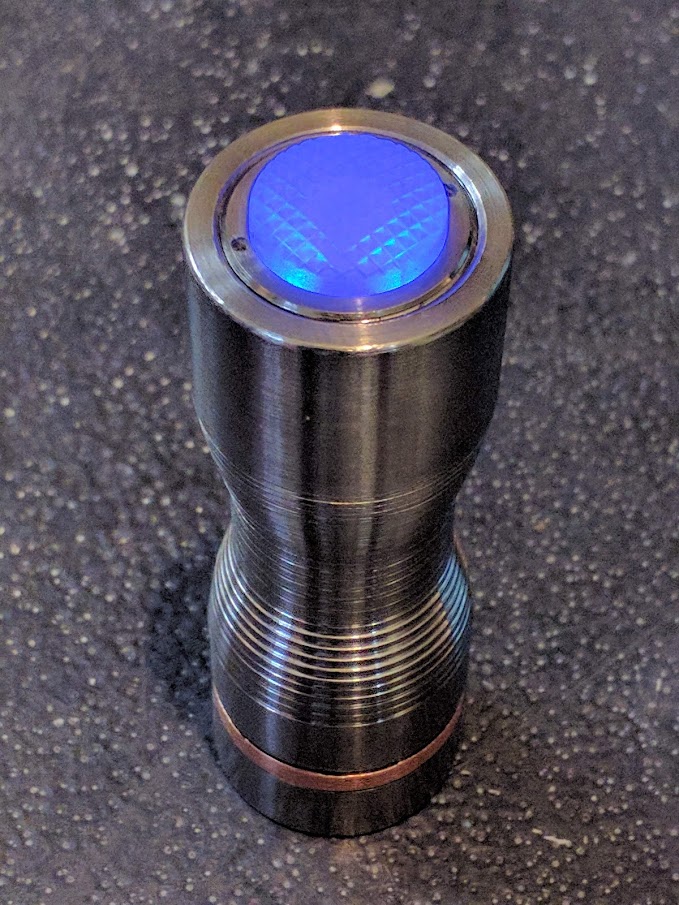
A banggood tail switch for the moment but will swap out to a led4power switch when it arrives
Powered by 16340
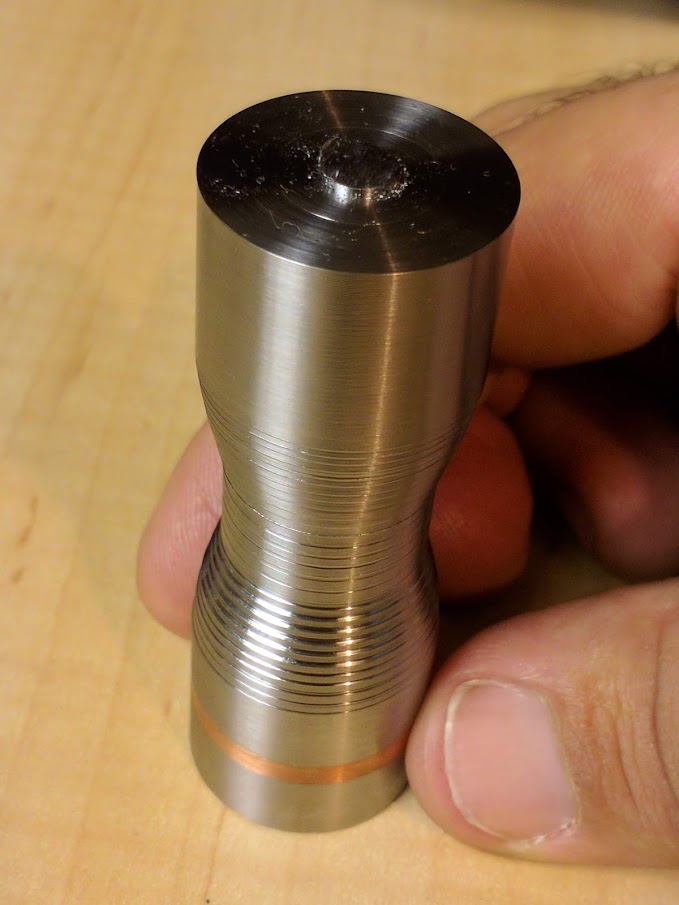
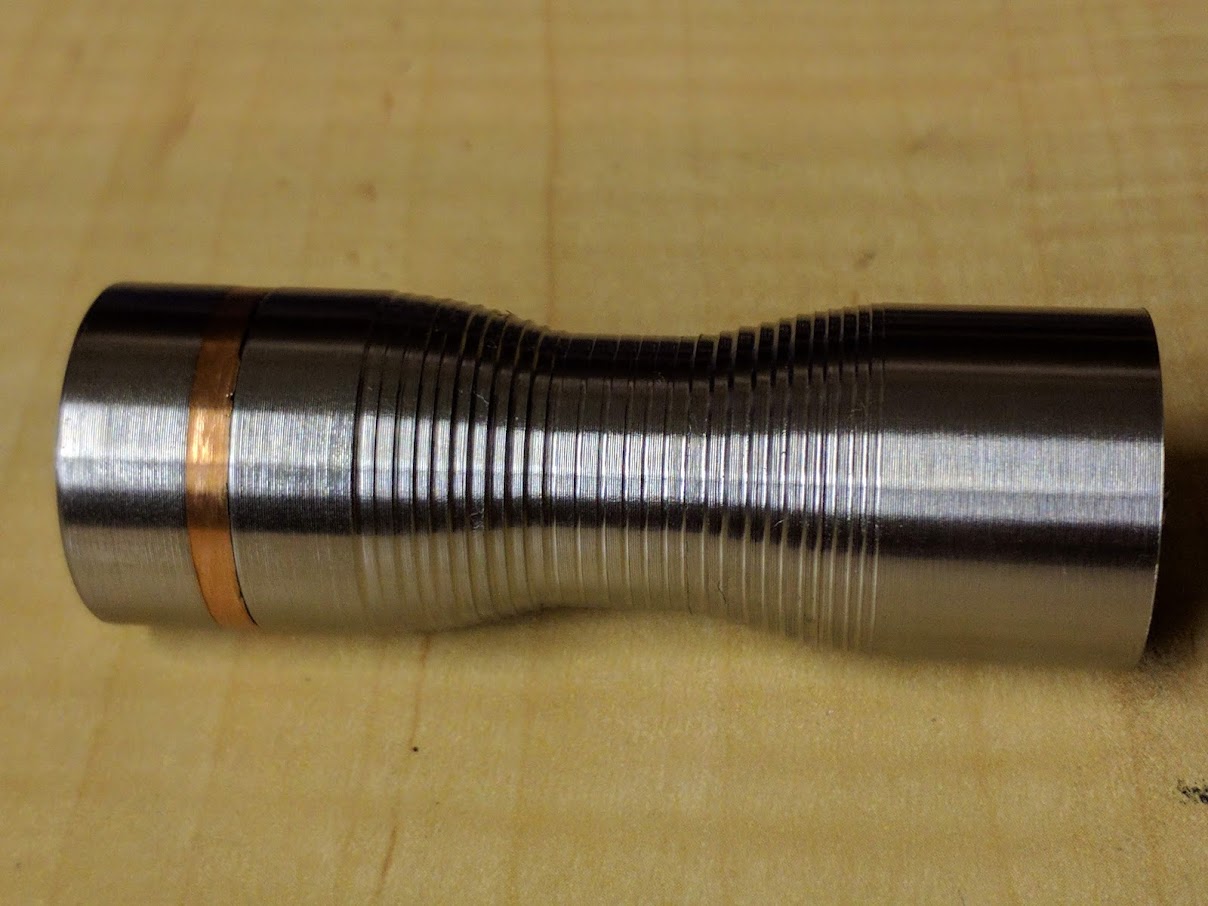
I had intended to knurl the narrow section of body but whilst I was rough cutting thought this looked kinda cool and left it as is. It’s a little uneven but it’s literally the roughing out I was doing. I then added some stripes to the narrow section to blend in. It feels good, I didn’t want a smoothy.
I tried to keep it simple. There is a shelf that the tail switch sits on (sorry didn’t get a pic of that)
Lots of wires for the mosled…
Yes, I know, my soldering hasn’t improved
The gap you see between the copper and body is intentional, to make it easier to unscrew the body without unscrewing the bezel. I will locktite the bezel shortly so it won’t be a problem in future. I’m thinking of fitting a pocket clip but haven’t decided yet Also thinking of machining some trit slots near the tail but I need to fit the degree wheel to my lathe first.
Hope you like it
Very nice!
FIAT LUX!
Nice! Must be very fulfilling to do.
If you didn’t tell anyone, I wouldn’t think it was your first try at titanium. Nice work!
Very original design, quality components, nice choice of materials, I really like it ! It definitely screams for trit slots in my opinion.
Excellent job !
- LEDs & Other Stuff - - UI CheatSheets - - CRX Flashlight Builds - - CRX Stuff for Sale -
Nice work pp. The curves look real neat along with the copper pill band adding a bit of colour. What thread pitch do you use?
djozz quotes, "it came with chinese lettering that is chinese to me".
"My man mousehole needs one too"
old4570 said "I'm not an expert , so don't suffer from any such technical restrictions".
Old-Lumens. Highly admired and cherished member of Budget Light Forum. 11.5.2011 - 20.12.16. RIP.
Very nice!
Let a flooder be my wife and a thrower be my mistress
Amazing work. Looks great!
Very Nice build
I curious about something, do you draw this up on CAD, paper, Napkin at dinner, just in your head, or on the fly ?
Love to see your Creations
Think outside the box too long , cannot find your way back in.
Necessity is the mother of invention and the father is creativity.
Never give up, Never surrender. Make someone Smile today.
“Hourglass”
Nice work!
Heck of a job on your first titanium chipping. The finish looks pretty good. Its even got a lighted tail cap.
Just food for thought, the Sunwayman V11R and the V10R will both except a lighted tail cap without having to add a bleed resistor.
V11R and V10R Current Mod
Wow, lotsa comments. Thanks guy’s
After the hunting light I went back to 1mm threads on this one.
I started in my head but eventually had to chicken scratch something just so I could remember the dimensions I was working to
Yes, you’re right…
Very nice pinkpanda3310! Lathing a flashlight out of metal, let alone titanium, is something I could only dream of. Looks like it should be in Star Wars.
I’d rather use my flashlight around the house than turn on the lights.
Watcha think your gonna come in here with a home made light like this and think no one would notice?
djozz quotes, "it came with chinese lettering that is chinese to me".
"My man mousehole needs one too"
old4570 said "I'm not an expert , so don't suffer from any such technical restrictions".
Old-Lumens. Highly admired and cherished member of Budget Light Forum. 11.5.2011 - 20.12.16. RIP.
I can’t see your second pic in post #13 pinkpanda3310.
V11R and V10R Current Mod
…where Frugal meets with Flashlight!
I believe this is the title around here!Not FancyhighqualityTitanium/Copperbling.com
…where the wife ask how much!
Nice build by the way.
I reckon there are lots of lurkers but I only so many commenters.
That’s odd
“ pinkpanda3310 “
Here is the link for a free 2D cad I use if you are interested. It is easy to learn and use.
https://www.plm.automation.siemens.com/plmapp/education/solid-edge/en_us...
Think outside the box too long , cannot find your way back in.
Necessity is the mother of invention and the father is creativity.
Never give up, Never surrender. Make someone Smile today.
Maybe pp is frugal by not having a wife?
djozz quotes, "it came with chinese lettering that is chinese to me".
"My man mousehole needs one too"
old4570 said "I'm not an expert , so don't suffer from any such technical restrictions".
Old-Lumens. Highly admired and cherished member of Budget Light Forum. 11.5.2011 - 20.12.16. RIP.
It’s a beauty!
Thanks CNCman, i’ll keep this in mind. I have a dream of doing a cnc conversion on the lathe one day but I have a hard time justifying it. I just get the feeling that it would not be a huge benefit to me because I do not make repeat parts (nearly always one off’s) and the dwg’s (I’m not familiar with cad/cam etc…) and set up for each part might take just as long as manually machining it from the start. Regardless of all that, the link you provided does look appealing
Thanks cabfrank
My wife is quite small (especially when she stands next to me), is that considered a frugal wife? Or am I the frugal one?
I have the multi colour tail switch that I ordered from Led4power now. So after thinking about it I wasn’t so keen on laying trits in there with such a bright tail cap.
….and I came up with this idea…
The drill bit walked a little and whilst it’s hard to see in the pic the line of holes was not 100% straight. So I cut a groove over them.
I stuffed the inside with blutac but I later found this wasn’t such a good idea. With the blutac blocking the holes inside I epoxied up the holes.

It took more effort than I was expecting to remove the blutac as the epoxy was doing it’s job and was sticking like shit to a blanket. Even after trying to clean it up the epoxy still looks ‘dirty’.


I cut back the outside epoxy flush with the body and reinstalled the switch. The ‘dirt’ is just as easily seen on this side. I don’t mind the epoxy is a little opaque but the dirty bits irritate the crap out of me. Really not looking forward to removing the epoxy and trying again
On the bright side I think it was a shit hot idea…
At the end of it all I might make a lanyard hole and call it done.
Nice idea. I use blutac a lot too, it helps if you smear a little grease on it where you don’t want it sticking. Lighter fluid dissolves it.
- LEDs & Other Stuff - - UI CheatSheets - - CRX Flashlight Builds - - CRX Stuff for Sale -
I would make a lanyard hole (or not) and call it done. It is amazing.
That’s a seriously good idea! Really like it. I would mill the epoxy, making the slot a bit wider and try agin. Will be worth the effort in the end.
Thanks for the tips CRX. I was thinking of wrapping the blutac in cling-wrap. Grease sounds like the way to go.
Thanks guys. I’m busy tomorrow so I might just enjoy the light as is for a few days until I get time to change it.
Nice build
MY REVIEWS THREAD /// My Flashlight Collection ///
Mods: 1 / 2 // TIR: 1 / 2 // Others: Biscotti 3 + 1*7135 / Triple TIR w/ XP-G2 /// My Review's Blog (PT) /// OL Contest 2019 /// OL Contest 2020 /// GIVEAWAYs: 1 / 2
Fantastic build and a nice write-up describing the steps taken. Love the (w)hole idea!
link to djozz tests
That looks so sick pp. Nice work.
djozz quotes, "it came with chinese lettering that is chinese to me".
"My man mousehole needs one too"
old4570 said "I'm not an expert , so don't suffer from any such technical restrictions".
Old-Lumens. Highly admired and cherished member of Budget Light Forum. 11.5.2011 - 20.12.16. RIP.
Pages