Looks good, I like woodwork!
The ‘sticks’ are called kumiko, in Japanese woodworking. These fit together to make a grid. I have played a little fast and loose with these as the do not have the interlocking that is traditional, but the end result is more or less the same. Traditional Japanese woodworking relies on precise fit and parts that fit together in a manner where one piece holds another in place. Very little glue and no mechanical fasteners like nails and screws.
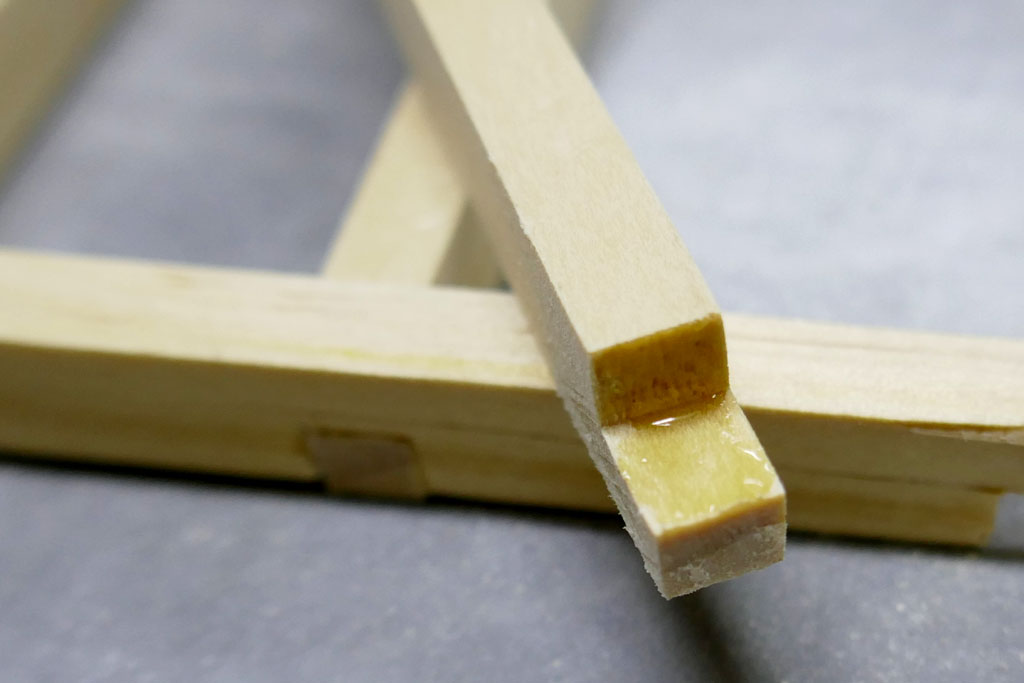
I am gluing some of the joints around the perimeter. I am using liquid hide glue, a modern development of traditional hide glue. Traditional hide glue has to be heated to make it flow for use. This version stays liquid in the bottle, can be used at room temperature. Hide glue was the glue traditionally used for furniture. It can be removed by steaming or soaking parts in water. Hence, this project cannot receive an IP rating as immersion in water with soften the glue and it might fall apart. ![]() Hide glue also has a longer open or worktime than the popular and good yellow glues.
Hide glue also has a longer open or worktime than the popular and good yellow glues.
There is a saying in woodworking that one can never have too many clamps.
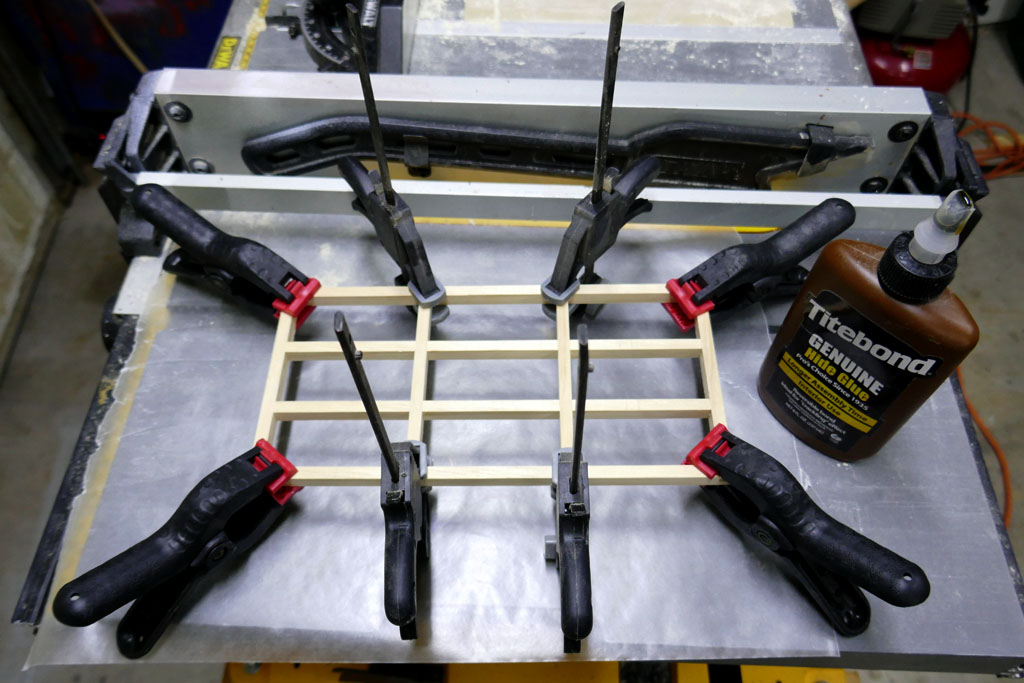
One down, three more to go. In a few hours I’ll do another frame and so on.
The design is known as shoji (Japanese). Those who have been around here for a while may remember the shoji bookshelf doors from about a year ago…. link to a sidestep in a flashlight project topic, and a photo of the finished unit.
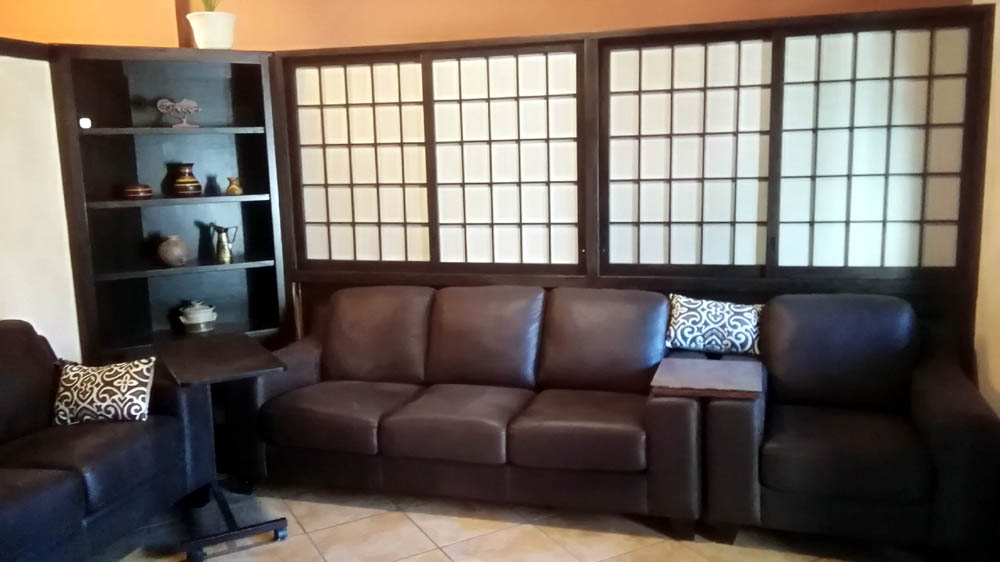
That’s not the best photo.
Four sides to the light…
Are you going to paper those? Is it rice paper?
I’ll be using a laminated paper made for shoji screens. The lamination makes it much more resistant to finger punctures and staining. Leftover material from the bookshelving doors.
Oh! Cool! :sunglasses: :+1:
Big ring on top?
TBD
FYI, the laminated paper is this one.
…and to affix the paper to the frame I’ll be using this tape.. Genuine Japanese product, not a word of english on the package
subscribed ![]() looking forward to this.
looking forward to this.
What’s the transmissivity of the paper? Do you know even rough numbers?
Not a clue off hand. However, I will keep the question in mind and will measure the difference when I get to the stage of mounting the material on the grid frames.
Looking groovy Don. :+1:
Thank you. I had a week off from work and didn’t do a thing on this. Now I’m back home and must get back at it.
missed it by that much ....
![]()
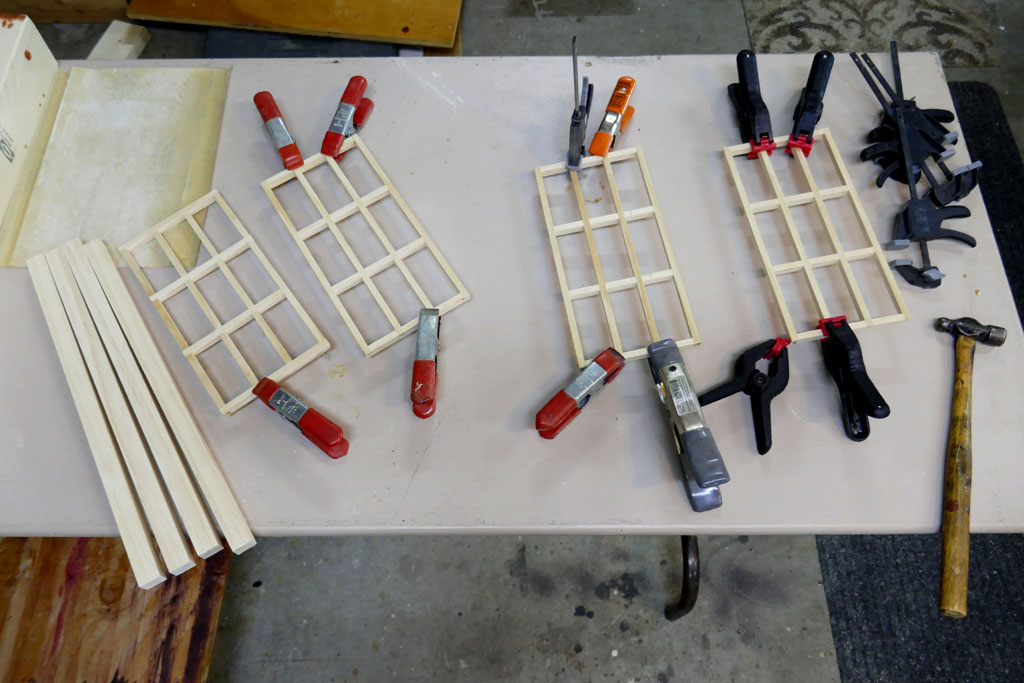
Back again. Normal life and other projects took me away from this for a while. Once the glue was dried on the screen frames they were sanded. 150 grit and then 220 grit. Now they are smooth and more or less all the same size. Here are a couple of photos showing them. Pardon the dust.
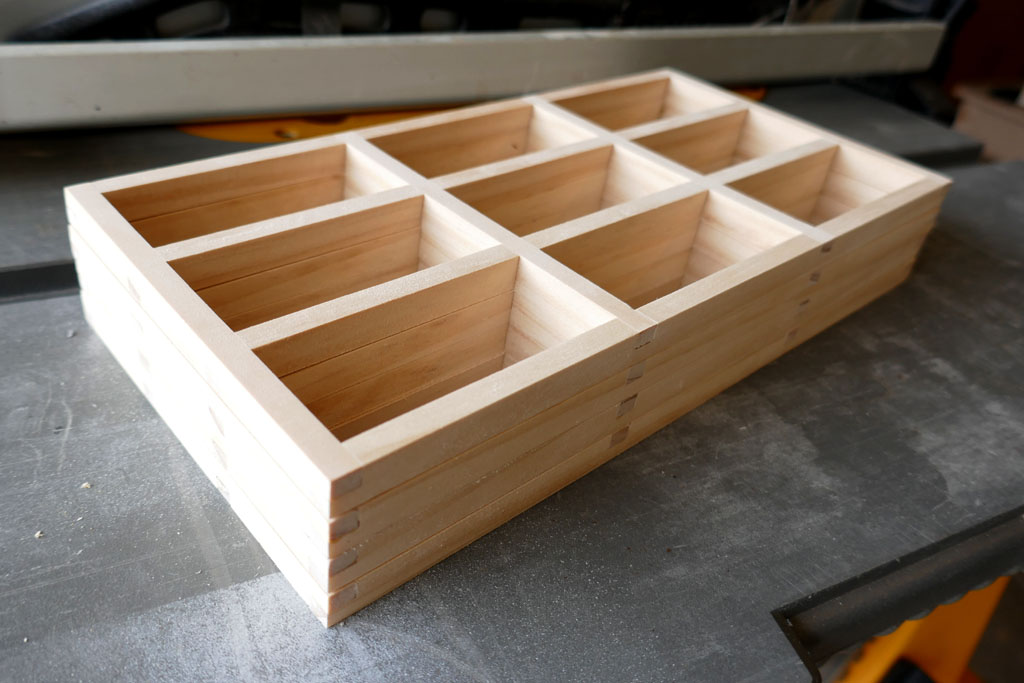
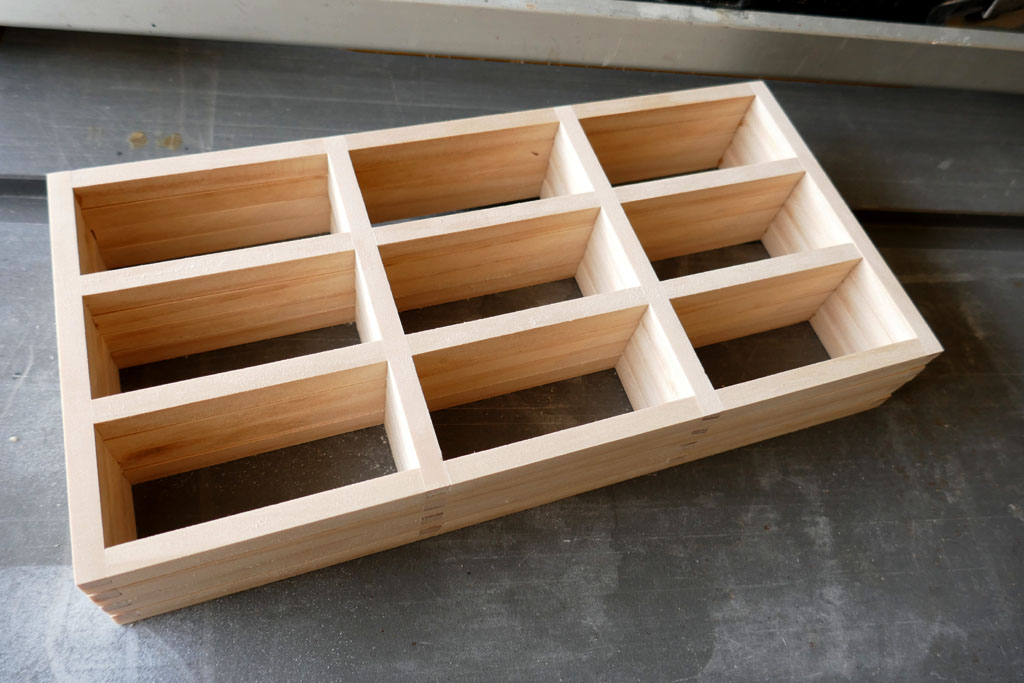
So those 4 pieces, called screen frames will have the shoji paper glued to one side after they are stained and clear coated. The frames will be mounted into a skelteton, or framewoork, that will hold the four screens in a box-like configuration. There are 4 corner “posts” or stiles. Each is 3/4 x 3/4 inch and about 15 inches long, also select grade pine. I cut them to length a few weeks back. Today I started in working on them and had progressed to the stage beyond before I remembered I had not taken photos of the rough cut sticks. :person_facepalming: So we will jump to what I spent most of today on. I’ll try to show and explain how the rabbets were cut in the stiles.
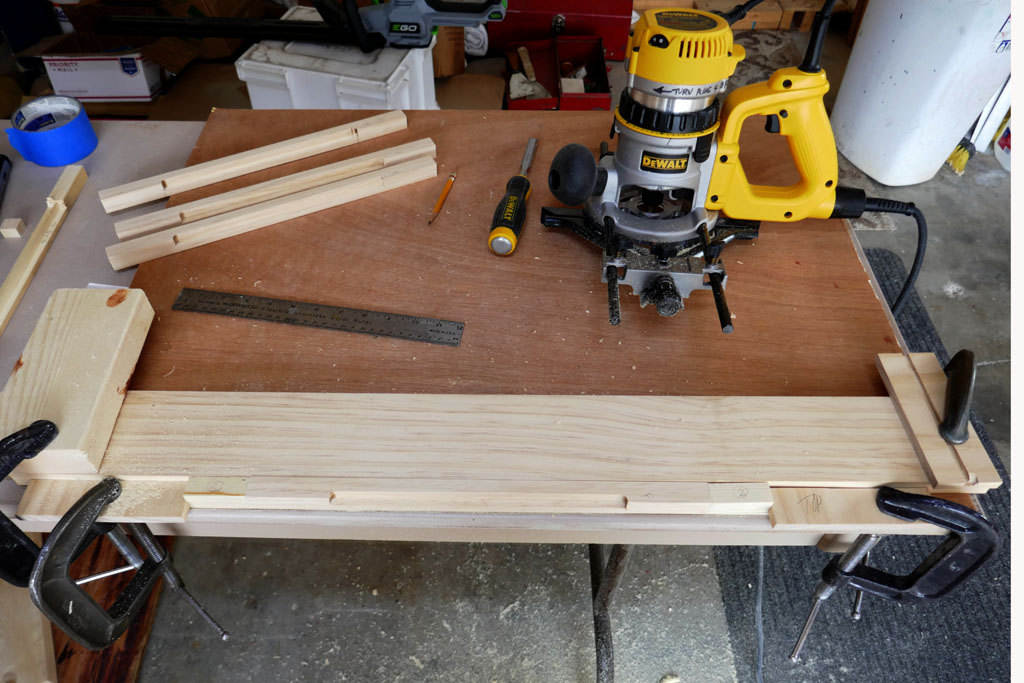
To mount the screens the each stile needs two rabbets cut into them. A rabbet is a sort of a notch. I used a router to cut the material away. A jig was temporarily assembled utilizing wood pieces and clamps. In the photo, the 4” wide long board is the same thickness as the stile material. That board is to provide a base for the router to run along as well as support the stile as it is machined.
In this next photo you can see two 1/2” thick scraps of wood at left and right, held down with clamps. Those are placed to stop the router at the furthest left and furthest right along the stile. The short 3/4 x 3/4 blocks were cut to locate the stile the proper distance from the ends. Some measuring, math and lots of trial and error on trial sticks was needed to get everything sized.
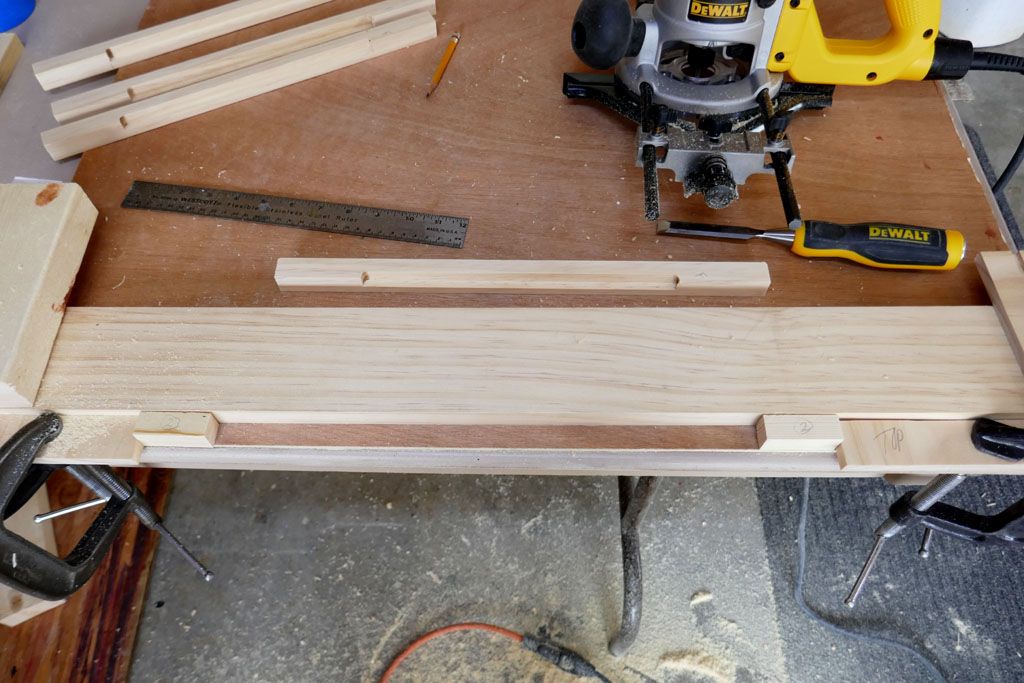
The next shot shows a stile held in the jig. It has a rabbet cut. Each stile has two rabbets cut intothem.
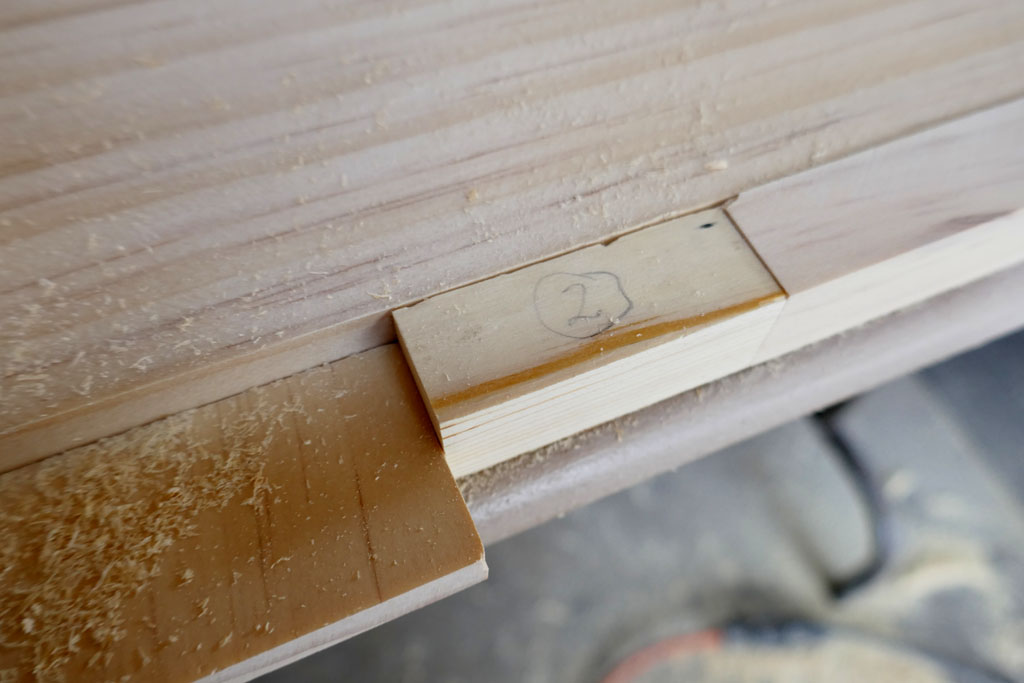
This next shot is a closeup of the left end of the jigged parts. The piece with a #2 in a circle is the 3/4x3/4 spacers block. The thinner but wider piece just to the left of it is the router stop strip that is clamped down to the table. The strip of wood that disappears off to the right is a portion of a stile. Hope that all makes sense.
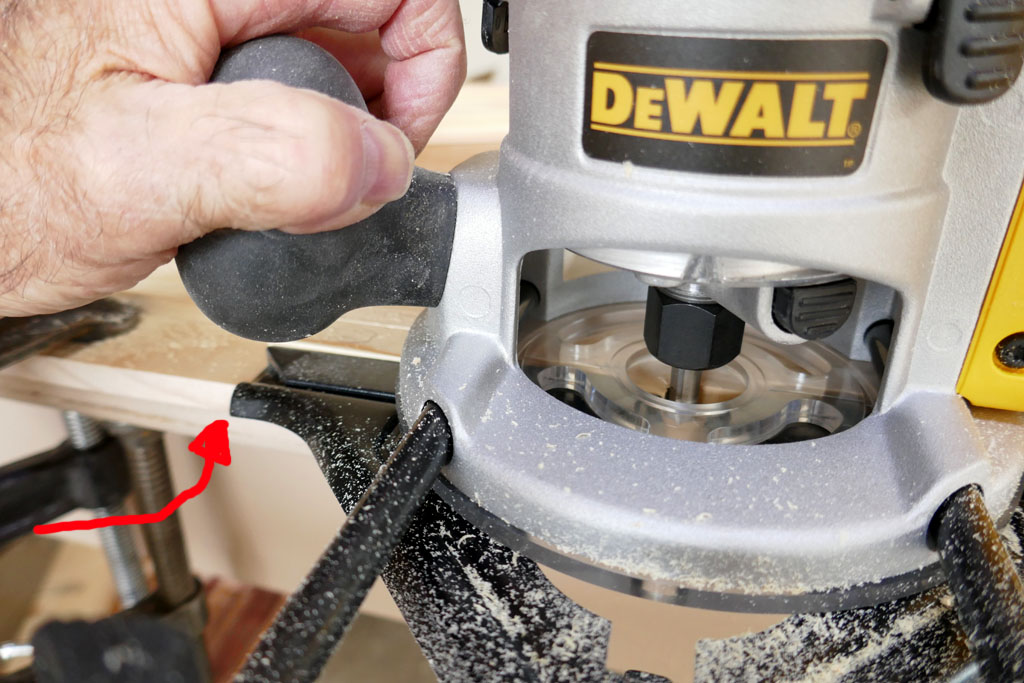
Next, is a photo attempt to show the router fence at the stop block. My photography is not the best, but maybe it helps understand the process. The red arrow points to where the black router fence is stopped from traveling any further left by the clamped down wood strip. That area is not in sharp focus unfortunately.
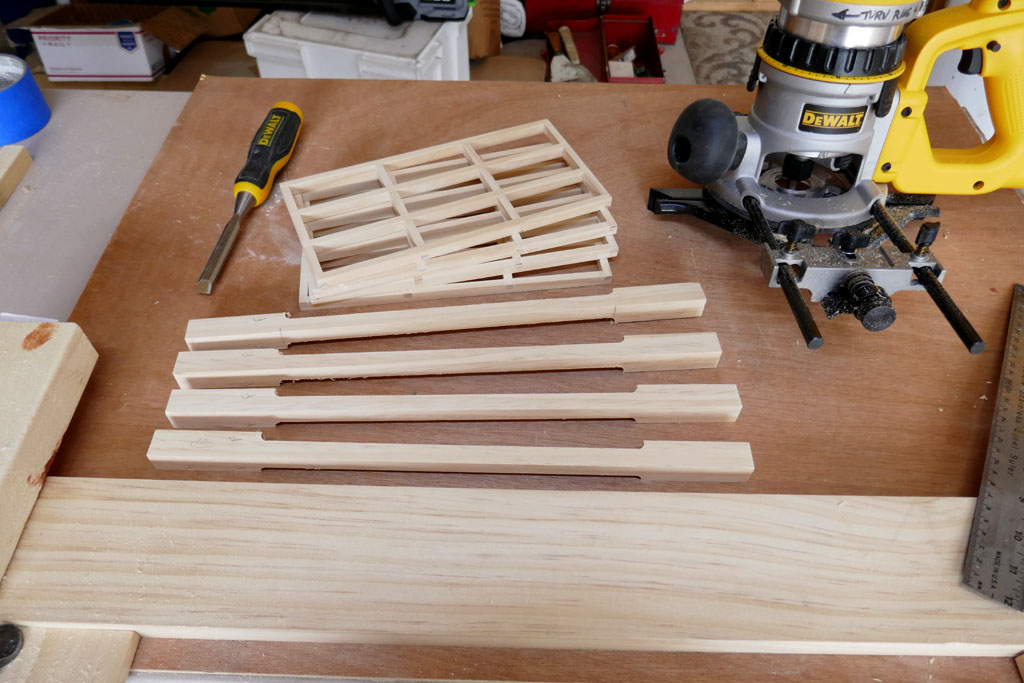
And to finish off todays work here is a shot that includes the 4 screen frames and the 4 stiles. Next I need to clean up the rabbets and check the fit of the frames into the rabbets.
The router fence has a fine thread machine screw that allows adjustment in small precise amounts.
After I get the rabbets sanded and fitted to the screen frames I will show how this goes together with rubber bands or something containing the assembly
Getting closer to the finish MD. Its looking real nice. ![]()
Nice woodwork :+1: