Another awesome mod CRX
Love the triples on small body lights ![]() Awesome mod CRX !
Awesome mod CRX !
Btw , is there any place to get these Novatac lights at a decent price ? Thanks !
Thanks :+1:
jon_slider is the NovaTac man ![]()
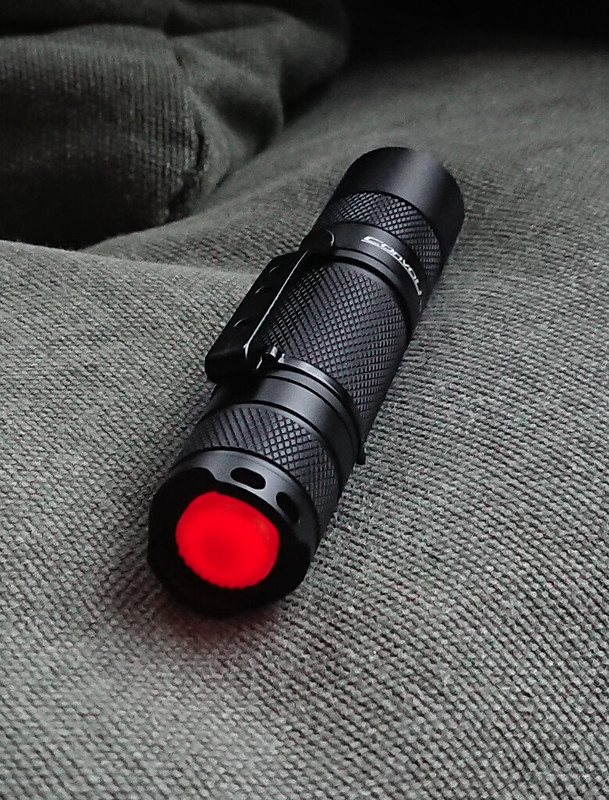
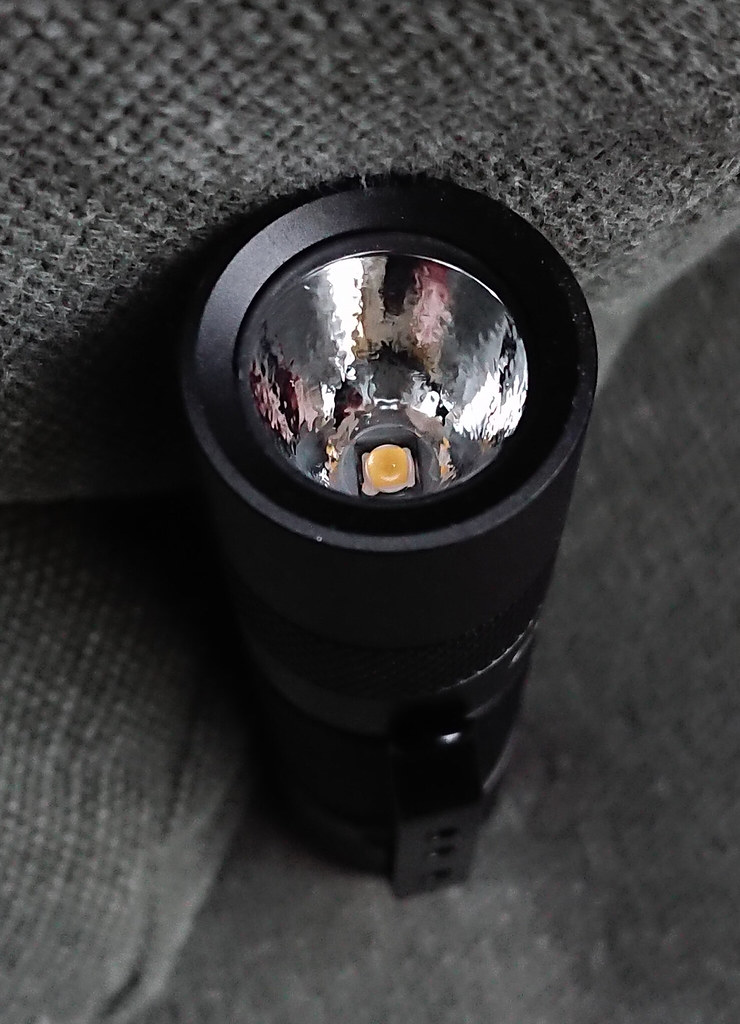
I installed OSRAM KW CSLNM1.TG in SP32A V2.0:
Throw is comparable with C8. Here is the picture with Convoy C8 with CREE XP-L HI V2 5D at 2.7A, SP32A with OSRAM KW CSLNM1.TG at 3A and stock Acebeam EC35 at 3.3A. Around 2.5 metres to a wall:

Reflowed some more XD16’s onto VR16S1 boards. Man those 1616 LED’s are tiny!!!

UltraFire UF-10 OSRAM KW CSLNM1.TG - DD - 16500 - Rv Clicky Lighted Sw - 640/ 250lm. OSRAM KW CSLNM1.TG 6N 15:
Max – 640lm/ 250lm - 4.5A
60000cd/ Throw 490m
^ Nice. Those are very good numbers CRX in a still very attractive host :+1: .
Thanks. Yeah this light has had more emitter swaps than any other light I’ve ever had, couldn’t resist the new Osram for it ![]()
CRX,
I like your zoomie mod very much.
60 kcd for such a small host is just superb. At 2007/2008 only super throwers with Cree XR- E EZ900 R2 had such performance in 5-10x larger hosts :+1:
Yeah one of my first lights was a wee sipik zoomie with an XR-E emitter, amazing throw from such a small light.
The UF-10 is direct drive so that's start up numbers of course, it's all down hill from there... :D
I might install a driver in this at some point, again.
So much bright light pollution around here, not much fun.
Batman call in third pic? ![]()
![]()
Wow that batman sign is awesome! Did you just stick a piece of paper over the lens?
No I just pasted that in there :innocent:
CRX always keeping us on our feet! ![]()
Would a Batman mask over the de-domed die yield a Batman beam profile? Should, shouldn’t it? I mean, the aspheric shows a mirror image of the square die so if the die were masked to show only a Batman logo then the aspheric should show that logo in light, only the illuminated Batman just like in the show. Right?
This is how an aperture works in a camera, I can cut out a small Batman and place the cover over the lens effectively making the Batman the aperture, then the Bokeh effect of all lights in the background will be Batman. Like, with a Christmas Tree in the background and I take a soft portrait, all the lights would look like Batman. I’ve done this before with various figures, even a Yorkshire Terrier for an old couple that really loved their dog!
Some PCBs arrived, so now it was time for step 2 of my Nichia Optisolis Ultra-CRI build in an Emisar D4 host.
So here is my own driver. Anduril, 3+1 Channels, 1+2+5 7135 and a seperate resistor moon mode.
It seems like 10k is a good series resistance for moon.
All in all, it works great and there have been no real problems with the PCB design.
The only problem was, that the footprint for the schottky diode was a bit to small for the diodes I had at hand, so I had to bend the legs a bit to get it to fit.
Please excuse the bad SMD soldering as it was done by hand and not with hot air.


Nothing physical, but I finally wrote driver specific voltage calibration values into my customized Anduril build and flashed a few lights.
Im “cut off” for a while. Still looking for a super thin EDC AA light though.
That is a really cool driver zeroflow!
No such skills to design my own driver here or else I would have made a new better boost driver for the Convoy T2 (higher freq. PWM, no memory, no strobe)
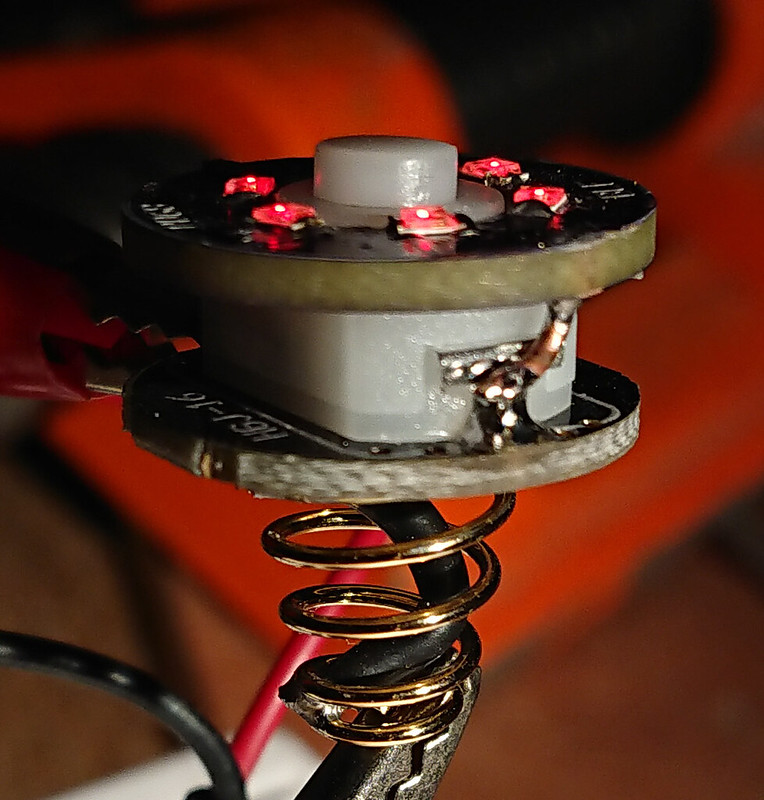
Instead I converted the T2 to li-ion, led=my very last 219C SM4070e, driver FET-converted AK-47 C1 (low-med-high no memory) 680 Ohm bleeder, lighted tail with 6x 0603 630nm leds, spring bypassed, orange tailcap.
High at 3 seconds 740 lumen, 30 seconds 580 lumen. Nice beam and very good tint, but not as rosy as some other SM4070e leds that I used, this one is only very slightly under the BBL. (CRI=91.7 R9=60, CCT=3976, duv=–0.0016)
Some pictures
A KD DTP board was sanded to 1mm thickness by soldering a handle on the wire-pads, grab it with pliers and using the disc sander to thin the board, then removed the handle. Then the board was sanded from 16mm diameter to 14mm.
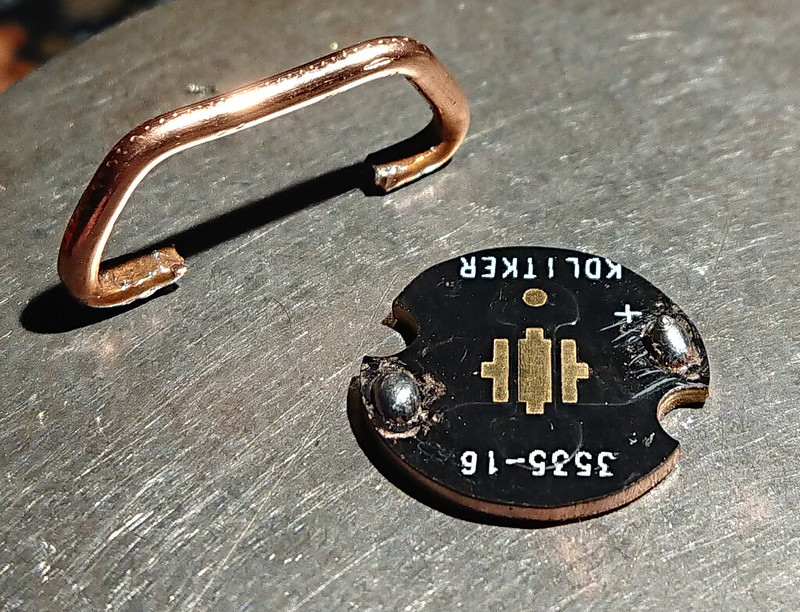
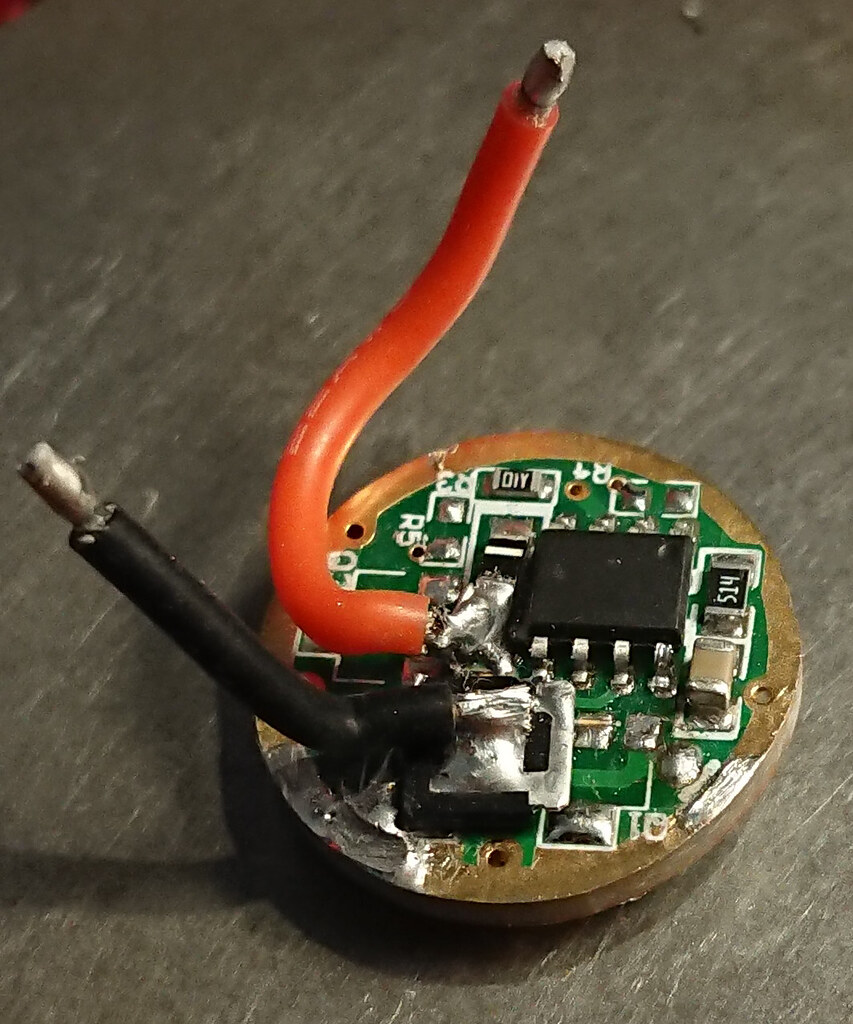
The driver had all 3 7135 chips removed and a FET added (see comfychair-inspired quick+cheap+lazy single-sided 17DD FET-driver (poor man's nanjg92)).
A brass button was soldered and a 680 Ohm bleeder resistor soldered in a shallow 2.5mm hole.
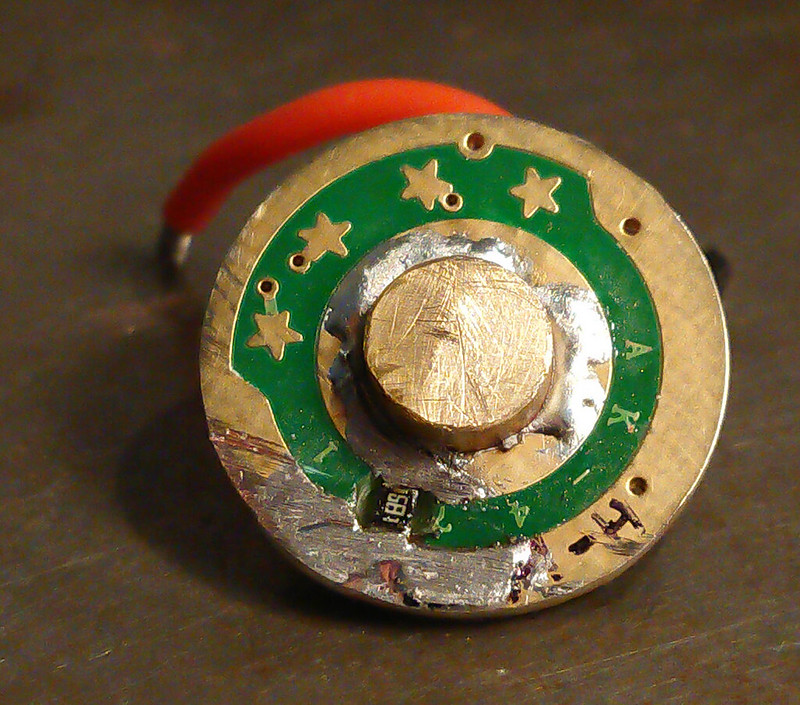
I used the stock tailboard with switch and added a pd68 6-led ringboard, 6x 630nm leds 3x 8.4 kOhm resistors.
Very cool idea with the temporary copper handle! :+1:
I could’ve used that a while ago when I teleported an MCPCB into another dimension while attempting to reduce its diameter on the belt sander.
Maybe I’ll find it again someday. ![]()