The 6th Annual BLF / Old Lumens - Handmade - MtnDon's Entry (fini)

A little more work to end the day….

The plan is to have a voltmeter located in that bottom plate edge, alongside the charger indicator led. In the next image I am carving the notch for the meter. It is one of those 3 digit led meters.


.
.
The voltmeter is to be wired into the battery with a normally open momentary contact push button switch. Press the button to get a voltage reading. The switch was scavenged from some old board from something that was junk. The red smudge on the wood is my blood. I inadvertently (gently) touched the chisel blade with my finger tip… I keep my chisels sharp.


.
.
There is one more cutout to be made. The small board that mounts the micr usb inlet port for the charger will be located on the bottom plate edge around the corner from the led indicator. I hope to get that dome tomorrow.

The bottom plate board is upside down on the bench. The digital meter decimal points are located at the lower edge of the display when viewed correctly.

A little more work tonight….

There needs to be a switch. I have chosen a small Omten 1288 reverse clicky. It will be mounted in one of the stiles, or legs, down low. Pictured below in the leftmost leg you can see the cutout.

That recess was a tad difficult to make. This pine is softer than I am used to and the wood fibers sometimes tear more than slice no matter the sharpness of the chisel. Fortunately pretty much all the chiseled areas will be hidden in the finished product.

Here’s a shot with the 1/4” chisel cutting out the bottom of the slot.

Please pardon my photography for its lack of clear focus. Here’s the stile with the switch recess and a 1/4” hole bored up from the bottom. The two wires to and from the switch will be hidden inside the stile. They will run up inside the stile.

The wires run up and then will exit the stile at or near the bottom plate of the lantern. That is the plate that holds the battery, charger and other sundry parts. I’m shining a flashlight up from the bottom bore hole.

OOOPS!! I made an error and drilled the exit hole in the wrong place. Oh well, the error will be hidden by the bottom plate. I may plug that hole with a length of dowel. Doing so might make t easier to thread the wire into the correct hole.

Next, not too good of a picture…… The switch slot is shown in the stile (the bottom direction is to the left. You can see the correct exit hole for the wires about center in the picture. The bottom plate is visible to the right in the picture. The recess is the battery recess. It is difficult to make out, but in the bottom plate there is a carved out channel for the wires from the switch.

That channel was carved with a carving tool I acquired over the summer. It is a Vee shape, very sharp, with a short handle that makes it easy to hold.

Last for tonight, here is a teaser shot showing the top plate, viewed from above. The 3/4” hole will facilitate the mounting of the LED mcpcb and permit what I believe will be more than adequate cooling. Details to follow; the final few parts should arrive in Mondays post.

Rubber bands still holding things together.

I'm a little bit of a woodworker myself and I must say this is some next level stuff for me. Thanks for the schoolin MtnDon. Great work, I can't wait to see the finished piece.

^ Indeed, excellent woodworking skills.
Next level stuff for sure.

Yep, this is coming along very nicely :+1:

Another classy piece of woody light is forming :wink:
Good work :slight_smile:

Looking great, MD!

Very Nice :+1:

Wow your on a role mate most of us are just starting lol

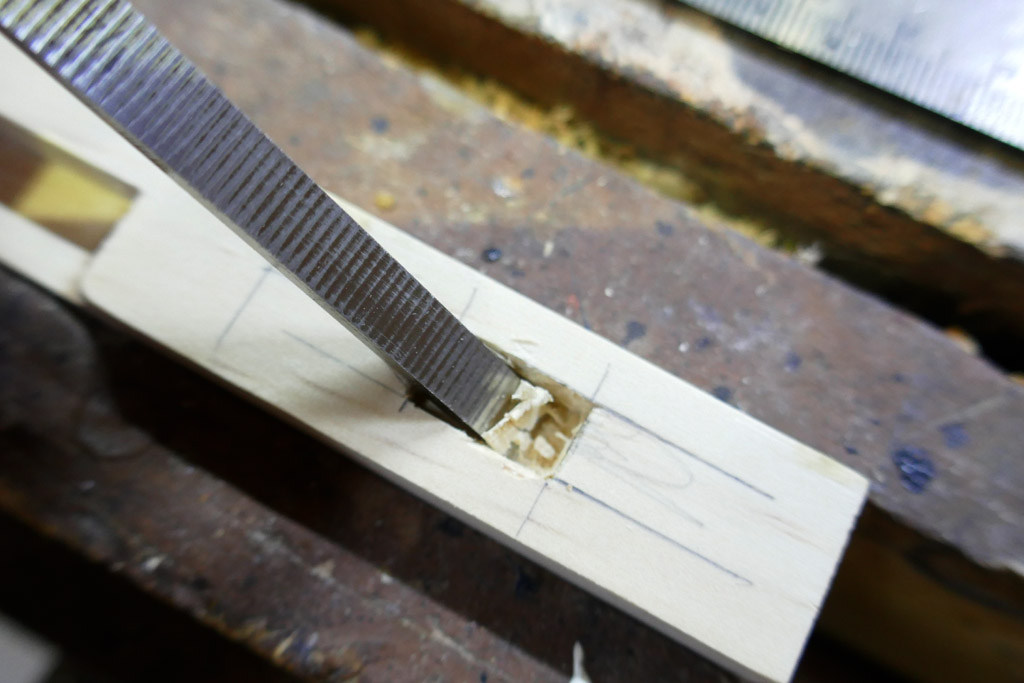
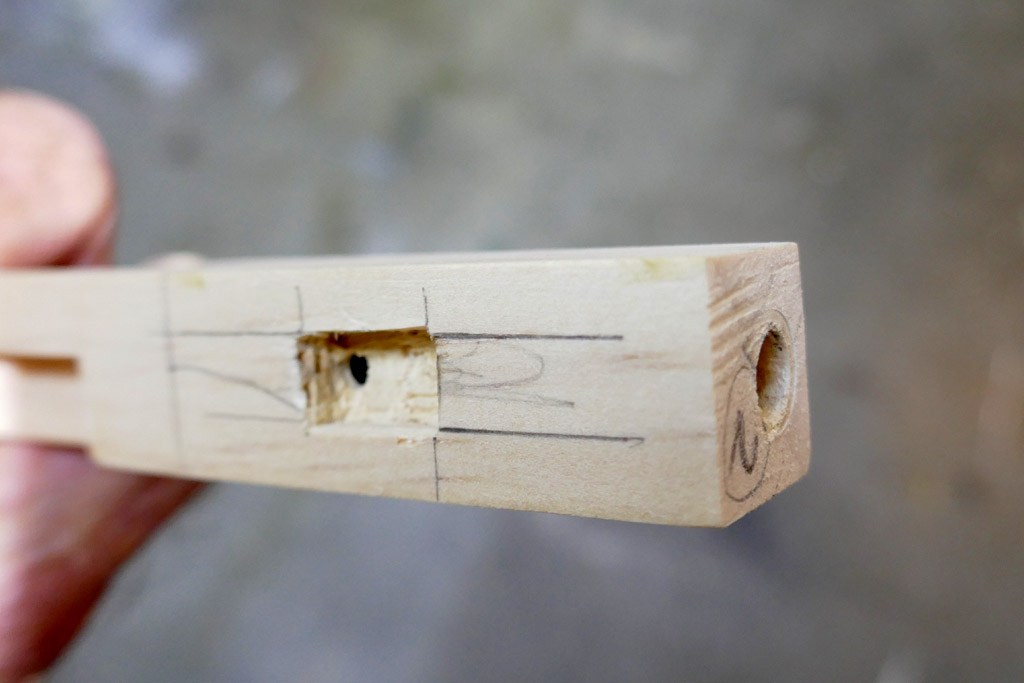
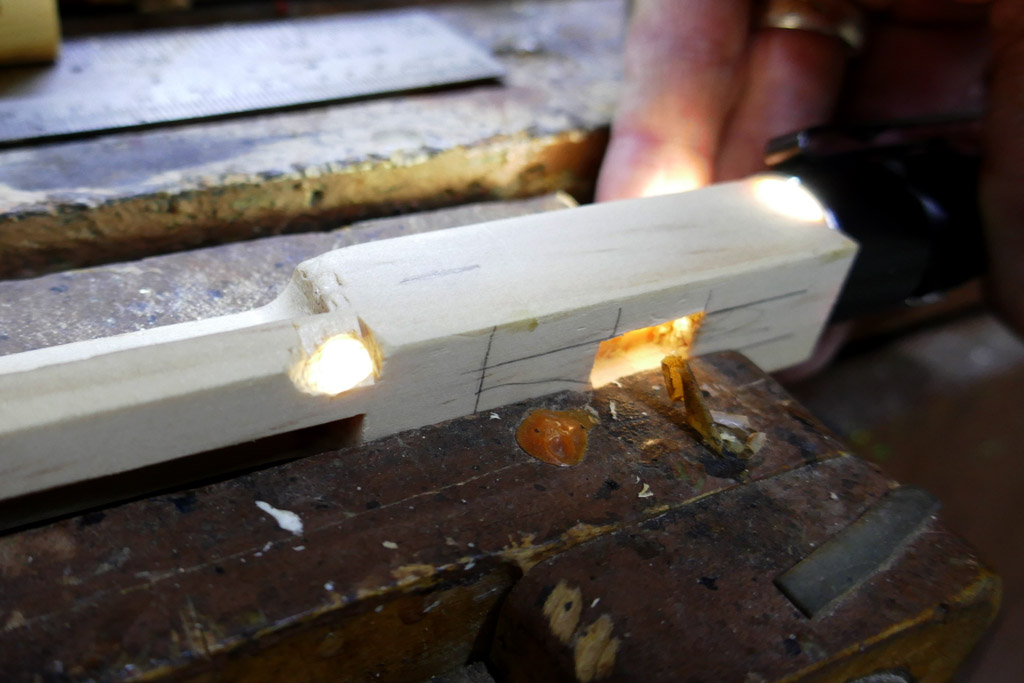
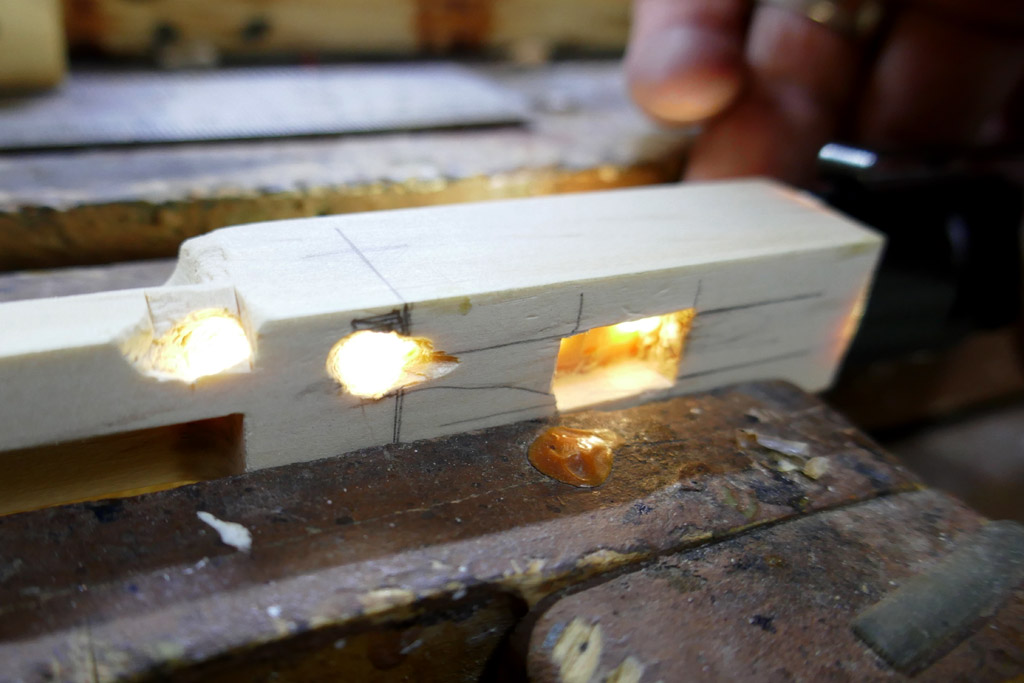
Time to replace the rubber bands with dowels and glue…

The brown stuff is liquid “hide” glue. It has a long open or work time compared to more common yellow wood glues. That makes it easier to assemble the multiple pieces. The drawback is mainly that it is not waterproof, so no IP rating on this light, and that it is not quite as strong.

Multiple clamps with a rubber band temporary assist.

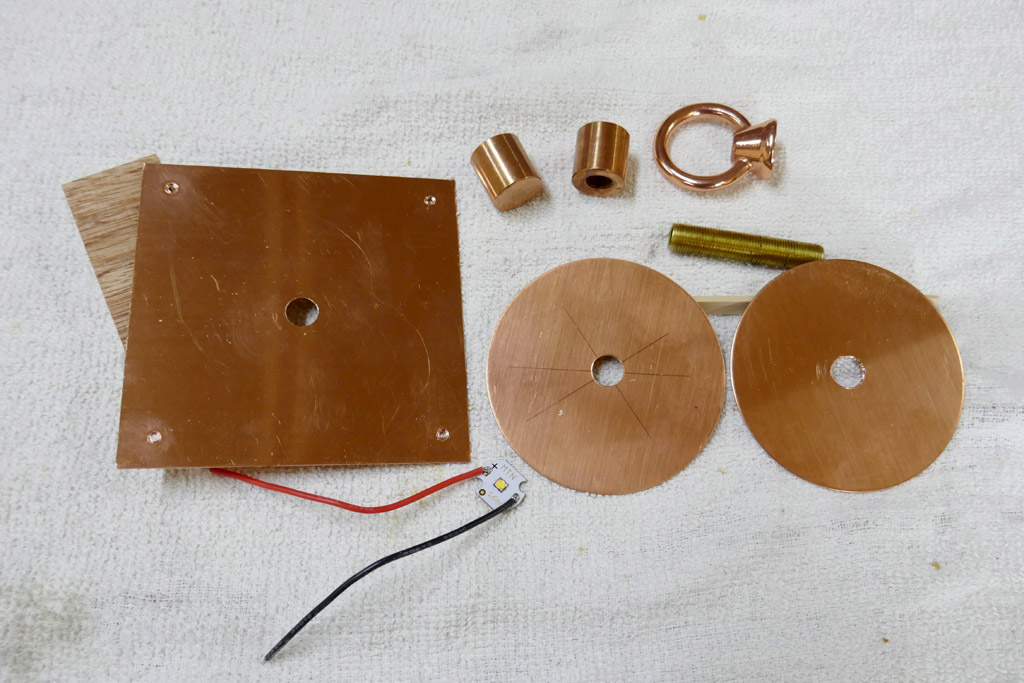
Some parts came in today’s post. The square piece of sheet copper I had lying about. I drilled a center 3/8” hole and 4 smaller ones for screws to secure this plate to the underside of the wood upper plate, inside the lantern.

The 2 copper discs were purchased from Bopper metal online; 18 gauge, 3 inch diameter. I drilled the 3/8” center holes.

The brass cylinder is a 1/8” IPS (internal pipe size) all threaded nipple. FYI, it has an OD of 3/8”. It and the three pieces above all came from grandbrass.com. They sell a wide assortment of parts used for electric household lamps. All sorts of bits and pieces for DIY building or repairing of lamps. The copper hoop is drilled and tapped to accept the1/8” IPS nipple. The two small cylindical copper items are 3/4” diamter x 3/4” long. One is drilled completely through and tapped 1/8” IPS while the other is drilled partways and tapped leaving a solid cap-like end.

The mcpcb is from mtnelectronics and has a Nichia 219C 3000K emitter.

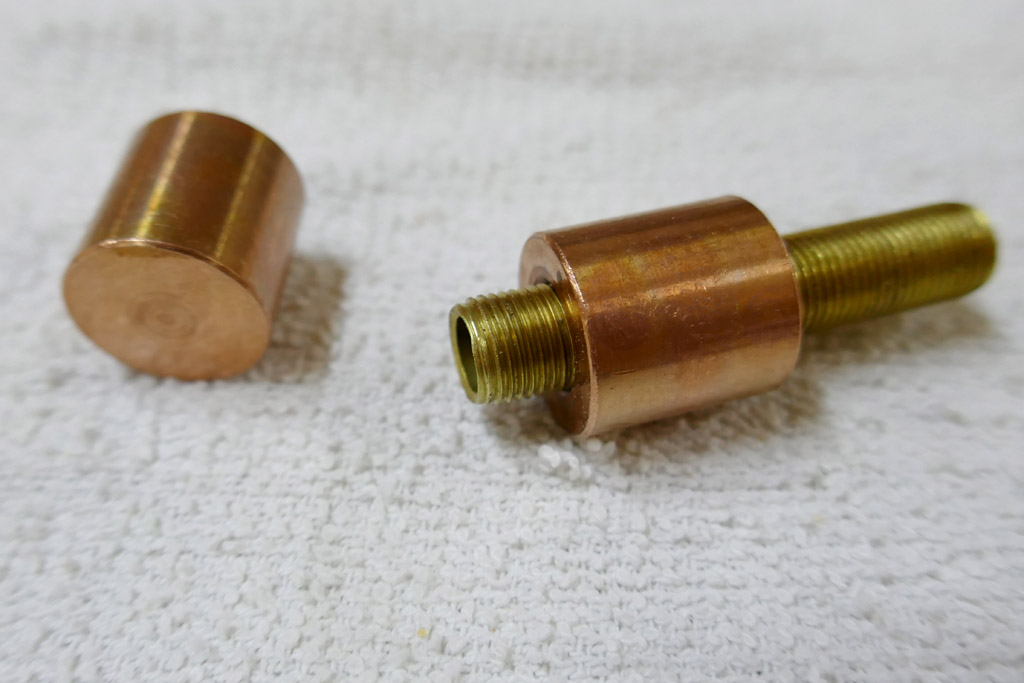
A close up of the nipple, spacer and cap……

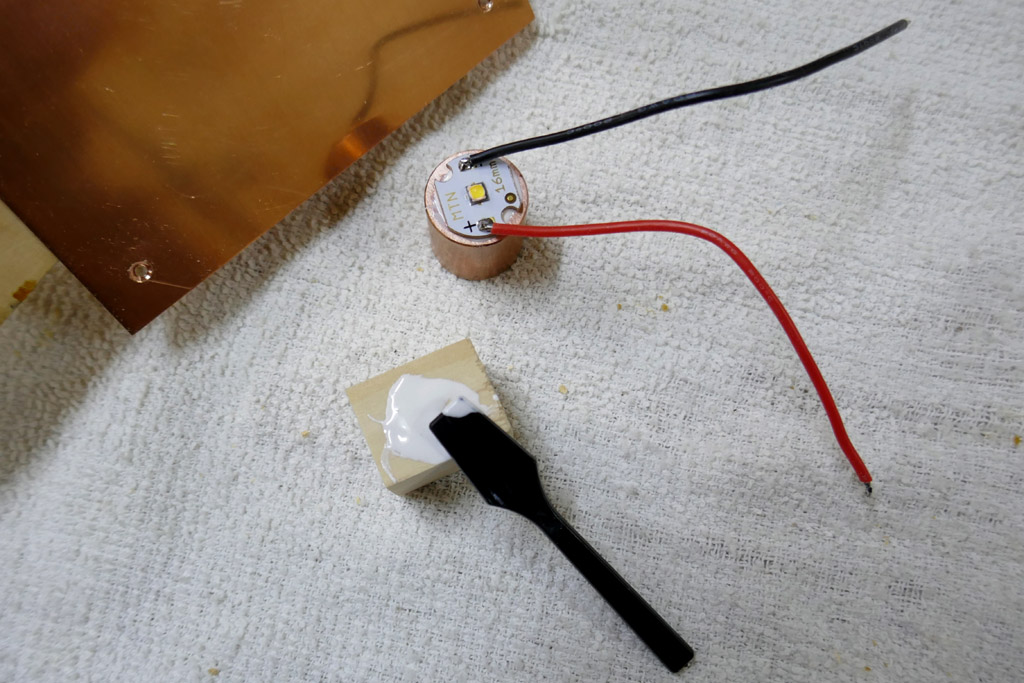
The mcpcb is glued to the copper cap using arctic alumina thermal adhesive.

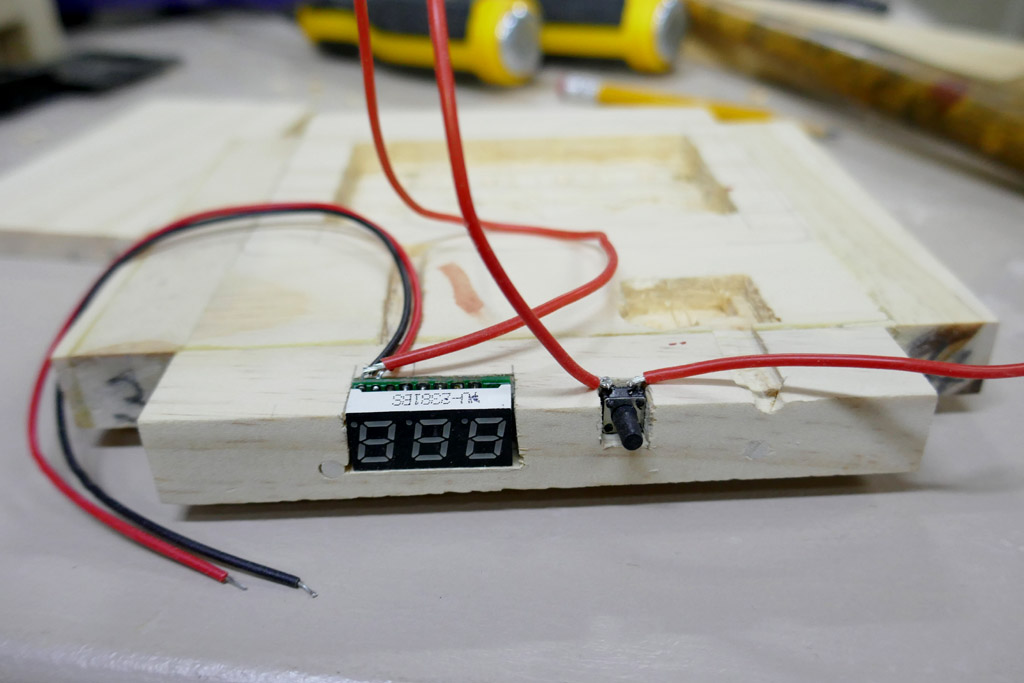
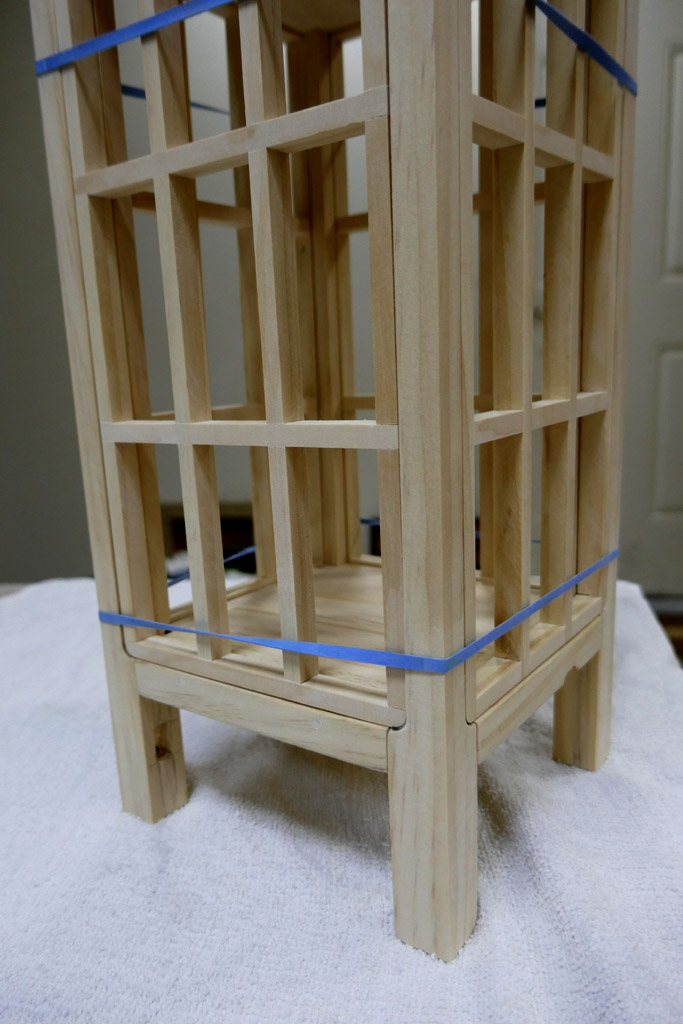
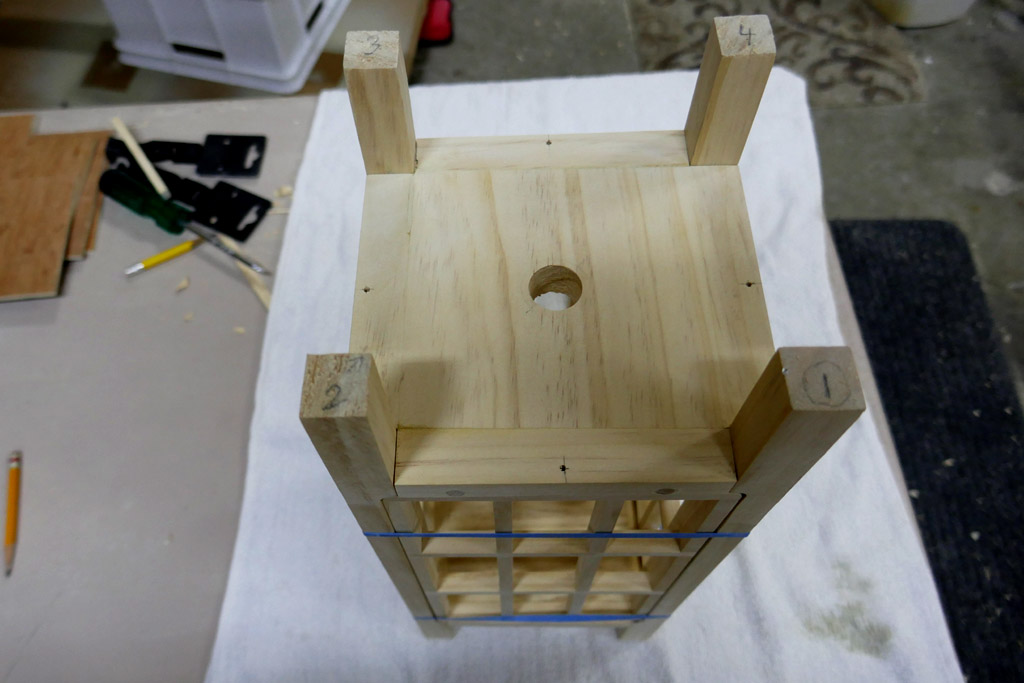
Voila! The rubber band is to keep the shoji screen frames from falling out. There will be pins installed later to hold them. Illustrated is the copper heat sinking for the led.

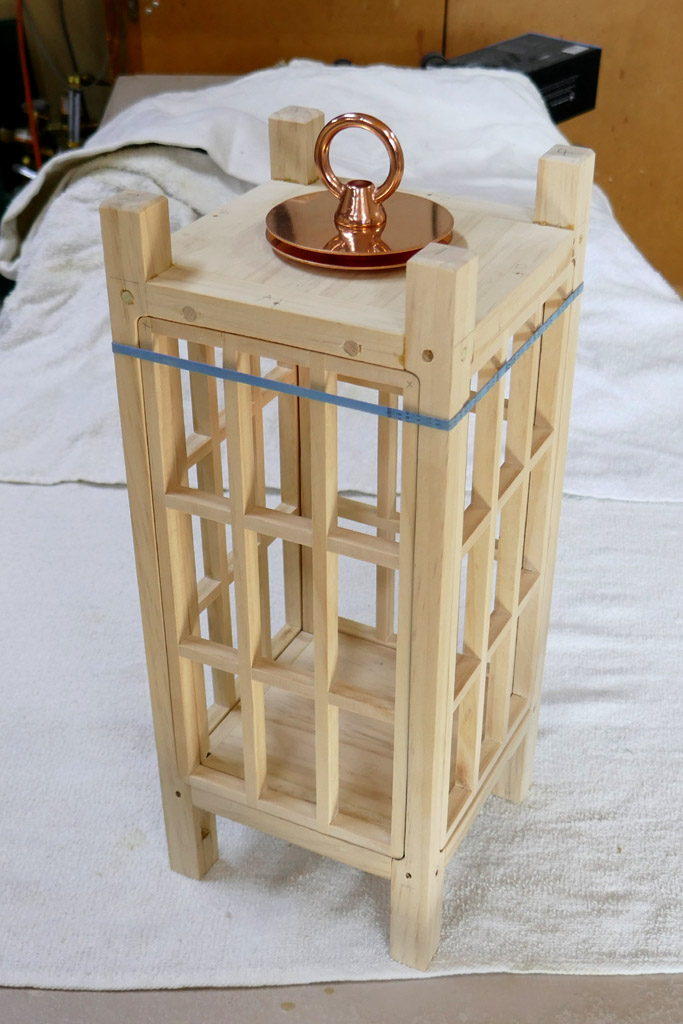
The discs are spaced with 1/8” thick copper washers I found at my local True Value Hardware store. You may note that I have trimmed the length of the upper ends of the 4 corner stiles.

Next we can see the 4 x 4 ” copper plate on the underside of the upper plate. The cap is threaded onto the nipple. Then the 3/4” thick copper spacer is threaded on above the 4 x 4 plate. That spacer is hidden in the hole drilled through the center of the upper wood plate. Then on the outside the round discs are slid on with the 1/8” washer spacers, with the hoop screwed on top. The lantern can be held by the hoop as well as hung.

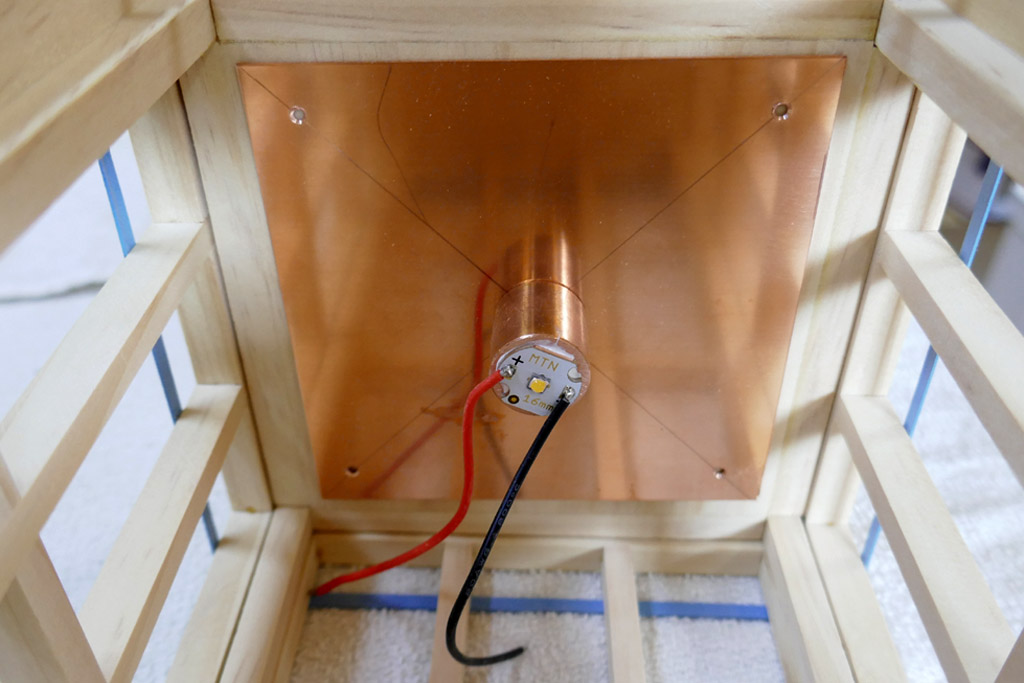
So from the mcpcb to the copper hoop there is, in effect, a solid copper path for heat distribution and dissapation., clamped together by the brass nipple threaded inside the copper parts.

Wow, that’s neat-o and nifty! :student:

I would have never thought of that, or anything like it. Nice work! How tightly do those copper parts interface with each other? Would it make any improvement if you put some Arctic Alumina between them?

Thanks.

The surfaces are quite smooth, but I was thinking of applying a tiny dab of AA between mating surfaces. Not that there will be a lot of heat; maximum current is 1.4 amps and likely it will be run at 50% of that most often.

If you mean the mount for the led and the heat sinking, it took me a lot of pondering the problem over months before I thought of the lamp parts. Then I got really lucky when I found that seller as most only have steel or brass parts with some having copper plated items. The ones I got are solid copper. FYI the threaded nipples come in many lengths as well as 3 or 4 foot long sections. There are also two other larger diameters.

I have another 4x4 piece of copper sheet that I may polish up and mount on the inside face of the bottom plate to see if it makes the illumination any nicer, warmer with the reflection.

That might be a good idea :+1:

Well, funny thing. I’m a licensed electrical contractor. I’ve installed lots of different ceiling fixtures (luminaire they’re called now). I’ve also seen lots of those lamp parts at Lowe’s. I’ve even used some of those all-threaded nipples before. But I still woulda never thought to put an LED into a lantern the way you did. :person_facepalming:

The really genius part was having a flat cap on the end of that nipple on the inside, and putting a MCPCB on it. That’s the part I’m sure I’d never think of doing. :crown: :+1:

I agree. In fact, it’s probably a great idea. :wink:

Man, that is looking so cool MD. Saying I admire your skills would be an under statement. :heart_eyes:

For sure. Those are some serious skills in order to keep everything that consistent and even looking.

MRsDNF, gchart, and all…. thank you very much for the kind words. :blush:

I just did a test stain on some of the pine cutoff pieces. I’m trying the black/ebony. I think it may look nice with the copper.