Blue, I’ll ultimately be able to run 16 cells and have run time too!
Wait.
At a conversvative 100lm/W(it is probably lower in real life), that means your light is consuming 250W+ at startup.
It is probably consuming more power, but you are pulling about 18A/cell.
That is a real monster.
And what do you mean brain cells?
If you only have a few of them, I can just say that yours are probably massive from all of the knowledge you built up over the years.
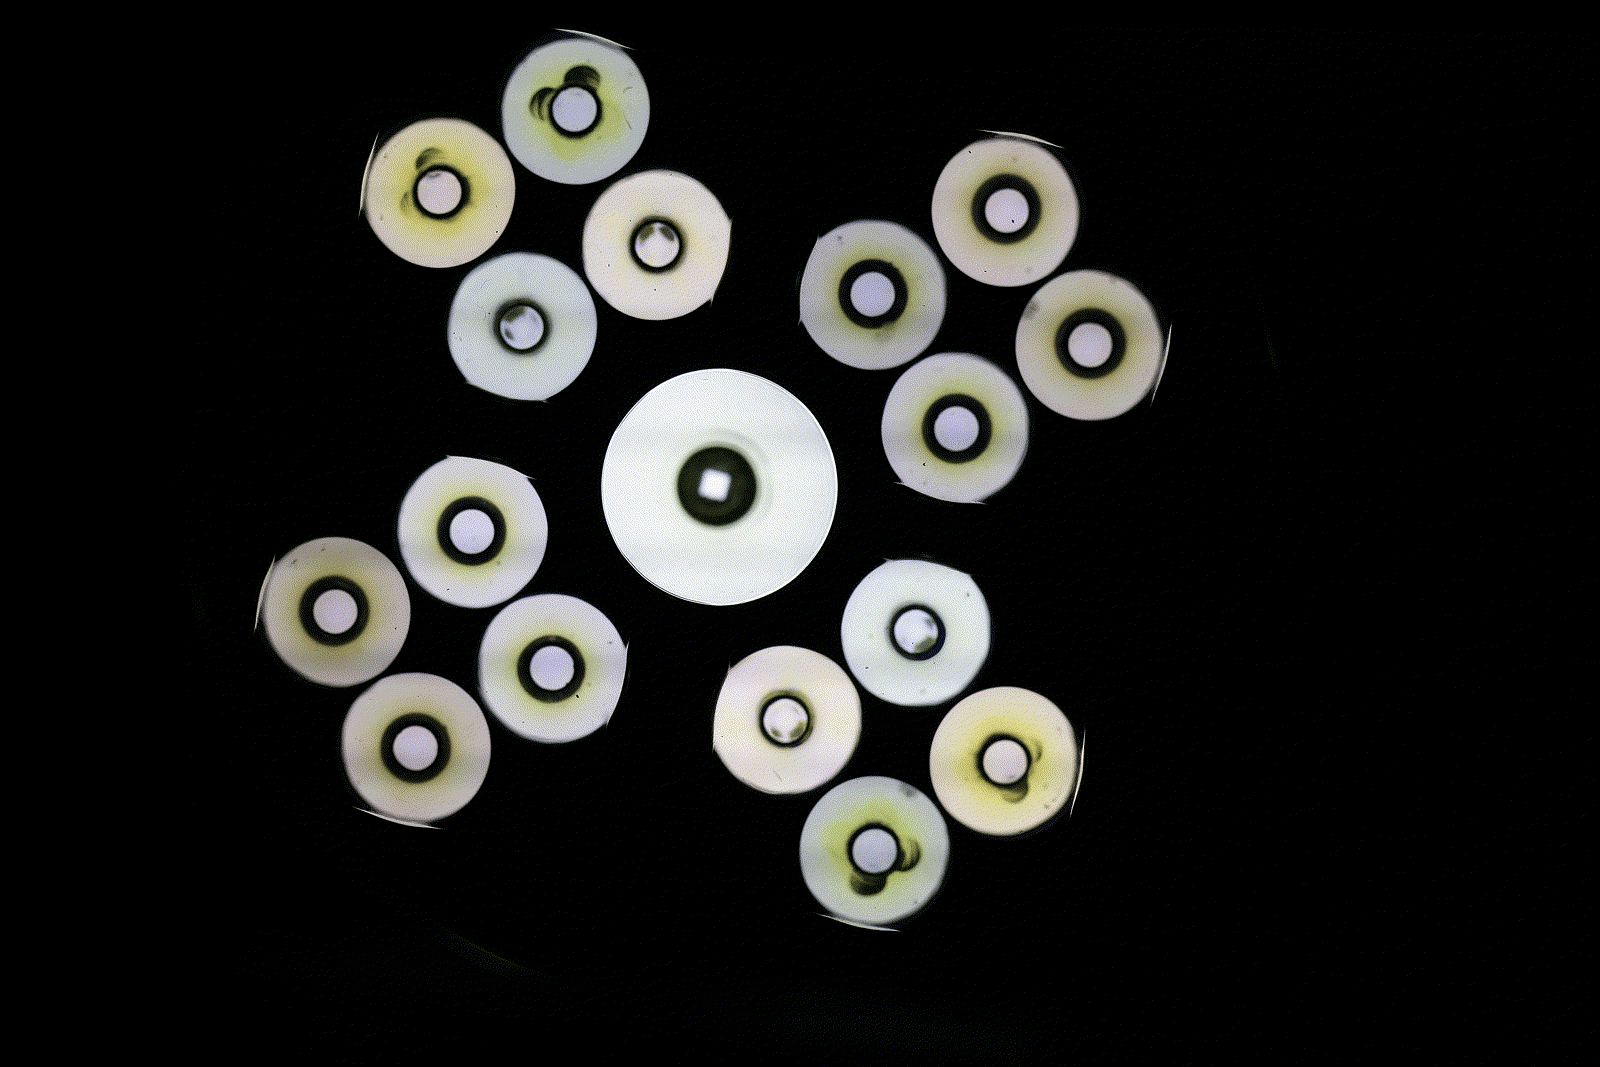
When I was trying to estimate what all these emitters would output I was figuring they’d pull some 86A to get around 25,000 lumens. At a guesstimated 3.4V on the average, maybe a bit higher, yeah, it’s a lot of power. A scary lot of power! I was going to add in 4 Nichia 219C’s but the 106A resulting draw was probably going to be too much and in the end I left them out.
My wife and daughter bought me a T-Shirt on one of my birthdays, years ago, that reads “I Do Know It All, I Just Can’t Remember It All At The Same Time” And while knowing it all is a large stretch, the part about what I can remember of what I should know is spot on!
I don’t know what I’m doing. I get lucky a lot. ![]()
Edit: When I built my Meteor M43 with 3 slaves to the one master, I got an actual at-emitter current draw reading of 58.8Amps from the 4 cells. That one has 12 Samsungs. So yeah, this one is seriously gobbling up some current!
I put off getting a smart phone for a long time, but now I have a pretty new Apple i8, the camera is decent and I have an app to let me fully control it. That said, I thought I could step outside and get a quick beamshot without grabbing a coat and going the full camera tripod route. Maybe I was wrong. My phone doesn’t quite know what to make of this…
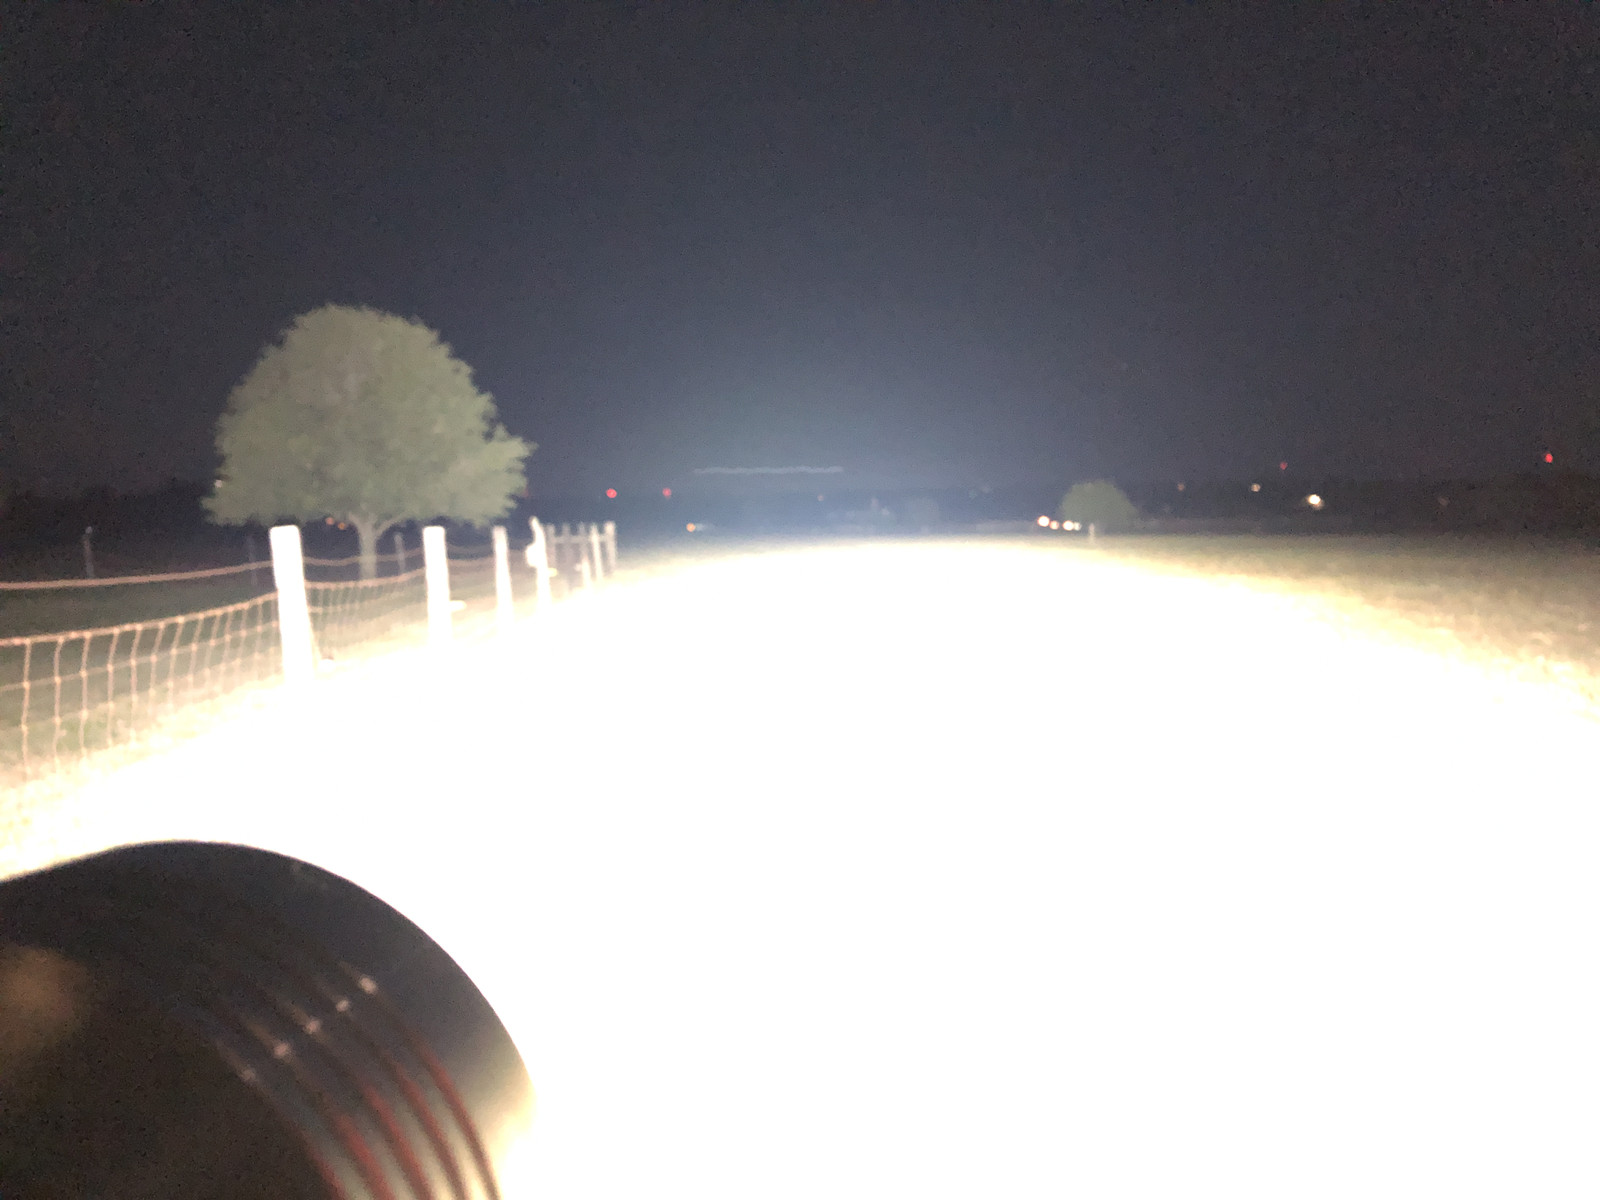
The white barn with the Flag flying at 610 yds distant is visible in the background, if you can get through the foreground. ![]()
I mean I see room for 4x 10mm “mule” boards for 180 degree flood but I guess you did pretty good.
I actually bought Carclo 10mm Optics to go with the Nichia’s I had but I needed the space for the wiring. I probably could have wired it differently, but still, didn’t want to piggyback them onto one of the existing 5 drivers and there wasn’t room for a 5th slave…
@Dale, great light canon. More pic once you get that iPhone figured out ![]()
My mod went the other way towards a tiny light.
I liked my new Olight i3T well enough to dedicate one of my last remaining Nichia 219BT SW45K R9080’s (but I apparently didn’t like it enough to leave it alone cool tinted; yes, I’m a tint snob ![]() )
)
Here’s a peak at the inside, that’s a Philips LUXEON TX CW -

I replaced -
- the Philips LED board with a copper MCPCB for the Nichia, and
- the plastic lens (which got destroyed in the mod process) with a glass lens.
Now that’s it’s done, this simple 2-mode light has managed to ‘warm’ it’s way into my heart (beautiful neutral white) and into my pocket as an EDC!

Excellent! Olights are typically well made but also typically lacking in the emitter dept. Nice upgrade!
What size is the mcpcb? Was breaking the plastic lens unavoidable?
So you have to unscrew the bezel to get the LED, right ?
Olight likes press fit bezels that can be difficult to remove…
Dale, are we going to get more pictures of your ultra mega Q8?
@Dale, thanks.
On the basis of what I had to do to get inside :weary: I can vouch that the i3T is built to be fairly water and drop resistant.
What attracted me to the light was the runtime & regulation they managed to squeeze out of an ordinary AAA and the forward clicky. And now with a great tint, it’s a tri-fecta :+1:
It took a 10mm mcpcb. The Philips Luxeon PCB was not reuseable/reflowable as it has different footprint than typical Nichia/Cree 3535 X-type (it’s also not metal core). Same for the lens, the few things I tried didn’t work, including taking heat to the lens to soften any glue…that only distorted the plastic lens :person_facepalming: after which it didn’t matter any more. Fortunately I had a salvaged 12mm glass lens I was able to use instead.
As far as I could tell there’s nothing to unscrew. The LED & lens assembly appear to be press fit and/or glued in. This light does not appear to be built to be modded/serviced but then that’s what makes it more robust.
Unlike most other AAA lights I’ve tackled which typically involve a small pill that is complete with driver and LED MCPCB, the i3T is designed more like some larger lights using an integrated shelf. Here’s a peak under the LED PCB, the shelf facilitates direct heat transfer to the body.

I still don’t get how you removed the optic/glass/LED
I removed it by inserting a tiny thin mini-screwdriver in from one side and wigging side-to-side to break any bond/glue. Once the bond/glue was loose, it pried out.
Perhaps if done carefully, one could salvage the soft plastic lens for re-use (sans any damage to the edge where the screwdriver went in) but in my case it was already deformed from trying heat so I made no attempt to preserve it.
Afterwards one could either try pressing the lens back in or replacing it with another, in my case I did the latter with a glass lens that I glued in.
On my big Quad quad plus one light, I was looking at the empty spaces this morning and trying to figure out how to finish that off… Two of the 4 spaces have a “T” intersection of the 18ga Teflon positive wire crossing the 14Ga Red Turnigy, so that needs to be sealed and capped. So I got to thinking, and looking around…. I would like to use 2 of the Sofirn carriers with 8 cells when all is said and done, so it will be 8 18650 cells powering up 5 drivers to 4 Quads and the output really hammers, right? So I found a new cartridge developed just this year for a specialized custom AR-15… the .458 HAM’R! I’m inquiring with brass companies to see if I can get a few pcs of this brass to fit into the voids here, maybe even put small SMD emitters in the primer cup and run these with the switch light for a glow up top. ![]() I can use Sugru (uncured Silicone) under and around the electrical connection and also to glue in a cut down .458 HAM’R brass cartridge such that the headstamp is up against the lens like the Quad optics and center reflector. Lighting it may be more than I want to bite off, but I could certainly fill the primer cup with a glow in the dark powder and cut a window in the side of the cartridge to allow this powder to charge when the lights are illuminated.
I can use Sugru (uncured Silicone) under and around the electrical connection and also to glue in a cut down .458 HAM’R brass cartridge such that the headstamp is up against the lens like the Quad optics and center reflector. Lighting it may be more than I want to bite off, but I could certainly fill the primer cup with a glow in the dark powder and cut a window in the side of the cartridge to allow this powder to charge when the lights are illuminated. ![]()
Anyone got any once fired .458 HAM’R brass laying around? ![]()
I keep seeing you mention “dedomed and sealed” - what does sealed mean in this context?
Richard managed to de-dome the SST-40 and then he sealed it with LED Seal to protect the bond wires. I’ve never used the stuff, but it appears to be a clear almost epoxy like stuff that is put on like one drop, it spreads and covers the die and bond wires and leaves a thin durable coating, like a micro dome.
How significant is this compared to just slicing above the wires