told you that this is for a selected group of tint weirdo’s ![]()
(high CRI tint pics are never look like reality, they tend to look brownish while it looks way whiter in real life)
Right On! It’s better than Yellow or Orange… but a bit too Rosy for me though…quite a bit… ![]()
Edit: I really like that Old Light :+1:
The problem there is the daylight white balance with a low tint from the emitter. ![]()
Set your camera for 3500K and it should look like you see it.
And I’m with Kawi, I’d throw that one in the trash. ![]()
Edit: Beautiful slice on it though! Well done!
Time for a BLF tint schism ![]()
(cool tints-cool schmints ![]() )
)
hahahahaha, I don’t like cool tints, per se, just really don’t like orange or brown light. Campfire girls or whatever. They can use it to cook their s-mores… ![]()
djozz that’s very good info. Amazing how much DUV drops with a tint slice on the SST-20 instead of going up like on the Crees. Too bad the efficiency is so poor.
I’m a bit surprised about the efficiency loss actually, compared to an undomed bare led I would expect 20% loss for dedoming and 20% cfrom building into a flashlight, assuming about 4A with tail on (I measured 4.65A with a clamp meter bypassing the clicky tail), that should be 550 lumen. I see that some light leaks to the side, but in a reflector build like this even most of that light should end up OTF.
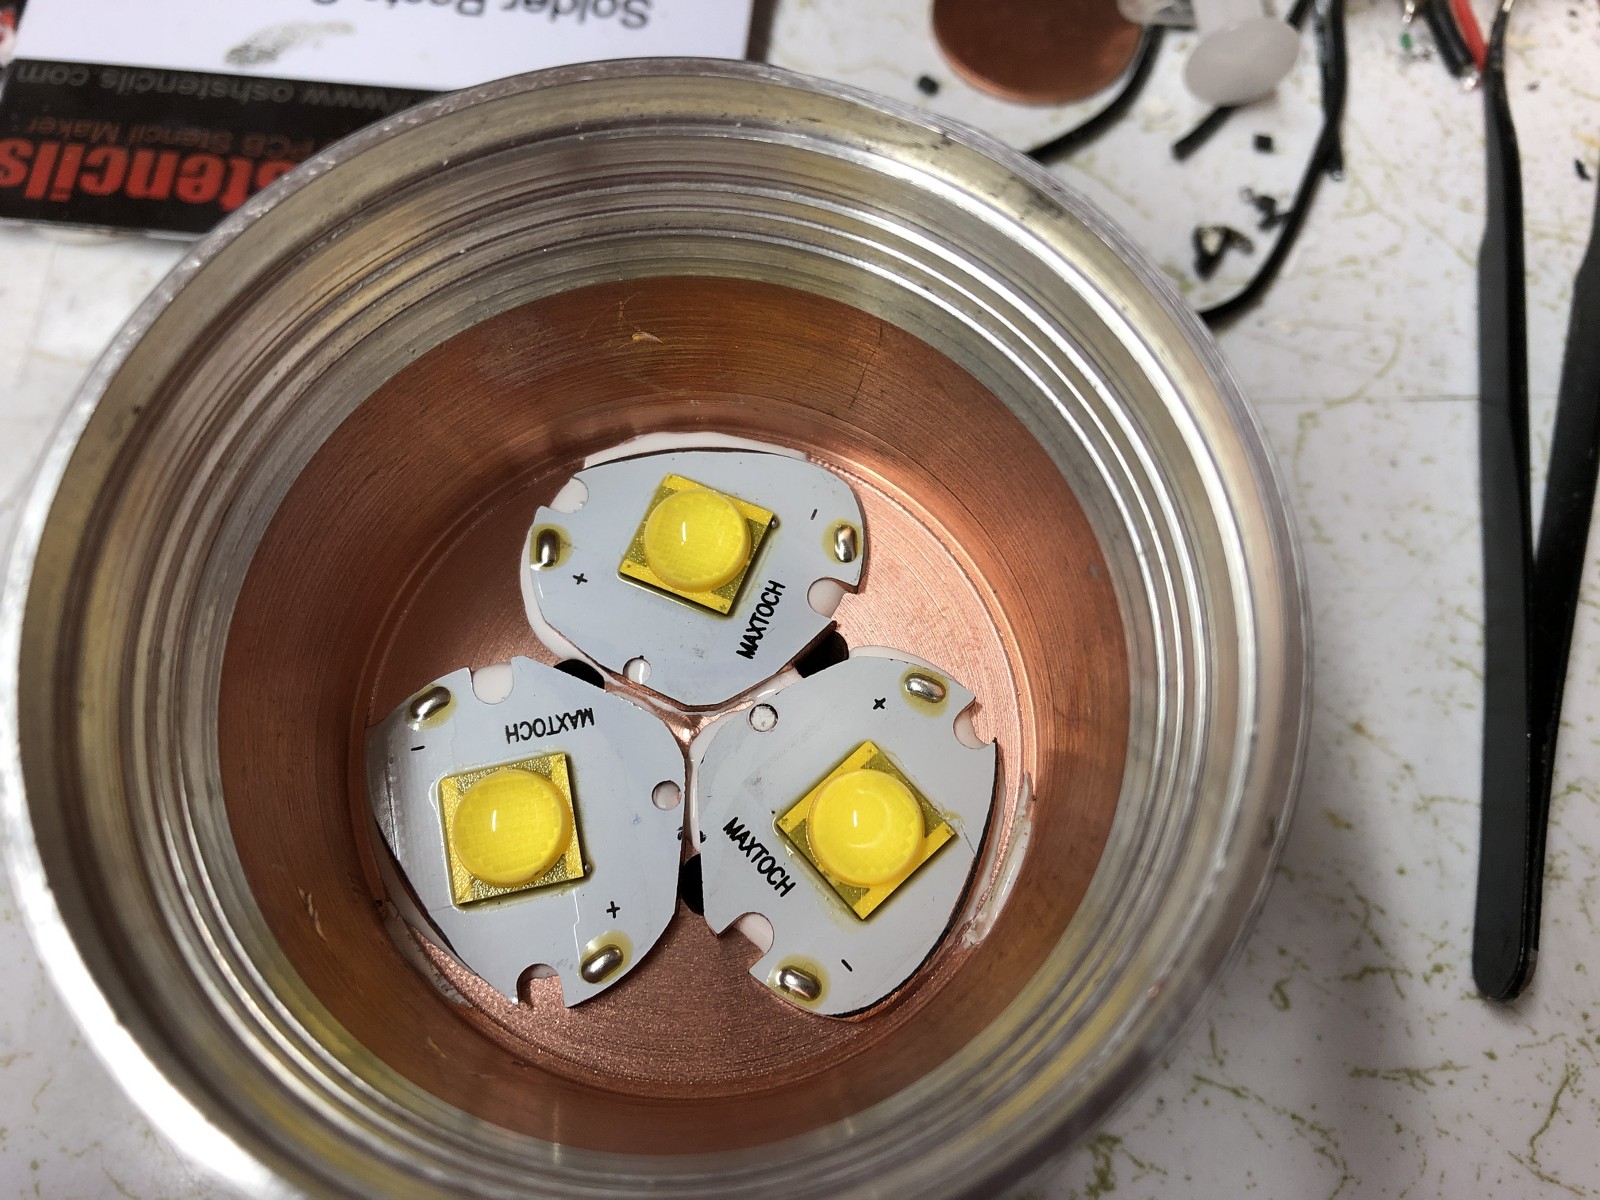
I had to rebuild my DBC05 today, the XHP-70.2’s were starting to fail so I removed them and put in MT-G2’s. It was a bear getting the 20mm SinkPAD’s heated up enough to break the bond on the Arctic Alumina Thermal Adhesive with them sitting on such a big chunk of copper, but perseverance paid off. I machined off the remaining adhesive and removed the rimmed opening on the triple reflector so the base of the reflector is completely flat now to sit on the MT-G2 substrate. Had to open the emitter openings with scissors, so yeah this swap involved some fairly extensive hand fitting.
Here’s the new emitters sitting in place before wiring it up… about 2 lbs of copper still sitting under these emitters.
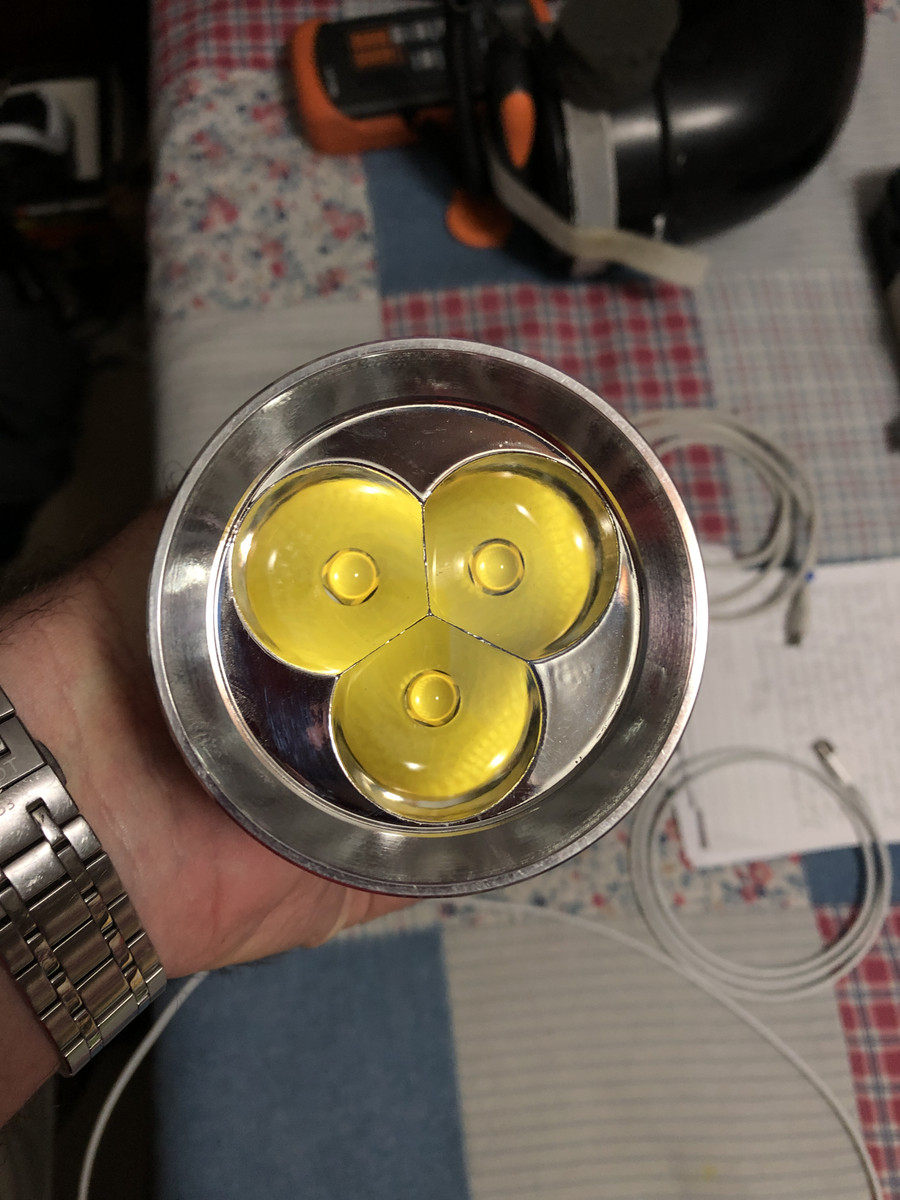
And a frontal view after assembly…
A shot on the wall showing a 16x20 canvas of my son when he was little…
These are Q0 5000K MT-G2 in 6V variant, they’re pulling 27A on the 2S Samsung 30T freshly charged for 12,488 lumens at start… not a horrible loss and a big tint improvement so all in all I’m ok with it. At around 9A each the MT-G2’s should hold up well, they’re very tough emitters….
Edit: The DBC-05 is this light for those that don’t recall…
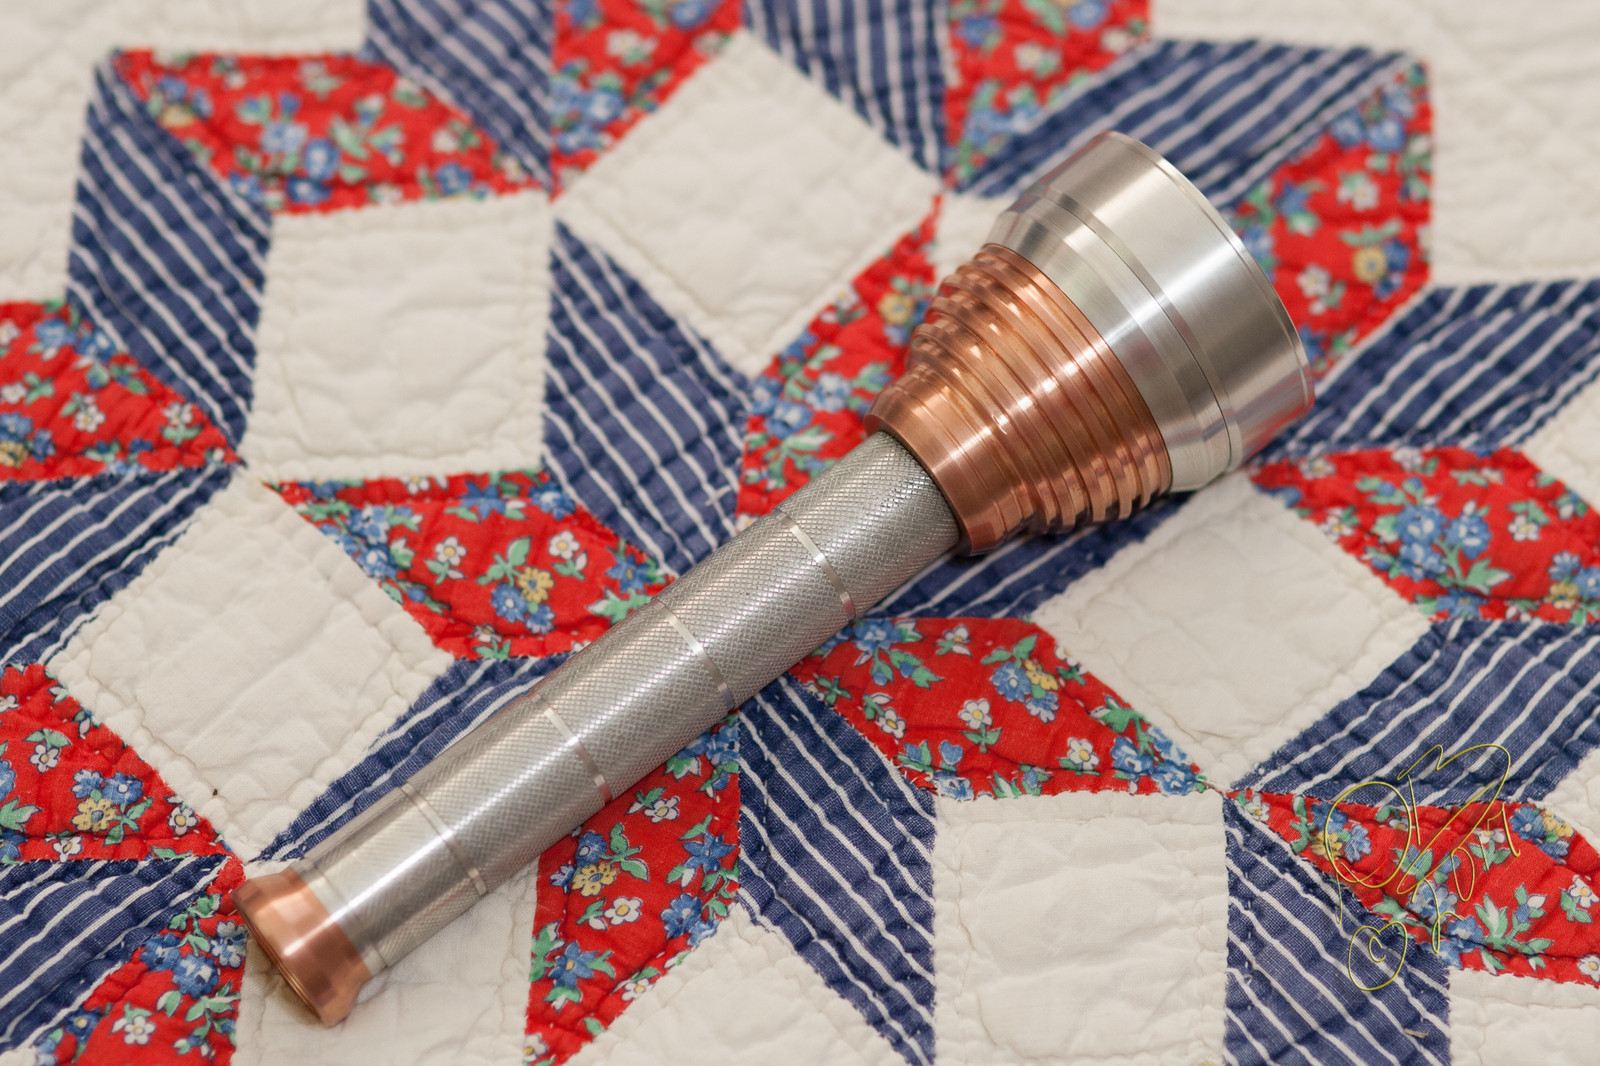
Completely scratch built it started with a 3.17 lb chunk of Tellurium Copper.
Very nice. Thoughts on 70.2 failures?
Not sure. They were running at less than 16A each, they made a lot of heat and saturated the big copper pill pretty quickly so I would have to think heat is a major factor. Could be I suck at re-flowing, but the 70.2 I stuck in an L6 at over 9000 lumens is still going strong so I don’t know. I usually try to use the 6V boards with these, as in the case of that one in the L6, but these were on 12V boards, maybe that had something to do with it? They were running at 6V, in parallel, off a single 20mm FET driver with Zener mod.
Not sure if this is going to be a problem or not but my bobbersphere looks like some kind of Christmas pokeball? I didn’t expect this much light to leak through…

Is the whole thing acting like a diffuser or do I need to make the inside more opaque somehow? I haven’t even attempted to calibrate it yet.
I think the XHP50.2 & 70.2 can be a bit sensitive.
Good old MT-G2 for the win ![]()
![]()
That is the prettiest integrating sphere that I have ever seen ![]()
My spheres “leak” light too. remind that every photon entering the sphere will either be absorbed at some point or will leave the sphere. If there is not much inside the sphere that will absorb photons eventually many will just end up through the wall to the outside. So that leaking light can be a sign of much light loss but can also be fine. What matters is how many times a foton that reaches the detector on average has bounced around before getting there, If that number is high, say 8, then the integration is good.
A misconception is that all light must be trapped. You need some trapping to get enough reflections for integration but just a fraction of the light will end up in the detector, the rest will go somewhere else.
Seeing lovely MT-G2 5000Ks in that beautiful light makes me all warm and fuzzy inside. I’ll bet you it was the light itself that spat out them XHPs, it knew it deserved the crème de la crème of LEDs.
Today i finally did the resistor mod for my L6, which has seen almost no use the last year.
I used a 1210 size (0,5W) R120 resistor which fits exactly over the two existing sensing resistors, and it worked out pretty nice.
I took out the whole driver to be able to get a nice solder joint and the result was very nice, it was a long time ago for me soldering these small parts.
Also i did file two small notches to get out the switch without having to disassemble and reassemble it (like the Q8)
Very happy with the result, and sometimes nice to see how satisfying those small mods can be!
Why not just wrap the outside with aluminum foil?
I like that tint Djozz but only in reflector lights. ![]()
It penetrates through misty/foggy conditions better than other.

I had this idea too but wanted to ask first if I need to solve the problem from the inside first. I don’t want my awesome bobber to look like every other Papier-mâché (thx wiki for spelling) foam sphere! However, I have a more elegant solution I will try… The cooler is double walled and when I cut the hole for the lux meter the two walls broke loose. I think I can fit foil in between the two layers of the cooler.
Get ya a can of that expanding foam, blow it between the layers and let it expand in to fill. ![]()
Today I did some warm LED swaps.
One was an Jaxman E2L that I took out my shaved SST-20 4000K and put in SST-20 3000K 95CRI, looked like too much star burst pattern with smooth narrow optic so I went with frosted narrow and it seems much nicer. I liked the tint better of the 4K shaved one LEDs but it was just too much current/heat for the output I was getting and the beam shape wasn’t great either. I will probably put one of those in a small reflector light or something (BLF 348?).
On to the more interesting mod. My first LED swap which didn’t require solder. In fact I only used a screwdriver, wire cutters, and tweezers:
I recently ordered some batteries from Shockli’s aliexpress store and they threw in some freebies with my order. One was this cheapo keychain light. It has a 5mm straw hat LED that is press to activate and has a tiny switch to “lock” it on.

I bent and trimmed the legs of my Yuji 95 CRI 3200K LED

We have light!

I just now am realizing it had 2 stacked CR2016 batteries so I am probably giving this thing way too much voltage? Maybe a 2032 battery would have been more appropriate, who knows. I guess if it dies i’m out 55 cents…