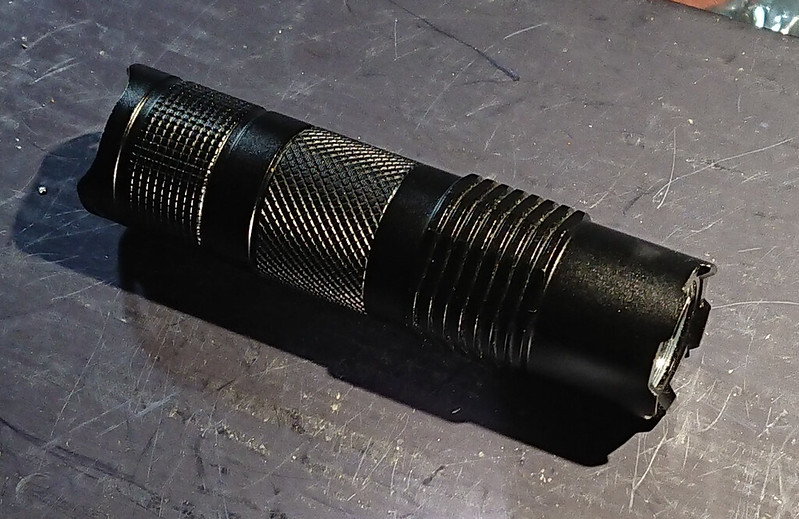
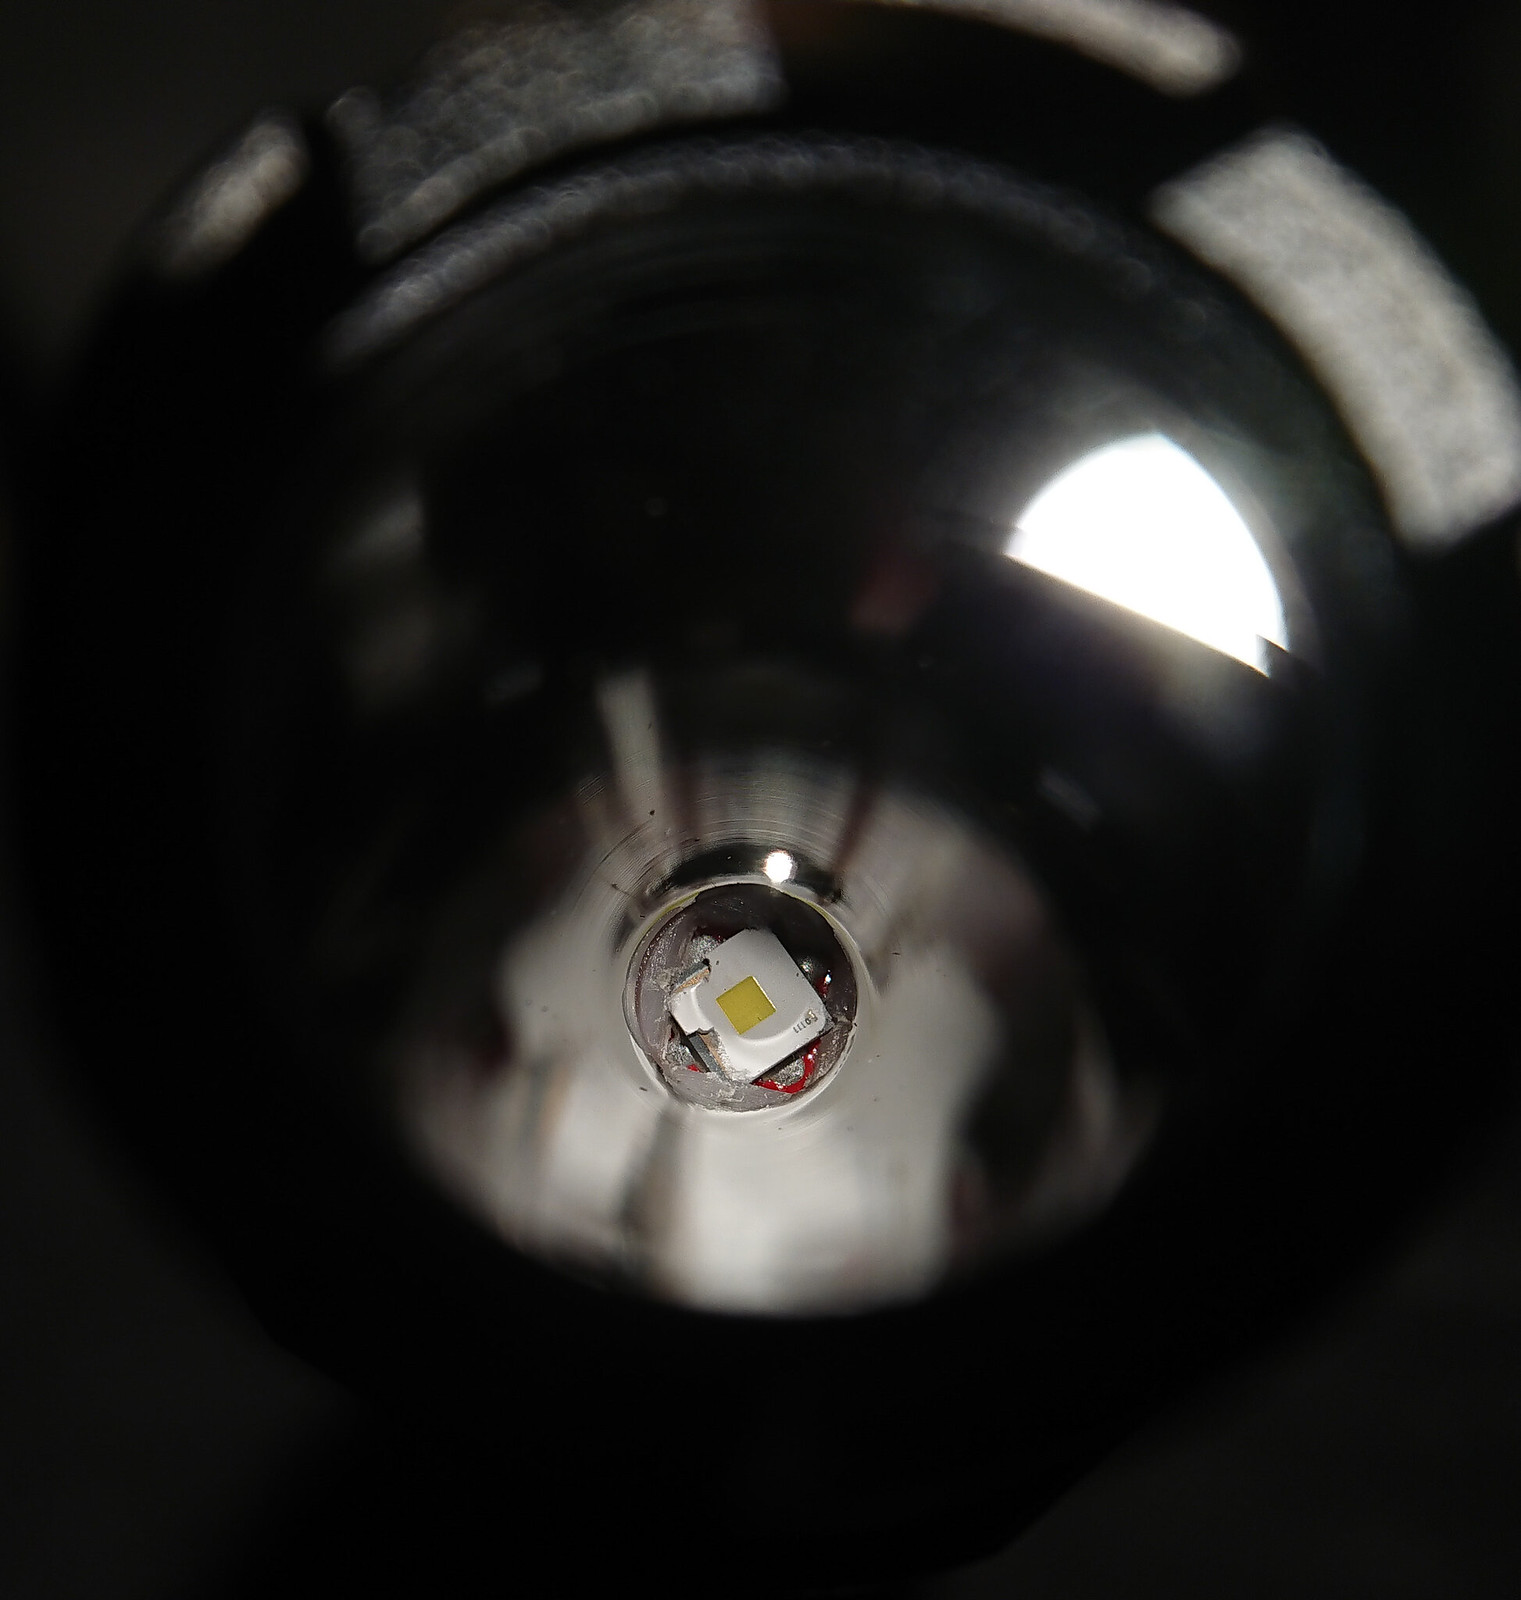
Re-modded a Convoy S8 shorty today with a 1mm2 White Flat, BLF-A6 driver with brass post (no tail spring bypass), and a lighted tail with 660nm 0603 leds. I messed a lot with a centerpiece that did not work well, and it appeared that the stock reflector was very poor so after a change to a different one the beam was much better. One centerpiece and one reflector later, and an in the meantime rather battered led I got the focus right and it measures 41 kcd now with a great clean hotspot
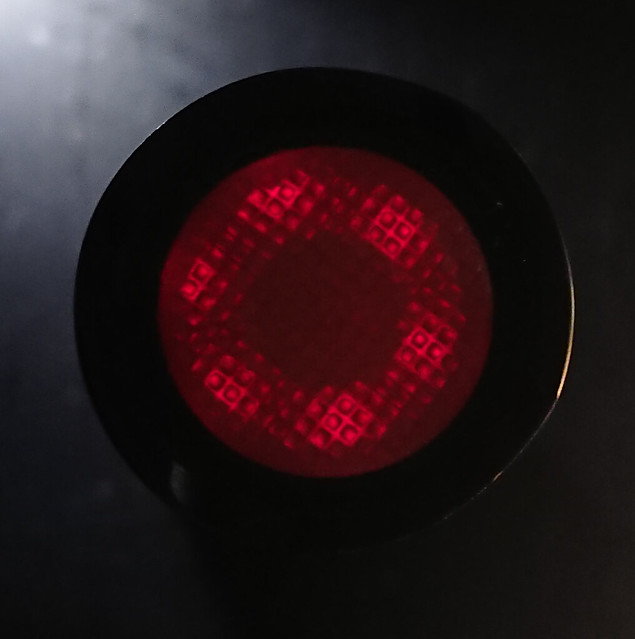
The 660nm leds give a nice almost crimson red but appear not very bright because the human eye can hardly see that wavelength. They should be great in the Fireflies E07 that I’m going to order sometime in the future.
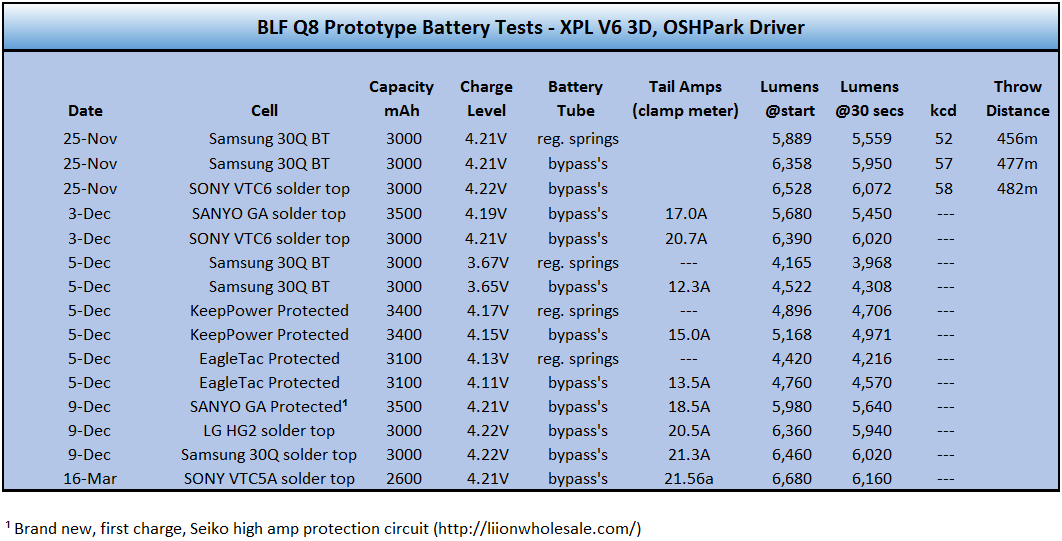
Yea, I think I know, but of course they are coated steel, and under compression, and depends on the quality. I've modded over a dozen Q8's and can't recall getting that high of a difference from just the springs -- I could be wrong, but a 25% jump is pretty big. I thought our decision to go with standard double springs, though not our first choice, was better performance than single springs. I argued for heavier gauge inner springs though. The current goes through the coating, not much, or not at all through the steel - takes the path of least resistance.
I don't understand the heatsinking tailcap, and dangerous to the cell's life part of that... I'm at a total loss there.
Here's comparisons on a Q8 prototype of dual stock springs vs. bypasses:
I shorted a BeCu single spring and it would have failed had I let it. Either way it’s a non-issue because we use bypasses so often something else will just get nuked in its place. See Tom E burning up his switch trace
The goal was to do as simple a mod as possible, with the idea that other modders might give it a shot. I got the idea for this after doing my last mod with a lighted metal switch button on the D4. Unlike that last one this one is pretty straightforward.
This mod is essentially just a replacement switch boot. The original rubber boot is removed and a new scratchbuilt switchbuilt made from a circle of rubber sheet with a smaller circle of aluminum glued on top goes in its place.
Here’s the detailed writeup:
Tools and parts needed:
1mm thick high-temp silicone sheet. Available at Amazon for $13.
Scissors
a small hand file
tin snips (metal cutting scissors).
steel wool
super glue - I highly recommend Fiberfix optical super-glue for its ease of use and instant results (it cures instantly when you shine the blue led built into the applicator). Also available at Amazon, but not cheap.
Plastic activator pen for super glue - I got this from a package of super glue advertised for plastics. Not sure if it works with other super-glues but certainly doesn’t hurt.
a screwdriver, victorinox mini knife or other tool to help in removing the switch boot retaining ring.
How to do the mod:
Step 1: Remove the switch retaining ring and remove the stock button boot. On a number of D4s, I can lever the boot off with the screwdriver at the end of the nail file on a Victorinox mini. Bring the file in from the side and dig it into the boot under the retaining ring, then lever it up. However, this didn’t work on every light. On my most recent D4, the ring was stuck and I gave up before seeing if it would break my knife. It’s possible that a twisting action would get a better result but would be more likely to damage the stock boot.
Step 2: cut a circle of 1mm thick high temperature silicone sheet with the exact same diameter as the stock button boot.
Step 3: cut a circle of aluminum sheet for the button. I used 0.016” aluminum sheet cut with tin snips and then filed with a hand file into a nice circle. File down the circle until it is about 1mm smaller than the retaining ring on all sides. Chamfer the upper edge so there is no sharp edge and then run steel wool over the edge to smooth it out. Rough up the bottom with an etcher so the glue will grip better.
Step 4: make a piston on the bottom of the silicone sheet. The barest hint of a piston is all that’s needed. I penned on the plastic activator, waited one minute, then put a single drop of fiberfix super glue right in the middle. I used the light on the glue applicator to instantly cure the glue.
Step 5: place the silicone circle into the switch socket of the light, piston down and test for fit.
Step 6: place the retaining ring back into the light with the silicone circle as the new switch boot. I found the easiest way to get the ring back on was to place it in position with the head upside down over a small anvil, then press hard with my hands to push the ring back in.
Step 7: Glue the Aluminum circle onto the top of the silicone circle. Carefully center the aluminum circle within the switch retaining ring before gluing, then use the plastic activator and fiberfix. When I first did this I noticed the silicone was bowing up into a dome with the boot sitting on top. I removed the new boot and determined the silicone circle was slightly too big so trimmed a bit off at the edges. I then used a toothpick to apply more fiberfix glue all around the edges of the metal button so there was no longer any gap.
Result: A fairly good looking metal switch that looks like it came with the light and sits flush with the stock retaining ring.
This entire project took me just half an hour. It was really quick.
Yes I think it was a S2+ tube, but I have a box of battery tubes (also for the S9, the X2R, the E2L, the BLF-A6) and they are all a bit different, so I’m not entirely sure.
I used a gasket with a square hole for 3535 leds (like XP-L Hi), but that hole is too large for the 3030-size White Flat so with a scalpel I cut little corners out 45 degrees from the original corners so that the 3030 led fit into those. It takes some practising, and you may waste one or two gaskets before you get the hang of it, but it is the only way to create precise centering unless you have the special 3030-gaskets from intl-outdoor.
Thanks for the indications djozz!
I’ve been thinking to mod a light with one of these leds (not sure which one, yet), but I’m seeing what will be needed to make it good. I’ve been reading that some people take a while to get a “perfect” centering and the gasket seems a key factor for that. I have some 3535 gaskets so I may try with modding them .
Thanks again for answering!!
Totally agree! Still a few terms and things I don't understand - are you a machinist or have some background in the industry? It's a shame Hank doesn't seem to believe in lighted switches though.
I think the scale is 1:8, your 1/2 hours is my 4 hours
For the Q8 dual springs, in developing a product, many times it's all about compromise. Believe me I work with this issue every day. It turns into an issue that needs some back and forth, and is it a fight worth fighting, of course they threaten costs and delays, we threaten quality loss of the product, etc... Unfortunately even the discussion is a delay because every response it seems like requires 24 hours working from 2 opposite sides of the planet. I think since then, it seems like newer products have less trouble getting quality springs, just not sure about Sofirn.
Fireflies gives quality and design some edge over costs, compared to Sofirn, but looks like so far, they have more issues with QC.
Sofirn is the mother company of Thorfire, hence they made the original BLF Q8. They have a LOT of practice! Fireflies is a start-up with only 3 lights made to date, not so much practice. They’re getting there fast though!
Just hope FF doesn't cheap things down. Love the SS bezels, different alum alloys, what appears to be better anodizing - like all those attributes, just need some buttoning down of the manu/QC issues. The Q8, SP36, and various other Sofirns don't use quality anodizing - way too easy to ding them to the bare alum. Funny because the The MIller insisted on using lower qual anodizing on the Q8 because he liked the idea of baking them to different colors.
Baking destroys the integrity of the anodization, it can be seen that a glazing of cracks appears in the surface after baking. Why would anyone opt for an inferior surface finish just to be able to destroy it in the oven? Odd…
I dunno - but my Q8 proto was baked and has held up well for about two years now. So if it's destroyed, it's not crumbling away. For a while it was a fad here on BLF, and I'm not sure from direct experience how inferior it is to regular cheaper grade anodizing at this point.
Yeah, well, if you’re like me with your 200+ lights you probably don’t use that one very often. (Yes I too have over 200, approaching 250. Favorites get the most use of course.)
I have baked a few, including a Type III Eagle Eye X6. The hard ano doesn’t turn colors like a lesser ano does but it too displays the micro fracturing indicating a compromised surface integrity. My Raysoon F13 turned literally the color of new copper, really looks neat… matches the feel of the big chunk of copper inside under the triple set-up.
Actually I used my proto copper colored Q8 this morning for bedroom lighting (why do I need a bedside lamp? ), but yes, it get's babied. But really, if the ano is damaged with cracks, etc., I want to know what's the downside, what happens over time of use, etc. Because I can't see the cracks, though can't recall look'n at it carefully. I do know it seems to have brought out a sparkle from the baking, but maybe that sparkle is because of the cracks?