Nice battery spacer.
Uh, yeah, about that spacer… you want to always put the spacer behind the cell not in front of it. The reason for this is that if the spacer manages to short against the body if it’s at the rear it will only cause the light to come on, bypassing the switch. If it’s in front of the cell it’s positive and a short will not be good, at the very least damaging your light and causing it to not function…
Thank you! It's super simple but I just use what's on hand and whatever pops in my head.
It can be a good heat sink as well.
Great point! I learned a lot from the Cometa discussions. This light came with a foam spacer. Just to make sure, I'll add some electrical tape around the caps. Card board sleeves stop the rattle.
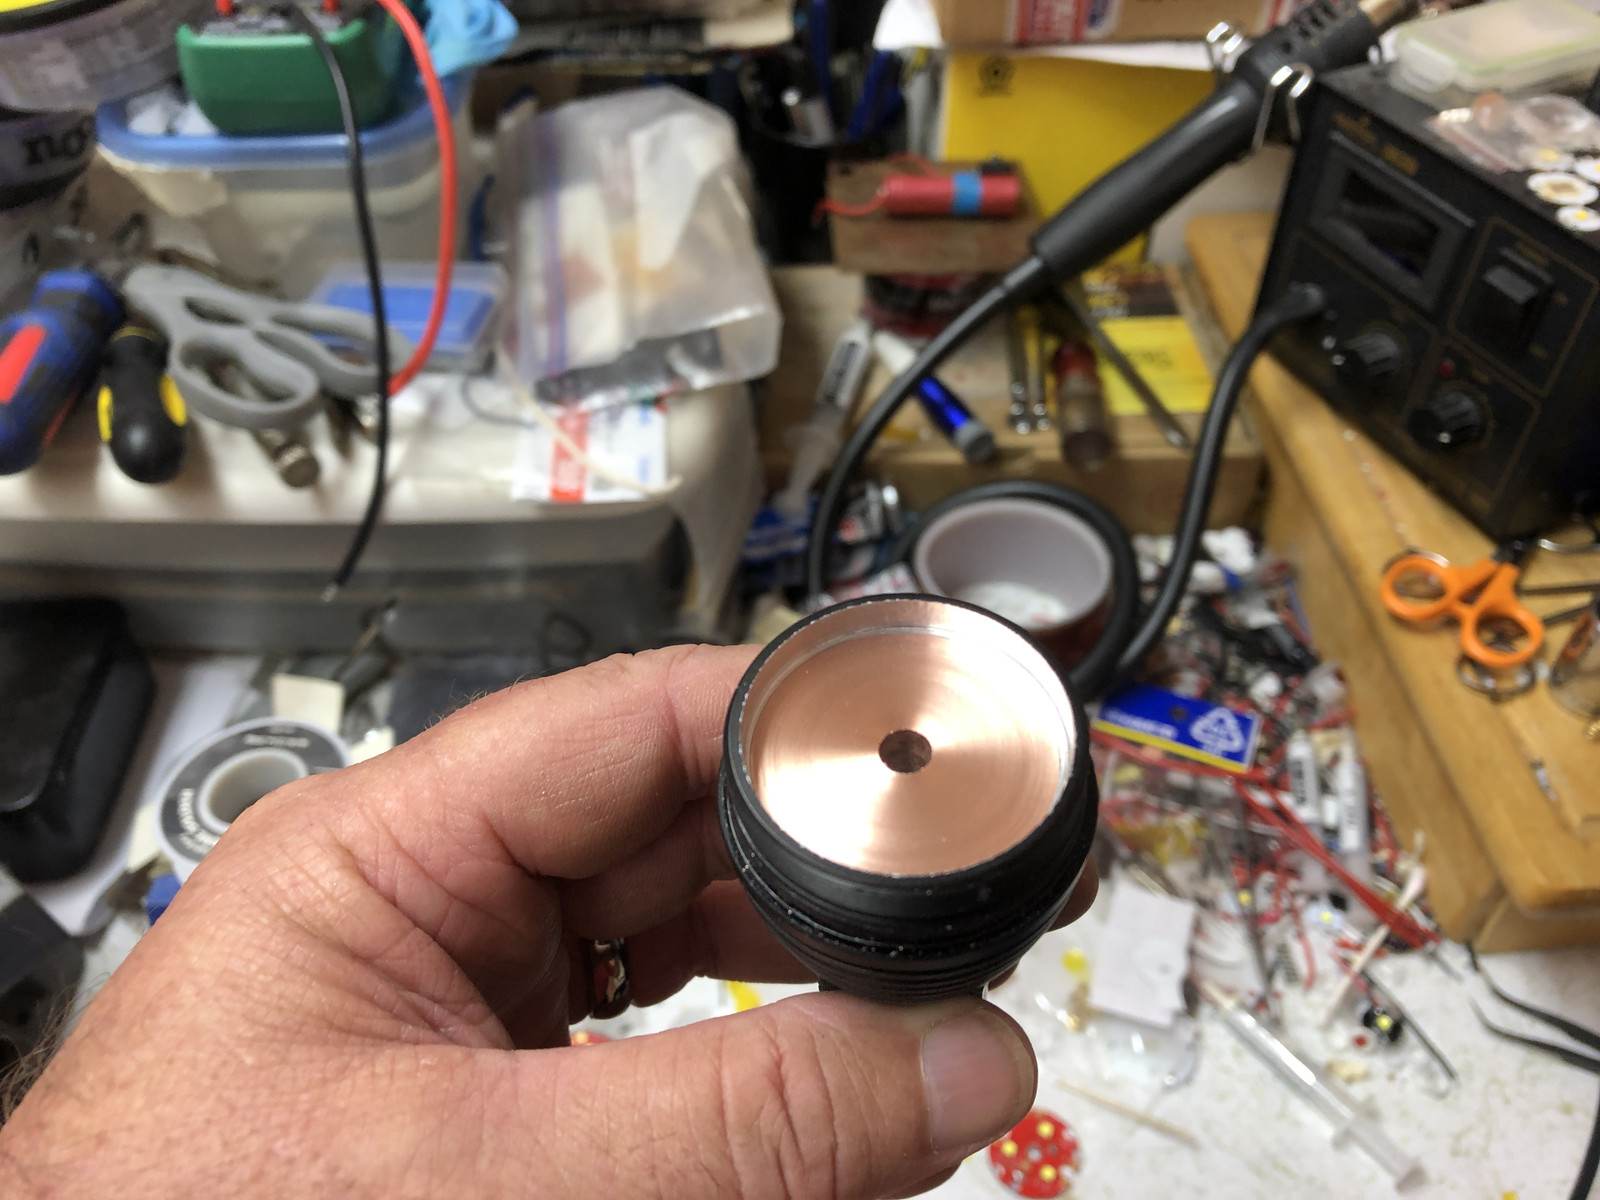
Truth be told, the copper will anodize and reduce transmission… you’ll have to periodically clean the ends with something like De-Oxit Gold. ![]()
Anodize
Solder blobs to the rescue?
It's bizarre that the inside of the cap stays shiny but the outside oxidizes. I scraped the patina and took some DMM measurements just to check on performance.
Solder blobs blacken and also increase resistance. Believe me, I deal with it all the time. I normally use aluminum quarter inch rod to make dummy cells, with a Delrin body. But solder blobbed high discharge cells continually have to be cleaned to maintain low internal resistance and high power.
In the link above, you'll see two other lights I upgraded. One of them being this Husky: https://1drv.ms/u/s!AqeZmZFhBiGKhEXGtjRD_lAAUS_S
I replaced the driver, LED and reflector. The original LED was an XPG 3 and it now has an XHP 50. The old reflector was plastic and it melted with all the heat. The new C8 reflector needed a little OD grinding reduction and works great. It also holds the MCPCB so in this case, I don't think screws will be needed to ensure good thermal transfer. It gets hot fast!

I put a sliced 3V 6500K XHP50.2 in my NS22 Seeker. I’m not too fond of a 6500K XHP50.2 (tint, Cree rainbow), and I’m not really fond of my NS22 Seeker (the cheapish finish mainly, and comic sans does not help), so I thought it fitting to combine the two.
And of course now my heart was not really into it, everything worked as planned, the result is ![]() , and now I wished I had waited for the neutral 3V XHP50.2 for this mod.
, and now I wished I had waited for the neutral 3V XHP50.2 for this mod. ![]()

I did not see anyone mention yet the pad layout on the bottom of the 3V XHP50.2, looks like individually addressable dies, and the option to go 6V. To make use of all this you could use the oldschool XM-L colour Sinkpad that is still for sale here and there.

I reflowed the led on a Kerui 20mm copper DTP board (got it as a sample 2 years ago) and using a few sizes washers sliced my way down to the dies, and then cut off the sides of the silicone. One way or another, 1 out of 4 ESD wires survived all that ![]() . The picture is with the led at 1 mA. (stereo pic)
. The picture is with the led at 1 mA. (stereo pic)

I could have gone a bit closer even to the dies.
Further mods to the host:
*bypassed the driver spring (steel), but not the tail spring (copper alloy)
*I kept the stock (FET-) driver but bypassed the big R015 resistor. Now the 3 modes are a bit messed up: high, highest, highest it is now. Maybe a different driver later.
*I replaced the led wires to short 18 AWG.
*used a butterfly-type XM-centerpiece and luckily the focus was correct.
I think I measured 16 amps at high setting, but my clamp meter does funny things lately. The 16A I think was a short moment of sanity of the meter.
Output on a 40T (almost full) at 30 seconds is 3150lm, at switch-on 3400lm. The limited output drop tells me that led is mounted properly and that the host handles this led well.
The slicing was a succes, the corona of the hotspot is not distracting at all and only mildly yellow. You have to look for it to notice it. The hotspot itself looks very nice, without dark center. This is at 5 meter on a white wall, underexposed to show the hotspot well.
And outside, first a control. I tried to match the exposure of the background in control and beamshot but the colour balance was not corrected. Big trees at 25 meter, lighted details further down the grass are up to 125 meter.


That is plenty bright for such a small light, just checked: pretty close to what my Convoy L6 with resistor mod, XHP70.2 and smooth reflector does, same size hotspot but slightly less light.

Nice job Djozz!
Have they announced neutral tint 3V XHP 50.2? If so where do I get them?
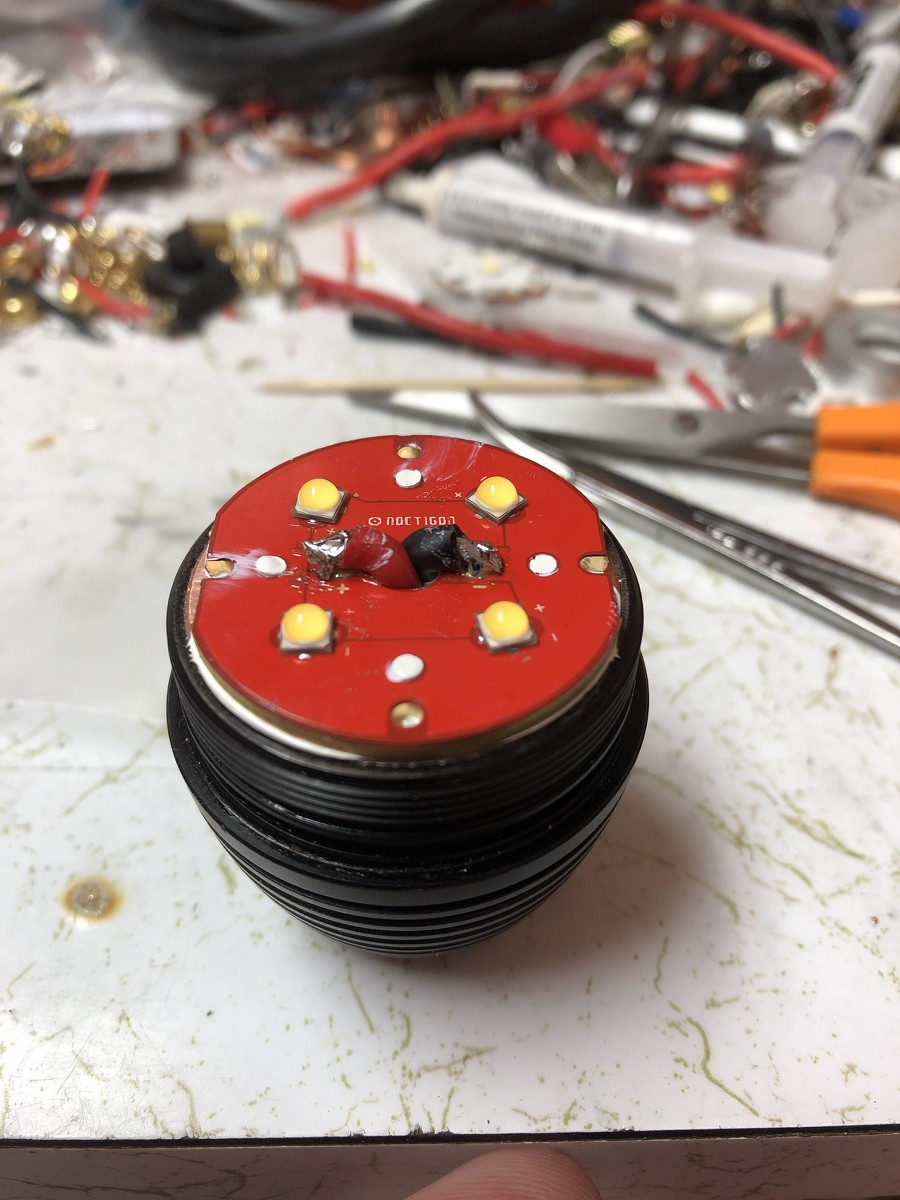
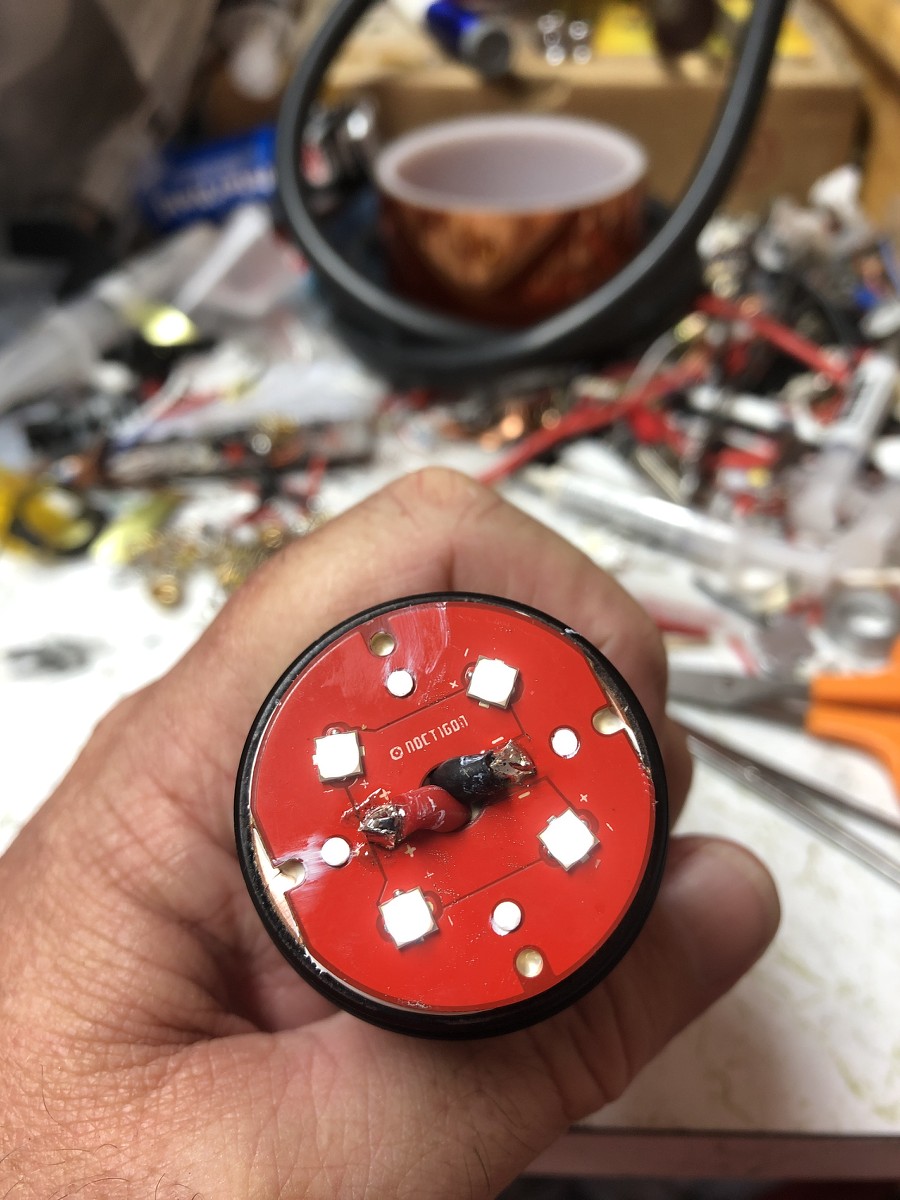
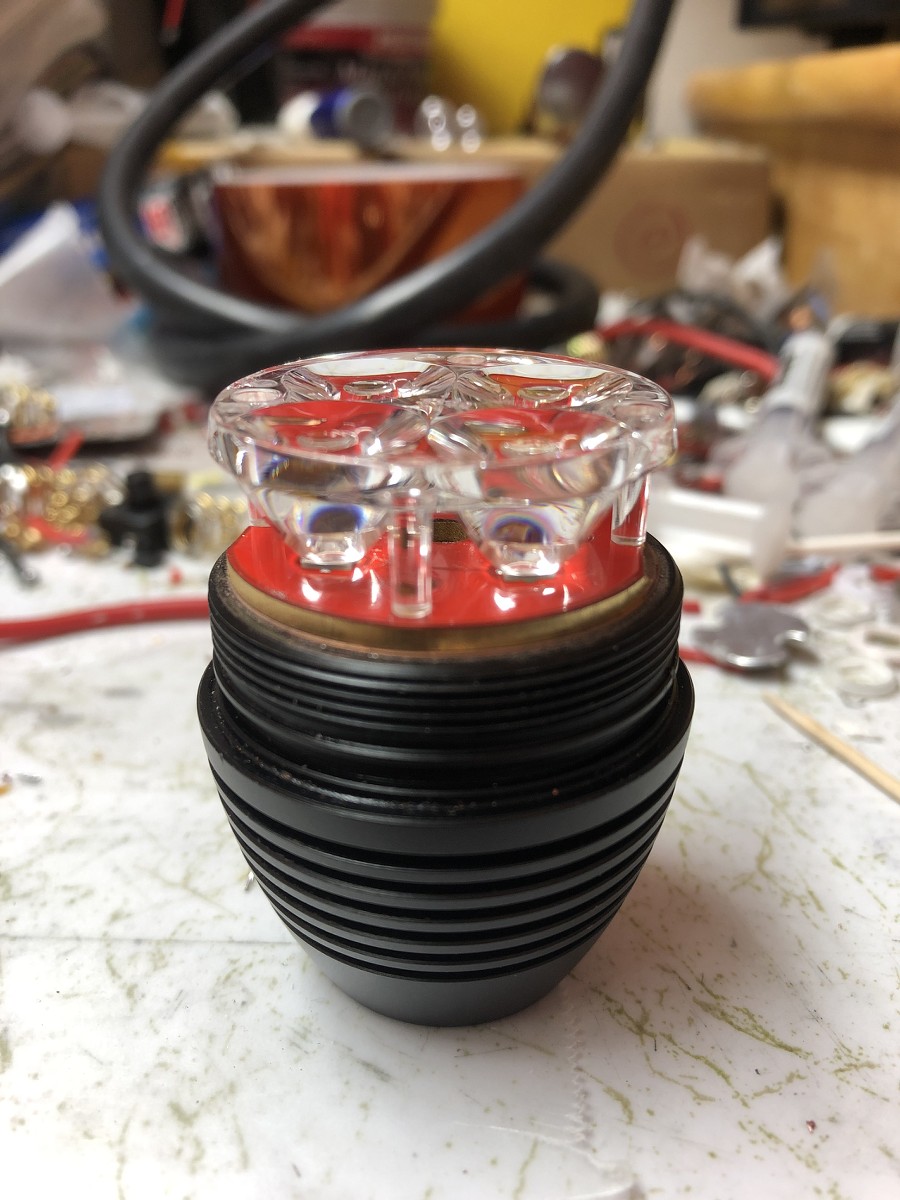
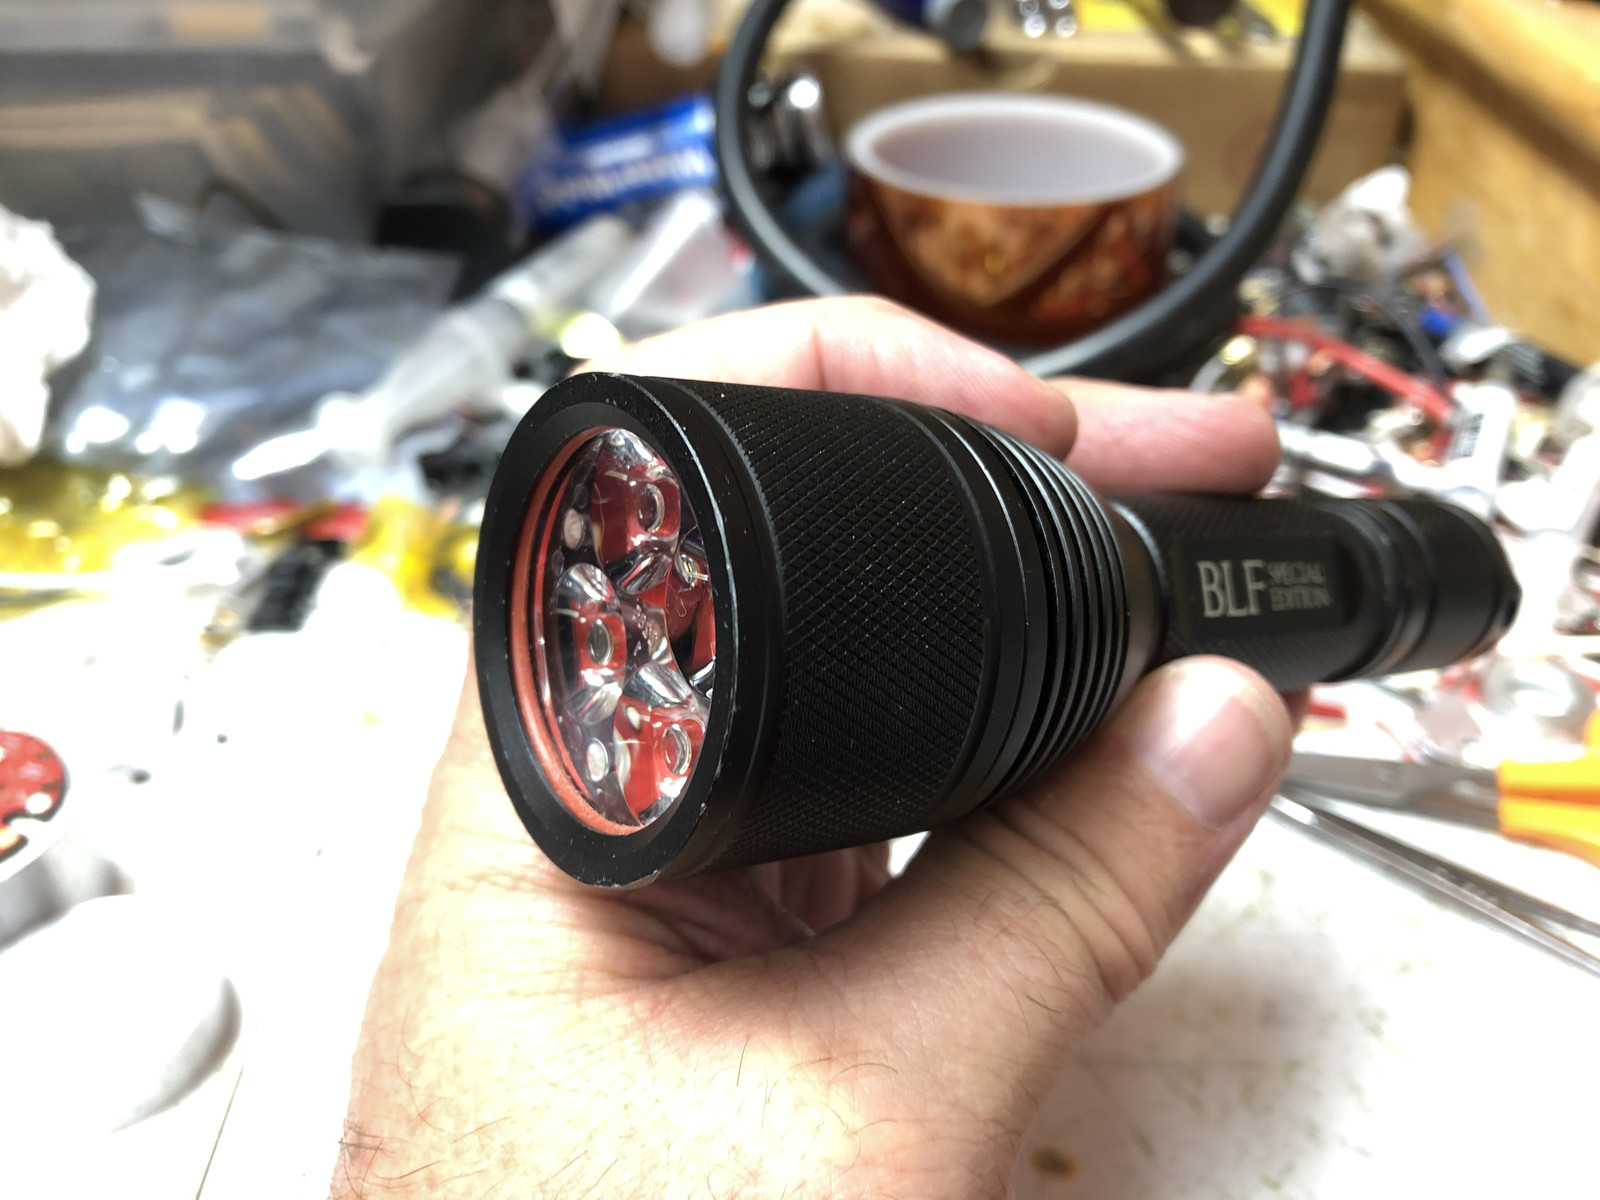
I picked up a couple of modified lights from a forum member that was trimming his herd, a triple BLF Special Edition X6 and a Convoy M1 Quad. I got these yesterday and the power levels were really severely down, each under a thousand lumens. The X6 had XP-L HD emitters on top of a Noctigon with a copper spacer and CUTE-3 optic. A Dr. Jones driver with very small 3 legged MOSFET for a driver. I looked in my stuff and found an original Special Edition driver, did the triangle stack mod to make sure it would handle high power and then stuck a couple of heavy gauge (16 ga Turnigy) leads on it, just because. Emitter of choice for me is the LH351D from Samsung, I really like the W6 power bin 70 CRI in 5000K but chose to go with the 80 CRI variant in U6 power bin here. These went on a Noctigon quad board designed for the D4S with an Angie optic, which required opening up the pill section of the X6 a bit on the lathe. Also required making a second copper spacer to allow for the shorter quad optics to work. I reflowed the two spacers together, ended up with over 16A at the tail for 4110 lumens through a single piece of one-eighth minus green Lee filter. Works for me! ![]()

Celebrated with a Pepperoni Pizza topped with Tillamook Pepper Jack cheese. Mmmmmm! ![]()

@DB Custom, how THICK are these power wires?
Also, how you tried chicken veggie pizza once? It’s absolutely lovely IMO.
I’ve actually made one with ghost peppers, and will never try that again in my life.
That is a very nice X6 version, Dale! (80CRI, I see progress ![]() )
)
@Firelight2 : not really, the 3V XHP50.2 goes down to the 3 tints at the moment. But a 3D tint would work well enough for me ![]()
The 16 ga Turnigy wires are pretty much the size of the emitter domes. lol My cheap plastic calipers say they’re 2.9mm.
I didn’t have any 18 ga and there was 16 ga sitting there, the Noctigon quad already had a big enough hole for the two wires to fit and I was going to have to drill the spacer and emitter shelf anyway, so … I didn’t even think about the quad optic being shorter, fitted the Noctigon quad into the head and brought it back into the house only to realize the entire set-up was well short of the bezel’s top. So back to the shop I went, made a second spacer….
This was all right after I got up this morning, was done with the light by 10:30 and then charged a 30Q up and tested it in time to make pizza for lunch for me and D. lol
Jos, the 80 CRI 351’s have a lemony look to em through this optic so I used the minus green filter to bring it around to a pleasing tint.
I felt the impact of my choice of not going with W6 bin when I saw the lumens numbers, I coulda had over 5000 lumens! lol Wanted it to be a little different though as it came to me via Panama and is a BLF SE light … I think I have 16 X6’s now, not 100% sure. ![]()
I really like to throw a whole lot of light in a beam like that. It's great to have such a high output LED for all the XM-L lights I'm now bored with. I mean, with a D4, anything less than 2K lumens is either getting gifted or stored for future technology upgrades.
Nice mod Djozz!
@DB Custom, Those wires are huge! 16 ga. is my minimum preference in home theater/sound system setups but putting them in a flashlight, whoa!
those separation gaps are a lot smaller than on regular XHP50.2, tricky to reflow if not done with stencil and paste and perfect placement
Major respect to Dale, always amazing mods and without a doubt the king of X6 mods in particular.
As a little bit of a tribute to DB Custom and a little bit of a one up to his daily mod I decided to class up my X6 a little and squeeze a little more out of it. Dale convinced me to start modding and helped me a ton via PM when I had no idea what I was doing and had never opened a light or used a soldering iron.
Changed from a Nickel BeCu spring with no bypass to a 20g bypassed silver BeCu spring. The silver spring was not necessary but it afforded a bit more room for the bypass and I wanted to try them out

This was one of MANY tricks I learned from Dale and have used on half a dozen lights. Flip a clear tail cap inside out and put a small hole through horizontally. Now you can use a toothpick or something and feed a nice 6mm tritium in there.

First attempt at heat treating stainless. This was done a while ago and didn’t turn out great but I do think it’s cool that it at least made it a matte finish

Dale is also a big advocate of high quality lenses so naturally this gets a UCLp AR acrylic lens . It’s doing double duty cause I needed a bit of slack to be taken up in the bezel. Also featuring the narrow Angie optic like the D4S.

And finally the trit switch all put together

Driver: MTN17-DDm
LEDs: Luxeon V 4000K
Spacer: LED4Power
Vapcell VTC5D battery
4,427lm at 0s w/ nickel BeCu tail
5,605lm at 0s w/ bypassed silver BeCu tail