DEAL ENDED - DX XM-LT6 900-Lumen 5-Mode White LED Flashlight - Titanium Color (2x18650) - $29.99 (Normally $41.30)

hmmm, might be valuable to calculate efficiency of both.

still, I'll use the manafont since I've already hacked it up. the SST-50 could be unstacked and resoldered w/ wires, if there was some odd host that required that...

did you check the current on the other modes? I higher mid would be ideal - 3A for long runs or hot weather, etc.

I forgot to specify, I measured it with 12v in (I red somewhere that it works fine with 12v), so with 2xLi batteries it could be 200mA lower; it's still good, but you can recalibrate if you want more current by adding parallel resistors on the bottom side of the top board.

I was going to measure output with 2x18650... and accidentally dropped the driver from less than 1m high (not big deal right?) it hit the FET from the top board, and then it smoked ¬¬ (the PHD45N03LTA chip).

Crap... I have to buy another driver

sorry to hear that. at least the price isn't as bad as the wait.

I don't suppose anyone who bought this light has any beamshots and/or lux readings vs. the HD2010 (single, not triple) or an XML in a Maglite LED reflector at similar drive current?

no hd2010... but at least some beamshots

https://budgetlightforum.com/t/-/7002#node-8165

I replaced the original (non working) driver with Manafont driver like viffer750 did... BUT I don't know why but this driver gives too much current or something, because I burned the original T6 led, plus TWO xml-U2 1C!! crap, this flashlight is expensive for me! xD

When I shortcircuit the driver with an ammeter, it pulls 4.4A or something like that... I don't understand why they keep burning.

Any recommendation? Now I'm waiting for 4x XML U2 1C to burn do some testing

I think viffer modded the original, but I used that driver.

I got 4.3A to the LED w/ old batteries. A few weeks ago I put a couple CGR18650CH in and destroyed an emitter.

So, I took the pill out, unsoldered the leads, unsoldered the emitter from the PCB, hot glued a rod to the PCB, put ~1200 grit lapping compound on the back of the PCB, put it on the pill and spun it w/ a drill. Once it was lapped I took an emitter off a 16mm PCB and reflowed it to the lapped 20mm PCB.

I'm amazed how little contact there is w/ a stock PCB - as evidenced by the lapping marks when I check after the first few turns of lapping. There's maybe 20% contact.

You can lap w/o removing an emitter...but I think it is easier to reflow than risk damaging the dome.

Anyway, it works fine now.

well...I've run it at least 10 minutes. The driver is really too powerful for stable output w/ an aluminum PCB (soldered to copper might be another story entirely!)

But like I've mentioned, I will be using this in my boat, and afaik, you're not supposed to navigate w/ a light on, other than navigation markers (because additional lighting would obscure them), so I want max brightness for a few seconds so I can do quick checks for obstructions and see as far as possible.

oh - easier suggestion - add a resistor

Thanks! I have a lot of serie12 1/4Watt resistors… which value do you recommend?

I guess if you added to either ends of the batteries the driver would still try to regulate the same current...

that makes it a little tougher, since there isn't much room between driver and emitter.

If you were shooting for ~3.5A you'd want to shed 3 watts, so 1 ohm should be about right. Don't know about your locale, but those are cheap and available locally here.

I'm more of a metal worker than electrician though, so hopefully someone else will chime in if I'm steering you the wrong way

@FX-32 I think your best bet would be to try a different driver that's actually a buck driver. The triple XML driver from Manafont is a boost driver that's meant to pick voltage up, not buck it down. When it's not necessary for that driver to boost the output voltage up so that current drawn from it reaches the target output current, then the output voltage is equal to the input voltage minus the driver's own (nominal) operating voltage (usually 1-2V). If your batteries aren't sagging much and there's not a lot of resistance in the rest of the circuit (contacts, switch, thin leads, etc.), then your LEDs are dying because they're being hit with way too much voltage.

Yes, it has sense, but I though it would work because it worked for some users.

I didn't find any driver that gives more than 3A and fits here... any recommendation?

yeah, that's the problem...availability

but techjunkie's the guy to tell you how to sandwich single cell drivers for this light, and if you've got the time to make one, they'll certainly fit in the pill

mine's been working fine, which makes me think it isn't a voltage issue (or it would die right away?)

I'll take the head off tonight and measure the voltage across the emitter.

Single cell drivers wouldn't work well here, with two cells and one emitter. I actually liked the original DX SST-50 driver sku 50025 (with two round boards) for driving an XM-L. I measured 3.5A to the XM-L on high with that driver, using a Fluke clamp meter around one of the leads from the driver to the LED. If I'd cooked my OEM driver, I'd probably use my dremel and a large engraving bit to cut away enough metal from the pill to fit my last remaining one of that driver. Not everyone would be compelled to go through the trouble though, and I don't know of the newer version with one round and one square board would fit in the same dimensions. (It looks like the square board could be trimmed in height a bit and the round board in diameter a bit, if that would help.)

If you don't care about how the mode memory operates, you could probably very easily fit in the DX 57779 driver (which can also be modded for single mode). It puts out 2.7A on high after settling in for a few seconds, down from 3.0A at power-on and can be modded for single mode by removing the daughter board and installing a pull-up resistor in its place. You can likely add sense resistors to it to increase the output from 2.7A to something higher, if desired. There's also a newer driver there that looks a lot like 57779 only without the daughter board, that I haven't tried yet, sku 128269. Both of those might be too narrow in diameter at only 22mm across.

Slightly larger in diameter but very time proven is the DX 20330 single mode driver which can be upped from 2.5A out to 2.8A out with a single 0.68ohm sense resistor added to its .1 and .4 ohm pair.

That's about the extent of the affordable drivers that I have personal experience with and can recommend trying that fit in this V-in, I-out category. Best of luck.

Thanks!

I will try with DX128269... so one or two more months waiting from DX :(

The original SST-50 driver is too big, it could be installed with the modding you mentioned but it is too much for me, I don't have the tools yet...

I have that driver, and it burned me a triple cute board TWICE! And also, adding SMD resistors there isn’t easy, you have to extract the top board and the coil to have space for working there… I’ll pass this time with 57779 driver, it brings me bad memories.

So I'm decided to try with DX.128269 and see what happens. The flashlight is waiting without LED and without driver for the parts to arrive.

Thanks again!

A month ago I ordered a 57779 driver, and last week I got a 12826. Nice chinese service, as always.

Good news: It works at least. The input current is 1.3-1.4A from 8V . Relativ easy to modify the value of the sense resistor, it is under the coil, but it can be moved from its place easily. No memory function, and the common problem (at least for me), if you switch off and on the light, the driver steps to the next mode. But it can be solved with a resistor.

Viffer, does "can be solved with a resistor" refer to the single mode mod, or have you discovered how to retain the modes but change the mode-changing behavior?

It isn't a complicated "thing", there is a capacitor on the board which holds the voltage, when you turn off the light. The light will step to the next mode (I mean a switch off-on period) as long as this capacitor hold the charge.

When the capacitor discharged completely, the driver will start with Hi mode next time, when you turn on the light.

The problem is that this discharge time is too long, often 10-20 minutes. If you find this capacitor, you have to solder a resistor parallel with it ( the value usually between 10k-100kohm). So the modes are remained, only the time decreased from 10-20 minutes to 5-10sec. You can see an example above in the topic.

Thanks for explaining that. I always go through the trouble of "setting" the light to turn back on in high mode the next time I use it. I never realized on the DX 57779 driver that it would have started up in high again the next time on its own if I'd waited long enough. I see three small ceramic caps on 57779... would you mind describing on which one I should place the resistor in parallel? I doesn't look anything (to me) like the OEM driver that you modded this way in post #70. Thanks.

I really wanted to see how this V6 deep SMO reflector compared to the D Maglite LED reflector (when used with an XM-L), so I ordered one of these too, at full price. I considered getting the UniqueFire UF-V6, which is the same host, from somewhere faster than DX, but if my pseudo-brand Chinese lights have to have a logo laser etched onto them, I prefer it to be UltraFire. This preference just dates back to years ago when that was the most prominent (first?, only?) "brand" of surefire imitator and generally considered to be of the highest quality among all the lights on DX/KD/etc. (Romisen deserves a mention here too. I've never been disappointed with any hosts of either label, but unfortunately cannot say the same for the other xxxxFire lights, even the ones now well regarded like TrustFire and Tank007.)

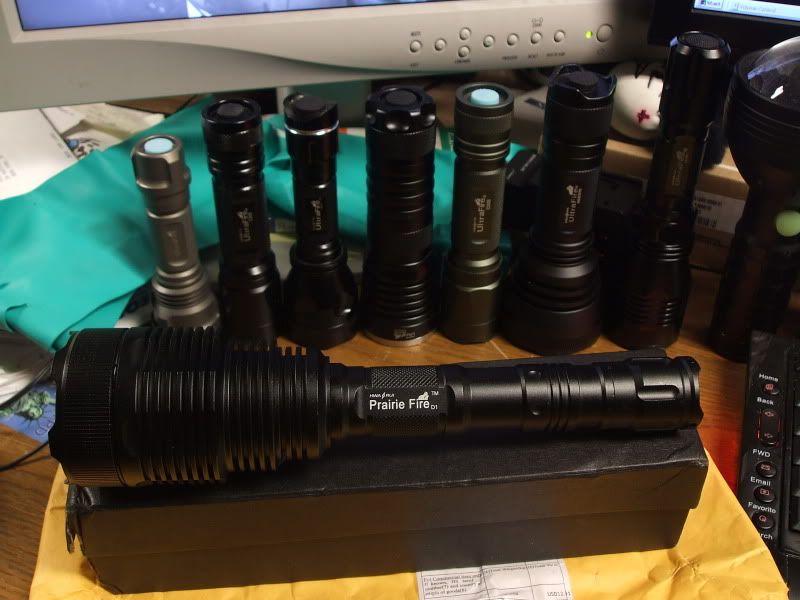
The DX photos and member photos posted here of the light as received from DX clearly show UltraFire D1 on the host, so I went with DX. A few days after ordering, I discovered a black version was available and quickly had my order changed to specify the black one. Now I didn't even mind spending a few bucks more than the deal I missed.

The light shipped from Singapore, which in all my orders from DX was a first for me. It took longer than I'm used to for tracking info to become available, but I have to say, I was impressed with the damage-free condition of the light's lovely black anodizing, thanks largely to the gift box the light was unexpectedly packed in. This would be a welcome addition to my UltraFire collection. One small glitch...

Grrr....

I can't complain about the quality of the host. The machine work and ano are top notch. They carelessly didn't knock off the hanging chads from the lanyard holes. Luckily, that didn't affect the ano on the holes and the chads came right off.

My only disappointment, besides the driver memory, which I shall soon remedy thanks to Viffer750, is the tint of the emitter, which I can only describe as a cool white trying to be a neutral white but landing somewhere closer to greenish white than truly neutral. Compared to my Maglite LED reflector XMLs, this reflector produces a smaller hotspot, but I haven't compared throw yet (and it wouldn't be fair to just yet) because the drive current would be lower with the OEM driver than in any of my Mag mods.

White wall hunting reveals a bullseye pattern inside the hotspot that I hope to improve upon or eliminate altogether by adjusting the vertical position of the LED in the reflector. Perhaps some filing to reduce the thickness of the bottom of the reflector to insert the LED further might do some good if backing the LED out further with a half turn of the pill doesn't.

I'd say that the size of the hotspot compares to the UltraFire C9-T60 (UniqueFire HS-802 host with XML), but its intensity is more akin to that of the UltraFire HD2010.