I have both the original and the successor. Charging usually takes about 1 to 1.5 hours from low energy state. There are times when I don’t activate it for over a month. I’m charging like once every 6 months. Because of this infrequent cycle, I’m expecting the battery should have a considerably long life.
As for battery replacement… this light is so cheap, there’s really no point. It’s pretty much “disposable.” But I do appreciate the curiosity… you know, that time when in a pinch where you’re on very limited resources and would find use in replacing the battery.
@xevious Replacing the battery is not just about cost, but also not being wasteful with the rest of a useful device.
Right you are! I was trying to unscrew, but at that fully opened and somewhat sideways position, pulling the head off works. Although, I did not disassemble further than what is shown in your pic. Still not sure how easy it would be to replace the battery, but I don’t feel like killing it to find out.
I still don’t quite understand how the (three?) contacts and modes work though.
FYI for Australian customers, on their website Olight is currently offering the i1R 2 EOS “for free” by sharing via fb or email and logging in/register - Offer Available at 8pm 24th-midnight 28th Aug(AEST). Just have to pay postage
Hmmm. I currently have a Nitecore tube for my keychain. I’m guessing this will be a nice upgrade, but?
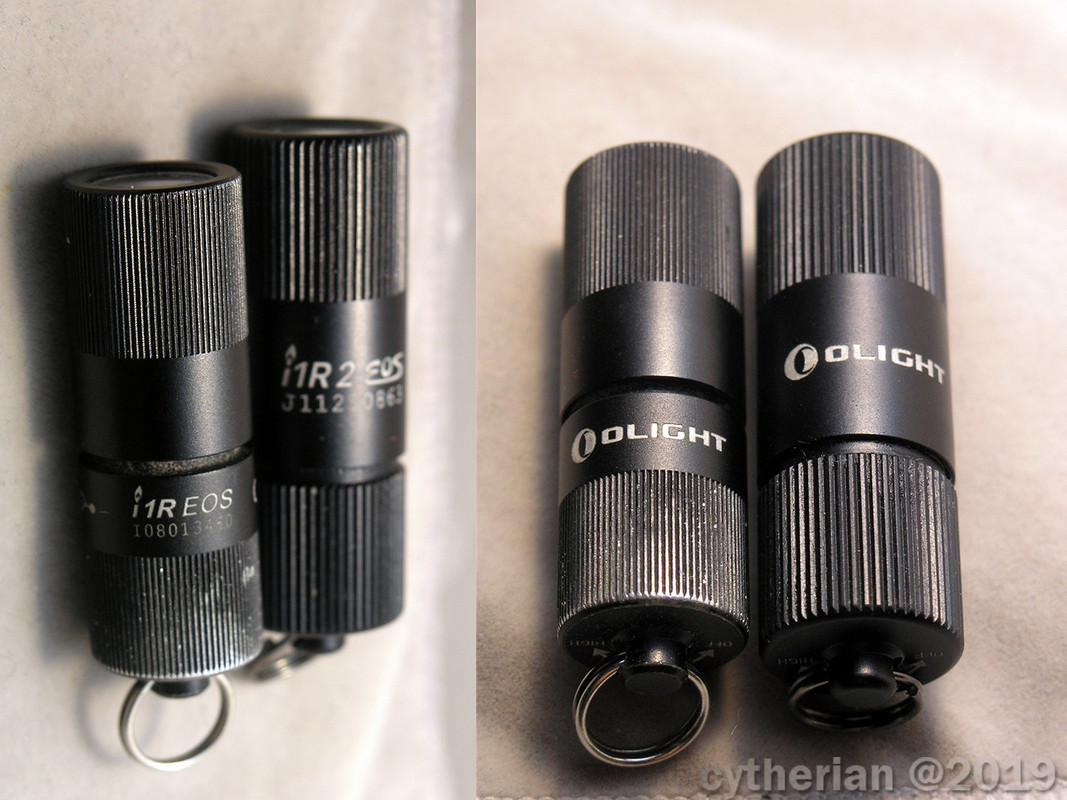
Nitecore weighs 9.6g with battery. Olite 13g. How noticeable will that difference in weight be in the pocket?
s. was alerted of this Olite deal via the OzBargain website… and now I’m on the BudgetLF… hmmm………
@Unheard The spring definitely always makes contact. It looks to me like the threads on both the body and head are unanodized, so I would think they are always in contact too when not completely unscrewed.
High mode is activated before “bottoming out”, i.e. it can still be twisted 2/3 of a turn after turning on High. Since the button does not seem to have any play, the threads of the body and head might indeed be responsible for High, but I don’t get it yet.
@redmars I suspect the smaller dimensions will be more noticeable than the weight difference. It would be impressive to be able to sense a 3.4g difference in the pocket.
That’s about the same as what I would guess. I dont think the battery is a cyclinder, probably a small lipo pack formed around the tube. That’s probably what allows the spring to be positive and not the center pin.
I’m using Nitecore Tube on my keychain as well. I like that the Tube is flatter than i1R 2, weight difference aside. The i1R 2 feels bulkier, even though it’s shorter.
True, although considering the cost saved by NOT making it user serviceable for battery replacement makes it a good bit cheaper. So inexpensive for them to make that they can periodically offer them for free as an Olight “product marketing” tool.
It is a Luxeon TX, right? That LED has a thermal pad.
Edit: On the original i1R, it looks like you’d need to rip off gasket and polarity protection, then reflow over a candle. Optimal position can be found with a scratch MCPCB and an IR-meter. Was easier with the i3E since it had a button contact. But if that assembly is press fit, all hope is lost for me. I’d need two lights to do such a mod. One to drill out the driver, keeping the shell intact, and one to nibble away the shell, having an intact driver.
Are you referring to the version 2 or version 1? Your Luxeon TX comment refers to V1 because V2 is definitely not a TX and it’s head is assembled differently. If it is V2 you are referring to did you unscrew or pull?